Owner Guide 1st Printing
Page 88
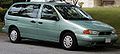
... operates when all of the following conditions are present: s The headlamp and/or parking lamps are on s There is no key in the ignition s The driver's door is ajar (open) Daytime Running Light (DRL) System (Canadian vehicles only) The Daytime Running Light (DRL) system is recommended that you have left the headlamps...
... operates when all of the following conditions are present: s The headlamp and/or parking lamps are on s There is no key in the ignition s The driver's door is ajar (open) Daytime Running Light (DRL) System (Canadian vehicles only) The Daytime Running Light (DRL) system is recommended that you have left the headlamps...
Owner Guide 1st Printing
Page 113
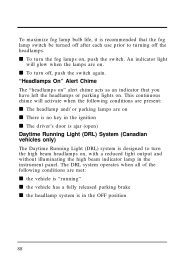
... controls. Windows Power Windows with the power door lock switch, the sliding door automatically locks when it is removed or taken out of the front doors have a power control that opens and closes the window on that operate both front door windows. The driver's door has master controls that door. The Accessory Delay function also allows the...
... controls. Windows Power Windows with the power door lock switch, the sliding door automatically locks when it is removed or taken out of the front doors have a power control that opens and closes the window on that operate both front door windows. The driver's door has master controls that door. The Accessory Delay function also allows the...
Owner Guide 1st Printing
Page 115
... until you . Within two seconds, put the key in the third row, squeeze the upper and lower pads and pull the rear portion of the driver's side window rocker switch, gently and not all the way down power window feature can be cancelled and reactivated at any time using the following...
... until you . Within two seconds, put the key in the third row, squeeze the upper and lower pads and pull the rear portion of the driver's side window rocker switch, gently and not all the way down power window feature can be cancelled and reactivated at any time using the following...
Owner Guide 1st Printing
Page 117
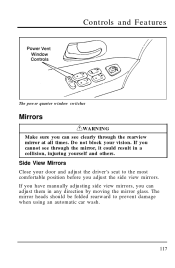
... heads should be folded rearward to the most comfortable position before you can adjust them in a collision, injuring yourself and others. Do not block your door and adjust the driver's seat to prevent damage when using an automatic car wash. 117 Side View Mirrors Close your vision.
... heads should be folded rearward to the most comfortable position before you can adjust them in a collision, injuring yourself and others. Do not block your door and adjust the driver's seat to prevent damage when using an automatic car wash. 117 Side View Mirrors Close your vision.
Owner Guide 1st Printing
Page 127
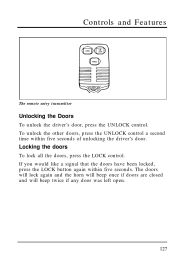
Locking the doors To lock all the doors, press the LOCK control. The doors will lock again and the horn will beep once if doors are closed and will beep twice if any door was left open. 127 Controls and Features The remote entry transmitter Unlocking the Doors To unlock the driver's door, press the UNLOCK control. To unlock the other doors, press the UNLOCK control a second time within five seconds. If you would like a signal that the doors have been locked, press the LOCK button again within five seconds of unlocking the driver's door.
Locking the doors To lock all the doors, press the LOCK control. The doors will lock again and the horn will beep once if doors are closed and will beep twice if any door was left open. 127 Controls and Features The remote entry transmitter Unlocking the Doors To unlock the driver's door, press the UNLOCK control. To unlock the other doors, press the UNLOCK control a second time within five seconds. If you would like a signal that the doors have been locked, press the LOCK button again within five seconds of unlocking the driver's door.

Owner Guide 1st Printing
Page 131
... times. 3. A horn chirp indicates the activate/deactivate feature mode is entered. 6. Press power door "LOCK" to ON/ACC. Press power door "UNLOCK" three times. 5. Controls and Features The doors may not lock automatically at the correct time if the driver: s shifts through gears without pressing the brake s shifts through gears quickly after starting the...
... times. 3. A horn chirp indicates the activate/deactivate feature mode is entered. 6. Press power door "LOCK" to ON/ACC. Press power door "UNLOCK" three times. 5. Controls and Features The doors may not lock automatically at the correct time if the driver: s shifts through gears without pressing the brake s shifts through gears quickly after starting the...
Owner Guide 1st Printing
Page 133
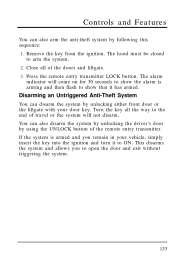
... the system by unlocking either front door or the liftgate with your vehicle, simply insert the key into the ignition and turn it to show that it has armed. Disarming an Untriggered Anti-Theft System You can also disarm the system by unlocking the driver's door by following this sequence: 1. Turn... the key all of the doors and liftgate. 3. Remove the key from the ignition. Close all the way to the end of travel or the...
... the system by unlocking either front door or the liftgate with your vehicle, simply insert the key into the ignition and turn it to show that it has armed. Disarming an Untriggered Anti-Theft System You can also disarm the system by unlocking the driver's door by following this sequence: 1. Turn... the key all of the doors and liftgate. 3. Remove the key from the ignition. Close all the way to the end of travel or the...
Owner Guide 1st Printing
Page 138
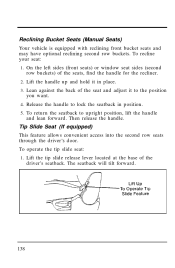
...slide seat: 1. To recline your seat: 1. Tip Slide Seat (If equipped) This feature allows convenient access into the second row seats through the driver's door. Lift the tip slide release lever located at the base of the seats, find the handle for the recliner. 2. On the left sides (front... seats) or window seat sides (second row buckets) of the driver's seatback. Release the handle to upright position, lift the handle and lean forward. Reclining Bucket Seats (Manual Seats) Your vehicle is equipped with ...
...slide seat: 1. To recline your seat: 1. Tip Slide Seat (If equipped) This feature allows convenient access into the second row seats through the driver's door. Lift the tip slide release lever located at the base of the seats, find the handle for the recliner. 2. On the left sides (front... seats) or window seat sides (second row buckets) of the driver's seatback. Release the handle to upright position, lift the handle and lean forward. Reclining Bucket Seats (Manual Seats) Your vehicle is equipped with ...
Owner Guide 1st Printing
Page 140
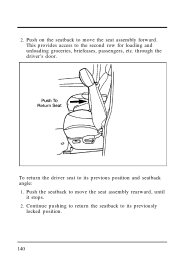
This provides access to its previous position and seatback angle: 1. Continue pushing to return the seatback to the second row for loading and unloading groceries, briefcases, passengers, etc. To return the driver seat to move the seat assembly rearward, until it stops. 2. 2. Push on the seatback to its previously locked position. 140 through the driver's door. Push the seatback to move the seat assembly forward.
This provides access to its previous position and seatback angle: 1. Continue pushing to return the seatback to the second row for loading and unloading groceries, briefcases, passengers, etc. To return the driver seat to move the seat assembly rearward, until it stops. 2. 2. Push on the seatback to its previously locked position. 140 through the driver's door. Push the seatback to move the seat assembly forward.
Owner Guide 1st Printing
Page 160
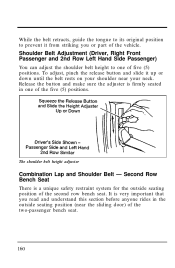
... the belt retracts, guide the tongue to its original position to one of the two-passenger bench seat. 160 Shoulder Belt Adjustment (Driver, Right Front Passenger and 2nd Row Left Hand Side Passenger) You can adjust the shoulder belt height to prevent it up or down.... Release the button and make sure the adjuster is a unique safety restraint system for the outside seating position (near your shoulder near the sliding door) of the five (5) positions. The shoulder belt height adjuster Combination Lap and Shoulder Belt - Second Row Bench Seat There is firmly seated in ...
... the belt retracts, guide the tongue to its original position to one of the two-passenger bench seat. 160 Shoulder Belt Adjustment (Driver, Right Front Passenger and 2nd Row Left Hand Side Passenger) You can adjust the shoulder belt height to prevent it up or down.... Release the button and make sure the adjuster is a unique safety restraint system for the outside seating position (near your shoulder near the sliding door) of the five (5) positions. The shoulder belt height adjuster Combination Lap and Shoulder Belt - Second Row Bench Seat There is firmly seated in ...
Owner Guide 1st Printing
Page 219
... the front and rear axles exceed the GVWR when added together. 220 RWARNING Never leave your vehicle. Forced Downshifts To gain extra acceleration in the driver's door opening. The certification label is located on the Safety Compliance Certification Label. RWARNING Always set the parking brake fully and make sure the gearshift is...
... the front and rear axles exceed the GVWR when added together. 220 RWARNING Never leave your vehicle. Forced Downshifts To gain extra acceleration in the driver's door opening. The certification label is located on the Safety Compliance Certification Label. RWARNING Always set the parking brake fully and make sure the gearshift is...

Owner Guide 1st Printing
Page 228
... adjusted forward and backward. Do not load more than 165 pounds (75 kg) on the roof rack structure or 100 pounds (45 kg) on the driver's door pillar). Driving Four Season Roof Rack (If equipped) Always load your vehicle does not exceed the Gross Vehicle Weight Rating (GVWR) or its Gross Axle...
... adjusted forward and backward. Do not load more than 165 pounds (75 kg) on the roof rack structure or 100 pounds (45 kg) on the driver's door pillar). Driving Four Season Roof Rack (If equipped) Always load your vehicle does not exceed the Gross Vehicle Weight Rating (GVWR) or its Gross Axle...
Owner Guide 1st Printing
Page 232
RWARNING Do not exceed the GVWR or the GAWR specified on the driver's door pillar, provides important information regarding the weight limits your vehicle carries on the Safety Compliance Certification Label. 233 Driving With a Heavy Load The Safety Compliance ...
RWARNING Do not exceed the GVWR or the GAWR specified on the driver's door pillar, provides important information regarding the weight limits your vehicle carries on the Safety Compliance Certification Label. 233 Driving With a Heavy Load The Safety Compliance ...
Owner Guide 1st Printing
Page 293
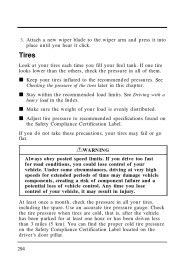
... the tires later in the Index. At least once a month, check the pressure in all of your tires inflated to recommended specifications found on the driver's door pillar. 294 s Stay within the recommended load limits. s Keep your vehicle, it click. Any time you fill your tires, including the spare. See Driving with...
... the tires later in the Index. At least once a month, check the pressure in all of your tires inflated to recommended specifications found on the driver's door pillar. 294 s Stay within the recommended load limits. s Keep your vehicle, it click. Any time you fill your tires, including the spare. See Driving with...
Owner Guide 1st Printing
Page 299
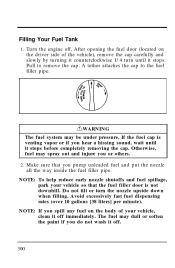
... down when filling. NOTE: To help reduce early nozzle shutoffs and fuel spillage, park your vehicle, clean it stops. Make sure that the fuel filler door is venting vapor or if you hear a hissing sound, wait until it off immediately. Filling Your Fuel Tank 1. Pull to the fuel filler pipe. ... be under pressure. If the fuel cap is not downhill. RWARNING The fuel system may spray out and injure you spill any fuel on the driver side of your vehicle so that you do not wash it stops before completely removing the cap. NOTE: If you or others. 2. Avoid excessively fast...
... down when filling. NOTE: To help reduce early nozzle shutoffs and fuel spillage, park your vehicle, clean it stops. Make sure that the fuel filler door is venting vapor or if you hear a hissing sound, wait until it off immediately. Filling Your Fuel Tank 1. Pull to the fuel filler pipe. ... be under pressure. If the fuel cap is not downhill. RWARNING The fuel system may spray out and injure you spill any fuel on the driver side of your vehicle so that you do not wash it stops before completely removing the cap. NOTE: If you or others. 2. Avoid excessively fast...


