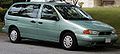
Customer Assistance Guide 1st Printing
Page 4
...date of vehicle purchase • the current mileage of the Magnuson-Moss Warranty Act or state replacement or repurchase laws. This dispute handling procedure is not required prior to enforcing state created rights or other rights which is located • the year and make of ...the Dispute Settlement Board before pursuing replacement or repurchase remedies provided by certain state laws. Box 43360 Detroit, Michigan 48243 1-800-392-3673 (FORD) (TDD for the hearing impaired: 1-800-232-5952) Please have a complaint involving a warranty dispute, you require roadside assistance, please refer...
...date of vehicle purchase • the current mileage of the Magnuson-Moss Warranty Act or state replacement or repurchase laws. This dispute handling procedure is not required prior to enforcing state created rights or other rights which is located • the year and make of ...the Dispute Settlement Board before pursuing replacement or repurchase remedies provided by certain state laws. Box 43360 Detroit, Michigan 48243 1-800-392-3673 (FORD) (TDD for the hearing impaired: 1-800-232-5952) Please have a complaint involving a warranty dispute, you require roadside assistance, please refer...
Owner Guide 1st Printing
Page 37
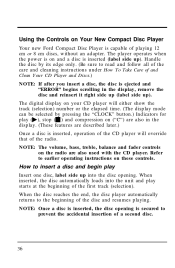
..., balance and fader controls on the radio are also in the display, remove the disc and reinsert it right side up (label side up ). Handle the disc by pressing the "CLOCK" button.) Indicators for play starts at the beginning of the first track (selection). Using the Controls on Your ...New Compact Disc Player Your new Ford Compact Disc Player is secured to prevent the accidental insertion of a second disc. 36 NOTE: Once a disc is inserted, the disc opening . Refer...
..., balance and fader controls on the radio are also in the display, remove the disc and reinsert it right side up (label side up ). Handle the disc by pressing the "CLOCK" button.) Indicators for play starts at the beginning of the first track (selection). Using the Controls on Your ...New Compact Disc Player Your new Ford Compact Disc Player is secured to prevent the accidental insertion of a second disc. 36 NOTE: Once a disc is inserted, the disc opening . Refer...
Owner Guide 1st Printing
Page 40
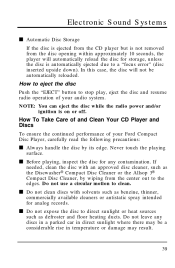
... its edge. How To Take Care of and Clean Your CD Player and Discs To ensure the continued performance of your Ford Compact Disc Player, carefully read the following precautions: s Always handle the disc by wiping from the disc opening within approximately 10 seconds, the player will not be a considerable rise in...
... its edge. How To Take Care of and Clean Your CD Player and Discs To ensure the continued performance of your Ford Compact Disc Player, carefully read the following precautions: s Always handle the disc by wiping from the disc opening within approximately 10 seconds, the player will not be a considerable rise in...
Owner Guide 1st Printing
Page 71
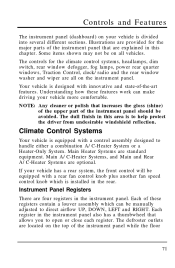
... of -the-art features. Controls and Features The instrument panel (dashboard) on all on the top of the instrument panel should be manually adjusted to handle either a combination A/C-Heater System or a Heater-Only System.
... of -the-art features. Controls and Features The instrument panel (dashboard) on all on the top of the instrument panel should be manually adjusted to handle either a combination A/C-Heater System or a Heater-Only System.
Owner Guide 1st Printing
Page 108
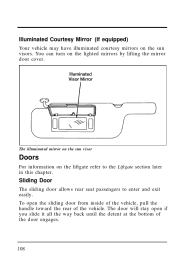
... turn on the liftgate refer to enter and exit easily. The door will stay open the sliding door from inside of the vehicle, pull the handle toward the rear of the door engages. 108 The illuminated mirror on the sun visor Doors For information on the lighted mirrors by lifting the...
... turn on the liftgate refer to enter and exit easily. The door will stay open the sliding door from inside of the vehicle, pull the handle toward the rear of the door engages. 108 The illuminated mirror on the sun visor Doors For information on the lighted mirrors by lifting the...

Owner Guide 1st Printing
Page 109
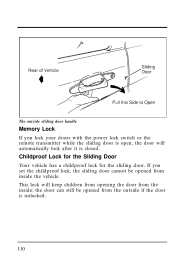
To open the sliding door from outside the vehicle, unlock the door then unlatch the sliding door by pulling the handle straight out and sliding the door back. 109 Controls and Features The inside sliding door handle To close the door, pull the handle toward the front of the vehicle and slide the door. Be sure it is fully closed.
To open the sliding door from outside the vehicle, unlock the door then unlatch the sliding door by pulling the handle straight out and sliding the door back. 109 Controls and Features The inside sliding door handle To close the door, pull the handle toward the front of the vehicle and slide the door. Be sure it is fully closed.
Owner Guide 1st Printing
Page 110
The outside if the door is closed. Childproof Lock for the Sliding Door Your vehicle has a childproof lock for the sliding door. If you lock your doors with the power lock switch or the remote transmitter while the sliding door is open, the door will keep children from opening the door from the outside sliding door handle Memory Lock If you set the childproof lock, the sliding door cannot be opened from inside ; This lock will automatically lock after it is unlocked. 110 the door can still be opened from the inside the vehicle.
The outside if the door is closed. Childproof Lock for the Sliding Door Your vehicle has a childproof lock for the sliding door. If you lock your doors with the power lock switch or the remote transmitter while the sliding door is open, the door will keep children from opening the door from the outside sliding door handle Memory Lock If you set the childproof lock, the sliding door cannot be opened from inside ; This lock will automatically lock after it is unlocked. 110 the door can still be opened from the inside the vehicle.
Owner Guide 1st Printing
Page 115
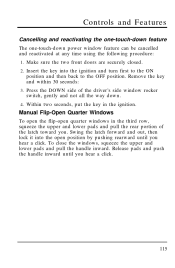
Press the DOWN side of the latch toward you. Release pads and push the handle inward until you hear a click. 115 Controls and Features Cancelling and reactivating the one-touch-down feature The one-touch-down . 4. Remove the key and ... open the flip-open position by pushing rearward until you hear a click. To close the windows, squeeze the upper and lower pads and pull the handle inward. Make sure the two front doors are securely closed. 2. Insert the key into the open quarter windows in the ignition. Swing the latch forward...
Press the DOWN side of the latch toward you. Release pads and push the handle inward until you hear a click. 115 Controls and Features Cancelling and reactivating the one-touch-down feature The one-touch-down . 4. Remove the key and ... open the flip-open position by pushing rearward until you hear a click. To close the windows, squeeze the upper and lower pads and pull the handle inward. Make sure the two front doors are securely closed. 2. Insert the key into the open quarter windows in the ignition. Swing the latch forward...
Owner Guide 1st Printing
Page 122
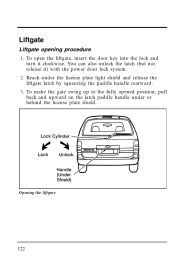
To make the gate swing up to the fully opened position, pull back and upward on the latch paddle handle under the license plate light shield and release the liftgate latch by squeezing the paddle handle rearward. 3. Opening the liftgate 122 Reach under or behind the license plate shield. You can also unlock the latch (but not release it clockwise. Liftgate Liftgate opening procedure 1. To open the liftgate, insert the door key into the lock and turn it ) with the power door lock system. 2.
To make the gate swing up to the fully opened position, pull back and upward on the latch paddle handle under the license plate light shield and release the liftgate latch by squeezing the paddle handle rearward. 3. Opening the liftgate 122 Reach under or behind the license plate shield. You can also unlock the latch (but not release it clockwise. Liftgate Liftgate opening procedure 1. To open the liftgate, insert the door key into the lock and turn it ) with the power door lock system. 2.
Owner Guide 1st Printing
Page 123
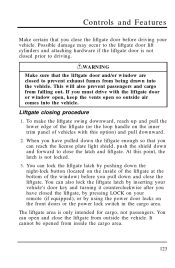
... liftgate. Liftgate closing procedure 1. This will also prevent passengers and cargo from inside of the liftgate at the bottom of the liftgate (or the loop handle on the front doors or the power lock switch in the cargo area. Possible damage may occur to the liftgate door lift cylinders and attaching...
... liftgate. Liftgate closing procedure 1. This will also prevent passengers and cargo from inside of the liftgate at the bottom of the liftgate (or the loop handle on the front doors or the power lock switch in the cargo area. Possible damage may occur to the liftgate door lift cylinders and attaching...
Owner Guide 1st Printing
Page 126
... interior lamps after 45 minutes. (The exterior lamps are located on or if a door or the glove box is not completely closed s the front door handle is lifted (for Illuminated Entry only) s taking the key IN or OUT of the ignition switch s the Keyless Entry keypad is used s the Remote Entry...
... interior lamps after 45 minutes. (The exterior lamps are located on or if a door or the glove box is not completely closed s the front door handle is lifted (for Illuminated Entry only) s taking the key IN or OUT of the ignition switch s the Keyless Entry keypad is used s the Remote Entry...
Owner Guide 1st Printing
Page 138
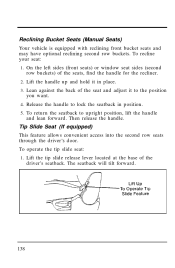
... the tip slide release lever located at the base of the seats, find the handle for the recliner. 2. On the left sides (front seats) or window seat sides (second row buckets) of the driver's seatback. The seatback will tilt forward. ... adjust it in position. 5. Tip Slide Seat (If equipped) This feature allows convenient access into the second row seats through the driver's door. Release the handle to upright position, lift the handle and lean forward. Lift the handle up and hold it to the position you want. 4.
... the tip slide release lever located at the base of the seats, find the handle for the recliner. 2. On the left sides (front seats) or window seat sides (second row buckets) of the driver's seatback. The seatback will tilt forward. ... adjust it in position. 5. Tip Slide Seat (If equipped) This feature allows convenient access into the second row seats through the driver's door. Release the handle to upright position, lift the handle and lean forward. Lift the handle up and hold it to the position you want. 4.
Owner Guide 1st Printing
Page 142
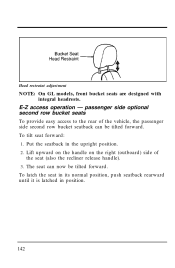
Lift upward on the handle on the right (outboard) side of the vehicle, the passenger side second row bucket seatback can now be tilted forward. To tilt seat forward: 1. Put ... integral headrests. E-Z access operation - passenger side optional second row bucket seats To provide easy access to the rear of the seat (also the recliner release handle). 3.
Lift upward on the handle on the right (outboard) side of the vehicle, the passenger side second row bucket seatback can now be tilted forward. To tilt seat forward: 1. Put ... integral headrests. E-Z access operation - passenger side optional second row bucket seats To provide easy access to the rear of the seat (also the recliner release handle). 3.
Owner Guide 1st Printing
Page 143
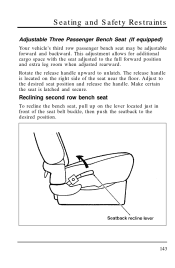
The release handle is latched and secure. Make certain the seat is located on the lever located just in front of... up on the right side of the seat belt buckle, then push the seatback to the desired seat position and release the handle. Adjust to the desired position. 143 Seating and Safety Restraints Adjustable Three Passenger Bench Seat (If equipped) Your vehicle's third ... backward. This adjustment allows for additional cargo space with the seat adjusted to unlatch. Rotate the release handle upward to the full forward position and extra leg room when adjusted rearward.
The release handle is latched and secure. Make certain the seat is located on the lever located just in front of... up on the right side of the seat belt buckle, then push the seatback to the desired seat position and release the handle. Adjust to the desired position. 143 Seating and Safety Restraints Adjustable Three Passenger Bench Seat (If equipped) Your vehicle's third ... backward. This adjustment allows for additional cargo space with the seat adjusted to unlatch. Rotate the release handle upward to the full forward position and extra leg room when adjusted rearward.

Owner Guide 1st Printing
Page 148
...up and rearward, causing the latch hooks to disengage it from the rear floor attachments. 2. While lifting the handles, lift the seat at the rear of floor attachments, release the latch handles. 3. 3rd row seat (bed position) Removing the Seats Quick release second row bucket seats (If equipped) ...To remove the second row bucket seats: 1. Lift the seat latch handles (located at the rear and rotate entire seat assembly ...
...up and rearward, causing the latch hooks to disengage it from the rear floor attachments. 2. While lifting the handles, lift the seat at the rear of floor attachments, release the latch handles. 3. 3rd row seat (bed position) Removing the Seats Quick release second row bucket seats (If equipped) ...To remove the second row bucket seats: 1. Lift the seat latch handles (located at the rear and rotate entire seat assembly ...

Owner Guide 1st Printing
Page 149
.... Two and Three Passenger Bench Seat Assemblies NOTE: It is easiest to adjust the seat while the vehicle is free of objects that the latch handles are latched securely in the rear seating compartments before seat removal.
.... Two and Three Passenger Bench Seat Assemblies NOTE: It is easiest to adjust the seat while the vehicle is free of objects that the latch handles are latched securely in the rear seating compartments before seat removal.
Owner Guide 1st Printing
Page 152
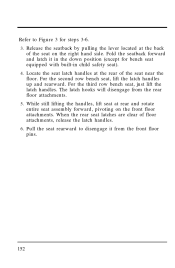
... rear and rotate entire seat assembly forward, pivoting on the right hand side. For the third row bench seat, just lift the latch handles. The latch hooks will disengage from the front floor pins. 152 Pull the seat rearward to Figure 3 for bench seat equipped with built...the down position (except for steps 3-6. 3. For the second row bench seat, lift the latch handles up and rearward. While still lifting the handles, lift seat at the rear of floor attachments, release the latch handles. 6. Fold the seatback forward and latch it from the rear floor attachments. 5. When the ...
... rear and rotate entire seat assembly forward, pivoting on the right hand side. For the third row bench seat, just lift the latch handles. The latch hooks will disengage from the front floor pins. 152 Pull the seat rearward to Figure 3 for bench seat equipped with built...the down position (except for steps 3-6. 3. For the second row bench seat, lift the latch handles up and rearward. While still lifting the handles, lift seat at the rear of floor attachments, release the latch handles. 6. Fold the seatback forward and latch it from the rear floor attachments. 5. When the ...

Owner Guide 1st Printing
Page 153
Lifting of the latch handles is not required for bench seats equipped with built-in child safety seat), place the seat assembly in the floor wells. 3. Tip the seat assembly ...
Lifting of the latch handles is not required for bench seats equipped with built-in child safety seat), place the seat assembly in the floor wells. 3. Tip the seat assembly ...

Owner Guide 1st Printing
Page 154
Ensure that the latch handles are fully seated in the vehicle and no one is using the outboard seating position (nearest the sliding door), the lap/shoulder safety belt must ... only) Before you hear a "snap" and feel the latch engage. 6. A twisted safety belt may cause the retractor to the warning label on the seatback latch handle. Improper installation of the seat will reduce effort on the latch. Refer to not work properly. Remove any twist, then insert the tongue end of...
Ensure that the latch handles are fully seated in the vehicle and no one is using the outboard seating position (nearest the sliding door), the lap/shoulder safety belt must ... only) Before you hear a "snap" and feel the latch engage. 6. A twisted safety belt may cause the retractor to the warning label on the seatback latch handle. Improper installation of the seat will reduce effort on the latch. Refer to not work properly. Remove any twist, then insert the tongue end of...
Owner Guide 1st Printing
Page 185
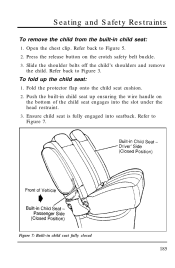
Open the chest clip. To fold up ensuring the wire handle on the crotch safety belt buckle. 3. Ensure child seat is fully engaged into the slot under the head restraint. 3. Refer to Figure 3. Press the release ...
Open the chest clip. To fold up ensuring the wire handle on the crotch safety belt buckle. 3. Ensure child seat is fully engaged into the slot under the head restraint. 3. Refer to Figure 3. Press the release ...