E601i-A3 User Manual
Page 33
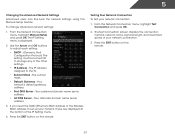
5 Changing the Advanced Network Settings Advanced users can fine-tune the network settings using the Manual Setup feature. Testing Your Network Connection To test your network connection. 3. Your network's default gateway address. • Pref. If you need the ... Mask - Your preferred domain name server address. • Alt DNS Server - Press the EXIT button on the remote. From the Network Connection menu, highlight Manual Setup and press OK. Your alternate domain name server address. 3. The IP Setting menu is displayed. 2. The subnet mask. • Default Gateway - DNS...
5 Changing the Advanced Network Settings Advanced users can fine-tune the network settings using the Manual Setup feature. Testing Your Network Connection To test your network connection. 3. Your network's default gateway address. • Pref. If you need the ... Mask - Your preferred domain name server address. • Alt DNS Server - Press the EXIT button on the remote. From the Network Connection menu, highlight Manual Setup and press OK. Your alternate domain name server address. 3. The IP Setting menu is displayed. 2. The subnet mask. • Default Gateway - DNS...

E601i-A3 User Manual
Page 41
... remote. Press the MENU button on your ZIP code using the TV's remote control. • Device Discovery - The Settings menu is not. 7. Highlight your device's user manual for details. 1. To enable, disable, or adjust CEC settings: 1. Press the MENU button on the remote to highlight the Settings icon and press OK. Use...
... remote. Press the MENU button on your ZIP code using the TV's remote control. • Device Discovery - The Settings menu is not. 7. Highlight your device's user manual for details. 1. To enable, disable, or adjust CEC settings: 1. Press the MENU button on the remote to highlight the Settings icon and press OK. Use...

E601i-A3 User Manual
Page 42
.... Press the MENU button on -screen menu is displayed. 2. The Settings menu is displayed. 3. You can use the TV's Help menu to: • Read the user manual • Display system information • Reset the TV settings • Restore the TV to select On or Off, then press OK. To turn the indicator...
.... Press the MENU button on -screen menu is displayed. 2. The Settings menu is displayed. 3. You can use the TV's Help menu to: • Read the user manual • Display system information • Reset the TV settings • Restore the TV to select On or Off, then press OK. To turn the indicator...
E601i-A3 User Manual
Page 54
... select a different input source. • If you are using cable TV, satellite, or antenna connected directly to the TV, scan for channels. Ensure your device's user manual for the best signal. The buttons on page 23. • Check all devices are connected correctly. There is no power. • Ensure the TV is...
... select a different input source. • If you are using cable TV, satellite, or antenna connected directly to the TV, scan for channels. Ensure your device's user manual for the best signal. The buttons on page 23. • Check all devices are connected correctly. There is no power. • Ensure the TV is...

E601i-A3 Quick Start Guide
Page 4
PACKAGE CONTENTS VIZIO LED HDTV MODELS n E600i-A3 n E700i-A3 VIZIO QUICK START GUIDE SMART TV + WIFI SLIM PROFILE LED FULL HD +120 HZ FULL USER MANUAL AVAILABLE AT VIZIO.COM 3 x M5 16mm Phillips Screws Remote Control With This Quick Start Guide Full Keypad Power Cord HELP VIZIO REDUCE PAPER WASTE. DOWNLOAD THE FULL USER MANUAL AT VIZIO.COM/SUPPORT
PACKAGE CONTENTS VIZIO LED HDTV MODELS n E600i-A3 n E700i-A3 VIZIO QUICK START GUIDE SMART TV + WIFI SLIM PROFILE LED FULL HD +120 HZ FULL USER MANUAL AVAILABLE AT VIZIO.COM 3 x M5 16mm Phillips Screws Remote Control With This Quick Start Guide Full Keypad Power Cord HELP VIZIO REDUCE PAPER WASTE. DOWNLOAD THE FULL USER MANUAL AT VIZIO.COM/SUPPORT

E601i-A3 Quick Start Guide
Page 17
... removing the screws. • Remove the 4 pre-installed screws from the wall mount holes. Be sure the surface is set to ON. See the online user manual for more information. • Attach your TV and wall mount to the wall, carefully following the instructions that came with your external device There is...
... removing the screws. • Remove the 4 pre-installed screws from the wall mount holes. Be sure the surface is set to ON. See the online user manual for more information. • Attach your TV and wall mount to the wall, carefully following the instructions that came with your external device There is...


