User Manual
Page 7
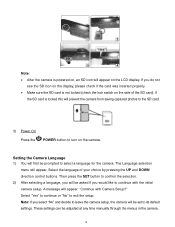
... the camera setup, the camera will be adjusted at any time manually through the menus in the camera. 6 If the SD card is locked this will prevent the camera from saving captured photos to the SD card. 3) Power On Press the POWER button to its default settings. Note: If you would like to continue with Camera Setup?" A message will appear: "Continue with the initial camera setup. Note: After the camera is powered on, an SD icon will...
... the camera setup, the camera will be adjusted at any time manually through the menus in the camera. 6 If the SD card is locked this will prevent the camera from saving captured photos to the SD card. 3) Power On Press the POWER button to its default settings. Note: If you would like to continue with Camera Setup?" A message will appear: "Continue with the initial camera setup. Note: After the camera is powered on, an SD icon will...
User Manual
Page 8
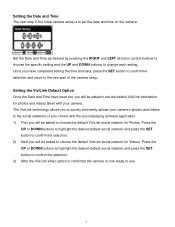
... direction control buttons to choose the specific setting and the UP and DOWN buttons to set the date and time on the camera. Once you will be asked to choose the default ViviLink social network for Videos. The ViviLink technology allows you to quickly and easily upload your camera‟s photos and videos to the social networks of the camera setup. Setting the Date and Time The next step in the initial camera setup...
... direction control buttons to choose the specific setting and the UP and DOWN buttons to set the date and time on the camera. Once you will be asked to choose the default ViviLink social network for Videos. The ViviLink technology allows you to quickly and easily upload your camera‟s photos and videos to the social networks of the camera setup. Setting the Date and Time The next step in the initial camera setup...
User Manual
Page 9
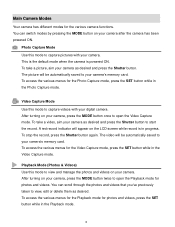
... you‟ve previously taken to capture videos with your camera, press the MODE button twice to view and manage the photos and videos on the LCD screen while record is powered ON. After turning on your digital camera. Main Camera Modes Your camera has different modes for the Photo Capture mode, press the SET button while in progress. Photo Capture Mode Use this mode to view, edit or delete them as desired and press the Shutter button to start the record.
... you‟ve previously taken to capture videos with your camera, press the MODE button twice to view and manage the photos and videos on the LCD screen while record is powered ON. After turning on your digital camera. Main Camera Modes Your camera has different modes for the Photo Capture mode, press the SET button while in progress. Photo Capture Mode Use this mode to view, edit or delete them as desired and press the Shutter button to start the record.

User Manual
Page 10
....5.x and above 3 * AAA (1.5V) batteries 0~40C 9 Camera Technical Specifications Image Sensor Image Resolution Video Resolution File Format Internal Memory External Memory LCD Display Lens Zoom Exposure White Balance ISO Scene Flash Self-Timer Anti-Shake Face Detect Print Photos Microphone Macro Interface System Requirements Battery Working Temperature 9 Mega Pixel CMOS Sensor 4416 x 3312 (14M) / 4000 x 3000 (12M) / 3456 x 2592 (9M) / 3264 x 2448 (8M) / 3648 x 2048 (7M HD) / 2592 x1944 (5M) / 2048 x ...
....5.x and above 3 * AAA (1.5V) batteries 0~40C 9 Camera Technical Specifications Image Sensor Image Resolution Video Resolution File Format Internal Memory External Memory LCD Display Lens Zoom Exposure White Balance ISO Scene Flash Self-Timer Anti-Shake Face Detect Print Photos Microphone Macro Interface System Requirements Battery Working Temperature 9 Mega Pixel CMOS Sensor 4416 x 3312 (14M) / 4000 x 3000 (12M) / 3456 x 2592 (9M) / 3264 x 2448 (8M) / 3648 x 2048 (7M HD) / 2592 x1944 (5M) / 2048 x ...

User Manual
Page 11
... to download photos and videos to your PC using the Vivitar Experience Image Manager Software, you will need the following minimum configuration: Microsoft® Windows XP with Service Pack 3, Windows Vista with Service Pack 1 or Windows 7 Pentium® 4 processor (or above) 1 GB of RAM, with 250 MB of free hard disk space 16-bit Color monitor, 1024 X 768 recommended screen resolution...
... to download photos and videos to your PC using the Vivitar Experience Image Manager Software, you will need the following minimum configuration: Microsoft® Windows XP with Service Pack 3, Windows Vista with Service Pack 1 or Windows 7 Pentium® 4 processor (or above) 1 GB of RAM, with 250 MB of free hard disk space 16-bit Color monitor, 1024 X 768 recommended screen resolution...
User Manual
Page 12
... camera will automatically turn your camera in either Photo Capture Mode or Video Capture Mode). 11 Note: Your digital camera also has an Auto Power Off feature that will power off your camera after a specific period of time that your camera is fully charged before the first use. Make sure an SD card has been inserted into your digital camera. SD Card not included) Please see Initial Camera Setup for more information. The Auto Power Off settings...
... camera will automatically turn your camera in either Photo Capture Mode or Video Capture Mode). 11 Note: Your digital camera also has an Auto Power Off feature that will power off your camera after a specific period of time that your camera is fully charged before the first use. Make sure an SD card has been inserted into your digital camera. SD Card not included) Please see Initial Camera Setup for more information. The Auto Power Off settings...
User Manual
Page 21
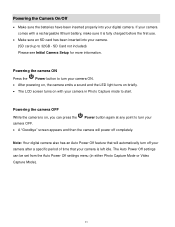
... the next menu item. 7) Press the MODE button to exit the menu and return to your previous mode. 8) An icon reflecting your selection will be saved by your camera until you to choose the desired size of the images taken by default the camera switches off the FLASH automatically (if it and manually turn ON the flash - If however, you to choose scene settings that this setting will display on...
... the next menu item. 7) Press the MODE button to exit the menu and return to your previous mode. 8) An icon reflecting your selection will be saved by your camera until you to choose the desired size of the images taken by default the camera switches off the FLASH automatically (if it and manually turn ON the flash - If however, you to choose scene settings that this setting will display on...
User Manual
Page 22
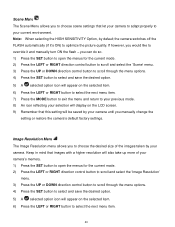
... yourself in the picture yourself. Image Quality Menu The Image Quality menu allows you to set the desired Self-Timer delay, press the Shutter button on the LCD screen. 9) Remember that the camera‟s Shutter button is an optimal feature if you to select the desired quality level of the camera as desired. 1) Press the SET button to be saved by your camera until you manually change the setting or restore the camera‟s default factory settings.
... yourself in the picture yourself. Image Quality Menu The Image Quality menu allows you to set the desired Self-Timer delay, press the Shutter button on the LCD screen. 9) Remember that the camera‟s Shutter button is an optimal feature if you to select the desired quality level of the camera as desired. 1) Press the SET button to be saved by your camera until you manually change the setting or restore the camera‟s default factory settings.

User Manual
Page 24
... or RIGHT button to select the next menu item. 7) Press the MODE button to exit the menu and return to your previous mode. 8) An icon reflecting your selection will display on the side of the subject(s) you start using your camera until the green square(s) appears around the subject‟s face. The face of the camera down for balancing the other colors and focus in Macro mode. The...
... or RIGHT button to select the next menu item. 7) Press the MODE button to exit the menu and return to your previous mode. 8) An icon reflecting your selection will display on the side of the subject(s) you start using your camera until the green square(s) appears around the subject‟s face. The face of the camera down for balancing the other colors and focus in Macro mode. The...

User Manual
Page 27
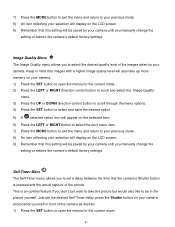
...;s lens. This setting should be adjusted when the environment is needed , reduce the exposure setting (by your camera. If the environment has less light (darker) than is lighter or darker than is needed , increase the exposure setting (by using the negative - 8) An icon reflecting your selection will display on the LCD screen 9) Remember that this setting will be saved by your camera until you manually change the setting or restore the camera‟s default factory settings.
...;s lens. This setting should be adjusted when the environment is needed , reduce the exposure setting (by your camera. If the environment has less light (darker) than is lighter or darker than is needed , increase the exposure setting (by using the negative - 8) An icon reflecting your selection will display on the LCD screen 9) Remember that this setting will be saved by your camera until you manually change the setting or restore the camera‟s default factory settings.
User Manual
Page 28
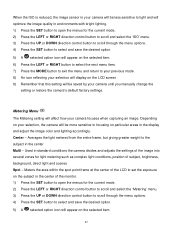
... in the display and adjust the image color and lighting accordingly. When the ISO is reduced, the image sensor in your camera will be less sensitive to light and will optimize the image quality in environments with bright lighting. 1) Press the SET button to open the menus for the current mode. 2) Press the LEFT or RIGHT direction control button to scroll and select the „ISO‟ menu. 3) Press the...
... in the display and adjust the image color and lighting accordingly. When the ISO is reduced, the image sensor in your camera will be less sensitive to light and will optimize the image quality in environments with bright lighting. 1) Press the SET button to open the menus for the current mode. 2) Press the LEFT or RIGHT direction control button to scroll and select the „ISO‟ menu. 3) Press the...

User Manual
Page 29
... Date/Time menu allows you to set your camera, the image will include a time stamp with your camera until you manually change the setting or restore the camera‟s default factory settings. 6) Press the LEFT or RIGHT button to select the next menu item. 7) Press the MODE button to exit the menu and return to your previous mode. 8) An icon reflecting your selection will display on the LCD screen. 9) Remember that this setting will be saved by your camera...
... Date/Time menu allows you to set your camera, the image will include a time stamp with your camera until you manually change the setting or restore the camera‟s default factory settings. 6) Press the LEFT or RIGHT button to select the next menu item. 7) Press the MODE button to exit the menu and return to your previous mode. 8) An icon reflecting your selection will display on the LCD screen. 9) Remember that this setting will be saved by your camera...
User Manual
Page 30
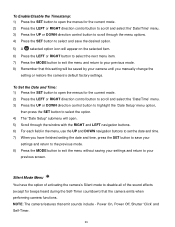
... "Date Setup" submenu will be saved by your camera until you have finished setting the date and time, press the SET button to save your settings and return to the previous mode. 8) Press the MODE button to exit the menu without saving your settings and return to your previous mode. 8) Remember that this setting will open the menus for beeps heard during the Self-Timer countdown) that emit sounds include - Power On, Power Off, Shutter „...
... "Date Setup" submenu will be saved by your camera until you have finished setting the date and time, press the SET button to save your settings and return to the previous mode. 8) Press the MODE button to exit the menu without saving your settings and return to your previous mode. 8) Remember that this setting will open the menus for beeps heard during the Self-Timer countdown) that emit sounds include - Power On, Power Off, Shutter „...
User Manual
Page 32
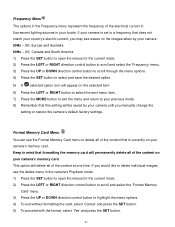
... open the menus for the current mode. 2) Press the LEFT or RIGHT direction control button to scroll and select the „Format Memory Card‟ menu. 3) Press the UP or DOWN direction control button to select and save the desired option. 5) A selected option icon will delete all of the content that does not match your country‟s electric current, you manually change the setting or restore the camera‟s default factory settings...
... open the menus for the current mode. 2) Press the LEFT or RIGHT direction control button to scroll and select the „Format Memory Card‟ menu. 3) Press the UP or DOWN direction control button to select and save the desired option. 5) A selected option icon will delete all of the content that does not match your country‟s electric current, you manually change the setting or restore the camera‟s default factory settings...
User Manual
Page 33
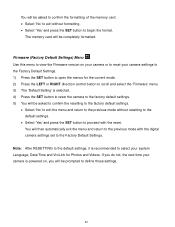
..., the next time your system Language, Date/Time and ViviLink for the current mode. 2) Press the LEFT or RIGHT direction control button to scroll and select the „Firmware‟ menu. 3) The „Default Setting‟ is powered on your camera or to reset your camera settings to the Factory Default Settings. 1) Press the SET button to open the menus for Photos and Videos. If you will be prompted to the Factory Default Settings. The memory card will be completely formatted.
..., the next time your system Language, Date/Time and ViviLink for the current mode. 2) Press the LEFT or RIGHT direction control button to scroll and select the „Firmware‟ menu. 3) The „Default Setting‟ is powered on your camera or to reset your camera settings to the Factory Default Settings. 1) Press the SET button to open the menus for Photos and Videos. If you will be prompted to the Factory Default Settings. The memory card will be completely formatted.
User Manual
Page 34
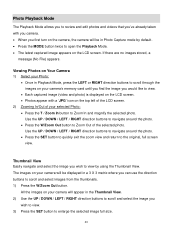
... the images on your camera‟s memory card until you find the image you would like to view. Each captured image (video and photo) is displayed on the LCD screen. Photos appear with you camera. When you first turn on the camera, the camera will be displayed in a 3 X 3 matrix where you can use the direction buttons to scroll and select images from the thumbnails. 1) Press the W/Zoom Out button. Photo Playback Mode The Playback Mode allows...
... the images on your camera‟s memory card until you find the image you would like to view. Each captured image (video and photo) is displayed on the LCD screen. Photos appear with you camera. When you first turn on the camera, the camera will be displayed in a 3 X 3 matrix where you can use the direction buttons to scroll and select images from the thumbnails. 1) Press the W/Zoom Out button. Photo Playback Mode The Playback Mode allows...

User Manual
Page 39
... Pictbridge printer. 7) Connect the USB cable provided in the playback mode. Photos that are not locked will not display the lock symbol. 9) Remember that image in the package from the camera to the Pictbridge port of the printer. 8) Once connected, follow the instructions on the LCD screen when viewing that you would like to protect/lock. 2) Press the SET button to open the menus for the current mode. 3) Press the LEFT or RIGHT direction control button to...
... Pictbridge printer. 7) Connect the USB cable provided in the playback mode. Photos that are not locked will not display the lock symbol. 9) Remember that image in the package from the camera to the Pictbridge port of the printer. 8) Once connected, follow the instructions on the LCD screen when viewing that you would like to protect/lock. 2) Press the SET button to open the menus for the current mode. 3) Press the LEFT or RIGHT direction control button to...

User Manual
Page 54
... Playback mode, press the LEFT or RIGHT direction buttons to scroll through the images on your camera‟s memory card until you find the video you would like to view. Each captured image (video and photo) is displayed on the LCD screen. Videos appear with an „AVI‟ icon on the top left of the LCD screen. 2) Play your selected video: Press the Shutter button to START playing the video. Press the Shutter button...
... Playback mode, press the LEFT or RIGHT direction buttons to scroll through the images on your camera‟s memory card until you find the video you would like to view. Each captured image (video and photo) is displayed on the LCD screen. Videos appear with an „AVI‟ icon on the top left of the LCD screen. 2) Play your selected video: Press the Shutter button to START playing the video. Press the Shutter button...

User Manual
Page 55
... the SET button to enlarge the image full size. 4) Once the selected video is full size you can play and view the video. Displays the previous image Up Right Down STOP - Opens the ViviLink for Photo Playback Mode Saves your selected menu option NOTE: To navigate through the Menus, use the UP/DOWN/LEFT/RIGHT direction control buttons. 54 Quick Function Button Function Left PREVIOUS - Plays and pauses a playing video Opens Thumbnail View To Navigate in the Thumbnail View...
... the SET button to enlarge the image full size. 4) Once the selected video is full size you can play and view the video. Displays the previous image Up Right Down STOP - Opens the ViviLink for Photo Playback Mode Saves your selected menu option NOTE: To navigate through the Menus, use the UP/DOWN/LEFT/RIGHT direction control buttons. 54 Quick Function Button Function Left PREVIOUS - Plays and pauses a playing video Opens Thumbnail View To Navigate in the Thumbnail View...
User Manual
Page 66
... do not appear on the SD memory card. If the camera powers off . How do I recover images that the images were successfully transferred but the photos do I make sure I accidently deleted? You can be uploaded quickly before you would like to your local toll free number. Can‟t find manuals, software and FAQ‟s at support@vivitar.com and one of our technical support team members will happen to...
... do not appear on the SD memory card. If the camera powers off . How do I recover images that the images were successfully transferred but the photos do I make sure I accidently deleted? You can be uploaded quickly before you would like to your local toll free number. Can‟t find manuals, software and FAQ‟s at support@vivitar.com and one of our technical support team members will happen to...


