Vivitar X014 Support and Manuals
Get Help and Manuals for this Vivitar item

View All Support Options Below
Free Vivitar X014 manuals!
Problems with Vivitar X014?
Ask a Question
Free Vivitar X014 manuals!
Problems with Vivitar X014?
Ask a Question
Most Recent Vivitar X014 Questions

Iv Brought This Camera And It Is Saying Memory Full Could You Explain Why This I
(Posted by Rtabb1971 9 years ago)

Cable For X014n Vivicam
Canno find a cable to upload photos to mycomputer. Vivitar ViviCam x014N
Canno find a cable to upload photos to mycomputer. Vivitar ViviCam x014N
(Posted by raposaanna 10 years ago)

The Language Has Changed On My Phone How Do I Set It Back To English
(Posted by Anonymous-113254 10 years ago)

How To Reset Camera
How do I reset the camera for dates, etc--I have the wrong ones now--thank you.
How do I reset the camera for dates, etc--I have the wrong ones now--thank you.
(Posted by lnelson22232 11 years ago)
Vivitar X014 Videos

Testing out the Vivitar ViviCam X014 from Walmart for $49 by playing Diablo II Lord of Destruction
Duration: 1:38
Total Views: 863
Duration: 1:38
Total Views: 863
Test vivitar X014 vid quality
Duration: :14
Total Views: 154
Duration: :14
Total Views: 154
Popular Vivitar X014 Manual Pages
Camera Manual - Page 2
...from my camera to my computer manually (Using Windows 52 Transfer media from my camera to my computer manually (Using Macintosh 53 Camera Maintenance ...53 Sakar Warranty Card...54 Technical Support...55 Troubleshooting...55
1 Contents Introduction ...2 What‟s Included...2 Parts of the Camera ...3 Initial Camera Setup...4 Main Camera Modes ...7 Camera Technical Specifications 8 Computer...
Camera Manual - Page 6
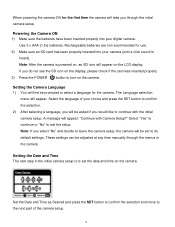
..., an SD icon will appear: "Continue with the initial camera setup. Powering the Camera ON 1) Make sure the batteries have been inserted properly into your digital camera. Use 3 x AAA (1.5v) batteries.
Setting the Camera Language 1) You will be set the date and time on the display, please check if the card was inserted properly. 3) Press the POWER button to...
Camera Manual - Page 8
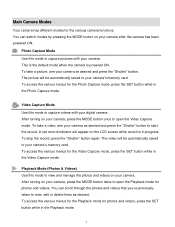
... your camera‟s memory card. Video Capture Mode Use this mode to your camera‟s memory card. You can switch modes by pressing the MODE button on the LCD screen while record is powered ON. To access the various menus for the Playback mode for the Photo Capture mode, press the SET button while in the Video Capture mode.
After turning on your digital camera. To...
Camera Manual - Page 12
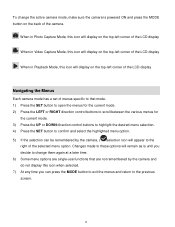
... on the top-left corner of the LCD display
Navigating the Menus
Each camera mode has a set of menus specific to that are single-use functions that mode. 1) Press the SET button to open the menus for the current mode. 2) Press the LEFT or RIGHT direction control buttons to scroll between the various menus for
the current...
Camera Manual - Page 14
... last photo taken ViviLink -
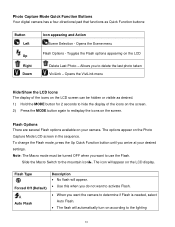
To change the Flash mode, press the Up Quick Function button until you want the camera to the mountain icon . Flash Options There are several Flash options available on the Photo Capture Mode LCD screen in the sequence. Note: The Macro mode must be hidden or visible as Quick Function buttons...
Camera Manual - Page 15
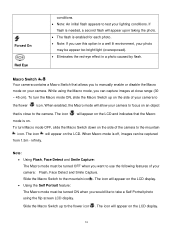
... when you want to take a Self Portrait photo using the Macro mode, you to manually enable or disable the Macro mode on the side of the camera to the mountain icon . While using the flip screen LCD display. infinity. Macro Switch / Your camera contains a Macro Switch that the Macro mode is off, images can capture images at close to the flower...
Camera Manual - Page 19
... balancing the other colors and focus in Macro mode. Face Detect Menu The Face Detect feature when set to 9 feet (3.5
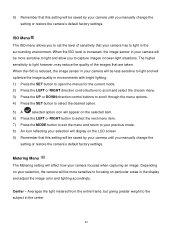
meters) from the camera - 9) Remember that this setting will be saved by
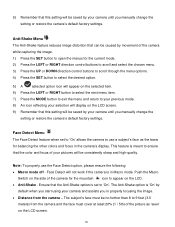
default when you start using your camera and assists you manually change the setting or restore the camera‟s default factory settings. Anti-Shake Menu The Anti-Shake...
Camera Manual - Page 20
...8223; by your camera until you manually change the
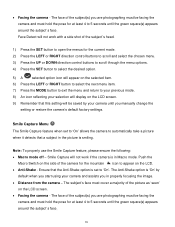
setting or restore the camera‟s default factory settings. The subject‟s face must cover a majority of the camera for the mountain ...setting will appear on the LCD screen. Facing the camera - Face Detect will not work if the camera is smiling. The face of the subject(s) you in Macro mode. Facing the camera...
Camera Manual - Page 24
... SET button to select the desired option.
5) A
selected option icon will appear on your selection, the camera will be more sensitive to light and allow you to your previous mode...setting will be saved by your camera until you manually change the
setting or restore the camera‟s default factory settings.
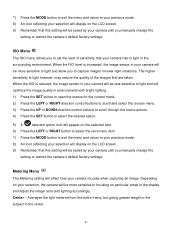
ISO Menu The ISO menu allows you to set the level of sensitivity that your camera...
Camera Manual - Page 28
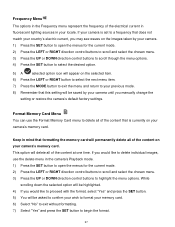
... confirm your wish to format your camera‟s memory card. If you would like to delete individual images, use the Format Memory Card menu to begin the format.
27 Frequency Menu The options in the Frequency menu represent the frequency of the content on your camera until you manually change the
setting or restore the camera‟s default factory...
Camera Manual - Page 29
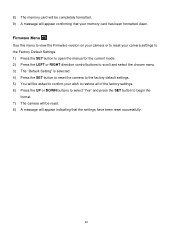
8) The memory card will be reset. 8) A message will appear confirming that the settings have been reset successfully.
28 Firmware Menu Use this menu to view the Firmware version on your camera or to reset your camera settings to the Factory Default Settings. 1) Press the SET button to open the menus for the current mode. 2) Press the LEFT or RIGHT direction control buttons...
Camera Manual - Page 32
... selected item.
6) An icon will appear on your camera‟s memory card, select "Delete All Images".
7) Press the SET button to select the desired option. 8) You will be asked to confirm your previous mode.
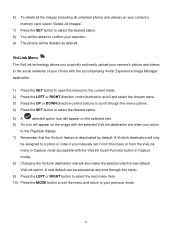
31 A ViviLink destination will only
be assigned to a photo or video if you manually set it from this menu.
9) Press the LEFT or...
Camera Manual - Page 42
... previous mode. 8) An icon reflecting your selection will display on the LCD screen. 9) Remember that this setting will be more sensitive to light and allow you to capture images in lower-light situations. When the ISO level is reduced, the image sensor in your camera will affect how your camera until you manually change the
setting...
Camera Manual - Page 46
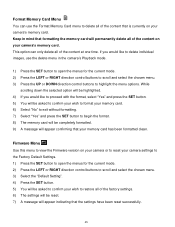
... your wish to format your memory card. 6) Select "No" to exit without formatting. 7) Select "Yes" and press the SET button to highlight the menu options. Firmware Menu Use this menu to view the Firmware version on your camera settings to the Factory Default Settings. 1) Press the SET button to open the menus for the current mode. 2) Press the LEFT or...
Camera Manual - Page 49

...through the menu options. 4) Press the SET button to select the desired option. 5) Press the MODE button to exit the menu and return to a photo or video if you manually set it from this menu. 7) An ... can be assigned to your camera can be selected at any deletion or alteration being made to the files. 1) Press the SET button to open the menus for the current mode. 2) Press the LEFT or...
Vivitar X014 Reviews
We have not received any reviews for Vivitar yet.