
User Manual
Page 1
Windows and the Windows logo are the property of Microsoft Corporation. All rights reserved. All other trademarks are registered trademarks of their respective companies. ViviCam F128 Digital Camera User Manual © 2009-2011 Sakar International, Inc.
Windows and the Windows logo are the property of Microsoft Corporation. All rights reserved. All other trademarks are registered trademarks of their respective companies. ViviCam F128 Digital Camera User Manual © 2009-2011 Sakar International, Inc.
User Manual
Page 2
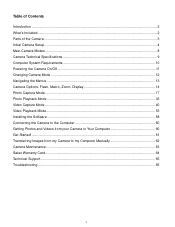
... Introduction ...2 What‟s Included...2 Parts of the Camera ...3 Initial Camera Setup...4 Main Camera Modes ...8 Camera Technical Specifications 9 Computer System Requirements 10 Powering the Camera On/Off ...11 Changing Camera Mode ...12 Navigating the Menus...13 Camera Options: Flash, Macro, Zoom, Display 14 Photo ...Installing the Software ...58 Connecting the Camera to the Computer 60 Getting Photos and Videos from your Camera to Your Computer 60 Get Started! ...61 Transferring Images from my Camera to my Computer Manually 62 Camera Maintenance ...63 Sakar Warranty Card...64...
... Introduction ...2 What‟s Included...2 Parts of the Camera ...3 Initial Camera Setup...4 Main Camera Modes ...8 Camera Technical Specifications 9 Computer System Requirements 10 Powering the Camera On/Off ...11 Changing Camera Mode ...12 Navigating the Menus...13 Camera Options: Flash, Macro, Zoom, Display 14 Photo ...Installing the Software ...58 Connecting the Camera to the Computer 60 Getting Photos and Videos from your Camera to Your Computer 60 Get Started! ...61 Transferring Images from my Camera to my Computer Manually 62 Camera Maintenance ...63 Sakar Warranty Card...64...
User Manual
Page 3
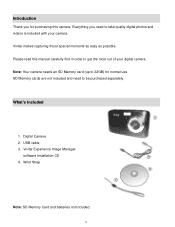
... to get the most out of your camera. SD Memory cards are not included and need to be purchased separately. USB cable 3. Digital Camera 2. Wrist Strap Note: SD Memory Card and batteries not included. 2 Vivitar Experience Image Manager software Installation CD 4. ...Introduction Thank you need to take quality digital photos and videos is included with your digital camera. What's Included 1. Vivitar makes capturing those special moments as easy as possible. Please read this manual carefully first ...
... to get the most out of your camera. SD Memory cards are not included and need to be purchased separately. USB cable 3. Digital Camera 2. Wrist Strap Note: SD Memory Card and batteries not included. 2 Vivitar Experience Image Manager software Installation CD 4. ...Introduction Thank you need to take quality digital photos and videos is included with your digital camera. What's Included 1. Vivitar makes capturing those special moments as easy as possible. Please read this manual carefully first ...
User Manual
Page 7
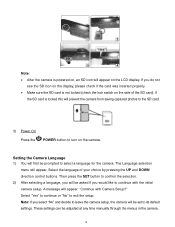
...side of your choice by pressing the UP and DOWN direction control buttons. The Language selection menu will be adjusted at any time manually through the menus in the camera. 6 If the SD card is locked this will be prompted to its default settings. Note: If you will appear. A message... asked if you would like to confirm the selection. 2) After selecting a language, you select "No" and decide to leave the camera setup, the camera will prevent the camera from saving captured photos to the SD card. 3) Power On Press the POWER button to exit the setup. Then press the SET...
...side of your choice by pressing the UP and DOWN direction control buttons. The Language selection menu will be adjusted at any time manually through the menus in the camera. 6 If the SD card is locked this will be prompted to its default settings. Note: If you will appear. A message... asked if you would like to confirm the selection. 2) After selecting a language, you select "No" and decide to leave the camera setup, the camera will prevent the camera from saving captured photos to the SD card. 3) Power On Press the POWER button to exit the setup. Then press the SET...

User Manual
Page 10
Camera Technical Specifications Image Sensor Image Resolution Video Resolution File Format Internal Memory External Memory LCD Display Lens Zoom Exposure White Balance ISO Scene Flash Self-..., Night Scenery, Night Portrait, High Sensitivity, Beach No Flash, Forced On, Auto Flash, Red Eye Reduction 2, 5 or 10 second delay Yes Yes Yes Yes Yes, Manual Switch USB 2.0 Windows XP (SP 3), Vista (SP1) and 7 ; Mac OSX v10.5.x and above 3 * AAA (1.5V) batteries 0~40C 9
Camera Technical Specifications Image Sensor Image Resolution Video Resolution File Format Internal Memory External Memory LCD Display Lens Zoom Exposure White Balance ISO Scene Flash Self-..., Night Scenery, Night Portrait, High Sensitivity, Beach No Flash, Forced On, Auto Flash, Red Eye Reduction 2, 5 or 10 second delay Yes Yes Yes Yes Yes, Manual Switch USB 2.0 Windows XP (SP 3), Vista (SP1) and 7 ; Mac OSX v10.5.x and above 3 * AAA (1.5V) batteries 0~40C 9
User Manual
Page 16
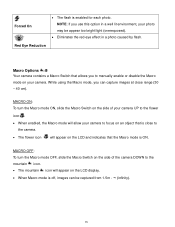
..., you can be appear too bright/light (overexposed). Eliminates the red-eye effect in a photo caused by flash. Red Eye Reduction Macro Options / Your camera contains a Macro Switch that the Macro mode is enabled for each photo. MACRO ON: To turn the Macro mode OFF, slide the Macro Switch on... the side of your camera UP to manually enable or disable the Macro mode on the LCD display. When Macro mode is off, images can capture images at close to focus...
..., you can be appear too bright/light (overexposed). Eliminates the red-eye effect in a photo caused by flash. Red Eye Reduction Macro Options / Your camera contains a Macro Switch that the Macro mode is enabled for each photo. MACRO ON: To turn the Macro mode OFF, slide the Macro Switch on... the side of your camera UP to manually enable or disable the Macro mode on the LCD display. When Macro mode is off, images can capture images at close to focus...
User Manual
Page 21
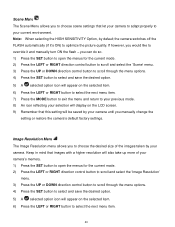
...Resolution menu allows you would like to your selection will be saved by default the camera switches off the FLASH automatically (if it and manually turn ON the flash - Note: When selecting the HIGH SENSITIVITY Option, by your camera to adapt properly to override it ‟s ON) to select the next menu... item. 20 Keep in mind that images with a higher resolution will also take up more of the images taken by your camera. Scene Menu The Scene Menu allows you manually change the setting or...
...Resolution menu allows you would like to your selection will be saved by default the camera switches off the FLASH automatically (if it and manually turn ON the flash - Note: When selecting the HIGH SENSITIVITY Option, by your camera to adapt properly to override it ‟s ON) to select the next menu... item. 20 Keep in mind that images with a higher resolution will also take up more of the images taken by your camera. Scene Menu The Scene Menu allows you manually change the setting or...
User Manual
Page 22
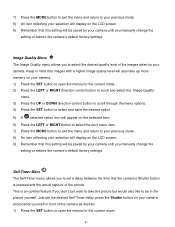
... that this setting will be saved by your camera and position yourself in the picture yourself. Just set a delay between the time that the camera‟s Shutter button is an optimal feature if you manually change the setting or restore the camera‟s default factory settings. This is pressed ...current mode. 21 Image Quality Menu The Image Quality menu allows you manually change the setting or restore the camera‟s default factory settings. Keep in mind that this setting will be in front of the camera as desired. 1) Press the SET button to select the desired ...
... that this setting will be saved by your camera and position yourself in the picture yourself. Just set a delay between the time that the camera‟s Shutter button is an optimal feature if you manually change the setting or restore the camera‟s default factory settings. This is pressed ...current mode. 21 Image Quality Menu The Image Quality menu allows you manually change the setting or restore the camera‟s default factory settings. Keep in mind that this setting will be in front of the camera as desired. 1) Press the SET button to select the desired ...

User Manual
Page 23
... mode. 8) An icon reflecting your selection will display on the LCD screen. 9) Remember that this setting will be saved by your camera until you manually change the setting or restore the camera‟s default factory settings. 22 Anti-Shake Menu The Anti-Shake feature reduces image distortion that can be caused by movement... return to your previous mode. 8) An icon reflecting your selection will display on the LCD screen. 9) Remember that this setting will be saved by your camera until you manually change the setting or restore the...
... mode. 8) An icon reflecting your selection will display on the LCD screen. 9) Remember that this setting will be saved by your camera until you manually change the setting or restore the camera‟s default factory settings. 22 Anti-Shake Menu The Anti-Shake feature reduces image distortion that can be caused by movement... return to your previous mode. 8) An icon reflecting your selection will display on the LCD screen. 9) Remember that this setting will be saved by your camera until you manually change the setting or restore the...

User Manual
Page 24
...further than 8 to appear on the LCD screen. Facing the camera - The Anti-Shake option is meant to your previous mode. 8) An icon reflecting your camera and assists you manually change the setting or restore the camera‟s default factory settings. 23 To turn MACRO Mode OFF: Push the... Macro Switch on the side of the camera down for at least 20% (1/5th) of your camera until the green square(s) appears...
...further than 8 to appear on the LCD screen. Facing the camera - The Anti-Shake option is meant to your previous mode. 8) An icon reflecting your camera and assists you manually change the setting or restore the camera‟s default factory settings. 23 To turn MACRO Mode OFF: Push the... Macro Switch on the side of the camera down for at least 20% (1/5th) of your camera until the green square(s) appears...
User Manual
Page 25
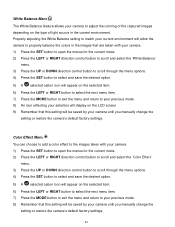
... appear on the LCD screen 9) Remember that this setting will be saved by your camera until you manually change the setting or restore the camera‟s default factory settings. 24 White Balance Menu The White Balance feature allows your camera to adjust the coloring of the captured images depending on the type of light... menu item. 7) Press the MODE button to exit the menu and return to your previous mode. 8) Remember that this setting will be saved by your camera until you manually change the setting or restore the...
... appear on the LCD screen 9) Remember that this setting will be saved by your camera until you manually change the setting or restore the camera‟s default factory settings. 24 White Balance Menu The White Balance feature allows your camera to adjust the coloring of the captured images depending on the type of light... menu item. 7) Press the MODE button to exit the menu and return to your previous mode. 8) Remember that this setting will be saved by your camera until you manually change the setting or restore the...

User Manual
Page 26
... 4) Press the SET button to select and save the desired option. 5) A selected option icon will be saved by your camera until you to your camera. The sharpness level dictates if the edges of the Shutter button. Multi SnapShots Menu When enabled, the Multi SnapShots feature allows ...you manually change the setting or restore the camera‟s default factory settings. This feature can set the level of sharpness in a row with a single click of objects...
... 4) Press the SET button to select and save the desired option. 5) A selected option icon will be saved by your camera until you to your camera. The sharpness level dictates if the edges of the Shutter button. Multi SnapShots Menu When enabled, the Multi SnapShots feature allows ...you manually change the setting or restore the camera‟s default factory settings. This feature can set the level of sharpness in a row with a single click of objects...

User Manual
Page 27
...image sensor in lower-light situations. This setting should be adjusted when the environment is needed , reduce the exposure setting (by your camera. When the environment has more sensitive to light and allow you to your previous mode. 8) An icon reflecting your selection will display... on the LCD screen 9) Remember that this setting will be saved by your camera until you manually change the setting or restore the camera‟s default factory settings. If the environment has less light (darker) than is lighter or darker than is needed...
...image sensor in lower-light situations. This setting should be adjusted when the environment is needed , reduce the exposure setting (by your camera. When the environment has more sensitive to light and allow you to your previous mode. 8) An icon reflecting your selection will display... on the LCD screen 9) Remember that this setting will be saved by your camera until you manually change the setting or restore the camera‟s default factory settings. If the environment has less light (darker) than is lighter or darker than is needed...
User Manual
Page 28
...- Center - Metering Menu The Metering setting will affect how your camera focuses when capturing an image. Depending on your selection, the camera will be saved by your camera until you manually change the setting or restore the camera‟s default factory settings. When the ISO is reduced, the image... sensor in your camera will be less sensitive to light and will ...
...- Center - Metering Menu The Metering setting will affect how your camera focuses when capturing an image. Depending on your selection, the camera will be saved by your camera until you manually change the setting or restore the camera‟s default factory settings. When the ISO is reduced, the image... sensor in your camera will be less sensitive to light and will ...

User Manual
Page 29
... allows you manually change the setting or restore the camera‟s default factory settings. The date stamp will appear on photos taken Off - Date/Time Menu When you capture an image with your camera, the image will include a time stamp with your camera. You can select your camera‟s language...1) Press the SET button to open the menus for future images that this setting will be saved by your camera until you manually change the setting or restore the camera‟s default factory settings. On - The timestamp will not appear on photos taken 28 Language Menu You can ...
... allows you manually change the setting or restore the camera‟s default factory settings. The date stamp will appear on photos taken Off - Date/Time Menu When you capture an image with your camera, the image will include a time stamp with your camera. You can select your camera‟s language...1) Press the SET button to open the menus for future images that this setting will be saved by your camera until you manually change the setting or restore the camera‟s default factory settings. On - The timestamp will not appear on photos taken 28 Language Menu You can ...
User Manual
Page 30
... MODE button to exit the menu without saving your settings and return to your camera until you manually change the setting or restore the camera‟s default factory settings. NOTE: The camera features that the camera emits when performing camera functions. To Enable/Disable the Timestamp: 1) Press the SET button to open ...in the menu, use the UP and DOWN navigation buttons to set the date and time. 7) When you have the option of activating the camera‟s Silent mode to disable all of the sound effects (except for the current mode. 2) Press the LEFT or RIGHT direction control button...
... MODE button to exit the menu without saving your settings and return to your camera until you manually change the setting or restore the camera‟s default factory settings. NOTE: The camera features that the camera emits when performing camera functions. To Enable/Disable the Timestamp: 1) Press the SET button to open ...in the menu, use the UP and DOWN navigation buttons to set the date and time. 7) When you have the option of activating the camera‟s Silent mode to disable all of the sound effects (except for the current mode. 2) Press the LEFT or RIGHT direction control button...
User Manual
Page 31
... MODE button to exit the menu and return to your previous mode. 8) Remember that this setting will be saved by your camera until you manually change the setting or restore the camera‟s default factory settings. 30 Auto Power Off Menu You can use . 1) Press the SET button to open the menus for... menu item. 7) Press the MODE button to exit the menu and return to your previous mode. 8) Remember that this setting will be saved by your camera until you manually change the setting or restore the...
... MODE button to exit the menu and return to your previous mode. 8) Remember that this setting will be saved by your camera until you manually change the setting or restore the camera‟s default factory settings. 30 Auto Power Off Menu You can use . 1) Press the SET button to open the menus for... menu item. 7) Press the MODE button to exit the menu and return to your previous mode. 8) Remember that this setting will be saved by your camera until you manually change the setting or restore the...
User Manual
Page 32
... the content that formatting the memory card will permanently delete all of the content at one time. If you manually change the setting or restore the camera‟s default factory settings. Frequency Menu The options in the Frequency menu represent the frequency of the electrical current... in fluorescent lighting sources in your camera‟s memory card. If your camera is currently on your camera's memory card. UK, Europe and Australia 60Hz - US, Canada and South America 1) Press the SET button...
... the content that formatting the memory card will permanently delete all of the content at one time. If you manually change the setting or restore the camera‟s default factory settings. Frequency Menu The options in the Frequency menu represent the frequency of the electrical current... in fluorescent lighting sources in your camera‟s memory card. If your camera is currently on your camera's memory card. UK, Europe and Australia 60Hz - US, Canada and South America 1) Press the SET button...

User Manual
Page 37
... are Protected/Locked. A ViviLink destination will only be assigned to a photo or video if you manually set it from the ViviLink menu in Capture mode (accessible with the ViviLink Quick-Function button in..., select „No‟ and press the SET button. All of your choice with the accompanying Vivitar Experience Image Manager application. 1) View the photo you would like to add a ViviLink. 2) Press the... the menus for Photos Menu The ViviLink technology allows you to quickly and easily upload your camera‟s photos and videos to the social networks of your SD card and you will exit...
... are Protected/Locked. A ViviLink destination will only be assigned to a photo or video if you manually set it from the ViviLink menu in Capture mode (accessible with the ViviLink Quick-Function button in..., select „No‟ and press the SET button. All of your choice with the accompanying Vivitar Experience Image Manager application. 1) View the photo you would like to add a ViviLink. 2) Press the... the menus for Photos Menu The ViviLink technology allows you to quickly and easily upload your camera‟s photos and videos to the social networks of your SD card and you will exit...

User Manual
Page 44
... your previous mode. 8) An icon reflecting your selection will display on the LCD screen. 9) Remember that this setting will be saved by your camera until you manually change the setting or restore the camera‟s default factory settings. 43 Scene Menu The Scene Menu allows you to choose scene settings that let your... return to your previous mode. 8) An icon reflecting your selection will display on the LCD screen. 9) Remember that this setting will be saved by your camera until you manually change the setting or restore the...
... your previous mode. 8) An icon reflecting your selection will display on the LCD screen. 9) Remember that this setting will be saved by your camera until you manually change the setting or restore the camera‟s default factory settings. 43 Scene Menu The Scene Menu allows you to choose scene settings that let your... return to your previous mode. 8) An icon reflecting your selection will display on the LCD screen. 9) Remember that this setting will be saved by your camera until you manually change the setting or restore the...


