English Owners Manual
Page 5
...Off 54 Priority Scan 54 Using the Backlight 54 Setting the Audio AGC 55 Adjusting the Display Contrast 55 Initializing the Scanner's Memory 56 Connecting Your Scanner to a Personal Computer 56 Using the Cloning Options 57 Wired Cloning 57 On-Air Cloning 58 Programming Radio Systems ...Motorola and EDACS Systems Only 79 Setting Emergency Alert (Motorola and EDACS Systems Only 80 Setting Control-Channel Only (Motorola Systems Only 80 Reviewing Locked Out Frequencies 81 Clearing All Locked-Out IDs 81 Adjusting the P25 Level (Motorola and Conventional Systems Only) ....81 Setting the ...
...Off 54 Priority Scan 54 Using the Backlight 54 Setting the Audio AGC 55 Adjusting the Display Contrast 55 Initializing the Scanner's Memory 56 Connecting Your Scanner to a Personal Computer 56 Using the Cloning Options 57 Wired Cloning 57 On-Air Cloning 58 Programming Radio Systems ...Motorola and EDACS Systems Only 79 Setting Emergency Alert (Motorola and EDACS Systems Only 80 Setting Control-Channel Only (Motorola Systems Only 80 Reviewing Locked Out Frequencies 81 Clearing All Locked-Out IDs 81 Adjusting the P25 Level (Motorola and Conventional Systems Only) ....81 Setting the ...
English Owners Manual
Page 18
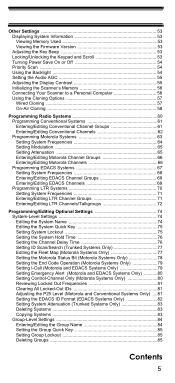
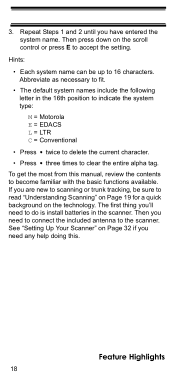
... Scanning" on Page 19 for a quick background on the technology. Then press down on Page 32 if you need any help doing this manual, review the contents to 16 characters. Feature Highlights 18 To get the most from this . The first thing you are new to scanning or trunk tracking...position to indicate the system type: M = Motorola E = EDACS L = LTR C = Conventional • Press twice to delete the current character. • Press three times to the scanner. 3. Then you have entered the system name. If you 'll need to connect the included antenna to clear the entire alpha tag.
... Scanning" on Page 19 for a quick background on the technology. Then press down on Page 32 if you need any help doing this manual, review the contents to 16 characters. Feature Highlights 18 To get the most from this . The first thing you are new to scanning or trunk tracking...position to indicate the system type: M = Motorola E = EDACS L = LTR C = Conventional • Press twice to delete the current character. • Press three times to the scanner. 3. Then you have entered the system name. If you 'll need to connect the included antenna to clear the entire alpha tag.
English Owners Manual
Page 37
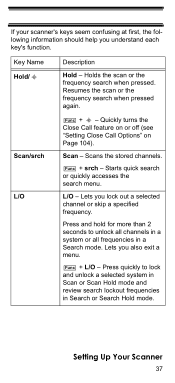
...frequency. Starts quick search or quickly accesses the search menu. Resumes the scan or the frequency search when pressed again. Func + srch - Setting Up Your Scanner 37 Quickly turns the Close Call feature on or off (see "Setting Close Call Options" on Page 104). L/O - Func + L/O - Lets you ... when pressed. Scan - Press quickly to unlock all channels in a system or all frequencies in Search or Search Hold mode. If your scanner's keys seem confusing at first, the following information should help you understand each key's function. Press and hold for more than 2 seconds...
...frequency. Starts quick search or quickly accesses the search menu. Resumes the scan or the frequency search when pressed again. Func + srch - Setting Up Your Scanner 37 Quickly turns the Close Call feature on or off (see "Setting Close Call Options" on Page 104). L/O - Func + L/O - Lets you ... when pressed. Scan - Press quickly to unlock all channels in a system or all frequencies in Search or Search Hold mode. If your scanner's keys seem confusing at first, the following information should help you understand each key's function. Press and hold for more than 2 seconds...
English Owners Manual
Page 68
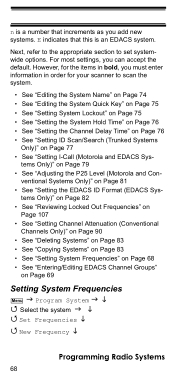
However, for the items in bold, you must enter information in order for your scanner to set systemwide options. Next, refer to the appropriate section to scan the system. • See "Editing the System Name" on Page 74 • See "... ID Scan/Search (Trunked Systems Only)" on Page 81 • See "Setting the EDACS ID Format (EDACS Sys- tems Only)" on Page 82 • See "Reviewing Locked Out Frequencies" on Page 107 • See "Setting Channel Attenuation (Conventional Channels Only)" on Page 90 • See "Deleting Systems" on Page 83 •...
However, for the items in bold, you must enter information in order for your scanner to set systemwide options. Next, refer to the appropriate section to scan the system. • See "Editing the System Name" on Page 74 • See "... ID Scan/Search (Trunked Systems Only)" on Page 81 • See "Setting the EDACS ID Format (EDACS Sys- tems Only)" on Page 82 • See "Reviewing Locked Out Frequencies" on Page 107 • See "Setting Channel Attenuation (Conventional Channels Only)" on Page 90 • See "Deleting Systems" on Page 83 •...
English Owners Manual
Page 71
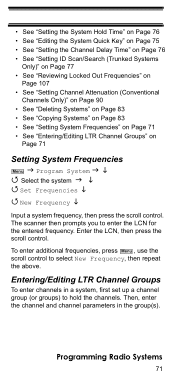
... 75 • See "Setting the Channel Delay Time" on Page 76 • See "Setting ID Scan/Search (Trunked Systems Only)" on Page 77 • See "Reviewing Locked Out Frequencies" on Page 107 • See "Setting Channel Attenuation (Conventional Channels Only)" on Page 90 • See "Deleting Systems" on Page 83 •... Set Frequencies New Frequency Input a system frequency, then press the scroll control. Enter the LCN, then press the scroll control. Programming Radio Systems 71 The scanner then prompts you to enter the LCN for the entered frequency.
... 75 • See "Setting the Channel Delay Time" on Page 76 • See "Setting ID Scan/Search (Trunked Systems Only)" on Page 77 • See "Reviewing Locked Out Frequencies" on Page 107 • See "Setting Channel Attenuation (Conventional Channels Only)" on Page 90 • See "Deleting Systems" on Page 83 •... Set Frequencies New Frequency Input a system frequency, then press the scroll control. Enter the LCN, then press the scroll control. Programming Radio Systems 71 The scanner then prompts you to enter the LCN for the entered frequency.
English Owners Manual
Page 81
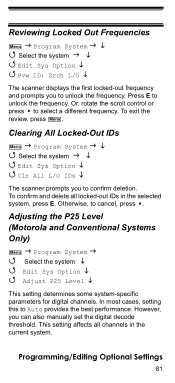
...for digital channels. This setting affects all locked-out IDs in the current system. However, you to unlock the frequency. To exit the review, press Menu . In most cases, setting this to cancel, press . Programming/Editing Optional Settings 81 To confirm and delete all channels ...-Out IDs Menu Program System Select the system Edit Sys Option Clr All L/O IDs The scanner prompts you can also manually set the digital decode threshold. Press E to select a different frequency. Reviewing Locked Out Frequencies Menu Program System Select the system Edit Sys Option Rvw ID: Srch L/O...
...for digital channels. This setting affects all locked-out IDs in the current system. However, you to unlock the frequency. To exit the review, press Menu . In most cases, setting this to cancel, press . Programming/Editing Optional Settings 81 To confirm and delete all channels ...-Out IDs Menu Program System Select the system Edit Sys Option Clr All L/O IDs The scanner prompts you can also manually set the digital decode threshold. Press E to select a different frequency. Reviewing Locked Out Frequencies Menu Program System Select the system Edit Sys Option Rvw ID: Srch L/O...
English Owners Manual
Page 107
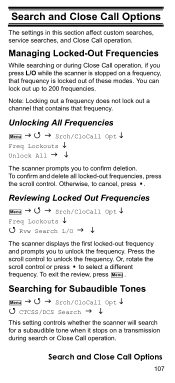
Press the scroll control to cancel, press . To exit the review, press Menu . Searching for Subaudible Tones Menu Srch/CloCall Opt CTCSS/DCS Search This setting controls whether the scanner will search for a subaudible tone when it stops on a frequency, that frequency. Search and ...Frequencies While searching or during search or Close Call operation. Reviewing Locked Out Frequencies Menu Srch/CloCall Opt Freq Lockouts Rvw Search L/O The scanner displays the first locked-out frequency and prompts you press L/O while the scanner is locked out of these modes. Or, rotate the...
Press the scroll control to cancel, press . To exit the review, press Menu . Searching for Subaudible Tones Menu Srch/CloCall Opt CTCSS/DCS Search This setting controls whether the scanner will search for a subaudible tone when it stops on a frequency, that frequency. Search and ...Frequencies While searching or during search or Close Call operation. Reviewing Locked Out Frequencies Menu Srch/CloCall Opt Freq Lockouts Rvw Search L/O The scanner displays the first locked-out frequency and prompts you press L/O while the scanner is locked out of these modes. Or, rotate the...
English Owners Manual
Page 122
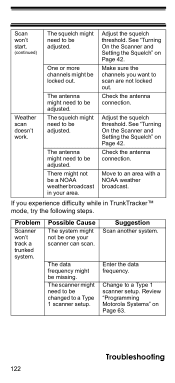
...42. There might not be one your area. Enter the data frequency. Make sure the channels you experience difficulty while in your scanner can scan. Weather scan doesn't work. Check the antenna connection. Possible Cause The system might not be a NOAA weather broadcast in... TrunkTracker™ mode, try the following steps. Review "Programming Motorola Systems" on Page 63. The squelch might need to be adjusted. Move to a Type 1 scanner setup. Suggestion Scan another system. Change to an area with a NOAA weather broadcast....
...42. There might not be one your area. Enter the data frequency. Make sure the channels you experience difficulty while in your scanner can scan. Weather scan doesn't work. Check the antenna connection. Possible Cause The system might not be a NOAA weather broadcast in... TrunkTracker™ mode, try the following steps. Review "Programming Motorola Systems" on Page 63. The squelch might need to be adjusted. Move to a Type 1 scanner setup. Suggestion Scan another system. Change to an area with a NOAA weather broadcast....

English Owners Manual
Page 123
...be missing. The squelch might be LTR or EDACS. The scanner might be adjusted. Make sure all the system's frequencies have been programmed. Scanner won 't stop scanning a trunked system. Missing replies to scan LTR or EDACS systems. Review "Programming LTR Systems" on Page 70 and "Programming EDACS Systems..." on Page 67. The system you have stored are trying to be LTR or EDACS. See "Turning On the Scanner and Setting the Squelch" on Page 63. Set ...
...be missing. The squelch might be LTR or EDACS. The scanner might be adjusted. Make sure all the system's frequencies have been programmed. Scanner won 't stop scanning a trunked system. Missing replies to scan LTR or EDACS systems. Review "Programming LTR Systems" on Page 70 and "Programming EDACS Systems..." on Page 67. The system you have stored are trying to be LTR or EDACS. See "Turning On the Scanner and Setting the Squelch" on Page 63. Set ...


