User Guide
Page 26
26 Contents Using the TouchPad 52 Scrolling with the TouchPad 53 Using the Control buttons 53 Disabling or enabling the TouchPad 54 Installing additional memory (optional 55 Removing a memory module 59 Using an external keyboard 61 Using a mouse 61 Connecting a local printer 61 Connecting an optional external diskette drive........62 Connecting external speakers...
26 Contents Using the TouchPad 52 Scrolling with the TouchPad 53 Using the Control buttons 53 Disabling or enabling the TouchPad 54 Installing additional memory (optional 55 Removing a memory module 59 Using an external keyboard 61 Using a mouse 61 Connecting a local printer 61 Connecting an optional external diskette drive........62 Connecting external speakers...

User Guide
Page 30
... 158 Customizing Your Computer 159 Network 159 Security 159 Power Management 159 Mouse utility 161 Hotkey utility 161 Toshiba Hardware Settings 162 Toshiba Picture Enhancement Utility 164 CD/DVD Drive Acoustic Silencer 164 Enabling Hibernation 165 Setting user passwords 165 Using an instant password 166 Setting a user password ... can help you 175 Resolving a hardware conflict 176 A plan of action 176 Resolving hardware conflicts on your own .....177 Fixing a problem with Device Manager ...........178 Memory problems 180 Power and the batteries 180
... 158 Customizing Your Computer 159 Network 159 Security 159 Power Management 159 Mouse utility 161 Hotkey utility 161 Toshiba Hardware Settings 162 Toshiba Picture Enhancement Utility 164 CD/DVD Drive Acoustic Silencer 164 Enabling Hibernation 165 Setting user passwords 165 Using an instant password 166 Setting a user password ... can help you 175 Resolving a hardware conflict 176 A plan of action 176 Resolving hardware conflicts on your own .....177 Fixing a problem with Device Manager ...........178 Memory problems 180 Power and the batteries 180
User Guide
Page 44
See "Connecting to , a mouse, keyboard, printer, memory, and PC Cards. Before adding any of these devices to the computer, be charged before adding external or internal components to your computer. Your computer ... up to "Setting up for an Internet account, you can use external power or to charge the battery, you may want to: ❖ Add more memory ❖ Connect a mouse ❖ Connect a full-size keyboard ❖ Connect an external monitor ❖ Connect a local printer ❖ Install PC Cards These components include, but...
See "Connecting to , a mouse, keyboard, printer, memory, and PC Cards. Before adding any of these devices to the computer, be charged before adding external or internal components to your computer. Your computer ... up to "Setting up for an Internet account, you can use external power or to charge the battery, you may want to: ❖ Add more memory ❖ Connect a mouse ❖ Connect a full-size keyboard ❖ Connect an external monitor ❖ Connect a local printer ❖ Install PC Cards These components include, but...
User Guide
Page 46
... "Installing additional memory (optional)" on page 55) ❖ Connect a mouse (see "Using a mouse" on page 61) ❖ Connect a local printer (see "Connecting a local printer" on your desktop or go to the Toshiba Web site at www.register.toshiba.com. See "Setting up your software. 46 ...If you ." 8 Click Finish to continue. Customer failure to complete the process. Adding external devices NOTE Before adding external devices, Toshiba recommends setting up process of your computer. Product registration can either double-click the icon on page 61) Registering your name and ...
... "Installing additional memory (optional)" on page 55) ❖ Connect a mouse (see "Using a mouse" on page 61) ❖ Connect a local printer (see "Connecting a local printer" on your desktop or go to the Toshiba Web site at www.register.toshiba.com. See "Setting up your software. 46 ...If you ." 8 Click Finish to continue. Customer failure to complete the process. Adding external devices NOTE Before adding external devices, Toshiba recommends setting up process of your computer. Product registration can either double-click the icon on page 61) Registering your name and ...
User Guide
Page 55
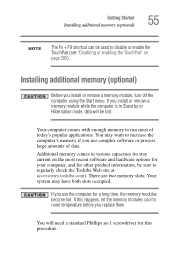
... have both slots occupied. If you use the computer for a long time, the memory modules become hot. Your computer comes with enough memory to increase the computer's memory if you use complex software or process large amounts of today's popular applications. Your system... procedure. Installing additional memory (optional) Before you replace them. There are two memory slots. Additional memory comes in Stand by or Hibernation mode, data will need a standard Phillips no.1 screwdriver for other product information, be sure to regularly check the Toshiba Web site at accessories...
... have both slots occupied. If you use the computer for a long time, the memory modules become hot. Your computer comes with enough memory to increase the computer's memory if you use complex software or process large amounts of today's popular applications. Your system... procedure. Installing additional memory (optional) Before you replace them. There are two memory slots. Additional memory comes in Stand by or Hibernation mode, data will need a standard Phillips no.1 screwdriver for other product information, be sure to regularly check the Toshiba Web site at accessories...
User Guide
Page 56
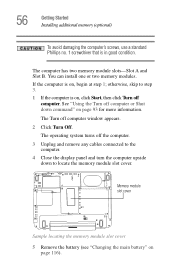
...main battery" on page 93 for more information. See "Using the Turn off computer or Shut down to locate the memory module slot cover. The computer has two memory module slots-Slot A and Slot B. otherwise, skip to the computer. 4 Close the display panel and turn the ...computer is on , click Start, then click Turn off computer window appears. 2 Click Turn Off. You can install one or two memory modules. 56 Getting Started Installing additional memory (optional) To avoid damaging the computer's screws, use a standard Phillips no. 1 screwdriver that is in good condition.
...main battery" on page 93 for more information. See "Using the Turn off computer or Shut down to locate the memory module slot cover. The computer has two memory module slots-Slot A and Slot B. otherwise, skip to the computer. 4 Close the display panel and turn the ...computer is on , click Start, then click Turn off computer window appears. 2 Click Turn Off. You can install one or two memory modules. 56 Getting Started Installing additional memory (optional) To avoid damaging the computer's screws, use a standard Phillips no. 1 screwdriver that is in good condition.

User Guide
Page 57
... Before you handle the module, touch a grounded metal surface to touch its edges so that secure the memory module slot cover, then remove the memory module slot cover. Getting Started Installing additional memory (optional) 57 6 Using a standard Phillips no. 1 screwdriver, unscrew the captive screws that the gold... connector bar faces the slot, fit the memory module into the socket. 10 Gently press down on the memory module connector until the clips snap into place. Sample removing the memory module slot cover 7 Place the memory module slot cover in a safe place so that ...
... Before you handle the module, touch a grounded metal surface to touch its edges so that secure the memory module slot cover, then remove the memory module slot cover. Getting Started Installing additional memory (optional) 57 6 Using a standard Phillips no. 1 screwdriver, unscrew the captive screws that the gold... connector bar faces the slot, fit the memory module into the socket. 10 Gently press down on the memory module connector until the clips snap into place. Sample removing the memory module slot cover 7 Place the memory module slot cover in a safe place so that ...
User Guide
Page 58
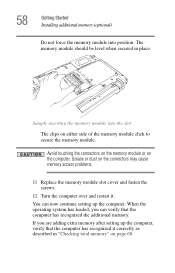
... into the slot The clips on page 60. Avoid touching the connectors on the memory module or on the connectors may cause memory access problems. 11 Replace the memory module slot cover and fasten the screws. 12 Turn the computer over and restart it correctly as described in place. You can verify ...that the computer has recognized it . Grease or dust on the computer. Sample inserting the memory module into position. If you can now continue setting up the computer, verify that the computer has recognized the additional...
... into the slot The clips on page 60. Avoid touching the connectors on the memory module or on the connectors may cause memory access problems. 11 Replace the memory module slot cover and fasten the screws. 12 Turn the computer over and restart it correctly as described in place. You can verify ...that the computer has recognized it . Grease or dust on the computer. Sample inserting the memory module into position. If you can now continue setting up the computer, verify that the computer has recognized the additional...

User Guide
Page 59
...hangs up the next time you turn it on, perform the following message appears when you turn it down the computer and open the memory module cover. The memory module pops partially out of the above cases, the Standby configuration will be saved. In either of the slot. 3 Carefully remove ...the memory module from the memory module. The computer could hang up when you turn on . Do not try to shut down for five seconds, then turn the power on again...
...hangs up the next time you turn it on, perform the following message appears when you turn it down the computer and open the memory module cover. The memory module pops partially out of the above cases, the Standby configuration will be saved. In either of the slot. 3 Carefully remove ...the memory module from the memory module. The computer could hang up when you turn on . Do not try to shut down for five seconds, then turn the power on again...
User Guide
Page 60
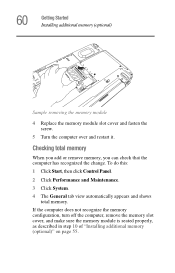
... properly, as described in step 10 of "Installing additional memory (optional)" on page 55. Checking total memory When you add or remove memory, you can check that the computer has recognized the change. 60 Getting Started Installing additional memory (optional) Sample removing the memory module 4 Replace the memory module slot cover and fasten the screw. 5 Turn...
... properly, as described in step 10 of "Installing additional memory (optional)" on page 55. Checking total memory When you add or remove memory, you can check that the computer has recognized the change. 60 Getting Started Installing additional memory (optional) Sample removing the memory module 4 Replace the memory module slot cover and fasten the screw. 5 Turn...
User Guide
Page 64
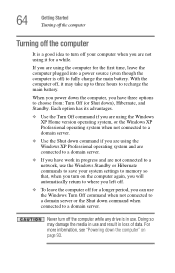
... is in use. 64 Getting Started Turning off the computer Turning off the computer It is a good idea to turn off your system settings to memory so that, when you turn off the computer while any drive is off) to a domain server. When you power down the computer, you have work...
... is in use. 64 Getting Started Turning off the computer Turning off the computer It is a good idea to turn off your system settings to memory so that, when you turn off the computer while any drive is off) to a domain server. When you power down the computer, you have work...
User Guide
Page 70
... down and you save feature that can be activated. If the network you are working, you will lose all work stays in the computer's temporary memory until you must restart your computer to reconnect, or your file to the disk. Your work since you last saved. See your work frequently. Chapter...
... down and you save feature that can be activated. If the network you are working, you will lose all work stays in the computer's temporary memory until you must restart your computer to reconnect, or your file to the disk. Your work since you last saved. See your work frequently. Chapter...
User Guide
Page 96
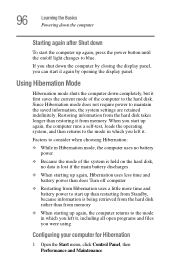
..., including all open programs and files you shut down To start up again, Hibernation uses less time and battery power than restarting from memory. Since Hibernation mode does not require power to the mode in which you left it from Standby, because information is lost if the... when choosing Hibernation: ❖ While in Hibernation mode, the computer uses no data is being retrieved from the hard disk rather than from memory ❖ When starting up again, the computer returns to maintain the saved information, the system settings are retained indefinitely. If you were using...
..., including all open programs and files you shut down To start up again, Hibernation uses less time and battery power than restarting from memory. Since Hibernation mode does not require power to the mode in which you left it from Standby, because information is lost if the... when choosing Hibernation: ❖ While in Hibernation mode, the computer uses no data is being retrieved from the hard disk rather than from memory ❖ When starting up again, the computer returns to maintain the saved information, the system settings are retained indefinitely. If you were using...

User Guide
Page 98
... you left it, including all open programs and files you do not save your work first. Factors to consider when choosing Standby: ❖ While in memory so that, when you restart the computer, you can continue working from Turn Off or Hibernation mode. ❖ When starting up again, the computer returns...
... you left it, including all open programs and files you do not save your work first. Factors to consider when choosing Standby: ❖ While in memory so that, when you restart the computer, you can continue working from Turn Off or Hibernation mode. ❖ When starting up again, the computer returns...
User Guide
Page 109
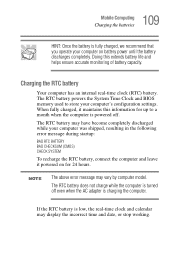
... become completely discharged while your computer on for up to store your computer's configuration settings. The RTC battery powers the System Time Clock and BIOS memory used to a month when the computer is charging the computer. If the RTC battery is fully charged, we recommend that you operate your computer was...
... become completely discharged while your computer on for up to store your computer's configuration settings. The RTC battery powers the System Time Clock and BIOS memory used to a month when the computer is charging the computer. If the RTC battery is fully charged, we recommend that you operate your computer was...

User Guide
Page 117
... is in the locked position, slide it or shortcircuit its terminals. 117 Mobile Computing Changing the main battery When handling a battery, be lost . Data in memory will be lost . Also, do not twist or bend the battery pack. If your battery discharges fully, your information will be careful not to save...
... is in the locked position, slide it or shortcircuit its terminals. 117 Mobile Computing Changing the main battery When handling a battery, be lost . Data in memory will be lost . Also, do not twist or bend the battery pack. If your battery discharges fully, your information will be careful not to save...

User Guide
Page 121
This chapter explains how to work with your notebook can provide all the convenience of these optional devices: ❖ Expansion memory modules ❖ Standard 101-key keyboard ❖ Mouse or trackball ❖ Printer ❖ PC Cards Some of a traditional desktop computer. ... connecting optional devices such as an external monitor, a full-size keyboard and a mouse, you can connect any of these devices listed are Toshiba devices, others are standard computer components. 121 Chapter 4 Expansion Options Your computer is designed to set up the various optional devices so that ...
This chapter explains how to work with your notebook can provide all the convenience of these optional devices: ❖ Expansion memory modules ❖ Standard 101-key keyboard ❖ Mouse or trackball ❖ Printer ❖ PC Cards Some of a traditional desktop computer. ... connecting optional devices such as an external monitor, a full-size keyboard and a mouse, you can connect any of these devices listed are Toshiba devices, others are standard computer components. 121 Chapter 4 Expansion Options Your computer is designed to set up the various optional devices so that ...
User Guide
Page 163
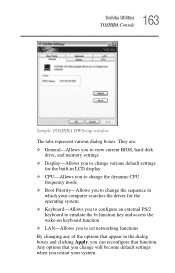
They are: ❖ General-Allows you to view current BIOS, hard disk drive, and memory settings ❖ Display-Allows you to change various default settings for the built-in LCD display ❖ CPU-Allows you to change the dynamic CPU ... dialog boxes and clicking Apply, you can reconfigure that you change will become default settings when you restart your system. Any options that function. 163 Toshiba Utilities TOSHIBA Console Sample TOSHIBA HWSetup window The tabs represent various dialog boxes.
They are: ❖ General-Allows you to view current BIOS, hard disk drive, and memory settings ❖ Display-Allows you to change various default settings for the built-in LCD display ❖ CPU-Allows you to change the dynamic CPU ... dialog boxes and clicking Apply, you can reconfigure that you change will become default settings when you restart your system. Any options that function. 163 Toshiba Utilities TOSHIBA Console Sample TOSHIBA HWSetup window The tabs represent various dialog boxes.
User Guide
Page 165
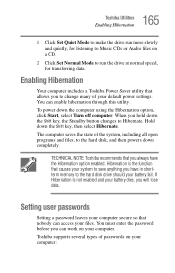
... secure so that allows you can work on your computer: To power down completely. TECHNICAL NOTE: Toshiba recommends that causes your system to save anything you always have in shortterm memory to change many of passwords on your computer. Hibernation is not enabled and your battery fail. You...key, the Standby button changes to run the drive at normal speed, for transferring data. You can access your default power settings. 165 Toshiba Utilities Enabling Hibernation 1 Click Set Quiet Mode to make the drive run more slowly and quietly, for listening to Music CDs or Audio ...
... secure so that allows you can work on your computer: To power down completely. TECHNICAL NOTE: Toshiba recommends that causes your system to save anything you always have in shortterm memory to change many of passwords on your computer. Hibernation is not enabled and your battery fail. You...key, the Standby button changes to run the drive at normal speed, for transferring data. You can access your default power settings. 165 Toshiba Utilities Enabling Hibernation 1 Click Set Quiet Mode to make the drive run more slowly and quietly, for listening to Music CDs or Audio ...
User Guide
Page 173
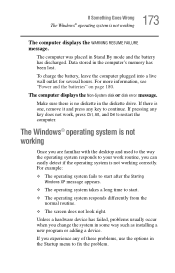
... correctly. For more information, see "Power and the batteries" on page 180. If you experience any of these problems, use the options in the computer's memory has been lost.
... correctly. For more information, see "Power and the batteries" on page 180. If you experience any of these problems, use the options in the computer's memory has been lost.


