
User Guide
Page 18
... yourself comfortable 40 Precautions 43 Setting up your computer 45 Setting up your software 45 Registering your computer with Toshiba ......... 47 Adding external devices 47 Connecting the AC adapter 48 Charging the main battery 50 Using the computer for the first time 51 Opening the display panel 51 Turning on the power...
... yourself comfortable 40 Precautions 43 Setting up your computer 45 Setting up your software 45 Registering your computer with Toshiba ......... 47 Adding external devices 47 Connecting the AC adapter 48 Charging the main battery 50 Using the computer for the first time 51 Opening the display panel 51 Turning on the power...

User Guide
Page 20
... quickly .......... 95 Starting again from Stand by 96 Toshiba's online resources 96 Chapter 4: Mobile Computing 97 Toshiba's energy-saver design 97 Running the computer on battery power 98 Power management 99 Charging the battery 99 Charging the RTC battery 100 Monitoring battery power 101 Determining remaining battery power 101 Conserving battery power 102 What to do when the...
... quickly .......... 95 Starting again from Stand by 96 Toshiba's online resources 96 Chapter 4: Mobile Computing 97 Toshiba's energy-saver design 97 Running the computer on battery power 98 Power management 99 Charging the battery 99 Charging the RTC battery 100 Monitoring battery power 101 Determining remaining battery power 101 Conserving battery power 102 What to do when the...
User Guide
Page 23
... 185 A plan of action 186 Resolving hardware conflicts on your own .... 186 Fixing a problem with Device Manager .......... 188 Memory card problems 190 Power and the batteries 190 Keyboard problems 192 Display problems 192 Disk drive problems 194 DVD-ROM or multifunction drive problems ... 196 Sound system problems 204 PC Card problems... 204 Printer problems 207 Modem problems 208 Develop good computing habits 209 If you need further assistance 210 Before you call 210 Contacting Toshiba 211 Other Toshiba Internet Web sites 212
... 185 A plan of action 186 Resolving hardware conflicts on your own .... 186 Fixing a problem with Device Manager .......... 188 Memory card problems 190 Power and the batteries 190 Keyboard problems 192 Display problems 192 Disk drive problems 194 DVD-ROM or multifunction drive problems ... 196 Sound system problems 204 PC Card problems... 204 Printer problems 207 Modem problems 208 Develop good computing habits 209 If you need further assistance 210 Before you call 210 Contacting Toshiba 211 Other Toshiba Internet Web sites 212
User Guide
Page 24
24 Contents Toshiba's worldwide offices 212 Appendix A: Hot Keys 215 Instant password security 215 Without a password 215 With a password 215 Maintaining security when the battery isn't fully charged 216 Sound 217 Power usage mode 217 Stand by mode 218 Hibernation mode 219 Display modes 220 Display modes 220 Enabling a wireless device 221 Disabling or enabling the TouchPad 221 Keyboard hot keys 222 Appendix B: Power Cable Connectors 223 Glossary 224 Index 239
24 Contents Toshiba's worldwide offices 212 Appendix A: Hot Keys 215 Instant password security 215 Without a password 215 With a password 215 Maintaining security when the battery isn't fully charged 216 Sound 217 Power usage mode 217 Stand by mode 218 Hibernation mode 219 Display modes 220 Display modes 220 Enabling a wireless device 221 Disabling or enabling the TouchPad 221 Keyboard hot keys 222 Appendix B: Power Cable Connectors 223 Glossary 224 Index 239

User Guide
Page 30
... on a projector or TV that accepts video inputs. You can also use them to play DVD audio and video on external power or charging the battery. For more information, see "CD/DVD control buttons" on . The S-video port lets you play CDs and DVDs with the display closed Display latch CD...
... on a projector or TV that accepts video inputs. You can also use them to play DVD audio and video on external power or charging the battery. For more information, see "CD/DVD control buttons" on . The S-video port lets you play CDs and DVDs with the display closed Display latch CD...

User Guide
Page 36
... . The CD In light glows green when the computer is on in CD mode when the computer is being accessed. It glows amber while the battery is playing a CD with the computer on. The disc/disk activity light flashes when the Modular Bay drive is playing a CD or DVD with the... computer off. It glows green when the battery is being accessed. The hard disk drive light flashes while the hard disk drive is fully charged. The light blinks when the computer is in...
... . The CD In light glows green when the computer is on in CD mode when the computer is being accessed. It glows amber while the battery is playing a CD with the computer on. The disc/disk activity light flashes when the Modular Bay drive is playing a CD or DVD with the... computer off. It glows green when the battery is being accessed. The hard disk drive light flashes while the hard disk drive is fully charged. The light blinks when the computer is in...
User Guide
Page 37
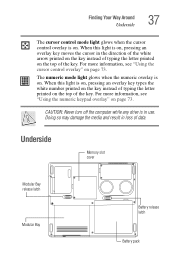
... top of the key. Doing so may damage the media and result in use. Underside Memory slot cover Modular Bay release latch Modular Bay Battery release latch Battery pack Finding Your Way Around Underside 37 The cursor control mode light glows when the cursor control overlay is on, pressing an overlay key...
... top of the key. Doing so may damage the media and result in use. Underside Memory slot cover Modular Bay release latch Modular Bay Battery release latch Battery pack Finding Your Way Around Underside 37 The cursor control mode light glows when the cursor control overlay is on, pressing an overlay key...
User Guide
Page 38
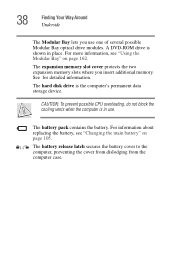
...expansion memory slot cover protects the two expansion memory slots where you use . The hard disk drive is in place. The battery release latch secures the battery cover to the computer, preventing the cover from dislodging from the computer case. A DVD-ROM drive is shown in use... one of several possible Modular Bay optical drive modules. For information about replacing the battery, see "Using the Modular Bay" on page 105. For more information, see "Changing the main battery" on page 162. See for detailed information. CAUTION: To prevent possible CPU overheating, ...
...expansion memory slot cover protects the two expansion memory slots where you use . The hard disk drive is in place. The battery release latch secures the battery cover to the computer, preventing the cover from dislodging from the computer case. A DVD-ROM drive is shown in use... one of several possible Modular Bay optical drive modules. For information about replacing the battery, see "Using the Modular Bay" on page 105. For more information, see "Changing the main battery" on page 162. See for detailed information. CAUTION: To prevent possible CPU overheating, ...
User Guide
Page 45
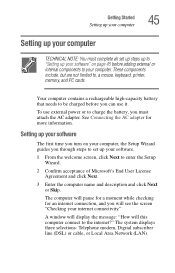
... computer connect to be charged before adding external or internal components to , a mouse, keyboard, printer, memory, and PC cards. Your computer contains a rechargeable high-capacity battery that needs to the internet?" These components include, but are not limited to your software" on your computer, the Setup Wizard guides you can use...
... computer connect to be charged before adding external or internal components to , a mouse, keyboard, printer, memory, and PC cards. Your computer contains a rechargeable high-capacity battery that needs to the internet?" These components include, but are not limited to your software" on your computer, the Setup Wizard guides you can use...
User Guide
Page 48
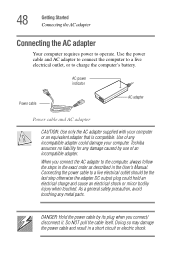
...live electrical outlet should be the last step otherwise the adapter DC output plug could damage your computer or an equivalent adapter that is compatible. Toshiba assumes no liability for any metal parts. AC power indicator Power cable AC adapter Power cable and AC adapter CAUTION: Use only the AC adapter... electrical outlet, or to operate. 48 Getting Started Connecting the AC adapter Connecting the AC adapter Your computer requires power to charge the computer's battery. Doing so may damage the power cable and result in the User's Manual. Use of an incompatible adapter.
...live electrical outlet should be the last step otherwise the adapter DC output plug could damage your computer or an equivalent adapter that is compatible. Toshiba assumes no liability for any metal parts. AC power indicator Power cable AC adapter Power cable and AC adapter CAUTION: Use only the AC adapter... electrical outlet, or to operate. 48 Getting Started Connecting the AC adapter Connecting the AC adapter Your computer requires power to charge the computer's battery. Doing so may damage the power cable and result in the User's Manual. Use of an incompatible adapter.
User Guide
Page 49
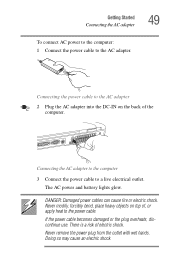
... Started Connecting the AC adapter 49 To connect AC power to the computer: 1 Connect the power cable to the power cable. The AC power and battery lights glow. Never modify, forcibly bend, place heavy objects on the back of electric shock. Connecting the AC adapter to the computer 3 Connect the power...
... Started Connecting the AC adapter 49 To connect AC power to the computer: 1 Connect the power cable to the power cable. The AC power and battery lights glow. Never modify, forcibly bend, place heavy objects on the back of electric shock. Connecting the AC adapter to the computer 3 Connect the power...
User Guide
Page 50
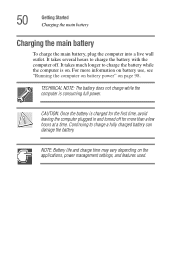
... hours at a time. It takes much longer to charge the battery while the computer is consuming full power. TECHNICAL NOTE: The battery does not charge while the computer is on page 98. NOTE: Battery life and charge time may vary depending on the applications, power ...charge a fully charged battery can damage the battery. Continuing to charge the battery with the computer off for more information on battery use, see "Running the computer on battery power" on . 50 Getting Started Charging the main battery Charging the main battery To charge the main battery, plug the computer...
... hours at a time. It takes much longer to charge the battery while the computer is consuming full power. TECHNICAL NOTE: The battery does not charge while the computer is on page 98. NOTE: Battery life and charge time may vary depending on the applications, power ...charge a fully charged battery can damage the battery. Continuing to charge the battery with the computer off for more information on battery use, see "Running the computer on battery power" on . 50 Getting Started Charging the main battery Charging the main battery To charge the main battery, plug the computer...
User Guide
Page 52
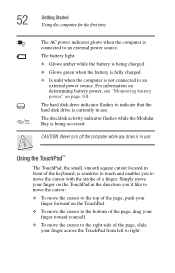
The hard disk drive indicator flashes to indicate that the hard disk drive is being charged. ❖ Glows green when the battery is fully charged. ❖ Is unlit when the computer is connected to an external power source. The disc/disk activity indicator flashes...in the direction you to move your finger across the TouchPad from left to right. The battery light: ❖ Glows amber while the battery is being accessed. For information on determining battery power, see "Monitoring battery power" on the TouchPad in use . 52 Getting Started Using the computer for the first ...
The hard disk drive indicator flashes to indicate that the hard disk drive is being charged. ❖ Glows green when the battery is fully charged. ❖ Is unlit when the computer is connected to an external power source. The disc/disk activity indicator flashes...in the direction you to move your finger across the TouchPad from left to right. The battery light: ❖ Glows amber while the battery is being accessed. For information on determining battery power, see "Monitoring battery power" on the TouchPad in use . 52 Getting Started Using the computer for the first ...

User Guide
Page 65
... may see various messages indicating the status of your computer when you have work in progress and are now ready to fully charge the main battery. The operating system prompts you may take up to three hours to turn on , click Next. With the computer off, it for the first time...
... may see various messages indicating the status of your computer when you have work in progress and are now ready to fully charge the main battery. The operating system prompts you may take up to three hours to turn on , click Next. With the computer off, it for the first time...
User Guide
Page 66
... for a longer period, you can use harsh or caustic chemical products to clean the computer. Cleaning the computer To keep your computer's battery, see "Powering down when connected to fit an antitheft lock. CAUTION: Keep liquid, including cleaning fluid, out of your computer clean, gently... care of the computer's keyboard, speaker grille, and other openings. For more information, see "Running the computer on battery power" on page 98. Ask your Toshiba dealer for suggestions for your computer This section gives tips on page 87. Never spray cleaner directly onto the computer. ...
... for a longer period, you can use harsh or caustic chemical products to clean the computer. Cleaning the computer To keep your computer's battery, see "Powering down when connected to fit an antitheft lock. CAUTION: Keep liquid, including cleaning fluid, out of your computer clean, gently... care of the computer's keyboard, speaker grille, and other openings. For more information, see "Running the computer on battery power" on page 98. Ask your Toshiba dealer for suggestions for your computer This section gives tips on page 87. Never spray cleaner directly onto the computer. ...
User Guide
Page 69
... you are working. Your computer can turn on page 99. See your file to the disk. Computing tips ❖ Save your battery runs out of charge while you when the battery is running low. See "Power management" on . Chapter 3 Learning the Basics This chapter lists some computing tips and provides important information...
... you are working. Your computer can turn on page 99. See your file to the disk. Computing tips ❖ Save your battery runs out of charge while you when the battery is running low. See "Power management" on . Chapter 3 Learning the Basics This chapter lists some computing tips and provides important information...
User Guide
Page 74
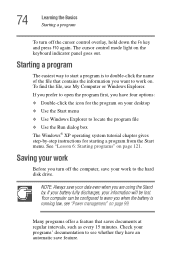
...file ❖ Use the Run dialog box The Windows® XP operating system tutorial chapter gives step-by . Your computer can be lost. If your battery fully discharges, your information will be configured to warn you want to see "Power management" on . 74 Learning the Basics Starting a program To turn... cursor control overlay, hold down the Fn key and press F10 again. Many programs offer a feature that contains the information you when the battery is running low, see whether they have four options: ❖ Double-click the icon for starting a program from the Start menu.
...file ❖ Use the Run dialog box The Windows® XP operating system tutorial chapter gives step-by . Your computer can be lost. If your battery fully discharges, your information will be configured to warn you want to see "Power management" on . 74 Learning the Basics Starting a program To turn... cursor control overlay, hold down the Fn key and press F10 again. Many programs offer a feature that contains the information you when the battery is running low, see whether they have four options: ❖ Double-click the icon for starting a program from the Start menu.

User Guide
Page 89
... than restarting from Stand by because information is lost if the battery discharges. ❖ Restarting from Hibernation mode uses less time and battery power than restoring it . Learning the Basics Using Turn Off or Shut down 89 2 Select Shut down from the drop-down ...Hibernation mode uses a little more information about setting up hibernation "Hibernation command" on page 89 and "Using Hibernation" on the hard disk, no battery power. ❖ Because the state of the system is open, changes the Stand By button to maintain the saved information, the system settings ...
... than restarting from Stand by because information is lost if the battery discharges. ❖ Restarting from Hibernation mode uses less time and battery power than restoring it . Learning the Basics Using Turn Off or Shut down 89 2 Select Shut down from the drop-down ...Hibernation mode uses a little more information about setting up hibernation "Hibernation command" on page 89 and "Using Hibernation" on the hard disk, no battery power. ❖ Because the state of the system is open, changes the Stand By button to maintain the saved information, the system settings ...
User Guide
Page 90
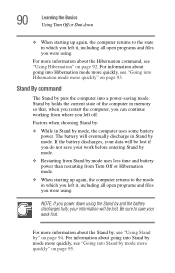
... the computer returns to save your work first. For information about the Hibernation command, see "Using Stand by" on page 95. The battery will eventually discharge in Stand by mode, the computer uses some battery power. Stand by holds the current state of the computer in which you left off. If the...will be lost if you do not save your work before entering Stand by mode. ❖ Restarting from Stand by mode uses less time and battery power than restarting from where you were using. Be sure to the state in memory so that, when you restart the computer, you were using...
... the computer returns to save your work first. For information about the Hibernation command, see "Using Stand by" on page 95. The battery will eventually discharge in Stand by mode, the computer uses some battery power. Stand by holds the current state of the computer in which you left off. If the...will be lost if you do not save your work before entering Stand by mode. ❖ Restarting from Stand by mode uses less time and battery power than restarting from where you were using. Be sure to the state in memory so that, when you restart the computer, you were using...
User Guide
Page 94
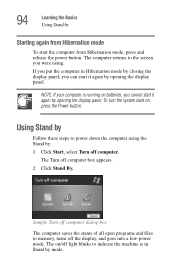
... by Starting again from Hibernation mode, press and release the power button. Using Stand by Follow these steps to indicate the machine is running on batteries, you were using the Stand by: 1 Click Start, select Turn off computer box appears. 2 Click Stand By.
... by Starting again from Hibernation mode, press and release the power button. Using Stand by Follow these steps to indicate the machine is running on batteries, you were using the Stand by: 1 Click Start, select Turn off computer box appears. 2 Click Stand By.


