
User Guide
Page 10
... in the upright position, the distance between the antenna and the user should not be used for this TOSHIBA Wireless LAN Mini PCI Card, or the substitution or attachment of the LCD screen. Nevertheless, the TOSHIBA Wireless LAN Mini PCI Card shall be less than specified by such unauthorized modification, substitution or attachment...
... in the upright position, the distance between the antenna and the user should not be used for this TOSHIBA Wireless LAN Mini PCI Card, or the substitution or attachment of the LCD screen. Nevertheless, the TOSHIBA Wireless LAN Mini PCI Card shall be less than specified by such unauthorized modification, substitution or attachment...

User Guide
Page 21
... Lesson 8: Closing programs 126 Lesson 9: Creating shortcuts 127 Creating a shortcut to the Calculator 127 Creating a shortcut to the Character Map ...... 128 Lesson 10: Changing the screen saver 130 Lesson 11: Setting the date and time 132 Lesson 12: Removing objects from the desktop .. 134 Lesson 13: Using System Restore 136 Lesson...
... Lesson 8: Closing programs 126 Lesson 9: Creating shortcuts 127 Creating a shortcut to the Calculator 127 Creating a shortcut to the Character Map ...... 128 Lesson 10: Changing the screen saver 130 Lesson 11: Setting the date and time 132 Lesson 12: Removing objects from the desktop .. 134 Lesson 13: Using System Restore 136 Lesson...
User Guide
Page 34
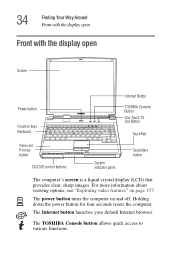
...seconds resets the computer. The TOSHIBA Console button allows quick access to various functions. On The power button turns the computer on page 157. 34 Finding Your Way Around Front with the display open Front with the display open Screen Power button Function keys Keyboard ... Console Button One Touch TV Out Button TouchPad Palm rest Primary button CD/DVD control buttons System indicator panel Secondary button The computer's screen is a liquid crystal display (LCD) that provides clear, sharp images. The Internet button launches your default Internet browser. For more ...
...seconds resets the computer. The TOSHIBA Console button allows quick access to various functions. On The power button turns the computer on page 157. 34 Finding Your Way Around Front with the display open Front with the display open Screen Power button Function keys Keyboard ... Console Button One Touch TV Out Button TouchPad Palm rest Primary button CD/DVD control buttons System indicator panel Secondary button The computer's screen is a liquid crystal display (LCD) that provides clear, sharp images. The Internet button launches your default Internet browser. For more ...
User Guide
Page 40
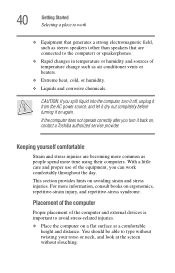
CAUTION: If you spill liquid into the computer, turn it on again. This section provides hints on , contact a Toshiba authorized service provider. For more time using their computers. With a little care and proper use of the equipment, you turn it off, unplug it from ... and corrosive chemicals. Placement of the computer Proper placement of temperature change such as people spend more information, consult books on a flat surface at the screen without slouching. 40 Getting Started Selecting a place to work comfortably throughout the day.
CAUTION: If you spill liquid into the computer, turn it on again. This section provides hints on , contact a Toshiba authorized service provider. For more time using their computers. With a little care and proper use of the equipment, you turn it off, unplug it from ... and corrosive chemicals. Placement of the computer Proper placement of temperature change such as people spend more information, consult books on a flat surface at the screen without slouching. 40 Getting Started Selecting a place to work comfortably throughout the day.
User Guide
Page 41
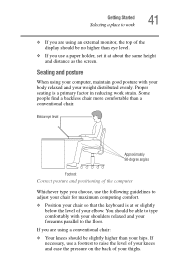
...; Your knees should be slightly higher than a conventional chair. If necessary, use a paper holder, set it at about the same height and distance as the screen. Proper seating is at or slightly below the level of the display should be no higher than eye level. ❖ If you are using your...
...; Your knees should be slightly higher than a conventional chair. If necessary, use a paper holder, set it at about the same height and distance as the screen. Proper seating is at or slightly below the level of the display should be no higher than eye level. ❖ If you are using your...
User Guide
Page 42
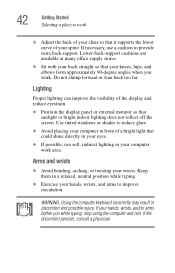
... the display and reduce eyestrain. ❖ Position the display panel or external monitor so that sunlight or bright indoor lighting does not reflect off the screen. Keep them in discomfort and possible injury. If your hands, wrists, and arms to improve circulation. Do not slump forward or lean back too far...
... the display and reduce eyestrain. ❖ Position the display panel or external monitor so that sunlight or bright indoor lighting does not reflect off the screen. Keep them in discomfort and possible injury. If your hands, wrists, and arms to improve circulation. Do not slump forward or lean back too far...
User Guide
Page 43
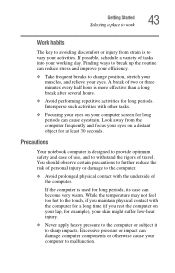
... avoiding discomfort or injury from the computer frequently and focus your efficiency. ❖ Take frequent breaks to withstand the rigors of tasks into your computer screen for long periods can reduce stress and improve your eyes on your working day. Intersperse such activities with the underside of use, and to change...
... avoiding discomfort or injury from the computer frequently and focus your efficiency. ❖ Take frequent breaks to withstand the rigors of tasks into your computer screen for long periods can reduce stress and improve your eyes on your working day. Intersperse such activities with the underside of use, and to change...
User Guide
Page 45
To use external power or to charge the battery, you must complete all set up your software. 1 From the welcome screen, click Next to enter the Setup Wizard. 2 Confirm acceptance of Microsoft's End User License Agreement and click Next. 3 Enter the computer name ...can use it. The computer will pause for a moment while checking for more information. A window will display the message: "How will see the screen "Checking your internet connectivity." Your computer contains a rechargeable high-capacity battery that needs to the internet?" Setting up your software The first time you ...
To use external power or to charge the battery, you must complete all set up your software. 1 From the welcome screen, click Next to enter the Setup Wizard. 2 Confirm acceptance of Microsoft's End User License Agreement and click Next. 3 Enter the computer name ...can use it. The computer will pause for a moment while checking for more information. A window will display the message: "How will see the screen "Checking your internet connectivity." Your computer contains a rechargeable high-capacity battery that needs to the internet?" Setting up your software The first time you ...
User Guide
Page 53
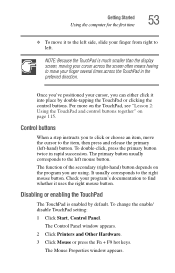
... of the secondary (right-hand) button depends on page 115. Disabling or enabling the TouchPad The TouchPad is much smaller than the display screen, moving your cursor across the screen often means having to move your finger several times across the TouchPad in rapid succession. To change the enable/ disable TouchPad setting...
... of the secondary (right-hand) button depends on page 115. Disabling or enabling the TouchPad The TouchPad is much smaller than the display screen, moving your cursor across the screen often means having to move your finger several times across the TouchPad in rapid succession. To change the enable/ disable TouchPad setting...
User Guide
Page 76
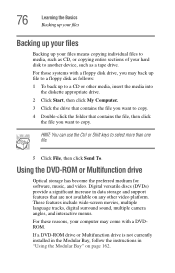
... files to media, such as CD, or copying entire sections of your hard disk to another device, such as a tape drive. These features include wide-screen movies, multiple language tracks, digital surround sound, multiple camera angles, and interactive menus. Digital versatile discs (DVDs) provide a significant increase in "Using the Modular Bay...
... files to media, such as CD, or copying entire sections of your hard disk to another device, such as a tape drive. These features include wide-screen movies, multiple language tracks, digital surround sound, multiple camera angles, and interactive menus. Digital versatile discs (DVDs) provide a significant increase in "Using the Modular Bay...
User Guide
Page 83
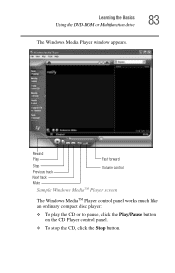
Rewind Play Fast forward Stop Previous track Next track Mute Volume control Sample Windows MediaTM Player screen The Windows MediaTM Player control panel works much like an ordinary compact disc player: ❖ To play the CD or to pause, click the Play/Pause button on the CD Player control panel. ❖ To stop the CD, click the Stop button. Learning the Basics Using the DVD-ROM or Multifunction drive 83 The Windows Media Player window appears.
Rewind Play Fast forward Stop Previous track Next track Mute Volume control Sample Windows MediaTM Player screen The Windows MediaTM Player control panel works much like an ordinary compact disc player: ❖ To play the CD or to pause, click the Play/Pause button on the CD Player control panel. ❖ To stop the CD, click the Stop button. Learning the Basics Using the DVD-ROM or Multifunction drive 83 The Windows Media Player window appears.
User Guide
Page 94
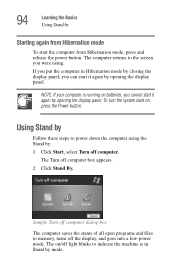
... files to power down the computer using . If you cannot start it again by opening the display panel. The Turn off light blinks to the screen you can start the computer from Hibernation mode To start it again by mode. 94 Learning the Basics Using Stand by Starting again from Hibernation...
... files to power down the computer using . If you cannot start it again by opening the display panel. The Turn off light blinks to the screen you can start the computer from Hibernation mode To start it again by mode. 94 Learning the Basics Using Stand by Starting again from Hibernation...
User Guide
Page 96
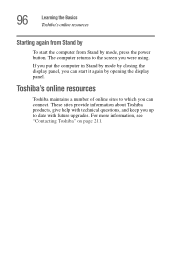
...computer returns to the screen you up to which you can connect. These sites provide information about Toshiba products, give help with technical questions, and keep you were using. Toshiba's online resources Toshiba maintains a number of online sites to date with future upgrades. 96 Learning the Basics Toshiba's online resources Starting ...again from Stand by To start it again by mode, press the power button. For more information, see "Contacting Toshiba" on page 211. If you put the computer in Stand by mode by closing the display panel, you can start the...
...computer returns to the screen you up to which you can connect. These sites provide information about Toshiba products, give help with technical questions, and keep you were using. Toshiba's online resources Toshiba maintains a number of online sites to date with future upgrades. 96 Learning the Basics Toshiba's online resources Starting ...again from Stand by To start it again by mode, press the power button. For more information, see "Contacting Toshiba" on page 211. If you put the computer in Stand by mode by closing the display panel, you can start the...

User Guide
Page 111
... this chapter will find the Windows® XP operating system familiar. If you have used a Windows® operating system before, you will gain from the screens displayed by guiding you will often discover alternative ways of accomplishing a particular task.
... this chapter will find the Windows® XP operating system familiar. If you have used a Windows® operating system before, you will gain from the screens displayed by guiding you will often discover alternative ways of accomplishing a particular task.

User Guide
Page 115
... touch pad surface to close the Start menu. Instructions requiring the secondary button specifically mention that comes with your basic tool for moving around the screen. For example, "click the secondary button." 2 Click an empty area of the desktop to perform the same function. 115 Getting to the primary button, which...
... touch pad surface to close the Start menu. Instructions requiring the secondary button specifically mention that comes with your basic tool for moving around the screen. For example, "click the secondary button." 2 Click an empty area of the desktop to perform the same function. 115 Getting to the primary button, which...
User Guide
Page 117
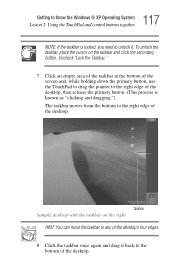
... can move the taskbar to any of the desktop. Uncheck "Lock the Taskbar." 7 Click an empty area of the taskbar at the bottom of the screen and, while holding down the primary button, use the TouchPad to drag the pointer to the right edge of the desktop, then release the primary...
... can move the taskbar to any of the desktop. Uncheck "Lock the Taskbar." 7 Click an empty area of the taskbar at the bottom of the screen and, while holding down the primary button, use the TouchPad to drag the pointer to the right edge of the desktop, then release the primary...
User Guide
Page 123
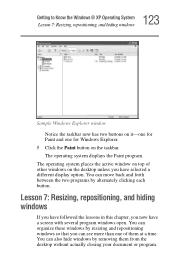
... Explorer window Notice the taskbar now has two buttons on it-one for Paint and one of other windows on the desktop unless you have a screen with several program windows open. The operating system places the active window on top of them from the desktop without actually closing your document or...
... Explorer window Notice the taskbar now has two buttons on it-one for Paint and one of other windows on the desktop unless you have a screen with several program windows open. The operating system places the active window on top of them from the desktop without actually closing your document or...
User Guide
Page 125
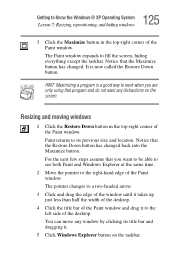
...less than half the width of the desktop. 4 Click the title bar of the Paint window and drag it . 5 Click Windows Explorer button on the screen. You can move any distractions on the taskbar. 125 Getting to Know the Windows® XP Operating System Lesson 7: Resizing, repositioning, and hiding windows ...Paint window. Resizing and moving windows 1 Click the Restore Down button in the top-right corner of the desktop. Paint returns to fill the screen, hiding everything except the taskbar. For the next few steps assume that you are only using that the Maximize button has changed back into ...
...less than half the width of the desktop. 4 Click the title bar of the Paint window and drag it . 5 Click Windows Explorer button on the screen. You can move any distractions on the taskbar. 125 Getting to Know the Windows® XP Operating System Lesson 7: Resizing, repositioning, and hiding windows ...Paint window. Resizing and moving windows 1 Click the Restore Down button in the top-right corner of the desktop. Paint returns to fill the screen, hiding everything except the taskbar. For the next few steps assume that you are only using that the Maximize button has changed back into ...

User Guide
Page 130
... not only teach you how to change the background, but will also introduce you want to add a special character to a document. Lesson 10: Changing the screen saver You can place as you find useful. 130 Getting to Know the Windows® XP Operating System Lesson 10: Changing the... screen saver HINT: Search also allows you to perform searches on -screen, and color). You can personalize the background area of your desktop as many shortcuts on your desktop with the secondary...
... not only teach you how to change the background, but will also introduce you want to add a special character to a document. Lesson 10: Changing the screen saver You can place as you find useful. 130 Getting to Know the Windows® XP Operating System Lesson 10: Changing the... screen saver HINT: Search also allows you to perform searches on -screen, and color). You can personalize the background area of your desktop as many shortcuts on your desktop with the secondary...
User Guide
Page 131
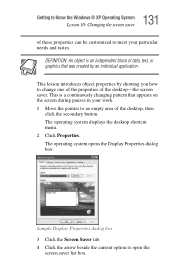
This lesson introduces object properties by an individual application. 131 Getting to Know the Windows® XP Operating System Lesson 10: Changing the screen saver of these properties can be customized to meet your work. 1 Move the pointer to an empty area of the desktop, then click the... tab. 4 Click the arrow beside the current option to change one of the properties of data, text, or graphics that appears on the screen during pauses in your particular needs and tastes. The operating system displays the desktop shortcut menu. 2 Click Properties. The operating system opens the Display ...
This lesson introduces object properties by an individual application. 131 Getting to Know the Windows® XP Operating System Lesson 10: Changing the screen saver of these properties can be customized to meet your work. 1 Move the pointer to an empty area of the desktop, then click the... tab. 4 Click the arrow beside the current option to change one of the properties of data, text, or graphics that appears on the screen during pauses in your particular needs and tastes. The operating system displays the desktop shortcut menu. 2 Click Properties. The operating system opens the Display ...


