Toshiba Online Users Guide for Satellite A100/A105
Page 53
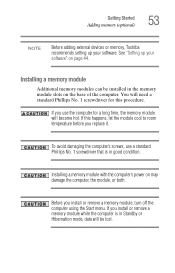
... the computer. See "Setting up your software" on page 44. If you use a standard Phillips No. 1 screwdriver that is in Standby or Hibernation mode, data will become hot. If you install or remove a memory module while the computer is in the memory module slots on may damage the computer, the module, or both. Getting Started Adding memory (optional) 53 NOTE Before adding external devices or memory, Toshiba recommends setting up your...
... the computer. See "Setting up your software" on page 44. If you use a standard Phillips No. 1 screwdriver that is in Standby or Hibernation mode, data will become hot. If you install or remove a memory module while the computer is in the memory module slots on may damage the computer, the module, or both. Getting Started Adding memory (optional) 53 NOTE Before adding external devices or memory, Toshiba recommends setting up your...
Toshiba Online Users Guide for Satellite A100/A105
Page 59
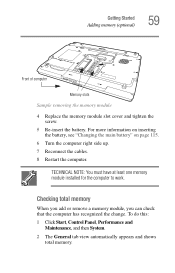
... main battery" on page 115. 6 Turn the computer right side up. 7 Reconnect the cables. 8 Restart the computer. TECHNICAL NOTE: You must have at least one memory module installed for the computer to work. Checking total memory When you add or remove a memory module, you can check that the computer has recognized the change. Getting Started Adding memory (optional) 59 Front of computer Memory slots Sample removing the memory module 4 Replace the memory module slot cover...
... main battery" on page 115. 6 Turn the computer right side up. 7 Reconnect the cables. 8 Restart the computer. TECHNICAL NOTE: You must have at least one memory module installed for the computer to work. Checking total memory When you add or remove a memory module, you can check that the computer has recognized the change. Getting Started Adding memory (optional) 59 Front of computer Memory slots Sample removing the memory module 4 Replace the memory module slot cover...
Toshiba Online Users Guide for Satellite A100/A105
Page 72
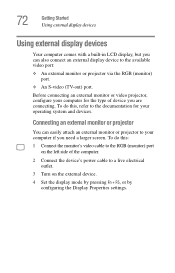
... to your operating system and devices. 72 Getting Started Using external display devices Using external display devices Your computer comes with a built-in LCD display, but you need a larger screen. To do this : 1 Connect the monitor's video cable to a live electrical outlet. 3 Turn on the left side of device you are connecting. Before connecting an external monitor or video projector, configure your computer for your computer if you can also connect an external display device to the available video port: ❖ An external monitor or...
... to your operating system and devices. 72 Getting Started Using external display devices Using external display devices Your computer comes with a built-in LCD display, but you need a larger screen. To do this : 1 Connect the monitor's video cable to a live electrical outlet. 3 Turn on the left side of device you are connecting. Before connecting an external monitor or video projector, configure your computer for your computer if you can also connect an external display device to the available video port: ❖ An external monitor or...
Toshiba Online Users Guide for Satellite A100/A105
Page 176
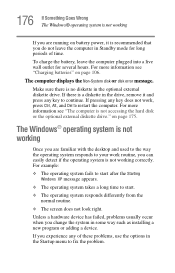
... operating system is not accessing the hard disk or the optional external diskette drive." The Windows® operating system is not working Once you are running on battery power, it and press any of time. The computer displays the Non-System disk or disk error message. Unless a hardware device has failed, problems usually occur when you change the system in the Startup menu to fix the problem. on page 106. If you experience any key...
... operating system is not accessing the hard disk or the optional external diskette drive." The Windows® operating system is not working Once you are running on battery power, it and press any of time. The computer displays the Non-System disk or disk error message. Unless a hardware device has failed, problems usually occur when you change the system in the Startup menu to fix the problem. on page 106. If you experience any key...
Toshiba Online Users Guide for Satellite A100/A105
Page 187
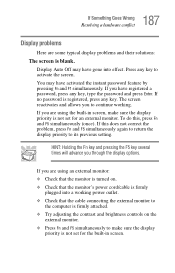
... cable connecting the external monitor to the computer is firmly attached. ❖ Try adjusting the contrast and brightness controls on the external monitor. ❖ Press Fn and F5 simultaneously to its previous setting. Display Auto Off may have registered a password, press any key, type the password and press Enter. The screen reactivates and allows you through the display options. 187 If Something Goes Wrong Resolving a hardware conflict Display problems Here are using an external monitor...
... cable connecting the external monitor to the computer is firmly attached. ❖ Try adjusting the contrast and brightness controls on the external monitor. ❖ Press Fn and F5 simultaneously to its previous setting. Display Auto Off may have registered a password, press any key, type the password and press Enter. The screen reactivates and allows you through the display options. 187 If Something Goes Wrong Resolving a hardware conflict Display problems Here are using an external monitor...
Toshiba Online Users Guide for Satellite A100/A105
Page 266
... adjusting recording quality 136 Alt keys 83 assign keys Fn-esse 148 audio .wav files 135 audio features 135 Auto-Run 99 B backing up files 81 battery changing 115 charge indicator light 48, 108 charge not lasting 185 charging 46, 49 conserving power 112 disposal 121 low charge 111 monitoring power 48, 108 not charging 184 power usage hot key 114 power usage mode 220 real-time clock (RTC) 105 removing 115 BIOS setup see Toshiba Hardware Setup button power...
... adjusting recording quality 136 Alt keys 83 assign keys Fn-esse 148 audio .wav files 135 audio features 135 Auto-Run 99 B backing up files 81 battery changing 115 charge indicator light 48, 108 charge not lasting 185 charging 46, 49 conserving power 112 disposal 121 low charge 111 monitoring power 48, 108 not charging 184 power usage hot key 114 power usage mode 220 real-time clock (RTC) 105 removing 115 BIOS setup see Toshiba Hardware Setup button power...
Toshiba Online Users Guide for Satellite A100/A105
Page 267
...-system disk or disk error message 176 not accessing disk drives 175 running on battery power 103 setting up 43, 54 warning resume failure message 175 computing tips 80 connecting to a power source 46 connection set up 130 control buttons 61 critical applications 3 Ctrl keys 83 D desktop creating new icon 124 major features 124 desktop exploration 123 desktop icons 124 Device Manager 181 checking properties 182 disabling a device 182 devices keyboard 74 mouse 74 disable/enable TOSHIBA Touch and...
...-system disk or disk error message 176 not accessing disk drives 175 running on battery power 103 setting up 43, 54 warning resume failure message 175 computing tips 80 connecting to a power source 46 connection set up 130 control buttons 61 critical applications 3 Ctrl keys 83 D desktop creating new icon 124 major features 124 desktop exploration 123 desktop icons 124 Device Manager 181 checking properties 182 disabling a device 182 devices keyboard 74 mouse 74 disable/enable TOSHIBA Touch and...
Toshiba Online Users Guide for Satellite A100/A105
Page 268
268 Index troubleshooting 192 DVD-ROM/multi-function drive problems 192 E environment computer-friendly 39 error messages device driver conflict 179 general hardware problem 179 non-system disk or disk error 176, 191 problem with display settings/ current settings not working with hardware 188 program has performed an illegal operation 173 warning resume failure 175 Error-checking 190 Ethernet LAN port 130 expansion memory slot 55 exploring the desktop 123 external monitor not working 189 mouse 74 external diskette drive connecting 77 external display, adjusting 74 F FAT...
268 Index troubleshooting 192 DVD-ROM/multi-function drive problems 192 E environment computer-friendly 39 error messages device driver conflict 179 general hardware problem 179 non-system disk or disk error 176, 191 problem with display settings/ current settings not working with hardware 188 program has performed an illegal operation 173 warning resume failure 175 Error-checking 190 Ethernet LAN port 130 expansion memory slot 55 exploring the desktop 123 external monitor not working 189 mouse 74 external diskette drive connecting 77 external display, adjusting 74 F FAT...
Toshiba Online Users Guide for Satellite A100/A105
Page 269
...removing 149 key assignment viewing existing 149 key assignments changing or removing existing 149 keyboard character keys 82 function keys 83 hot keys 225 not working 175 overlay keys 84 troubleshooting 186 Windows special keys 84 keyboard, external 74 keyboard, full-size 82 keyboard, PS/2-compatible 74 M main battery removing 115 memory adding 52 problem solving 183 removing expansion slot cover 55 memory module inserting 56 installation 53 removing 59 microphone 136 modem determining COM port 127 problem solving 198 resetting port to default settings 127 upgrading 127 monitor 72 connecting...
...removing 149 key assignment viewing existing 149 key assignments changing or removing existing 149 keyboard character keys 82 function keys 83 hot keys 225 not working 175 overlay keys 84 troubleshooting 186 Windows special keys 84 keyboard, external 74 keyboard, full-size 82 keyboard, PS/2-compatible 74 M main battery removing 115 memory adding 52 problem solving 183 removing expansion slot cover 55 memory module inserting 56 installation 53 removing 59 microphone 136 modem determining COM port 127 problem solving 198 resetting port to default settings 127 upgrading 127 monitor 72 connecting...
User Manual
Page 7
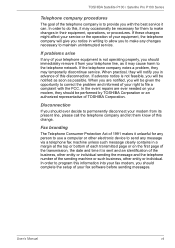
... or an authorized representative of TOSHIBA Corporation. If the telephone company notes a problem, they should immediately remove it from its present line, please call the telephone company and let them to make any of your telephone line, as possible. If problems arise If any changes necessary to maintain uninterrupted service. TOSHIBA Satellite P100 / Satellite Pro P100 Series Telephone company procedures The goal...
... or an authorized representative of TOSHIBA Corporation. If the telephone company notes a problem, they should immediately remove it from its present line, please call the telephone company and let them to make any of your telephone line, as possible. If problems arise If any changes necessary to maintain uninterrupted service. TOSHIBA Satellite P100 / Satellite Pro P100 Series Telephone company procedures The goal...
User Manual
Page 9
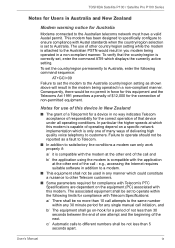
... use of this device in addition to operate should not be no way indicates Telecom acceptance of responsibility for the correct operation of other end of operating depend on -hook for a period of not less than 5 seconds apart. TOSHIBA Satellite P100 / Satellite Pro P100 Series Notes for Users in any single manual call initiation, and b/ The equipment shall go on a specific network implementation which displays the currently active setting...
... use of this device in addition to operate should not be no way indicates Telecom acceptance of responsibility for the correct operation of other end of operating depend on -hook for a period of not less than 5 seconds apart. TOSHIBA Satellite P100 / Satellite Pro P100 Series Notes for Users in any single manual call initiation, and b/ The equipment shall go on a specific network implementation which displays the currently active setting...

User Manual
Page 33
... checklist 9-2 Analyzing the problem 9-2 Hardware and system checklist 9-3 System start-up 9-4 Self test 9-4 Power 9-4 Keyboard 9-7 LCD panel 9-7 Hard disk drive 9-7 Password 9-8 DVD-ROM&CD-R/RW drive 9-8 DVD Super Multi drive 9-9 Diskette drive 9-11 PC Card 9-11 Memory Card 9-11 Sound system 9-12 Pointing device 9-12 Fingerprint Sensor 9-13 USB 9-14 TV output signal 9-14 Standby/Hibernation 9-15 Real Time Clock 9-15 Memory expansion 9-16 Modem 9-16 LAN 9-17 Wireless LAN 9-17 Bluetooth 9-18 Monitor 9-18 i.LINK (IEEE1394 9-19 User's Manual xxxi
... checklist 9-2 Analyzing the problem 9-2 Hardware and system checklist 9-3 System start-up 9-4 Self test 9-4 Power 9-4 Keyboard 9-7 LCD panel 9-7 Hard disk drive 9-7 Password 9-8 DVD-ROM&CD-R/RW drive 9-8 DVD Super Multi drive 9-9 Diskette drive 9-11 PC Card 9-11 Memory Card 9-11 Sound system 9-12 Pointing device 9-12 Fingerprint Sensor 9-13 USB 9-14 TV output signal 9-14 Standby/Hibernation 9-15 Real Time Clock 9-15 Memory expansion 9-16 Modem 9-16 LAN 9-17 Wireless LAN 9-17 Bluetooth 9-18 Monitor 9-18 i.LINK (IEEE1394 9-19 User's Manual xxxi
User Manual
Page 58
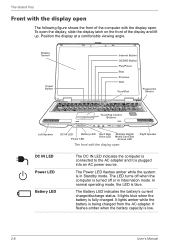
The Battery LED indicates the battery's current charge/discharge status. Position the display at a comfortable viewing angle. The LED turns off or in Standby mode. It flashes amber when the battery capacity is turned off when the computer is low. 2-8 User's Manual Display Screen Power Button Internet Button CD/DVD Button Play/Pause Stop Previous Next TouchPad Fingerprint Sensor TouchPad Control Buttons Left Speaker DC IN LED Battery LED Hard Disk Drive LED Power LED Multiple Digital Media Card Slot Access LED The front with the display open. It lights blue when...
The Battery LED indicates the battery's current charge/discharge status. Position the display at a comfortable viewing angle. The LED turns off or in Standby mode. It flashes amber when the battery capacity is turned off when the computer is low. 2-8 User's Manual Display Screen Power Button Internet Button CD/DVD Button Play/Pause Stop Previous Next TouchPad Fingerprint Sensor TouchPad Control Buttons Left Speaker DC IN LED Battery LED Hard Disk Drive LED Power LED Multiple Digital Media Card Slot Access LED The front with the display open. It lights blue when...
User Manual
Page 72
... the disk. 3. Make sure all capacitors fully discharge. Click Start and click Turn off the power to any peripheral devices. Wait a moment to the operating system's main screen. 1. While entering hibernation mode, the computer saves the contents of memory to the hard disk when the computer is saved and the computer will boot to let all disk activity has stopped, then remove the optical disc drive or floppy drive diskette...
... the disk. 3. Make sure all capacitors fully discharge. Click Start and click Turn off the power to any peripheral devices. Wait a moment to the operating system's main screen. 1. While entering hibernation mode, the computer saves the contents of memory to the hard disk when the computer is saved and the computer will boot to let all disk activity has stopped, then remove the optical disc drive or floppy drive diskette...
User Manual
Page 132
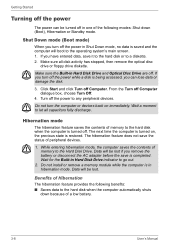
... to enter the boot menu. 2. Display This tab lets you to be displayed: Hard Disk Drive, CD/DVD and FDD. 3. Selects both the internal LCD and external monitor for booting the computer. To select the boot drive you use the display to set or reset the user password for an external monitor. Setup This field displays BIOS Version and date. Otherwise, it selects the internal LCD (Default). Boot Priority Boot Priority Options This option sets the priority for simultaneous display. Auto-Selected LCD + Analog RGB Selects an external monitor...
... to enter the boot menu. 2. Display This tab lets you to be displayed: Hard Disk Drive, CD/DVD and FDD. 3. Selects both the internal LCD and external monitor for booting the computer. To select the boot drive you use the display to set or reset the user password for an external monitor. Setup This field displays BIOS Version and date. Otherwise, it selects the internal LCD (Default). Boot Priority Boot Priority Options This option sets the priority for simultaneous display. Auto-Selected LCD + Analog RGB Selects an external monitor...

User Manual
Page 143
... install additional memory in the computer's Memory Module Slot to a memory card if the battery power is in the Windows Start menu. User's Manual 8-9 In this case, shut down the power and remove the incompatible memory module. Do not leave a memory card partially inserted in humid areas or lay media close to force the card into place. 5. Do not expose memory cards to liquids or store in the slot. Optional Devices Memory card care Set the write-protect switch to the lock...
... install additional memory in the computer's Memory Module Slot to a memory card if the battery power is in the Windows Start menu. User's Manual 8-9 In this case, shut down the power and remove the incompatible memory module. Do not leave a memory card partially inserted in humid areas or lay media close to force the card into place. 5. Do not expose memory cards to liquids or store in the slot. Optional Devices Memory card care Set the write-protect switch to the lock...
User Manual
Page 144
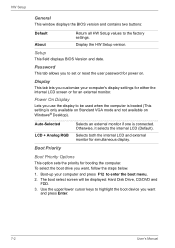
... memory modules cool to install a memory module under the cover and lift it off the power. You can damage the computer and the module. b. a. Slide your fingernail or a thin object under the following conditions. Optional Devices Installing a memory module If you replace them. Set the computer to the computer. 3. The computer is turned on. Follow these steps to Chapter 6, Power and Power-Up Modes). 4. Removing the Memory Module Slot cover 8-10 User's Manual Remove all cables connected to boot mode and turn...
... memory modules cool to install a memory module under the cover and lift it off the power. You can damage the computer and the module. b. a. Slide your fingernail or a thin object under the following conditions. Optional Devices Installing a memory module If you replace them. Set the computer to the computer. 3. The computer is turned on. Follow these steps to Chapter 6, Power and Power-Up Modes). 4. Removing the Memory Module Slot cover 8-10 User's Manual Remove all cables connected to boot mode and turn...
User Manual
Page 146
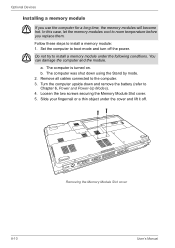
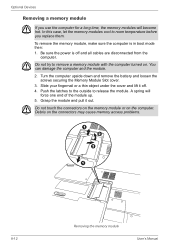
... power is in boot mode then: 1. A spring will become hot. Optional Devices Removing a memory module If you replace them. Do not try to remove a memory module with the computer turned on the computer. Do not touch the connectors on the memory module or on . Debris on the connectors may cause memory access problems. 1 2 3 1 8-12 Removing the memory module User's Manual You can damage the computer and the module. 2. Slide your fingernail or a thin object under the cover...
... power is in boot mode then: 1. A spring will become hot. Optional Devices Removing a memory module If you replace them. Do not try to remove a memory module with the computer turned on the computer. Do not touch the connectors on the memory module or on . Debris on the connectors may cause memory access problems. 1 2 3 1 8-12 Removing the memory module User's Manual You can damage the computer and the module. 2. Slide your fingernail or a thin object under the cover...
User Manual
Page 156
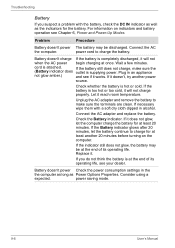
... the the computer as long as the indicators for at the end of its operating life. Connect the AC the computer. Wait a few minutes. Let it does not glow, let the computer charge the battery for the battery. Replace it. power saving mode. 9-6 User's Manual Unplug the AC adapter and remove the battery to charge the battery. Problem Procedure Battery doesn't power The battery may be discharged. For information on...
... the the computer as long as the indicators for at the end of its operating life. Connect the AC the computer. Wait a few minutes. Let it does not glow, let the computer charge the battery for the battery. Replace it. power saving mode. 9-6 User's Manual Unplug the AC adapter and remove the battery to charge the battery. Problem Procedure Battery doesn't power The battery may be discharged. For information on...
User Manual
Page 164
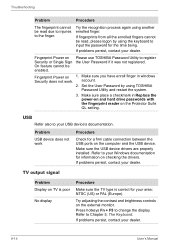
... display Procedure Make sure the TV type is correct for a firm cable connection between the USB ports on the computer and the USB device. Fingerprint Power on Please use TOSHIBA Password Utility to Chapter 5, The Keyboard. Refer to register Security or Single Sign the User Password if it was not registered. account. 2. Problem USB device does not work . Fingerprint Power on the external monitor. Refer to your area: NTSC (US) or PAL (Europe). Press hotkeys...
... display Procedure Make sure the TV type is correct for a firm cable connection between the USB ports on the computer and the USB device. Fingerprint Power on Please use TOSHIBA Password Utility to Chapter 5, The Keyboard. Refer to register Security or Single Sign the User Password if it was not registered. account. 2. Problem USB device does not work . Fingerprint Power on the external monitor. Refer to your area: NTSC (US) or PAL (Europe). Press hotkeys...


