
User Manual
Page 1
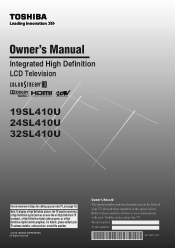
...Refer to these numbers in the spaces below. Owner's Manual Integrated High Definition LCD Television 19SL410U 24SL410U 32SL410U For an overview of your TV. Note: To display a High Definition picture, the TV must be receiving a High Definition signal (such as an over-the-air High ...High Definition digital satellite program). For details, please contact your TV antenna installer, cable provider, or satellite provider. 2010 TOSHIBA CORPORATION All Rights Reserved Owner's Record The model number and serial number are on the back of steps for setting up your Toshiba dealer about this TV.
...Refer to these numbers in the spaces below. Owner's Manual Integrated High Definition LCD Television 19SL410U 24SL410U 32SL410U For an overview of your TV. Note: To display a High Definition picture, the TV must be receiving a High Definition signal (such as an over-the-air High ...High Definition digital satellite program). For details, please contact your TV antenna installer, cable provider, or satellite provider. 2010 TOSHIBA CORPORATION All Rights Reserved Owner's Record The model number and serial number are on the back of steps for setting up your Toshiba dealer about this TV.
User Manual
Page 6
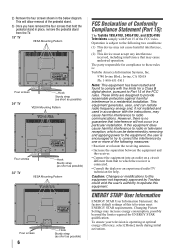
... Pattern Four screws 6 Hook Sturdy strap (as short as possible) FCC Declaration of Conformity Compliance Statement (Part 15): The Toshiba 19SL410U, 24SL410U, and 32SL410U Televisions comply with the instructions, may increase energy consumption, possibly beyond the limits required for compliance to these rules... meet ENERGY STAR requirements. ENERGY STAR® User Information ENERGY STAR User Information Statement: the factory default settings of the FCC rules. Changing Picture Settings may cause harmful interference to comply with the limits for help. Irvine, CA 92618 Ph: 1-800-631...
... Pattern Four screws 6 Hook Sturdy strap (as short as possible) FCC Declaration of Conformity Compliance Statement (Part 15): The Toshiba 19SL410U, 24SL410U, and 32SL410U Televisions comply with the instructions, may increase energy consumption, possibly beyond the limits required for compliance to these rules... meet ENERGY STAR requirements. ENERGY STAR® User Information ENERGY STAR User Information Statement: the factory default settings of the FCC rules. Changing Picture Settings may cause harmful interference to comply with the limits for help. Irvine, CA 92618 Ph: 1-800-631...
User Manual
Page 7
...under your LCD TV The following symptoms are technical limitations of HDMI Licensing LLC in this TV. To return to [Home] mode settings, select [Standard] picture mode. [Standard] mode is viewed from a normal viewing distance. marks. ENERGY STAR and the ENERGY STAR mark are not an..., Toshiba is not responsible for perceived issues resulting from these symptoms. (1) An afterimage (ghost) may not work with this TV is displayed for normal home use. Note: Interactive video games that earn the ENERGY STAR prevent green house gas emissions by meeting strict guidelines set by...
...under your LCD TV The following symptoms are technical limitations of HDMI Licensing LLC in this TV. To return to [Home] mode settings, select [Standard] picture mode. [Standard] mode is viewed from a normal viewing distance. marks. ENERGY STAR and the ENERGY STAR mark are not an..., Toshiba is not responsible for perceived issues resulting from these symptoms. (1) An afterimage (ghost) may not work with this TV is displayed for normal home use. Note: Interactive video games that earn the ENERGY STAR prevent green house gas emissions by meeting strict guidelines set by...
User Manual
Page 8
...® functions 49 Displaying TV status information 50 Understanding the last mode memory feature 50 Chapter 7: Using the TV's advanced features ......... 51 Using the advanced picture settings features 51 Using Dynamic Contrast 51 Using the static gamma feature 51 Selecting the color temperature 51 Using CableClear® digital noise reduction 51 Using... 55 Specifications 55 Acceptable signal formats for PC IN and HDMI terminals 56 Limited United States Warranty for LCD Televisions .. 57 Limited Canadian Warranty for Toshiba Brand Flat Panel Televisions 58
...® functions 49 Displaying TV status information 50 Understanding the last mode memory feature 50 Chapter 7: Using the TV's advanced features ......... 51 Using the advanced picture settings features 51 Using Dynamic Contrast 51 Using the static gamma feature 51 Selecting the color temperature 51 Using CableClear® digital noise reduction 51 Using... 55 Specifications 55 Acceptable signal formats for PC IN and HDMI terminals 56 Limited United States Warranty for LCD Televisions .. 57 Limited Canadian Warranty for Toshiba Brand Flat Panel Televisions 58
User Manual
Page 9
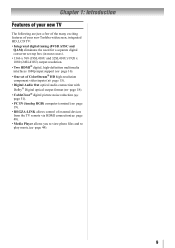
... exciting features of your new Toshiba widescreen, integrated HD, LCD TV: • Integrated digital tuning (8VSB ATSC and QAM) eliminates the need for a separate digital converter set-top box (in most cases). • 1366 x 768 (19SL410U and 32SL410U)/1920 x 1080 (24SL410U) output resolution. • ...support ( page 16). • One set of ColorStream® HD high-resolution component video inputs ( page 15). • Digital Audio Out optical audio connection with Dolby® Digital optical output format ( page 18). • CableClear® digital picture noise reduction ( page 51). •...
... exciting features of your new Toshiba widescreen, integrated HD, LCD TV: • Integrated digital tuning (8VSB ATSC and QAM) eliminates the need for a separate digital converter set-top box (in most cases). • 1366 x 768 (19SL410U and 32SL410U)/1920 x 1080 (24SL410U) output resolution. • ...support ( page 16). • One set of ColorStream® HD high-resolution component video inputs ( page 15). • Digital Audio Out optical audio connection with Dolby® Digital optical output format ( page 18). • CableClear® digital picture noise reduction ( page 51). •...
User Manual
Page 13
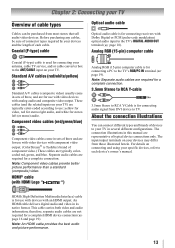
...19). Note: Separate audio cables are typically colorcoded red, green, and blue. Note: An HDMI cable provides the best audio and picture performance. 13 Chapter 2: Connecting your TV Overview of cable types Cables can connect different types and brands of devices to the TV's...cables (composite video) usually come in several different configurations. HDMI (High-Definition Multimedia Interface) cable is Toshiba's brand of typical device connections only. For details on your TV in sets of three and are for use with devices with HDMI Logo " ") Analog RGB (15-pin) ...
...19). Note: Separate audio cables are typically colorcoded red, green, and blue. Note: An HDMI cable provides the best audio and picture performance. 13 Chapter 2: Connecting your TV Overview of cable types Cables can connect different types and brands of devices to the TV's...cables (composite video) usually come in several different configurations. HDMI (High-Definition Multimedia Interface) cable is Toshiba's brand of typical device connections only. For details on your TV in sets of three and are for use with devices with HDMI Logo " ") Analog RGB (15-pin) ...
User Manual
Page 19
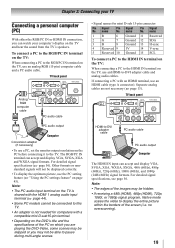
... back panel Analog RGB computer cable PC audio cable PC audio output Computer Conversion adapter (if necessary) • To use the PC setting feature ( "Using the PC settings feature" on the TV, use an analog RGB (15-pin) computer cable and a PC audio cable. For detailed signal specifications, ...personal computer (PC) With either the RGB/PC IN or HDMI IN connection, you may be displayed correctly. • To display the optimum picture, use a PC, set the monitor output resolution on the DVD's title and the specifications of the screen (i.e. To connect a PC to the RGB/PC IN terminal...
... back panel Analog RGB computer cable PC audio cable PC audio output Computer Conversion adapter (if necessary) • To use the PC setting feature ( "Using the PC settings feature" on the TV, use an analog RGB (15-pin) computer cable and a PC audio cable. For detailed signal specifications, ...personal computer (PC) With either the RGB/PC IN or HDMI IN connection, you may be displayed correctly. • To display the optimum picture, use a PC, set the monitor output resolution on the DVD's title and the specifications of the screen (i.e. To connect a PC to the RGB/PC IN terminal...
User Manual
Page 22
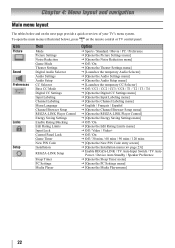
... New PIN Code Installation REGZA-LINK Setup Sleep Timer PC Settings Media Player Option J Sports / Standard / Movie / PC / Preference J [Opens the Picture Settings menu] J [Opens the Noise Reduction menu] J Off / On J [Opens the Theater Settings menu] J [Launches the temporary Audio Selector] J [Opens the Audio Settings menu] J [Opens the Audio Setup menu] J [Launches the temporary CC...
... New PIN Code Installation REGZA-LINK Setup Sleep Timer PC Settings Media Player Option J Sports / Standard / Movie / PC / Preference J [Opens the Picture Settings menu] J [Opens the Noise Reduction menu] J Off / On J [Opens the Theater Settings menu] J [Launches the temporary Audio Selector] J [Opens the Audio Settings menu] J [Opens the Audio Setup menu] J [Launches the temporary CC...
User Manual
Page 23
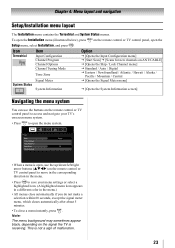
Picture Mode Picture Settings Noise Reduction Game Mode Theater Settings Sports Off • When a menu is open, use the buttons on the remote control or TV control panel, open the menu system. This is receiving. ... below), press on the remote control or TV control panel to access and navigate your TV's onscreen menu system. • Press to save your menu settings or select a highlighted item. (A highlighted menu item appears in a different color in the menu. • Press to open the Setup menu, select Installation, and press...
Picture Mode Picture Settings Noise Reduction Game Mode Theater Settings Sports Off • When a menu is open, use the buttons on the remote control or TV control panel, open the menu system. This is receiving. ... below), press on the remote control or TV control panel to access and navigate your TV's onscreen menu system. • Press to save your menu settings or select a highlighted item. (A highlighted menu item appears in a different color in the menu. • Press to open the Setup menu, select Installation, and press...

User Manual
Page 33
...You can save separate picture size preferences for external inputs. Note: Some of the picture (including subtitles or captions) may not be "grayed out" in the Theater Settings menu. 2 Press W or X to select digital channel 125-1, press 1, 2, 5, -, 1, then . Note: The "picture size" illustrations are currently...your TV. This feature also works for each time. 1 Select the first channel you will display. For example, to select the desired picture size setting. 3 Highlight Done and press . Note: If a digital channel is open . To memorize a channel to the 1 Tune the ...
...You can save separate picture size preferences for external inputs. Note: Some of the picture (including subtitles or captions) may not be "grayed out" in the Theater Settings menu. 2 Press W or X to select digital channel 125-1, press 1, 2, 5, -, 1, then . Note: The "picture size" illustrations are currently...your TV. This feature also works for each time. 1 Select the first channel you will display. For example, to select the desired picture size setting. 3 Highlight Done and press . Note: If a digital channel is open . To memorize a channel to the 1 Tune the ...
User Manual
Page 35
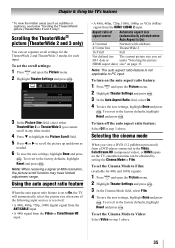
... and press . To revert to the factory defaults, highlight Reset and press . Picture Mode Picture Settings Noise Reduction Game Mode Theater Settings Sports Off 3 In the Picture Size field, select either TheaterWide 2 or TheaterWide 3 (you set the scroll settings: 1 Press and open the Picture menu. 2 Highlight Theater Settings and press . 3 In the Auto Aspect Ratio field, select On. 4 To...
... and press . To revert to the factory defaults, highlight Reset and press . Picture Mode Picture Settings Noise Reduction Game Mode Theater Settings Sports Off 3 In the Picture Size field, select either TheaterWide 2 or TheaterWide 3 (you set the scroll settings: 1 Press and open the Picture menu. 2 Highlight Theater Settings and press . 3 In the Auto Aspect Ratio field, select On. 4 To...

User Manual
Page 36
... coloring of dark areas in FREEZE mode for more than your personal preferences. Mode Sports Standard Movie PC Preference Picture Quality Bright and dynamic picture (factory setting) Standard picture settings (factory setting) Lower contrast for darkened room (factory setting) Designed for viewing of PC tables and documents Your personal preferences Note: PC mode is selected. 36 To...
... coloring of dark areas in FREEZE mode for more than your personal preferences. Mode Sports Standard Movie PC Preference Picture Quality Bright and dynamic picture (factory setting) Standard picture settings (factory setting) Lower contrast for darkened room (factory setting) Designed for viewing of PC tables and documents Your personal preferences Note: PC mode is selected. 36 To...

User Manual
Page 42
...the PIN code has not been set . To lock/unlock the video inputs: 1 From the Locks menu, Press T to display the PIN code entering screen. 2 Enter your four-digit PIN code and press . Channel Options Ch. If rating information is temporarily released and the normal picture appears. To lock channels: 1...level of the program you place an " " in the lock column. 4 Press . Unlocking programs temporarily If you try to tune the TV to set , the TV will enter program lock mode and the following message will be blocked; Chapter 6: Using the TV's features Independent rating system for movies ...
...the PIN code has not been set . To lock/unlock the video inputs: 1 From the Locks menu, Press T to display the PIN code entering screen. 2 Enter your four-digit PIN code and press . Channel Options Ch. If rating information is temporarily released and the normal picture appears. To lock channels: 1...level of the program you place an " " in the lock column. 4 Press . Unlocking programs temporarily If you try to tune the TV to set , the TV will enter program lock mode and the following message will be blocked; Chapter 6: Using the TV's features Independent rating system for movies ...

User Manual
Page 43
... Off in step 5 above . Note: "Using the input lock • A message will have to display the PIN code entering screen. 3 Enter your settings from a PC on page 29). 2 Press and open the Setup menu. 43 If the edges of time until the volume icon appears. Chapter 6: Using ...the TV's features Mode Video Video+ Off 4 Press Description Locks Video, ColorStream HD, HDMI 1, HDMI 2, and PC. If the picture is activated (30, 60, 90, or 120 minutes). Locks Video, ColorStream HD, HDMI 1, HDMI 2, PC and channels 3 and 4. • Select Video+ if...
... Off in step 5 above . Note: "Using the input lock • A message will have to display the PIN code entering screen. 3 Enter your settings from a PC on page 29). 2 Press and open the Setup menu. 43 If the edges of time until the volume icon appears. Chapter 6: Using ...the TV's features Mode Video Video+ Off 4 Press Description Locks Video, ColorStream HD, HDMI 1, HDMI 2, and PC. If the picture is activated (30, 60, 90, or 120 minutes). Locks Video, ColorStream HD, HDMI 1, HDMI 2, PC and channels 3 and 4. • Select Video+ if...
User Manual
Page 44
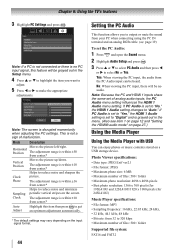
...is within 16 from center.* Vertical Position Moves the picture up/down. If PC Audio is disrupted momentarily when adjusting the PC settings. If PC Audio is set to "Yes," the HDMI 1 Audio setting is set to "No," the HDMI 1 Audio setting changes to select No or Yes. Phase The ... folder • Maximum photo resolution: 4096 x 4096 pixels • Best photo resolution: 1366 x 768 pixels (for 19SL410U and 32SL410U/1920 x 1080 pixels (for 24SL410U) Music Player specifications: • File format: MP3 • Sampling frequency: 16 kHz, 22.05 kHz, 24 kHz, • 32 kHz, 44.1 kHz, 48...
...is within 16 from center.* Vertical Position Moves the picture up/down. If PC Audio is disrupted momentarily when adjusting the PC settings. If PC Audio is set to "Yes," the HDMI 1 Audio setting is set to "No," the HDMI 1 Audio setting changes to select No or Yes. Phase The ... folder • Maximum photo resolution: 4096 x 4096 pixels • Best photo resolution: 1366 x 768 pixels (for 19SL410U and 32SL410U/1920 x 1080 pixels (for 24SL410U) Music Player specifications: • File format: MP3 • Sampling frequency: 16 kHz, 22.05 kHz, 24 kHz, • 32 kHz, 44.1 kHz, 48...
User Manual
Page 47
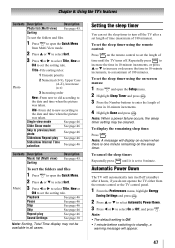
...display the remaining sleep time: Press . Old--From old to new according to the date and time when the picture was taken. Note: When a power failure occurs, the sleep timer setting may not be cleared. Automatic Power Down The TV will appear. 47 Single view mode See page 46 Slide Show... folders and files 1 Press to open the Quick Menu from the remote control or the TV control panel. 1 From the Preferences menu, highlight Energy Saving Settings and press . 2 Press S or T to select Automatic Power Down. 3 Press W or X to previous/next photo See page 46 Slideshow Repeat play See ...
...display the remaining sleep time: Press . Old--From old to new according to the date and time when the picture was taken. Note: When a power failure occurs, the sleep timer setting may not be cleared. Automatic Power Down The TV will appear. 47 Single view mode See page 46 Slide Show... folders and files 1 Press to open the Quick Menu from the remote control or the TV control panel. 1 From the Preferences menu, highlight Energy Saving Settings and press . 2 Press S or T to select Automatic Power Down. 3 Press W or X to previous/next photo See page 46 Slideshow Repeat play See ...
User Manual
Page 48
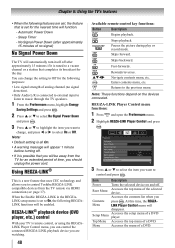
...your TV's remote control, or using the REGZALINK Player Control menu, you can change the setting to Off for an extended period of time, you want to change, and press W or X to control Toshiba REGZA-LINK compatible devices from the TV for the following purposes: • Low signal ...Power Turns the selected device on the devices connected. At this time, the REGZA- Setup Menu Accesses the setup menu of a DVD. Pauses the picture during play or record mode. Skips backward. Fast-forwards. When the Enable REGZA-LINK in the REGZALINK setup menu is all On. • ...
...your TV's remote control, or using the REGZALINK Player Control menu, you can change the setting to Off for an extended period of time, you want to change, and press W or X to control Toshiba REGZA-LINK compatible devices from the TV for the following purposes: • Low signal ...Power Turns the selected device on the devices connected. At this time, the REGZA- Setup Menu Accesses the setup menu of a DVD. Pauses the picture during play or record mode. Skips backward. Fast-forwards. When the Enable REGZA-LINK in the REGZALINK setup menu is all On. • ...

User Manual
Page 51
... a broadcast with a weak signal (especially a Cable channel) or playing a noisy video cassette or disc. 51 To adjust the static gamma settings: 1 Press and open the Picture menu. 2 Highlight Picture Settings and press . 3 Highlight Advanced Picture Settings and press . 4 Highlight Color Temperature and press . 5 In the Color Temperature field, press W or X to select the mode you select...
... a broadcast with a weak signal (especially a Cable channel) or playing a noisy video cassette or disc. 51 To adjust the static gamma settings: 1 Press and open the Picture menu. 2 Highlight Picture Settings and press . 3 Highlight Advanced Picture Settings and press . 4 Highlight Color Temperature and press . 5 In the Color Temperature field, press W or X to select the mode you select...

User Manual
Page 52
... either Hue, Saturation, or Brightness, and then press S or T to adjust the setting. 6 Repeat Steps 5 through 6 to adjust. 1 In the Picture menu, highlight Picture Settings and press . 2 Highlight Advanced Picture Settings and press . 3 Highlight Base Color Adjustment and press . Note: To use the ... Using MPEG noise reduction The MPEG noise reduction feature allows you to adjust standard colors. 1 In the Picture menu, highlight Picture Settings and press . 2 Highlight Advanced Picture Settings and press . 52 3 Highlight Color Master and press W or X to the factory defaults, highlight ...
... either Hue, Saturation, or Brightness, and then press S or T to adjust the setting. 6 Repeat Steps 5 through 6 to adjust. 1 In the Picture menu, highlight Picture Settings and press . 2 Highlight Advanced Picture Settings and press . 3 Highlight Base Color Adjustment and press . Note: To use the ... Using MPEG noise reduction The MPEG noise reduction feature allows you to adjust standard colors. 1 In the Picture menu, highlight Picture Settings and press . 2 Highlight Advanced Picture Settings and press . 52 3 Highlight Color Master and press W or X to the factory defaults, highlight ...
User Manual
Page 53
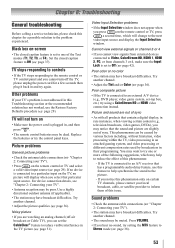
... a programmable audio delay feature, use the Restore Factory Defaults procedure ( page 28). Poor composite picture • If the TV is connected to an external A/V device (e.g., DVD player, video game system, set to inform them of the Text modes (T1, T2, T3, or T4). If the TV...turn off -air broadcast or Cable TV), you may have broadcast difficulties. Noisy picture • If you notice this issue. Try another channel. • Adjust the Tint and/or Color ( page 36). Set the closed caption feature is not addressed in their programming. TV stops responding to...
... a programmable audio delay feature, use the Restore Factory Defaults procedure ( page 28). Poor composite picture • If the TV is connected to an external A/V device (e.g., DVD player, video game system, set to inform them of the Text modes (T1, T2, T3, or T4). If the TV...turn off -air broadcast or Cable TV), you may have broadcast difficulties. Noisy picture • If you notice this issue. Try another channel. • Adjust the Tint and/or Color ( page 36). Set the closed caption feature is not addressed in their programming. TV stops responding to...


