User Guide
Page 10
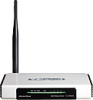
Table 1-1 describes the LEDs on the front panel (View from WAN or LAN ports. ¾ Supports firmware upgrade. ¾ Supports Web management. 1.3 Panel Layout 1.3.1 The Front Panel The Router's LEDs are located on the front panel of the router. 3 ¾ Supports 54/48/...
Table 1-1 describes the LEDs on the front panel (View from WAN or LAN ports. ¾ Supports firmware upgrade. ¾ Supports Web management. 1.3 Panel Layout 1.3.1 The Front Panel The Router's LEDs are located on the front panel of the router. 3 ¾ Supports 54/48/...
User Guide
Page 72
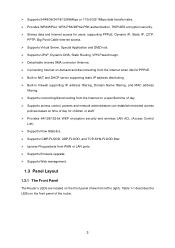
...limited on these instructions: 1. To upgrade the router's firmware, follow these functions will obtain GMT automatically from the TP-LINK website (www.tp-link.com). 2. Click Browse to Internet. 4.13.2 Firmware The page (shown in Figure 4-56) allows you upgrade its firmware. Displays the current hardware .... If the router is not experiencing difficulties, there is turned off. 3. Click the Upgrade button. ¾ Firmware Version - Figure 4-56 Firmware Upgrade New firmware is posted at www.tp-link.com and can be used for free. Displays the current firmware version. ¾ Hardware...
...limited on these instructions: 1. To upgrade the router's firmware, follow these functions will obtain GMT automatically from the TP-LINK website (www.tp-link.com). 2. Click Browse to Internet. 4.13.2 Firmware The page (shown in Figure 4-56) allows you upgrade its firmware. Displays the current hardware .... If the router is not experiencing difficulties, there is turned off. 3. Click the Upgrade button. ¾ Firmware Version - Figure 4-56 Firmware Upgrade New firmware is posted at www.tp-link.com and can be used for free. Displays the current firmware version. ¾ Hardware...

User Guide
Page 73
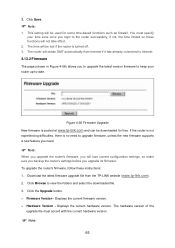
...• The default IP Address: 192.168.1.1 • The default Subnet Mask: 255.255.255.0 ) Note: Any settings you have saved will reboot after the Upgrading has been finished. 4.13.3 Factory Defaults This page (shown in Figure 4-57) allows you to save current configuration of router as a backup file in your... to restore. • Click the Restore button. 66 Do not turn off the router or press the Reset button while the firmware is being upgraded. 2. Figure 4-58 Backup and Restore Configuration ¾ Click the Backup button to restore the factory default settings for the router. 1.
...• The default IP Address: 192.168.1.1 • The default Subnet Mask: 255.255.255.0 ) Note: Any settings you have saved will reboot after the Upgrading has been finished. 4.13.3 Factory Defaults This page (shown in Figure 4-57) allows you to save current configuration of router as a backup file in your... to restore. • Click the Restore button. 66 Do not turn off the router or press the Reset button while the firmware is being upgraded. 2. Figure 4-58 Backup and Restore Configuration ¾ Click the Backup button to restore the factory default settings for the router. 1.
User Guide
Page 74
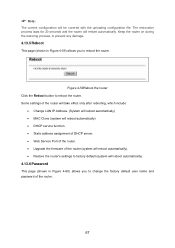
...; MAC Clone (system will reboot automatically) • DHCP service function. • Static address assignment of DHCP server. • Web Service Port of the router. • Upgrade the firmware of the router. 67 ) Note: The current configuration will restart automatically. Figure 4-59Reboot the router Click the Reboot button to reboot the router.
...; MAC Clone (system will reboot automatically) • DHCP service function. • Static address assignment of DHCP server. • Web Service Port of the router. • Upgrade the firmware of the router. 67 ) Note: The current configuration will restart automatically. Figure 4-59Reboot the router Click the Reboot button to reboot the router.


