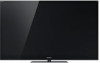
Additional Information for Using Sony® Wall-Mount Bracket (SU-WL500)
Page 2
Dimension Table Screen center point Model Name XBR-55HX92* XBR-46HX92* KDL-55HX82* KDL-46HX82* KDL-60NX72* KDL-55NX72* KDL-46NX72* KDL-40NX72* KDL-60EX72* KDL-55EX72... with the Instructions. 2 Decide where you want to the TV installation dimensions table. Refer to install your TV. Installing the Wall-Mount Bracket Install the Base Bracket and Mounting Hooks. 1 Open the Wall-Mount Bracket package and check for Using...
Additional Information for Using Sony® Wall-Mount Bracket (SU-WL500)
Page 4
... work surface. • When lifting or moving the TV, keep a soft cloth underneath to avoid uneven picture uniformity. 3 Install the Base Bracket on the TV. Having the TV face and the base of TV; Refer to the surface of the TV, the TV may break or become damaged. • Lay the TV... actual model names, the "" indicates numbers and/or characters specific to each model. ✍ • Do not remove the Table-Top Stand for Using Sony Wall-Mount Bracket (SU-WL500) − − The TV set must not be sure to read the operating instructions of your TV. • Be sure...
Additional Information for Using Sony® Wall-Mount Bracket (SU-WL500)
Page 5
... Bracket (SU-WL500) varies depending on the TV. Additional Information for Using Sony Wall-Mount Bracket (SU-WL500) − − d Hook Location When installing the TV onto the Base Bracket. Screw and Hook Locations Diagram/Table Model Name Screw Locations XBR-55HX92*/46HX92* e, j KDL-55HX82*/46HX82* e, j KDL-60NX72...
Additional Information for Using Sony® Wall-Mount Bracket (SU-WL500)
Page 7
... Adjust the angles of the top Y and bottom Z arm to fit the corresponding hole, and firmly secure each arm base X is not necessary. Do not attempt to the Instructions for Using Sony Wall-Mount Bracket (SU-WL500) − − CAUTION Be careful not to your fingers when adjusting the angle of...the Mounting Hook using the two screws removed in the previous procedure . Make sure that the two arm bases are screwed in securely. Remove the two screws from the arm base X of the Mounting Hook. Hexagon wrench Soft cloth ✍ • Be sure to adjust the right ...
Additional Information for Using Sony® Wall-Hanging Bracket (SU-WH500)
Page 3
... surface with the Table-Top Stand hanging over the edge of the surface. Table-Top Stand attached to TV. Having the TV face and the base of the TV. be sure to the TV. • Be sure the TV is not attached to read the operating instructions of TV; Additional Information... for its weight. 2 Install the Wire Bracket on the model of your TV's operating instructions for Using Sony Wall-Hanging Bracket (SU-WH500) − − Refer to your TV. • Be sure to remove the joint when the Table-Top Stand is in...
Additional Information for Using Sony® Wall-Mount Bracket (SU-WL700)
Page 2
... Bracket Install the Base Bracket and Mounting Bracket. 1 Open the Wall-Mount Bracket package and check for all the required parts along with the Instructions. 2 Decide where you want to the TV installation dimensions table. Dimension Table Screen center point Unit: inches (mm) Model Name XBR-55HX92* XBR-46HX92* KDL... (1,281) 30 1/2 (774) 42 3/4 (1,084) 26 1/8 (663) 37 3/8 (949) 23 1/8 (587) Screen center dimensions 7/32 (5) 2 1/8 (51) 7/32 (5) 2 1/8 (51) 7/32 (5) 2 1/8 (51) 4 1/8 (103) Length for Using Sony Wall-Mount Bracket (SU-WL700) − −
Additional Information for Using Sony® Wall-Mount Bracket (SU-WL700)
Page 3
... of the surface. be powered on . CAUTION • If pressure or shock is applied to avoid uneven picture uniformity. Having the TV face and the base of the Table-Top Stand on the model of the Mounting Bracket using two screws (+PSW M6 × 16). Screw Mounting Bracket ×2 ×2 ×... the work surface. • When lifting or moving the TV, keep a soft cloth underneath to store the removed screws in the screw holes for Using Sony Wall-Mount Bracket (SU-WL700) − −
Setup Guide (Operating Instructions)
Page 12
3: Connecting the TV ~ • Use an antenna cable connector no greater than 1.5 mm. Projection of the F type plug) 12 Set Top Box 1.5 mm max. (Reference drawing of the inner wire from the connection part must be less than 14 mm thick. • Use an HDMI cable connector within 12 mm (thickness) × 21 mm (width). Shown with a Set Top Box with HDMI connection Shown with a Set Top Box with COMPONENT connection Video/Component Adapter (supplied) Set Top Box Recommendation of the F type plug The one based on the following drawing is recommended about the F type plug.
Setup Guide (Operating Instructions)
Page 21
... on-screen cursor, and confirms the item. 5 OPTIONS Displays a list of convenient functions and menu shortcuts. Rear of Remote Control 21 The menu items vary based on the current input and/or content. 6 Color buttons When the color buttons are explained here.
Setup Guide (Operating Instructions)
Page 23
... can enjoy various applications such as categories. Favorites/History Settings Widgets Provides quick access to the TV. Recommendations Presents recommendations for programs you may like, based on the remote control, following icons are available depending on your TV settings. Applications Qriocity You can select equipment connected to your frequently used and...