
User Guide
Page 68
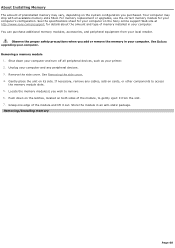
...any peripheral devices. 3. Locate the memory module(s) you add or remove the memory in your printer. 2. Rem ov ing/Installing m em ory Page 68 Removing a memory module 1. See Removing the side cover. 4. For memory replacement or upgrades, use the correct memory module for your local retailer. ...the Sony online support Web site at http://www.sony.com/pcsupport, for your computer on its side. About Installing Memory The amount of preinstalled memory may ship with all peripheral devices, such as your computer. Store the module in your computer. Push down your computer and ...
...any peripheral devices. 3. Locate the memory module(s) you add or remove the memory in your printer. 2. Rem ov ing/Installing m em ory Page 68 Removing a memory module 1. See Removing the side cover. 4. For memory replacement or upgrades, use the correct memory module for your local retailer. ...the Sony online support Web site at http://www.sony.com/pcsupport, for your computer on its side. About Installing Memory The amount of preinstalled memory may ship with all peripheral devices, such as your computer. Store the module in your computer. Push down your computer and ...

User Guide
Page 69
... peripheral devices. 3. Page 69 The latches snap into place. 9. Replace the side cover. Firmly insert the bottom edge of the module to align it by the edges. 6. Installing a memory module 1. Press down your computer and turn off all peripheral devices, such as your computer and any components or add-on the bottom edge of...
... peripheral devices. 3. Page 69 The latches snap into place. 9. Replace the side cover. Firmly insert the bottom edge of the module to align it by the edges. 6. Installing a memory module 1. Press down your computer and turn off all peripheral devices, such as your computer and any components or add-on the bottom edge of...
User Guide
Page 70
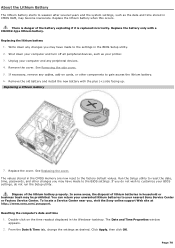
... CMOS memory are now reset to the factory default values. If necessary, remove any changes you do not wish to customize your nearest Sony Service Center or Factory Service Center. Replace the battery only with the plus (+) side facing up. Write down your computer and ...turn off all peripheral devices, such as your computer and any peripheral devices. 4. See Replacing the cover. Dispose of the...
... CMOS memory are now reset to the factory default values. If necessary, remove any changes you do not wish to customize your nearest Sony Service Center or Factory Service Center. Replace the battery only with the plus (+) side facing up. Write down your computer and ...turn off all peripheral devices, such as your computer and any peripheral devices. 4. See Replacing the cover. Dispose of the...

User Guide
Page 73
... an extended partition in the Windows taskbar, then right-click My Computer. Reconnect the SATA signal cable and power connectors to the new drive. See Replacing the cover. 16. The Computer Management window appears. 4. The Windows® XP operating system recognizes...shortcut menu. 7. The New Partition wizard appears. 8. Replace the side cover. Reconnect the power cord to the new drive, following the instructions supplied with memory card readers. Connect the second power connector to your computer's hardware configuration. From the shortcut menu, select Initialize ...
... an extended partition in the Windows taskbar, then right-click My Computer. Reconnect the SATA signal cable and power connectors to the new drive. See Replacing the cover. 16. The Computer Management window appears. 4. The Windows® XP operating system recognizes...shortcut menu. 7. The New Partition wizard appears. 8. Replace the side cover. Reconnect the power cord to the new drive, following the instructions supplied with memory card readers. Connect the second power connector to your computer's hardware configuration. From the shortcut menu, select Initialize ...


