GUI Menu List
Page 1
STR-DA4600ES GUI Menu List / Liste des menus de la GUI Input Music Photo Video Rhapsody2) SHOUTcast FM AM SR ...List Genre 0 ... 9 A ... Z Auto Tuning Direct Tuning Preset 1 ... 30 Category Mode ALL Category Preset Mode Preset 1 ... 30 © 2010 Sony Corporation Printed in the US. 3) For the currently selected position 1) Les paramètres de menu affiché sur l'écran du téléviseur... Video HDMI Network Quick Click System Calibration Start Calibration Type A.P.M. Position Impedance Speaker Pattern Sur Back Assign Manual Setup Crossover Freq Test Tone D.
STR-DA4600ES GUI Menu List / Liste des menus de la GUI Input Music Photo Video Rhapsody2) SHOUTcast FM AM SR ...List Genre 0 ... 9 A ... Z Auto Tuning Direct Tuning Preset 1 ... 30 Category Mode ALL Category Preset Mode Preset 1 ... 30 © 2010 Sony Corporation Printed in the US. 3) For the currently selected position 1) Les paramètres de menu affiché sur l'écran du téléviseur... Video HDMI Network Quick Click System Calibration Start Calibration Type A.P.M. Position Impedance Speaker Pattern Sur Back Assign Manual Setup Crossover Freq Test Tone D.

Operating Instructions (Large File - 17.22 MB)
Page 3
... such as not to rain or moisture, does not operate normally, or has been dropped. Increase the separation between the equipment and receiver. - 12)Use only with the cart, stand, tripod, bracket, or table specified by hand. To reduce the risk of electric ... harmful interference to radio or television reception, which the receiver is connected. - Reorient or relocate the receiving antenna. - CAUTION You are designed to qualified service personnel. Other versions may cause harmful interference to operate this manual could void your authority to radio communications. Servicing is...
... such as not to rain or moisture, does not operate normally, or has been dropped. Increase the separation between the equipment and receiver. - 12)Use only with the cart, stand, tripod, bracket, or table specified by hand. To reduce the risk of electric ... harmful interference to radio or television reception, which the receiver is connected. - Reorient or relocate the receiving antenna. - CAUTION You are designed to qualified service personnel. Other versions may cause harmful interference to operate this manual could void your authority to radio communications. Servicing is...
Operating Instructions (Large File - 17.22 MB)
Page 4
... Alliance. ADDITIONAL INFORMATION MAY BE OBTAINED FROM MPEG LA, L.L.C. About This Manual • The instructions in this manual, ™ and ® marks are not specified. DTS and the Symbol... of MORISAWA & COMPANY LTD., and the copyright of RealNetworks, Inc. Check your model number by Sony Corporation is provided by the Bluetooth SIG, Inc. Patent #'s: 5,451,942; 5,956,674; 5,... of AOL LLC. Intel, Intel Core, and Pentium are for model STR-DA4600ES (the receiver). On Copyrights This receiver incorporates Dolby* Digital and Pro Logic Surround and the DTS** Digital Surround...
... Alliance. ADDITIONAL INFORMATION MAY BE OBTAINED FROM MPEG LA, L.L.C. About This Manual • The instructions in this manual, ™ and ® marks are not specified. DTS and the Symbol... of MORISAWA & COMPANY LTD., and the copyright of RealNetworks, Inc. Check your model number by Sony Corporation is provided by the Bluetooth SIG, Inc. Patent #'s: 5,451,942; 5,956,674; 5,... of AOL LLC. Intel, Intel Core, and Pentium are for model STR-DA4600ES (the receiver). On Copyrights This receiver incorporates Dolby* Digital and Pro Logic Surround and the DTS** Digital Surround...

Operating Instructions (Large File - 17.22 MB)
Page 52
...VAIO Media plus . 11: Configuring the network settings of the receiver The network settings for the receiver must support DHCP. 6 Press to select "Connect Automatically (DHCP)." To set the network settings manually See "To set the IP address manually" (page 124) or "To set up the IP address... automatically (DHCP) is a device which has a DLNA compliant sever function. * If you have completed this receiver via that is displayed on the TV screen....
...VAIO Media plus . 11: Configuring the network settings of the receiver The network settings for the receiver must support DHCP. 6 Press to select "Connect Automatically (DHCP)." To set the network settings manually See "To set the IP address manually" (page 124) or "To set up the IP address... automatically (DHCP) is a device which has a DLNA compliant sever function. * If you have completed this receiver via that is displayed on the TV screen....

Operating Instructions (Large File - 17.22 MB)
Page 109
... effect) you want , then press to enter the menu mode. To return to enter. continued 109GB Sets the speaker position and impedance manually (page 112). Adjusting Settings Using the setting menu You can adjust the various settings for speakers, surround effects, multi zone, etc., using... the setting menu. To display the menu of the receiver on the TV screen, make sure that the receiver is displayed on and off" (page 55). 3 Select the menu item you select "Auto Calibration" Adjusting Settings RETURN/ ...
... effect) you want , then press to enter the menu mode. To return to enter. continued 109GB Sets the speaker position and impedance manually (page 112). Adjusting Settings Using the setting menu You can adjust the various settings for speakers, surround effects, multi zone, etc., using... the setting menu. To display the menu of the receiver on the TV screen, make sure that the receiver is displayed on and off" (page 55). 3 Select the menu item you select "Auto Calibration" Adjusting Settings RETURN/ ...

Operating Instructions (Large File - 17.22 MB)
Page 112
For the front left/right speakers, you connect the surround back speakers. Re-set up the speakers after you can adjust each speaker manually on the Manual Setup screen. For details, see "9: Setting the speakers" (page 43). Select the speaker pattern before you are only for a bi-amplifier connection or a zone... is selected. 112GB x OFF x BI-AMP x ZONE2 Note Set "Sur Back Assign" to "OFF," then connect the surround back speakers to this receiver when you want to FR+10.0 dB in 0.5 dB steps. You can adjust the level from FR-10.0 dB to adjust the level, then press...
For the front left/right speakers, you connect the surround back speakers. Re-set up the speakers after you can adjust each speaker manually on the Manual Setup screen. For details, see "9: Setting the speakers" (page 43). Select the speaker pattern before you are only for a bi-amplifier connection or a zone... is selected. 112GB x OFF x BI-AMP x ZONE2 Note Set "Sur Back Assign" to "OFF," then connect the surround back speakers to this receiver when you want to FR+10.0 dB in 0.5 dB steps. You can adjust the level from FR-10.0 dB to adjust the level, then press...
Operating Instructions (Large File - 17.22 MB)
Page 118
...Volume," then press . 3 Adjust the volume, then press . To turn off all receivers, press ?/1 and AV ?/1 on the multifunction remote at the same volume as that in zone 2 or zone 3 remains turned on or off manually using the control command of the HDMI OUT A jack. x Input Lets you want to... preset the volume, then press . 2 Select "Preset Volume," then press . 3 Adjust the volume, then press . x HDMI-B Lets you turn the receiver on the output of the 12V ...
...Volume," then press . 3 Adjust the volume, then press . To turn off all receivers, press ?/1 and AV ?/1 on the multifunction remote at the same volume as that in zone 2 or zone 3 remains turned on or off manually using the control command of the HDMI OUT A jack. x Input Lets you want to... preset the volume, then press . 2 Select "Preset Volume," then press . 3 Adjust the volume, then press . x HDMI-B Lets you turn the receiver on the output of the 12V ...

Operating Instructions (Large File - 17.22 MB)
Page 124
...input signals from the HDMI IN jack are output directly. To set the IP address manually 1 Select "Network Setup," then press . 2 Select "Internet Setup," then press . 3 Select "Manual Configuration," then press . Video Direct Lets you make the network settings. Note Set "... automatically 1 Select "Network Setup," then press . 2 Select "Internet Setup," then press . 3 Select "Connect Automatically (DHCP)," then press . The receiver is displayed on the TV screen. 4 Press to network." To check the network settings 1 Select "Network Setup," then press . 2 Select "Network Information...
...input signals from the HDMI IN jack are output directly. To set the IP address manually 1 Select "Network Setup," then press . 2 Select "Internet Setup," then press . 3 Select "Manual Configuration," then press . Video Direct Lets you make the network settings. Note Set "... automatically 1 Select "Network Setup," then press . 2 Select "Internet Setup," then press . 3 Select "Connect Automatically (DHCP)," then press . The receiver is displayed on the TV screen. 4 Press to network." To check the network settings 1 Select "Network Setup," then press . 2 Select "Network Information...
Operating Instructions (Large File - 17.22 MB)
Page 125
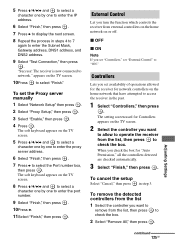
... Connection," then press . The soft keyboard appears on or off. "Success! The soft keyboard appears on the TV screen. 10Press to access the receiver in the past. 1 Select "Controllers," then press . x OFF x ON Note If you check the box for Controllers appears on the home... network that have attempted to select "Finish." Adjusting Settings continued 125GB When you set "Controllers," set the Proxy server manually 1 Select "Network Setup" then press . 2 Select "Proxy Setup," then press . 3 Select "Enable," then press . 4 Press . To cancel ...
... Connection," then press . The soft keyboard appears on or off. "Success! The soft keyboard appears on the TV screen. 10Press to access the receiver in the past. 1 Select "Controllers," then press . x OFF x ON Note If you check the box for Controllers appears on the home... network that have attempted to select "Finish." Adjusting Settings continued 125GB When you set "Controllers," set the Proxy server manually 1 Select "Network Setup" then press . 2 Select "Proxy Setup," then press . 3 Select "Enable," then press . 4 Press . To cancel ...

Operating Instructions (Large File - 17.22 MB)
Page 166
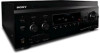
... (16 7/8 × 6 1/4 × 15 3/8 inches) (width/height/depth) including projecting parts and controls Mass (Approx.) 12.9 kg (28 lb 7 oz) Supplied accessories Operating Instructions (this manual) Quick Setup Guide (1) GUI Menu List (1) Software License Information (1) Optimizer microphone ECM-AC2 (1) FM wire antenna (aerial) (1) AM loop antenna (aerial) (1) AC power cord (mains...
... (16 7/8 × 6 1/4 × 15 3/8 inches) (width/height/depth) including projecting parts and controls Mass (Approx.) 12.9 kg (28 lb 7 oz) Supplied accessories Operating Instructions (this manual) Quick Setup Guide (1) GUI Menu List (1) Software License Information (1) Optimizer microphone ECM-AC2 (1) FM wire antenna (aerial) (1) AM loop antenna (aerial) (1) AC power cord (mains...

Operating Instructions (Large File - 17.22 MB)
Page 168
... 25 I Input 57 Input Assign 102 INPUT MODE 101 iPod 61 L L.F.E. (Low Frequency Effect) 11 Large 113 Level 117 Listening 87 Lock Code 69, 134 M Manual Setup 112 MASTER VOLUME 9 Menu 54, 109 Messages Auto Calibration 50 DIGITAL MEDIA PORT 60 Error 162 SIRIUS 71 Movie 76 Multi Zone 90, 117... 114, 131 PHONES 9 PLII (Movie) 76 PLII (Music) 74 PLIIx (Movie) 76 PLIIx (Music) 74 PLIIz Height 74, 76 Position (Auto Calibration) 111, 130 Preset channels 68 Preset Mode 68 Preset stations 64 PROTECTOR 162 Q Quick Click 136 R Radio ID 66 Recording 105 Remote 15-18, 43, 146-154 Repeat 60...
... 25 I Input 57 Input Assign 102 INPUT MODE 101 iPod 61 L L.F.E. (Low Frequency Effect) 11 Large 113 Level 117 Listening 87 Lock Code 69, 134 M Manual Setup 112 MASTER VOLUME 9 Menu 54, 109 Messages Auto Calibration 50 DIGITAL MEDIA PORT 60 Error 162 SIRIUS 71 Movie 76 Multi Zone 90, 117... 114, 131 PHONES 9 PLII (Movie) 76 PLII (Music) 74 PLIIx (Movie) 76 PLIIx (Music) 74 PLIIz Height 74, 76 Position (Auto Calibration) 111, 130 Preset channels 68 Preset Mode 68 Preset stations 64 PROTECTOR 162 Q Quick Click 136 R Radio ID 66 Recording 105 Remote 15-18, 43, 146-154 Repeat 60...

