Operating Instructions (Large File - 15.18 MB)
Page 2
...shall not be unplugged from that interference will not occur in a residential installation. Refer to them whenever you call upon your Sony dealer regarding this system so that may cause harmful interference to radio communications. Model No Serial No This symbol is intended to... operating and maintenance (servicing) instructions in cabinet. WARNING This equipment has been tested and found to comply with liquids, such as vases, on the apparatus. Increase the separation between the equipment and receiver. - To prevent fire, do not cover the ventilation of the apparatus with...
...shall not be unplugged from that interference will not occur in a residential installation. Refer to them whenever you call upon your Sony dealer regarding this system so that may cause harmful interference to radio communications. Model No Serial No This symbol is intended to... operating and maintenance (servicing) instructions in cabinet. WARNING This equipment has been tested and found to comply with liquids, such as vases, on the apparatus. Increase the separation between the equipment and receiver. - To prevent fire, do not cover the ventilation of the apparatus with...
Operating Instructions (Large File - 15.18 MB)
Page 44
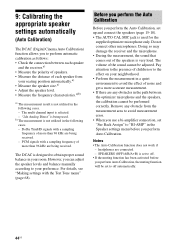
The multi channel input is very loud. PCM signals with the Test Tone menu" (page 68). Remove any obstacles in your seating position automatically.a) • Measure the speaker size.a) • Adjust the speaker level. • Measure the ... the muting function has been activated before you perform Auto Calibration. headphones are being used for the supplied optimizer microphone only. b) The measurement is being received. For details, see "Making settings with a sampling frequency of noise and get a more than 96 kHz are any obstacle from your room. Before you ...
The multi channel input is very loud. PCM signals with the Test Tone menu" (page 68). Remove any obstacles in your seating position automatically.a) • Measure the speaker size.a) • Adjust the speaker level. • Measure the ... the muting function has been activated before you perform Auto Calibration. headphones are being used for the supplied optimizer microphone only. b) The measurement is being received. For details, see "Making settings with a sampling frequency of noise and get a more than 96 kHz are any obstacle from your room. Before you ...
Operating Instructions (Large File - 15.18 MB)
Page 47
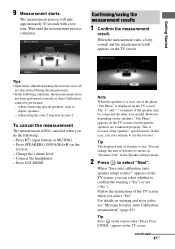
...a beep sounds and the measurement result appears on the TV screen. Press GUI MODE. In this case, you can select whether to use the receiver. You can continue to confirm the warning ("Yes") or not ("No"). The measurement process will be performed. - Tips • Operations other way.... When "Save auto calibration (auto speaker setup) results?" To cancel the measurement The measurement will take approximately 30 seconds with a test tone. Press ?/1, input buttons or MUTING. - appears on warning and error codes, see "Message list after Auto Calibration measurement" (page 49).
...a beep sounds and the measurement result appears on the TV screen. Press GUI MODE. In this case, you can select whether to use the receiver. You can continue to confirm the warning ("Yes") or not ("No"). The measurement process will be performed. - Tips • Operations other way.... When "Save auto calibration (auto speaker setup) results?" To cancel the measurement The measurement will take approximately 30 seconds with a test tone. Press ?/1, input buttons or MUTING. - appears on warning and error codes, see "Message list after Auto Calibration measurement" (page 49).
Operating Instructions (Large File - 15.18 MB)
Page 68
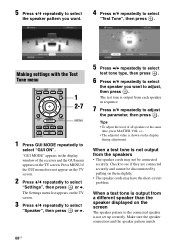
... press . 6 Press V/v repeatedly to select the speaker you want to adjust, then press . Tips • To adjust the level of the receiver and the GUI menu appears on the screen The speaker pattern to the connected speaker is not output from the speakers • The speaker cords ...from a different speaker than the speaker displayed on the TV screen. "GUI MODE" appears in sequence. 7 Press V/v repeatedly to select "GUI ON". The test tone is shown on the TV screen. 2 Press V/v repeatedly to select "Settings", then press or b. Make sure the speaker connection and the speaker pattern ...
... press . 6 Press V/v repeatedly to select the speaker you want to adjust, then press . Tips • To adjust the level of the receiver and the GUI menu appears on the screen The speaker pattern to the connected speaker is not output from the speakers • The speaker cords ...from a different speaker than the speaker displayed on the TV screen. "GUI MODE" appears in sequence. 7 Press V/v repeatedly to select "GUI ON". The test tone is shown on the TV screen. 2 Press V/v repeatedly to select "Settings", then press or b. Make sure the speaker connection and the speaker pattern ...
Operating Instructions (Large File - 15.18 MB)
Page 69
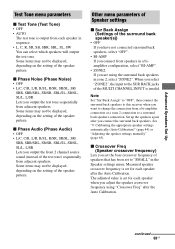
... Back Assign" to "OFF", then connect the surround back speakers to this receiver when you want to a surround back speakers connection. Some items may not be displayed, depending on the setting of the MULTI CHANNEL INPUT is set for each speaker after you connect the surround back speakers. ...that has been set to the SUR BACK jacks of the speaker pattern. Advanced Speakers Set Up Test Tone menu parameters x Test Tone (Test Tone) • OFF • AUTO The test tone is set for each speaker when you adjust the speaker crossover frequency using the surround back speakers...
... Back Assign" to "OFF", then connect the surround back speakers to this receiver when you want to a surround back speakers connection. Some items may not be displayed, depending on the setting of the MULTI CHANNEL INPUT is set for each speaker after you connect the surround back speakers. ...that has been set to the SUR BACK jacks of the speaker pattern. Advanced Speakers Set Up Test Tone menu parameters x Test Tone (Test Tone) • OFF • AUTO The test tone is set for each speaker when you adjust the speaker crossover frequency using the surround back speakers...

Operating Instructions (Large File - 15.18 MB)
Page 110
... start [] [A.CAL START] Calibration type [CAL TYPE] FULL FLAT, ENGINEER, FRONT REF, OFF Position [POSITION] POS 3, POS 2, POS 1 Level Settings [] Naming Inputs [NAME IN] Test tone [TEST TONE] For details, see page 41. OFF, FIX xxxa), AUTO xxxa) Phase noise [P. AUTO, COMP. MAX, COMP. OFF Initial Setting FULL FLAT POS 1 OFF OFF...
... start [] [A.CAL START] Calibration type [CAL TYPE] FULL FLAT, ENGINEER, FRONT REF, OFF Position [POSITION] POS 3, POS 2, POS 1 Level Settings [] Naming Inputs [NAME IN] Test tone [TEST TONE] For details, see page 41. OFF, FIX xxxa), AUTO xxxa) Phase noise [P. AUTO, COMP. MAX, COMP. OFF Initial Setting FULL FLAT POS 1 OFF OFF...

Operating Instructions (Large File - 15.18 MB)
Page 143
... CD player 21, 23, 24, 52 Sur Back Assign 69 Surround Settings 112 System (Settings) 58, 113 System Audio Control 89 System Power Off 89 T Test Tone 68, 69, 110 Tuner 71 Tuner (Settings) 112 Tuning 71, 72, 73 U Up converting 33 V VCR 32, 55 Video (Settings) 57, 113 Video game...
... CD player 21, 23, 24, 52 Sur Back Assign 69 Surround Settings 112 System (Settings) 58, 113 System Audio Control 89 System Power Off 89 T Test Tone 68, 69, 110 Tuner 71 Tuner (Settings) 112 Tuning 71, 72, 73 U Up converting 33 V VCR 32, 55 Video (Settings) 57, 113 Video game...
