Instruction Manual
Page 1
... at our Customer Support Website. Printed in Japan US 2-319-777-11(1) Digital HD Video Camera Recorder Operating Guide HDR-UX5/UX7 Enjoying Your Camcorder 13 Getting Started 20 Recording/Playback 30 Editing 48 Utilizing Recording Media 56 Customizing Your 65 Camcorder Using a Computer 86 Troubleshooting 91 Additional Information 103 Quick Reference 118 Spanish Quick Guide/ 130 Guía rápida en español © 2007 Sony Corporation Additional information...
... at our Customer Support Website. Printed in Japan US 2-319-777-11(1) Digital HD Video Camera Recorder Operating Guide HDR-UX5/UX7 Enjoying Your Camcorder 13 Getting Started 20 Recording/Playback 30 Editing 48 Utilizing Recording Media 56 Customizing Your 65 Camcorder Using a Computer 86 Troubleshooting 91 Additional Information 103 Quick Reference 118 Spanish Quick Guide/ 130 Guía rápida en español © 2007 Sony Corporation Additional information...
Instruction Manual
Page 4
... original parts. When the power cord or plug is in safe operating condition. 4 Servicing Do not attempt to service the set yourself as specified by a qualified technician to restore the set to normal operation. - IMPORTANT SAFEGUARDS (Continued) Lightning For added protection for this indicates a need for long periods of any service or repairs to the set, ask the service technician to perform routine safety checks (as opening or removing...
... original parts. When the power cord or plug is in safe operating condition. 4 Servicing Do not attempt to service the set yourself as specified by a qualified technician to restore the set to normal operation. - IMPORTANT SAFEGUARDS (Continued) Lightning For added protection for this indicates a need for long periods of any service or repairs to the set, ask the service technician to perform routine safety checks (as opening or removing...
Instruction Manual
Page 6
... before operating your camcorder. • Using a disc other than above may cause the unsatisfactory recording/playback or you can use Your camcorder is supplied with an *(for VIDEO CAMERA) mark for your camcorder (Continued) Note This equipment has been tested and found to comply with the limits for a digital device pursuant to Subpart B of Part 15 of operations guides. - This equipment generates, uses, and can be used in...
... before operating your camcorder. • Using a disc other than above may cause the unsatisfactory recording/playback or you can use Your camcorder is supplied with an *(for VIDEO CAMERA) mark for your camcorder (Continued) Note This equipment has been tested and found to comply with the limits for a digital device pursuant to Subpart B of Part 15 of operations guides. - This equipment generates, uses, and can be used in...
Instruction Manual
Page 8
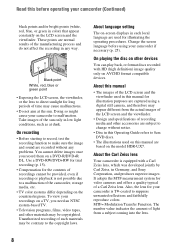
... screen language before operating your camcorder (Continued) black points and/or bright points (white, red, blue, or green in color) that appear constantly on AVCHD format compatible devices. Use a DVD-RW/DVD+RW for trial recording (p. 15). • Compensation for illustrating the operating procedures. Unauthorized recording of a Carl Zeiss lens. About language setting The on-screen displays in Germany, and Sony Corporation, and produces superior images. On playing the disc on other devices You can play back, or format discs recorded...
... screen language before operating your camcorder (Continued) black points and/or bright points (white, red, blue, or green in color) that appear constantly on AVCHD format compatible devices. Use a DVD-RW/DVD+RW for trial recording (p. 15). • Compensation for illustrating the operating procedures. Unauthorized recording of a Carl Zeiss lens. About language setting The on-screen displays in Germany, and Sony Corporation, and produces superior images. On playing the disc on other devices You can play back, or format discs recorded...
Instruction Manual
Page 10
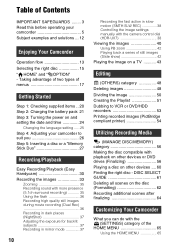
... operating your camcorder to VCR or DVD/HDD recorders 53 Printing recorded images (PictBridge compliant printer 54 Utilizing Recording Media (MANAGE DISC/MEMORY) category 56 Making the disc compatible with the (SETTINGS) category of the HOME MENU 65 Using the HOME MENU 65 Taking advantage of two types of menus 17 Getting Started Step 1: Checking supplied items .. 20 Step 2: Charging the battery pack 21 Step 3: Turning the power on and setting the date and time 24 Changing the language setting...
... operating your camcorder to VCR or DVD/HDD recorders 53 Printing recorded images (PictBridge compliant printer 54 Utilizing Recording Media (MANAGE DISC/MEMORY) category 56 Making the disc compatible with the (SETTINGS) category of the HOME MENU 65 Using the HOME MENU 65 Taking advantage of two types of menus 17 Getting Started Step 1: Checking supplied items .. 20 Step 2: Charging the battery pack 21 Step 3: Turning the power on and setting the date and time 24 Changing the language setting...
Instruction Manual
Page 11
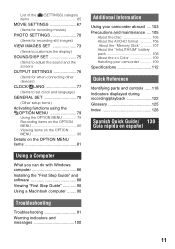
... ........ 90 Troubleshooting Troubleshooting 91 Warning indicators and messages 100 Additional Information Using your camcorder abroad ....103 Precautions and maintenance ....105 About the Disc 105 About the AVCHD format 106 About the "Memory Stick 107 About the "InfoLITHIUM" battery pack 108 About the x.v.Color 109 Handling your camcorder 109 Specifications 112 Quick Reference Identifying parts and controls ......118 Indicators displayed during recording/playback 122 Glossary 125 Index 126 Spanish Quick Guide/ 130...
... ........ 90 Troubleshooting Troubleshooting 91 Warning indicators and messages 100 Additional Information Using your camcorder abroad ....103 Precautions and maintenance ....105 About the Disc 105 About the AVCHD format 106 About the "Memory Stick 107 About the "InfoLITHIUM" battery pack 108 About the x.v.Color 109 Handling your camcorder 109 Specifications 112 Quick Reference Identifying parts and controls ......118 Indicators displayed during recording/playback 122 Glossary 125 Index 126 Spanish Quick Guide/ 130...
Instruction Manual
Page 23
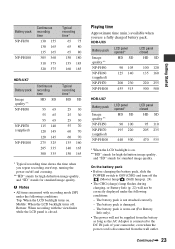
... * Typical recording time shows the time when you use a fully charged battery pack. Middle: When the LCD backlight turns off the (Movie) lamp/ (Still) lamp (p. 24). • The CHG (charge) lamp flashes during charging, or Battery Info (p. 22) will not be correctly displayed under the following conditions: - Playing time Approximate time (min.) available when you repeat recording start/stop, turning the power on/off and zooming. **"HD" stands for high definition image quality...
... * Typical recording time shows the time when you use a fully charged battery pack. Middle: When the LCD backlight turns off the (Movie) lamp/ (Still) lamp (p. 24). • The CHG (charge) lamp flashes during charging, or Battery Info (p. 22) will not be correctly displayed under the following conditions: - Playing time Approximate time (min.) available when you repeat recording start/stop, turning the power on/off and zooming. **"HD" stands for high definition image quality...

Instruction Manual
Page 25
... not use your camcorder to be displayed during recording, but they are automatically recorded on the disc, and can be ready to shoot after the power is correctly set, then touch . z Tips • The date and time does not appear during playback ([DATA CODE], p. 73). • Refer to page 104 for some models. • If the buttons on . To turn off automatically if you do not work correctly, adjust...
... not use your camcorder to be displayed during recording, but they are automatically recorded on the disc, and can be ready to shoot after the power is correctly set, then touch . z Tips • The date and time does not appear during playback ([DATA CODE], p. 73). • Refer to page 104 for some models. • If the buttons on . To turn off automatically if you do not work correctly, adjust...

Instruction Manual
Page 30
... the POWER switch is set to adjust the focus. The screen font size increases for easy viewing. appears on the screen. Recording/Playback Easy Recording/Playback (Easy Handycam) With this Easy Handycam operation, most of the camera settings are recorded in [SP] mode. 30 Flashing t Lit **Still images are automatically optimally adjusted, which frees you from detailed adjustments. Press fully to OFF (CHG), slide it again. * Movies are recorded in [FINE] quality. HDR-UX5 Movies 1 Slide the POWER switch G to light up the (Movie...
... the POWER switch is set to adjust the focus. The screen font size increases for easy viewing. appears on the screen. Recording/Playback Easy Recording/Playback (Easy Handycam) With this Easy Handycam operation, most of the camera settings are recorded in [SP] mode. 30 Flashing t Lit **Still images are automatically optimally adjusted, which frees you from detailed adjustments. Press fully to OFF (CHG), slide it again. * Movies are recorded in [FINE] quality. HDR-UX5 Movies 1 Slide the POWER switch G to light up the (Movie...
Instruction Manual
Page 43
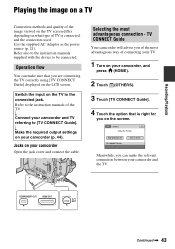
... way of connecting your TV. 1 Turn on your camcorder and TV referring to the connected jack. Recording/Playback Playing the image on a TV Connection methods and quality of the image viewed on the TV screen differ depending on what type of TV is right for you on the screen. Switch the input on your camcorder (p. 44). Meanwhile, you are connecting the TV correctly using [TV CONNECT Guide] displayed on the LCD screen. Operation flow You...
... way of connecting your TV. 1 Turn on your camcorder and TV referring to the connected jack. Recording/Playback Playing the image on a TV Connection methods and quality of the image viewed on the TV screen differ depending on what type of TV is right for you on the screen. Switch the input on your camcorder (p. 44). Meanwhile, you are connecting the TV correctly using [TV CONNECT Guide] displayed on the LCD screen. Operation flow You...
Instruction Manual
Page 53
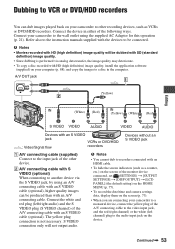
... (Yellow) IN (White) (Red) IN (Yellow) (White) (Red) S VIDEO VIDEO AUDIO VIDEO AUDIO Devices with an HDMI cable. • To hide the screen indicators (such as a counter, etc.) on the screen of the monitor device connected, set (SETTINGS) t [OUTPUT SETTINGS] t [DISP OUTPUT] t [LCD PANEL] (the default setting) on the HOME MENU (p. 77). • To record the date/time and camera settings data, display them on the screen (p. 73). • When you are connecting your camcorder to the wall outlet using an A/V connecting cable with SD (standard...
... (Yellow) IN (White) (Red) IN (Yellow) (White) (Red) S VIDEO VIDEO AUDIO VIDEO AUDIO Devices with an HDMI cable. • To hide the screen indicators (such as a counter, etc.) on the screen of the monitor device connected, set (SETTINGS) t [OUTPUT SETTINGS] t [DISP OUTPUT] t [LCD PANEL] (the default setting) on the HOME MENU (p. 77). • To record the date/time and camera settings data, display them on the screen (p. 73). • When you are connecting your camcorder to the wall outlet using an A/V connecting cable with SD (standard...
Instruction Manual
Page 55
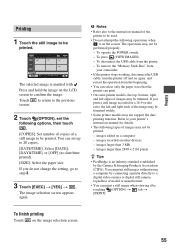
... setting, go to step 3. 3 Touch [EXEC] t [YES] t . images recorded on the image selection screen. 55 To press (VIEW IMAGES) - You can print still images without using a computer by connecting a printer directly to a digital video camera or digital still camera, regardless of the image may be printed. To disconnect the USB cable from your printer's instruction manual for details. • The following operations when is marked with . images edited on the LCD screen to confirm the image. images...
... setting, go to step 3. 3 Touch [EXEC] t [YES] t . images recorded on the image selection screen. 55 To press (VIEW IMAGES) - You can print still images without using a computer by connecting a printer directly to a digital video camera or digital still camera, regardless of the image may be printed. To disconnect the USB cable from your printer's instruction manual for details. • The following operations when is marked with . images edited on the LCD screen to confirm the image. images...
Instruction Manual
Page 68
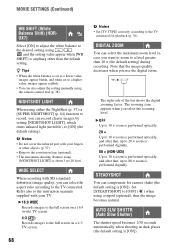
... the white balance is [ON]). Refer also to the instruction manuals supplied with your fingers or other than 10 × (the default setting) during recording. DIGITAL ZOOM You can record clearer images by setting [NIGHTSHOT LIGHT], which emits infrared light (invisible), to [ON] (the default setting). The right side of the bar shows the digital zooming factor. AUTO SLW SHUTTR (Auto Slow Shutter) The shutter speed becomes 1/30 seconds automatically when shooting in...
... the white balance is [ON]). Refer also to the instruction manuals supplied with your fingers or other than 10 × (the default setting) during recording. DIGITAL ZOOM You can record clearer images by setting [NIGHTSHOT LIGHT], which emits infrared light (invisible), to [ON] (the default setting). The right side of the bar shows the digital zooming factor. AUTO SLW SHUTTR (Auto Slow Shutter) The shutter speed becomes 1/30 seconds automatically when shooting in...
Instruction Manual
Page 69
... the movie recording mode on the screen. b Notes • When the remaining recordable time for about 8 seconds in portions of the screen where brightness is played back on a device with HD (high definition) image quality can be set to [OFF] (the default setting). • If the movies recorded with the POWER switch set to [ON] to capture wider range of the guide frame makes a balanced composition. b Notes • Discs recorded with a subtitle display function...
... the movie recording mode on the screen. b Notes • When the remaining recordable time for about 8 seconds in portions of the screen where brightness is played back on a device with HD (high definition) image quality can be set to [OFF] (the default setting). • If the movies recorded with the POWER switch set to [ON] to capture wider range of the guide frame makes a balanced composition. b Notes • Discs recorded with a subtitle display function...
Instruction Manual
Page 82
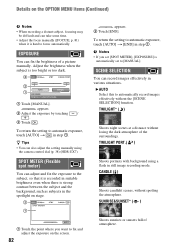
... on the OPTION MENU items (Continued) b Notes • When recording a distant subject, focusing may be difficult and can also adjust the setting manually using a flash in step 1. Adjust the brightness when the subject is automatically set to fix and adjust the exposure on the screen. 82 Shoots sunrises or sunsets full of the surroundings. CANDLE ( ) Shoots candlelit scenes, without the [SCENE SELECTION] function. Details on stage...
... on the OPTION MENU items (Continued) b Notes • When recording a distant subject, focusing may be difficult and can also adjust the setting manually using a flash in step 1. Adjust the brightness when the subject is automatically set to fix and adjust the exposure on the screen. 82 Shoots sunrises or sunsets full of the surroundings. CANDLE ( ) Shoots candlelit scenes, without the [SCENE SELECTION] function. Details on stage...
Instruction Manual
Page 91
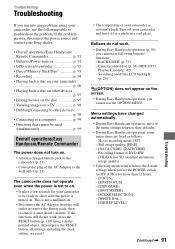
... operations/Easy Handycam/Remote Commander The power does not turn on your camcorder, use the following buttons/ functions. - Movie recording mode: [SP] - Playback zoom (p. 42) - Still image quality: [FINE] - [DATA CODE]: [DATE/TIME] - Recording format of your camcorder is turned on a TV p. 98 • Dubbing/Connecting to other devices p. 98 • Connecting to a computer p. 99 • Functions that cannot be ready to troubleshoot the problem. If the functions still do not work , press the RESET button (p. 119) using your camcorder p. 96 • Playing back a disc...
... operations/Easy Handycam/Remote Commander The power does not turn on your camcorder, use the following buttons/ functions. - Movie recording mode: [SP] - Playback zoom (p. 42) - Still image quality: [FINE] - [DATA CODE]: [DATE/TIME] - Recording format of your camcorder is turned on a TV p. 98 • Dubbing/Connecting to other devices p. 98 • Connecting to a computer p. 99 • Functions that cannot be ready to troubleshoot the problem. If the functions still do not work , press the RESET button (p. 119) using your camcorder p. 96 • Playing back a disc...
Instruction Manual
Page 94
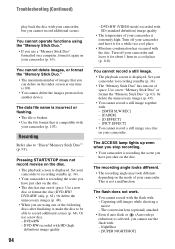
... REC] - [FADER] - [D.EFFECT] - [PICT.EFFECT] • You cannot record a still image on a disc on the index screen at one of space. You cannot record a still image. • The playback screen is not a malfunction. The ACCESS lamp lights up even when you stop recording. • Your camcorder is broken. • Use the file format that you use a "Memory Stick Duo" formatted on the disc. This is displayed. The conversion lens (optional) attached • Even if auto flash...
... REC] - [FADER] - [D.EFFECT] - [PICT.EFFECT] • You cannot record a still image on a disc on the index screen at one of space. You cannot record a still image. • The playback screen is not a malfunction. The ACCESS lamp lights up even when you stop recording. • Your camcorder is broken. • Use the file format that you use a "Memory Stick Duo" formatted on the disc. This is displayed. The conversion lens (optional) attached • Even if auto flash...
Instruction Manual
Page 106
...) video signal shot on a digital video camera recorder to be recorded or played on the AVCHD format, your camcorder. 8 cm DVD-RAM discs cannot be recorded on the printed side using efficient data compression coding technology. Precautions and maintenance (Continued) Care and storage of the discs • Keep the disc clean, or the image quality of the audio and video output may cause a malfunction to the disc. • Do not expose the disc to direct...
...) video signal shot on a digital video camera recorder to be recorded or played on the AVCHD format, your camcorder. 8 cm DVD-RAM discs cannot be recorded on the printed side using efficient data compression coding technology. Precautions and maintenance (Continued) Care and storage of the discs • Keep the disc clean, or the image quality of the audio and video output may cause a malfunction to the disc. • Do not expose the disc to direct...

Instruction Manual
Page 107
... image files on the combination of the "Memory Stick" and "Memory Stick" compliant product you use . x On handling a "Memory Stick" Keep the following cases: • If you eject the "Memory Stick Duo," turn the power off on your camcorder. • Data read/write speed may occur in the JPEG (Joint Photographic Experts Group) format. The speed of data transfer varies depending on the hard disk of a computer. About the "Memory Stick" A "Memory Stick" is a compact, portable IC recording...
... image files on the combination of the "Memory Stick" and "Memory Stick" compliant product you use . x On handling a "Memory Stick" Keep the following cases: • If you eject the "Memory Stick Duo," turn the power off on your camcorder. • Data read/write speed may occur in the JPEG (Joint Photographic Experts Group) format. The speed of data transfer varies depending on the hard disk of a computer. About the "Memory Stick" A "Memory Stick" is a compact, portable IC recording...
Instruction Manual
Page 112
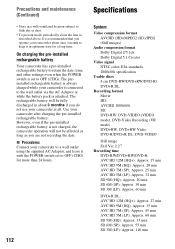
... POWER switch set to OFF (CHG) for a long time. Precautions and maintenance (Continued) • Store in optimum state for more than 24 hours. 112 Specifications System Video compression format AVCHD (HD)/MPEG2 (SD)/JPEG (Still images) Audio compression format Dolby Digital 2/5.1ch Dolby Digital 5.1 Creator Video signal NTSC color, EIA standards 1080i/60i specification Usable discs 8 cm DVD-RW/DVD+RW/DVD-R/ DVD+R DL Recording format Movie HD: AVCHD 1080i/60i SD: DVD-RW: DVD-VIDEO (VIDEO mode), DVD-Video Recording (VR mode) DVD+RW: DVD+RW Video DVD-R/DVD...
... POWER switch set to OFF (CHG) for a long time. Precautions and maintenance (Continued) • Store in optimum state for more than 24 hours. 112 Specifications System Video compression format AVCHD (HD)/MPEG2 (SD)/JPEG (Still images) Audio compression format Dolby Digital 2/5.1ch Dolby Digital 5.1 Creator Video signal NTSC color, EIA standards 1080i/60i specification Usable discs 8 cm DVD-RW/DVD+RW/DVD-R/ DVD+R DL Recording format Movie HD: AVCHD 1080i/60i SD: DVD-RW: DVD-VIDEO (VIDEO mode), DVD-Video Recording (VR mode) DVD+RW: DVD+RW Video DVD-R/DVD...


