Handycam® Handbook
Page 57
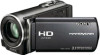
... size of display devices (TV, etc.) is finished, stop the recording device, and then your camcorder, and record it on the recording device. Refer to the audio input jack on the...and the white (left channel) or the red (right channel) plug to the instruction manuals supplied with an HDMI cable. To hide the screen indicators (such as a .... To record the date/time or camera settings data, touch (MENU) [Show others ] [OUTPUT SETTINGS] (under [PLAYBACK] category) [DATA CODE] a desired setting .
... size of display devices (TV, etc.) is finished, stop the recording device, and then your camcorder, and record it on the recording device. Refer to the audio input jack on the...and the white (left channel) or the red (right channel) plug to the instruction manuals supplied with an HDMI cable. To hide the screen indicators (such as a .... To record the date/time or camera settings data, touch (MENU) [Show others ] [OUTPUT SETTINGS] (under [PLAYBACK] category) [DATA CODE] a desired setting .

Handycam® Handbook
Page 61
Menu lists (MANUAL SETTINGS) category SCENE SELECTION 63 FADER 63 WHITE BAL. 64 SPOT MTR/FCS 65 SPOT METER 65 SPOT FOCUS 65 EXPOSURE 65... category VISUAL INDEX 29 VIEW IMAGES DATE INDEX 32 FILM ROLL 32 FACE 33 PLAYLIST 47 HIGHLIGHT 33 SCENARIO 34 PLAYBACK SET / SET 26 DATA CODE 72 (EDIT) category DELETE DELETE 40 DELETE 40 SCENARIO ERASE ERASE 35 ERASE ALL 35 PROTECT PROTECT 41 PROTECT 41 DIVIDE 42 PHOTO CAPTURE.../ ADD 46 ADD by date/ ADD by date 47 ERASE/ ERASE 47 ERASE ALL/ ERASE ALL 47 MOVE/ MOVE 48 Customizing your camcorder US 61
Menu lists (MANUAL SETTINGS) category SCENE SELECTION 63 FADER 63 WHITE BAL. 64 SPOT MTR/FCS 65 SPOT METER 65 SPOT FOCUS 65 EXPOSURE 65... category VISUAL INDEX 29 VIEW IMAGES DATE INDEX 32 FILM ROLL 32 FACE 33 PLAYLIST 47 HIGHLIGHT 33 SCENARIO 34 PLAYBACK SET / SET 26 DATA CODE 72 (EDIT) category DELETE DELETE 40 DELETE 40 SCENARIO ERASE ERASE 35 ERASE ALL 35 PROTECT PROTECT 41 PROTECT 41 DIVIDE 42 PHOTO CAPTURE.../ ADD 46 ADD by date/ ADD by date 47 ERASE/ ERASE 47 ERASE ALL/ ERASE ALL 47 MOVE/ MOVE 48 Customizing your camcorder US 61
Handycam® Handbook
Page 107
...BEEP 76 BLACK FADER 64 BLT-IN ZOOM MIC 69 "BRAVIA" Sync 39 C CALIBRATION 99 CAMERA DATA 72 Capturing a photo from a movie 43 Charging the battery pack..........12 Charging the battery pack abroad ... 15 COMPONENT 77 CONVERSION LENS 68 Copy 45 Creating a disc 51 CTRL FOR HDMI 79 D DATA CODE 16, 72 DATE/TIME 16, 72 Date Index 32 DELETE 40 DEMO MODE 79 DIGITAL ZOOM ...95 MANAGE MEDIA 17, 74 MANUAL SETTINGS 63 MEDIA FORMAT 74 MEDIA INFO 74 MEDIA SETTINGS 17 Memory card 18 "Memory Stick" media.........18, 95 "Memory Stick PRO-HG Duo" media 18, 95 "Memory Stick PRO Duo" media ...
...BEEP 76 BLACK FADER 64 BLT-IN ZOOM MIC 69 "BRAVIA" Sync 39 C CALIBRATION 99 CAMERA DATA 72 Capturing a photo from a movie 43 Charging the battery pack..........12 Charging the battery pack abroad ... 15 COMPONENT 77 CONVERSION LENS 68 Copy 45 Creating a disc 51 CTRL FOR HDMI 79 D DATA CODE 16, 72 DATE/TIME 16, 72 Date Index 32 DELETE 40 DEMO MODE 79 DIGITAL ZOOM ...95 MANAGE MEDIA 17, 74 MANUAL SETTINGS 63 MEDIA FORMAT 74 MEDIA INFO 74 MEDIA SETTINGS 17 Memory card 18 "Memory Stick" media.........18, 95 "Memory Stick PRO-HG Duo" media 18, 95 "Memory Stick PRO Duo" media ...
Operating Guide
Page 55
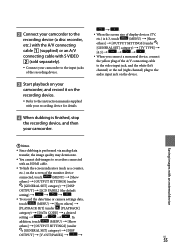
...sold separately). Connect your camcorder to the input jacks of the recording device. Start playback on your recording device for details. When dubbing is 4:3, touch (MENU) [Show others ] [PLAYBACK SET] (under [PLAYBACK] category) [DATA CODE] a desired setting ... (left channel) or the red (right channel) plug to recorders connected with your camcorder, and record it on the recording device. Refer to the instruction manuals supplied with an HDMI cable. To hide the screen indicators (such as ...
...sold separately). Connect your camcorder to the input jacks of the recording device. Start playback on your recording device for details. When dubbing is 4:3, touch (MENU) [Show others ] [PLAYBACK SET] (under [PLAYBACK] category) [DATA CODE] a desired setting ... (left channel) or the red (right channel) plug to recorders connected with your camcorder, and record it on the recording device. Refer to the instruction manuals supplied with an HDMI cable. To hide the screen indicators (such as ...


