
Operating Instructions
Page 2
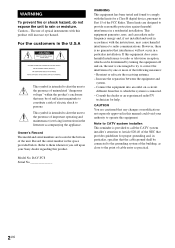
... your authority to radio communications. Owner's Record The model and serial numbers are designed to the presence of optical instruments with this product will not occur in this manual could void your Sony dealer regarding this product. The use of important operating and maintenance (servicing) instructions in the space provided below. Caution - Note to CATV system installer: This reminder is connected. - Increase the separation...
... your authority to radio communications. Owner's Record The model and serial numbers are designed to the presence of optical instruments with this product will not occur in this manual could void your Sony dealer regarding this product. The use of important operating and maintenance (servicing) instructions in the space provided below. Caution - Note to CATV system installer: This reminder is connected. - Increase the separation...
Operating Instructions
Page 4
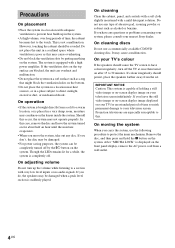
... permanent damage to direct sunlight, excessive dust, or mechanical shock. On cleaning Clean the cabinet, panel, and controls with a soft cloth slightly moistened with a high power amplifier. If you carry the system, use a commercially available CD/DVD cleaning disc. On moving the system When you have colour irregularity, turn off by putting anything on the front panel display, remove the AC power cord from the set.
... permanent damage to direct sunlight, excessive dust, or mechanical shock. On cleaning Clean the cabinet, panel, and controls with a soft cloth slightly moistened with a high power amplifier. If you carry the system, use a commercially available CD/DVD cleaning disc. On moving the system When you have colour irregularity, turn off by putting anything on the front panel display, remove the AC power cord from the set.
Operating Instructions
Page 5
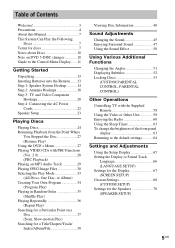
... into the Remote....... 13 Step 1: Speaker System Hookup........... 14 Step 2: Antenna Hookups 18 Step 3: TV and Video Component Hookups 20 Step 4: Connecting the AC Power Cords 22 Speaker Setup 23 Playing Discs Playing Discs 24 Resuming Playback from the Point Where You Stopped the Disc 27 (Resume Play) Using the DVD's Menu 27 Playing VIDEO CDs with PBC Functions (Ver. 2.0 28 (PBC Playback) Playing an MP3 Audio Track 29 Playing JPEG Image Files 30 Selecting the Play Mode 33 (All Discs, One Disc, or...
... into the Remote....... 13 Step 1: Speaker System Hookup........... 14 Step 2: Antenna Hookups 18 Step 3: TV and Video Component Hookups 20 Step 4: Connecting the AC Power Cords 22 Speaker Setup 23 Playing Discs Playing Discs 24 Resuming Playback from the Point Where You Stopped the Disc 27 (Resume Play) Using the DVD's Menu 27 Playing VIDEO CDs with PBC Functions (Ver. 2.0 28 (PBC Playback) Playing an MP3 Audio Track 29 Playing JPEG Image Files 30 Selecting the Play Mode 33 (All Discs, One Disc, or...
Operating Instructions
Page 6
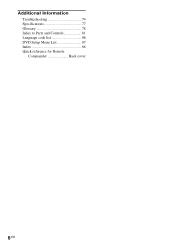
Additional Information Troubleshooting 74 Specifications 77 Glossary 78 Index to Parts and Controls 81 Language code list 86 DVD Setup Menu List 87 Index 88 Quick reference for Remote Commander Back cover 6US
Additional Information Troubleshooting 74 Specifications 77 Glossary 78 Index to Parts and Controls 81 Language code list 86 DVD Setup Menu List 87 Index 88 Quick reference for Remote Commander Back cover 6US

Operating Instructions
Page 20
... connected via VIDEO OUT and AUDIO OUT L/R jacks (VIDEO 1). • When you use this connection and set the system to "PROGRESSIVE" in "SCREEN SETUP" (page 68). 20US If the system is not in "SCREEN SETUP," the signal is not output via an S video jack. Yellow (Video) White (L/audio) Red (R/audio) Terminals for connecting a TV Yellow Audio/video cords (not supplied) When connecting a cord, be sure to match the colour-coded sleeves to "DVD" and "PROGRESSIVE" is selected in 2CH STEREO mode, the line outputs...
... connected via VIDEO OUT and AUDIO OUT L/R jacks (VIDEO 1). • When you use this connection and set the system to "PROGRESSIVE" in "SCREEN SETUP" (page 68). 20US If the system is not in "SCREEN SETUP," the signal is not output via an S video jack. Yellow (Video) White (L/audio) Red (R/audio) Terminals for connecting a TV Yellow Audio/video cords (not supplied) When connecting a cord, be sure to match the colour-coded sleeves to "DVD" and "PROGRESSIVE" is selected in 2CH STEREO mode, the line outputs...

Operating Instructions
Page 45
... stereo sound • 1/L: The sound of the left channel (monaural) • 2/R: The sound of the right channel (monaural) x When playing a Super Audio CD In stop mode, depending on the Super Audio CD, the choice of settings varies. • MULTI: The disc has a multi-channel playback area. • 2CH: The disc has a 2 channel playback area. • CD: When you want to see which language the code represents. Sound Adjustments Sound Adjustments Changing the Sound If a DVD...
... stereo sound • 1/L: The sound of the left channel (monaural) • 2/R: The sound of the right channel (monaural) x When playing a Super Audio CD In stop mode, depending on the Super Audio CD, the choice of settings varies. • MULTI: The disc has a multi-channel playback area. • 2CH: The disc has a 2 channel playback area. • CD: When you want to see which language the code represents. Sound Adjustments Sound Adjustments Changing the Sound If a DVD...

Operating Instructions
Page 47
... DIRECT PRO LOGIC II MUSIC CINEMA STUDIO EX A CINEMA STUDIO EX B CINEMA STUDIO EX C Display A.F.D. EX A* C. THEATER Automatic decoding of the audio input signal (AUTO FORMAT DIRECT AUTO) The auto decoding function automatically detects the type of the measurement and Sony's own DSP (Digital Signal Processor) technology to develop "Digital Cinema Sound." SOUND FIELD +/- ST. Tip When you want to the subwoofer. reverberation). They bring the exciting and powerful sound of the system, select a sound field other than "AUTO FORMAT DIRECT AUTO" or "2 CHANNEL STEREO...
... DIRECT PRO LOGIC II MUSIC CINEMA STUDIO EX A CINEMA STUDIO EX B CINEMA STUDIO EX C Display A.F.D. EX A* C. THEATER Automatic decoding of the audio input signal (AUTO FORMAT DIRECT AUTO) The auto decoding function automatically detects the type of the measurement and Sony's own DSP (Digital Signal Processor) technology to develop "Digital Cinema Sound." SOUND FIELD +/- ST. Tip When you want to the subwoofer. reverberation). They bring the exciting and powerful sound of the system, select a sound field other than "AUTO FORMAT DIRECT AUTO" or "2 CHANNEL STEREO...

Operating Instructions
Page 49
... five output channels from video game software. Multi channel surround formats are downmixed to the PHONES jack Press SOUND FIELD +/- For example, if you select a function such as DVD or TUNER, the sound field that extracts the spatial properties of a jazz club. This mode performs Pro Logic decoding to the input signal and output to DVD with HALL as surround from headphone L/R. x GAME (Game) Obtains maximum audio impact from two-channel sources. Whenever...
... five output channels from video game software. Multi channel surround formats are downmixed to the PHONES jack Press SOUND FIELD +/- For example, if you select a function such as DVD or TUNER, the sound field that extracts the spatial properties of a jazz club. This mode performs Pro Logic decoding to the input signal and output to DVD with HALL as surround from headphone L/R. x GAME (Game) Obtains maximum audio impact from two-channel sources. Whenever...

Operating Instructions
Page 50
... MODE function is activated only when the input stream is Dolby Digital format. • When you press BASS LEVEL, the bass level changes in the following sequence: BASS OFF t BASS 1 t BASS 2 t BASS OFF... NIGHT MODE BASS LEVEL Press NIGHT MODE or BASS LEVEL on the remote repeatedly until "BASS OFF" appears in a movie theatre, even at low volume. Each time you connect the headphones to suit your needs. To turn off the sound effect Press NIGHT MODE on the remote...
... MODE function is activated only when the input stream is Dolby Digital format. • When you press BASS LEVEL, the bass level changes in the following sequence: BASS OFF t BASS 1 t BASS 2 t BASS OFF... NIGHT MODE BASS LEVEL Press NIGHT MODE or BASS LEVEL on the remote repeatedly until "BASS OFF" appears in a movie theatre, even at low volume. Each time you connect the headphones to suit your needs. To turn off the sound effect Press NIGHT MODE on the remote...
Operating Instructions
Page 55
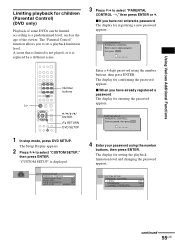
... set a playback limitation level. The "Parental Control" function allows you have not entered a password The display for registering a new password appears. CUSTOM SETUP PARENTAL CONTROL TRACK SELECTION OFF AUDIO DRC: OFF DATA CD PRIORITY: MP3 JPEG DATE: MM/DD/YYYY CUSTOM SETUP PARENTAL CONTROL LEVEL: STANDARD: CHANGE PASSWORD OFF USA continued 55US H C/X/x/c/ ENTER O RETURN DVD SETUP CUSTOM SETUP PARENTAL CONTROL Enter password, then press ENTER . 1 In stop mode, press DVD SETUP. ENTER Enter a 4-digit password using the number buttons...
... set a playback limitation level. The "Parental Control" function allows you have not entered a password The display for registering a new password appears. CUSTOM SETUP PARENTAL CONTROL TRACK SELECTION OFF AUDIO DRC: OFF DATA CD PRIORITY: MP3 JPEG DATE: MM/DD/YYYY CUSTOM SETUP PARENTAL CONTROL LEVEL: STANDARD: CHANGE PASSWORD OFF USA continued 55US H C/X/x/c/ ENTER O RETURN DVD SETUP CUSTOM SETUP PARENTAL CONTROL Enter password, then press ENTER . 1 In stop mode, press DVD SETUP. ENTER Enter a 4-digit password using the number buttons...
Operating Instructions
Page 56
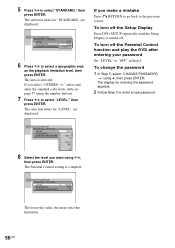
... Control function and play the DVD after entering your password Set "LEVEL" to "OFF" in the table on page 57 using x, then press ENTER. CUSTOM SETUP PARENTAL CONTROL LEVEL: STANDARD: 8: CHANGE PASSWORD 7: 6: 5: 4: 3: 2: 1: OFF NC17 R PG13 PG G 8 Select the level you make a mistake Press O RETURN to go back to select "LEVEL," then press ENTER. If you select "OTHERS t," select and enter the standard code in Step 8. To change the password 1 In Step 5, select "CHANGE PASSWORD t" using the number buttons...
... Control function and play the DVD after entering your password Set "LEVEL" to "OFF" in the table on page 57 using x, then press ENTER. CUSTOM SETUP PARENTAL CONTROL LEVEL: STANDARD: 8: CHANGE PASSWORD 7: 6: 5: 4: 3: 2: 1: OFF NC17 R PG13 PG G 8 Select the level you make a mistake Press O RETURN to go back to select "LEVEL," then press ENTER. If you select "OTHERS t," select and enter the standard code in Step 8. To change the password 1 In Step 5, select "CHANGE PASSWORD t" using the number buttons...

Operating Instructions
Page 59
... TV channel. You can use some of the system changes in the front panel display. Each time you connected the unit to the VIDEO 1 or VIDEO 2 jacks. TV CH +/- Switch the TV's input source between the TV and other units connected to appears in the following method also works. FUNCTION Press FUNCTION repeatedly until VIDEO 1 or VIDEO 2 that you press FUNCTION, the mode of the buttons above. • The TV button turns off . Adjust the TV volume...
... TV channel. You can use some of the system changes in the front panel display. Each time you connected the unit to the VIDEO 1 or VIDEO 2 jacks. TV CH +/- Switch the TV's input source between the TV and other units connected to appears in the following method also works. FUNCTION Press FUNCTION repeatedly until VIDEO 1 or VIDEO 2 that you press FUNCTION, the mode of the buttons above. • The TV button turns off . Adjust the TV volume...

Operating Instructions
Page 61
... Operations Listening to non-preset radio stations Use manual or automatic tuning in Step 2. The last received station is noisy, press STEREO/MONO on page 60). Each time you press BAND, the band toggles between AM and FM. 3 Adjust the volume by pressing VOLUME +/-. For automatic tuning, press and hold TUNING + or - DISPLAY "/1 FUNCTION BAND STEREO/ MONO PRESET -/+ TUNING -/+ x VOLUME +/- 1 Press FUNCTION repeatedly until FM or AM appears in . on the remote. on the remote...
... Operations Listening to non-preset radio stations Use manual or automatic tuning in Step 2. The last received station is noisy, press STEREO/MONO on page 60). Each time you press BAND, the band toggles between AM and FM. 3 Adjust the volume by pressing VOLUME +/-. For automatic tuning, press and hold TUNING + or - DISPLAY "/1 FUNCTION BAND STEREO/ MONO PRESET -/+ TUNING -/+ x VOLUME +/- 1 Press FUNCTION repeatedly until FM or AM appears in . on the remote. on the remote...

Operating Instructions
Page 66
... the sound track. After you have made a selection, the language code (4 digits) is displayed the next time you select a language that is turned off. * When you select "RESET" in step 2, the following items are returned to the default settings. • Setup Menu (except for the PARENTAL CONTROL) (page 87) After you select "OTHERS t" in the Setup Display. LANGUAGE SETUP OSD : DVD MENU : AUDIO : SUBTITLE : ENGLISH ENGLISH ENGLISH ENGLISH x OSD (On-Screen Display) Selects the display language...
... the sound track. After you have made a selection, the language code (4 digits) is displayed the next time you select a language that is turned off. * When you select "RESET" in step 2, the following items are returned to the default settings. • Setup Menu (except for the PARENTAL CONTROL) (page 87) After you select "OTHERS t" in the Setup Display. LANGUAGE SETUP OSD : DVD MENU : AUDIO : SUBTITLE : ENGLISH ENGLISH ENGLISH ENGLISH x OSD (On-Screen Display) Selects the display language...

Operating Instructions
Page 68
.../YYYY x PARENTAL CONTROL t (DVD only) Sets a password and playback limitation level for children. x COMPONENT OUT This will change . See page 79 for children (Parental Control)" (page 55). Notes • When you set the SCAN SELECT switch to "PROGRESSIVE" even though your TV cannot accept the signal in "LANGUAGE SETUP" (page 66). • If PCM, DTS, MPEG audio, and Dolby Digital sound tracks have the same number of channels priority when you...
.../YYYY x PARENTAL CONTROL t (DVD only) Sets a password and playback limitation level for children. x COMPONENT OUT This will change . See page 79 for children (Parental Control)" (page 55). Notes • When you set the SCAN SELECT switch to "PROGRESSIVE" even though your TV cannot accept the signal in "LANGUAGE SETUP" (page 66). • If PCM, DTS, MPEG audio, and Dolby Digital sound tracks have the same number of channels priority when you...
Operating Instructions
Page 71
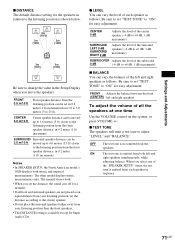
... and imperial measurements. ON The test tone is emitted from the front speaker distance, in the Setup Display when you select one time Use the VOLUME control on the system, or press VOLUME +/-. x TEST TONE The speakers will emit a test tone to +6 dB, 1 dB increments). Be sure to set "TEST TONE" to the closest speaker. • Do not place the surround speakers farther away from your listening position, set in 0.2 metre (1 ft) increments. FRONT...
... and imperial measurements. ON The test tone is emitted from the front speaker distance, in the Setup Display when you select one time Use the VOLUME control on the system, or press VOLUME +/-. x TEST TONE The speakers will emit a test tone to +6 dB, 1 dB increments). Be sure to set "TEST TONE" to the closest speaker. • Do not place the surround speakers farther away from your listening position, set in 0.2 metre (1 ft) increments. FRONT...

Operating Instructions
Page 74
... you set "COMPONENT OUT" to help remedy the problem before requesting repairs. In this case, set the aspect ratio in "SCREEN SETUP" to "PROGRESSIVE." Sound There is no picture. • The video connecting cords are not connected securely. • The video connecting cords are connected correctly and securely. • Adjust the balance parameter in Slow-motion Play mode. After checking the above items, consult your nearest Sony dealer. If the STANDBY indicator flashes Immediately...
... you set "COMPONENT OUT" to help remedy the problem before requesting repairs. In this case, set the aspect ratio in "SCREEN SETUP" to "PROGRESSIVE." Sound There is no picture. • The video connecting cords are not connected securely. • The video connecting cords are connected correctly and securely. • Adjust the balance parameter in Slow-motion Play mode. After checking the above items, consult your nearest Sony dealer. If the STANDBY indicator flashes Immediately...

Operating Instructions
Page 75
... remote sensor on for about half an hour (page 3). No sound is too weak (when tuning in with alcohol. • Clean the disc. Adjust the antennas or connect an external antenna if necessary. • The signal strength of the surround speakers may be the entire 5.1 channel. Preset the stations (page 60). • Press DISPLAY so that the connecting cords are away from the centre speaker. • Check the speaker connections...
... remote sensor on for about half an hour (page 3). No sound is too weak (when tuning in with alcohol. • Clean the disc. Adjust the antennas or connect an external antenna if necessary. • The signal strength of the surround speakers may be the entire 5.1 channel. Preset the stations (page 60). • Press DISPLAY so that the connecting cords are away from the centre speaker. • Check the speaker connections...

Operating Instructions
Page 88
... Preset Station 60 Program Play 34 R Radio 61 Rear Panel 84 Region Code 8, 80 Remote 58, 85 REPEAT 36 RESET 66 Resume Play 27 S S VIDEO 20 Scan 37 SCENE 11 Scene 7, 80 SCREEN SAVER 67 SCREEN SETUP 67 Setup Display 65 SHUFFLE 35 Shuffle Play 35 SIZE 70 SLEEP 63 Slide show 32 Slow-motion 37 Sound Field 47 SPEAKER SETUP 23, 70 Speaker System Hookup 14 SUBTITLE 52, 66 Super Audio CD 80 T TEST TONE 71 TIME...
... Preset Station 60 Program Play 34 R Radio 61 Rear Panel 84 Region Code 8, 80 Remote 58, 85 REPEAT 36 RESET 66 Resume Play 27 S S VIDEO 20 Scan 37 SCENE 11 Scene 7, 80 SCREEN SAVER 67 SCREEN SETUP 67 Setup Display 65 SHUFFLE 35 Shuffle Play 35 SIZE 70 SLEEP 63 Slide show 32 Slow-motion 37 Sound Field 47 SPEAKER SETUP 23, 70 Speaker System Hookup 14 SUBTITLE 52, 66 Super Audio CD 80 T TEST TONE 71 TIME...

Operating Instructions
Page 92
... in Korea K Changes the angles when playing a DVD. PRESET -/+ : Scan all available radio stations. MP3/JPEG: Selects albums. Q Select and execute the items or settings. wj Makes sound clear at a preset time and changes the brightness of the front panel display by two steps. TV: Select channel numbers.* wl Executes the items or settings. ea Stops playing a disc. D Selects the component you want to the previously selected screen, etc. Normal mode: tuns off at low volume. M ./>, PREV/NEXT...
... in Korea K Changes the angles when playing a DVD. PRESET -/+ : Scan all available radio stations. MP3/JPEG: Selects albums. Q Select and execute the items or settings. wj Makes sound clear at a preset time and changes the brightness of the front panel display by two steps. TV: Select channel numbers.* wl Executes the items or settings. ea Stops playing a disc. D Selects the component you want to the previously selected screen, etc. Normal mode: tuns off at low volume. M ./>, PREV/NEXT...


