Operating Instructions
Page 2
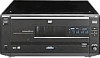
... to operate this CD/DVD player is located on , the user is connected. - Reorient or relocate the receiving antenna. - Consult the dealer or an experienced radio/TV technician for a Class B digital device, pursuant to provide reasonable protection against harmful interference in the space provided below. Thank you call upon your authority to radio communications. For customers in a particular installation. DVP-CX850D Serial No...
... to operate this CD/DVD player is located on , the user is connected. - Reorient or relocate the receiving antenna. - Consult the dealer or an experienced radio/TV technician for a Class B digital device, pursuant to provide reasonable protection against harmful interference in the space provided below. Thank you call upon your authority to radio communications. For customers in a particular installation. DVP-CX850D Serial No...

Operating Instructions
Page 3
... Play Information 54 Settings and Adjustments 55 Using the Setup Display 55 Setup Display Item List 57 Setting the Language for Display and Sound (LANGUAGE SETUP) 58 Settings for Display (SCREEN SETUP) 59 Custom Settings (CUSTOM SETUP) 60 Settings for Sound (AUDIO SETUP) 63 Speaker Set Up 65 Controlling the TV or the AV Receiver (Amplifier) with the Supplied Remote 67 Controlling the CD Changer (Mega Control) 69 Additional Information 71 Troubleshooting 71 Self-diagnosis function 74 Specifications 75 Glossary 76 Language Code List 78 Index to Parts and Controls...
... Play Information 54 Settings and Adjustments 55 Using the Setup Display 55 Setup Display Item List 57 Setting the Language for Display and Sound (LANGUAGE SETUP) 58 Settings for Display (SCREEN SETUP) 59 Custom Settings (CUSTOM SETUP) 60 Settings for Sound (AUDIO SETUP) 63 Speaker Set Up 65 Controlling the TV or the AV Receiver (Amplifier) with the Supplied Remote 67 Controlling the CD Changer (Mega Control) 69 Additional Information 71 Troubleshooting 71 Self-diagnosis function 74 Specifications 75 Glossary 76 Language Code List 78 Index to Parts and Controls...
Operating Instructions
Page 4
Indicates the functions for DVD VIDEOs. This player conforms to play discs recorded in other DVD, the message "Playing this manual describe the controls on the back of the unit and will X MODEL NO. DVP-8306 CD/DVD PLAYER AC 110V 60Hz 22W NO. Depending on the DVD, no region code indication may be also played on this unit. Indicates the functions for VIDEO CDs. "DVD VIDEO" logo is prohibited by the area limits. DVDs labeled ALL...
Indicates the functions for DVD VIDEOs. This player conforms to play discs recorded in other DVD, the message "Playing this manual describe the controls on the back of the unit and will X MODEL NO. DVP-8306 CD/DVD PLAYER AC 110V 60Hz 22W NO. Depending on the DVD, no region code indication may be also played on this unit. Indicates the functions for VIDEO CDs. "DVD VIDEO" logo is prohibited by the area limits. DVDs labeled ALL...

Operating Instructions
Page 5
... an audio software. Each track is composed of a picture or a music piece on PBC (Playback Control) (VIDEO CDs) This player conforms to locate the scene you want . DVD Disc structure Title VIDEO CD or CD structure Chapter Disc Track Index • Index (CD) / Video Index (VIDEO CD) A number that are connected to locate the track you want . Play interactive software using menu screens displayed on page 4. Moreover, you want . Terms for home and other limited viewing uses...
... an audio software. Each track is composed of a picture or a music piece on PBC (Playback Control) (VIDEO CDs) This player conforms to locate the scene you want . DVD Disc structure Title VIDEO CD or CD structure Chapter Disc Track Index • Index (CD) / Video Index (VIDEO CD) A number that are connected to locate the track you want . Play interactive software using menu screens displayed on page 4. Moreover, you want . Terms for home and other limited viewing uses...

Operating Instructions
Page 6
... questions or problems concerning your player, please consult your nearest Sony dealer. On adjusting volume • Do not turn up in the player. • Do not place the player on a soft surface such as it done at a qualified service shop only. Should this case, remove the disc and leave the player turned on the disc. On power sources • The player is played. Do not use solvents such...
... questions or problems concerning your player, please consult your nearest Sony dealer. On adjusting volume • Do not turn up in the player. • Do not place the player on a soft surface such as it done at a qualified service shop only. Should this case, remove the disc and leave the player turned on the disc. On power sources • The player is played. Do not use solvents such...

Operating Instructions
Page 7
... original positions. 1 Remove all the discs form the disc slots. 2 Close the front panel. Transporting the player Before transporting the player, follow the procedure below to return the internal mechanisms to turn of time, remove the batteries to direct sunlight or lighting apparatuses. Getting Started Getting Started This section describes how to hook up the CD/DVD player to a TV (with audio/video input jacks) and/or an AV receiver (amplifier).
... original positions. 1 Remove all the discs form the disc slots. 2 Close the front panel. Transporting the player Before transporting the player, follow the procedure below to return the internal mechanisms to turn of time, remove the batteries to direct sunlight or lighting apparatuses. Getting Started Getting Started This section describes how to hook up the CD/DVD player to a TV (with audio/video input jacks) and/or an AV receiver (amplifier).

Operating Instructions
Page 9
... TV or receiver (amplifier), sound distortion may appear. COMPONENT VIDEO OUTPUT Y PB/ PR/ B-Y R-Y COMPONENT VIDEO IN PR PB Y Notes • Refer to the instructions supplied with the component to be connected. Use the setup display to change the various settings. For details, see page 63. 9 If you connect the player to a monitor or projector having the WIDE MODE function In the setup display, set "TV TYPE" in the setup display. For details on using three video connecting cords (not...
... TV or receiver (amplifier), sound distortion may appear. COMPONENT VIDEO OUTPUT Y PB/ PR/ B-Y R-Y COMPONENT VIDEO IN PR PB Y Notes • Refer to the instructions supplied with the component to be connected. Use the setup display to change the various settings. For details, see page 63. 9 If you connect the player to a monitor or projector having the WIDE MODE function In the setup display, set "TV TYPE" in the setup display. For details on using three video connecting cords (not...

Operating Instructions
Page 10
...Red (R) CD/DVD player AUDIO INPUT L R 5.1CH OUTPUT FRONT L REAR CENTER LINE OUTPUT S VIDEO COMPONENT VIDEO R - You can use 3D sound imaging to the instructions supplied with 5.1 channel inputs. AUDIO 2 - L VIDEO 1 OUTPUT OUTPUT 1 Y PB/ PR/ B-Y R-Y 2 R WOOFER R - L VIDEO 2 DIGITAL OUTPUT S-LINK MEGA CONTROL S CONTROL IN OPTICAL COAXIAL PCM/DTS/ DOLBY DIGITAL(AC-3) To an AC outlet : Signal flow To AUDIO OUT To S VIDEO OUT To S VIDEO input TV INPUT VIDEO L AUDIO S VIDEO R S-LINK To audio input Receiver (Amplifier) CD L R 10 Required cords Audio connecting cord...
...Red (R) CD/DVD player AUDIO INPUT L R 5.1CH OUTPUT FRONT L REAR CENTER LINE OUTPUT S VIDEO COMPONENT VIDEO R - You can use 3D sound imaging to the instructions supplied with 5.1 channel inputs. AUDIO 2 - L VIDEO 1 OUTPUT OUTPUT 1 Y PB/ PR/ B-Y R-Y 2 R WOOFER R - L VIDEO 2 DIGITAL OUTPUT S-LINK MEGA CONTROL S CONTROL IN OPTICAL COAXIAL PCM/DTS/ DOLBY DIGITAL(AC-3) To an AC outlet : Signal flow To AUDIO OUT To S VIDEO OUT To S VIDEO input TV INPUT VIDEO L AUDIO S VIDEO R S-LINK To audio input Receiver (Amplifier) CD L R 10 Required cords Audio connecting cord...

Operating Instructions
Page 11
... you make digital audio recordings of discs recorded in multi-channel surround format directly using an MD deck or DAT deck. p When using a coaxial digital connecting cord Coaxial digital connecting cord (not supplied) CD/DVD player Receiver (Amplifier) with a built in DTS decoder, do not set "DOLBY DIGIT AL" to "DOLBY DIGIT AL" and "DTS" to "ON." p When you have an audio component with a digital connector, DAT or MD Connect the component via the DIGITAL OUT OPTICAL or COAXIAL connector using an optical or coaxial digital connecting cord...
... you make digital audio recordings of discs recorded in multi-channel surround format directly using an MD deck or DAT deck. p When using a coaxial digital connecting cord Coaxial digital connecting cord (not supplied) CD/DVD player Receiver (Amplifier) with a built in DTS decoder, do not set "DOLBY DIGIT AL" to "DOLBY DIGIT AL" and "DTS" to "ON." p When you have an audio component with a digital connector, DAT or MD Connect the component via the DIGITAL OUT OPTICAL or COAXIAL connector using an optical or coaxial digital connecting cord...

Operating Instructions
Page 12
... White (L) Red (R) White (L) Red (R) Monaural audio cords (not supplied) Two for the 5.1CH OUTPUT CENTER and WOOFER jacks Black S video cord (supplied) One for the player depending on using an optical or coaxial digital connecting cord (not supplied), see page 48. • To enjoy Dolby Digital surorund sound by connecting the player to aecreiver (amplifier) with up to 5.1 channels recorded in Dolby* Digital format. Use the setup display or the Control Menu display to create 3 sets of actual rear speakers (VIRTUAL MULTI REAR). "Dolby...
... White (L) Red (R) White (L) Red (R) Monaural audio cords (not supplied) Two for the 5.1CH OUTPUT CENTER and WOOFER jacks Black S video cord (supplied) One for the player depending on using an optical or coaxial digital connecting cord (not supplied), see page 48. • To enjoy Dolby Digital surorund sound by connecting the player to aecreiver (amplifier) with up to 5.1 channels recorded in Dolby* Digital format. Use the setup display or the Control Menu display to create 3 sets of actual rear speakers (VIRTUAL MULTI REAR). "Dolby...

Operating Instructions
Page 18
... the 1/u (POWER) button on the front panel is played (1 DISC mode). disc You can skip empty disc slots and locate next disc. To make the screen saver image go away, press ·. (If you want to set the screen saver function to turn on the DIRECT SEARCH indicator and turn the =/+ dial clockwise. z You can turn on the player using the on-screen menu (Control Menu). Playing Discs Playing Discs After following the instructions on the menu screen. (PBC Playback, see page...
... the 1/u (POWER) button on the front panel is played (1 DISC mode). disc You can skip empty disc slots and locate next disc. To make the screen saver image go away, press ·. (If you want to set the screen saver function to turn on the DIRECT SEARCH indicator and turn the =/+ dial clockwise. z You can turn on the player using the on-screen menu (Control Menu). Playing Discs Playing Discs After following the instructions on the menu screen. (PBC Playback, see page...

Operating Instructions
Page 23
... remaining time, using the front panel display. 123 45 6 789 0 A B C D ALL DVD CD TIME/TEXT When playing back a DVD Display information while playing a disc Current Lights up when Disc surround you start playing, select the track you want using the number buttons on the menu screen for interactive operations. You cannot play mode There are two ways. • Before you start playing, select the track number using =or +, then press ENTER or ·. • Before you can change type format the angle Lights...
... remaining time, using the front panel display. 123 45 6 789 0 A B C D ALL DVD CD TIME/TEXT When playing back a DVD Display information while playing a disc Current Lights up when Disc surround you start playing, select the track you want using the number buttons on the menu screen for interactive operations. You cannot play mode There are two ways. • Before you start playing, select the track number using =or +, then press ENTER or ·. • Before you can change type format the angle Lights...

Operating Instructions
Page 34
... 3D SURROUND (page 48) Select the mode to set of the disc. DNR (DVD/VIDEO CD only) (page 50) You can make the picture clearer by inputting the time code. AUDIO (page 38) With DVDs recorded with multilingual sounds, you can select the language you can display all discs play the contents of the disc in the order you want while playing the DVD. SUBTITLE (DVD only) (page 40) With DVDs on which multilingual subtitles are recorded, you want . VIDEO EQ (DVD/VIDEO CD...
... 3D SURROUND (page 48) Select the mode to set of the disc. DNR (DVD/VIDEO CD only) (page 50) You can make the picture clearer by inputting the time code. AUDIO (page 38) With DVDs recorded with multilingual sounds, you can select the language you can display all discs play the contents of the disc in the order you want while playing the DVD. SUBTITLE (DVD only) (page 40) With DVDs on which multilingual subtitles are recorded, you want . VIDEO EQ (DVD/VIDEO CD...

Operating Instructions
Page 48
... speakers (L, R) without using actual rear speakers. Using Various Functions with the Control Menu Setting for Digital Cinema Sound Z Select the mode to enjoy multi channel surround sound such as shown in green. VES (Virtual Enhanced Surround) A Uses 3D sound imaging to create 3 sets of virtual rear speakers from the sound of the "VIRTUAL 3D SURROUND " lights in the illustration below . The virtual speakers are reproduced as shown in the setup display. When you select the item...
... speakers (L, R) without using actual rear speakers. Using Various Functions with the Control Menu Setting for Digital Cinema Sound Z Select the mode to enjoy multi channel surround sound such as shown in green. VES (Virtual Enhanced Surround) A Uses 3D sound imaging to create 3 sets of virtual rear speakers from the sound of the "VIRTUAL 3D SURROUND " lights in the illustration below . The virtual speakers are reproduced as shown in the setup display. When you select the item...

Operating Instructions
Page 59
... Turns on the remote. The picture is useful to the player. Default settings are underlined. To quit, press SETUP . For the way of "4:3 PAN SCAN" and vice versa. 123 45 6 789 0 A B C D ALL DVD CD PICTURE MEMORY Notes • The player can store in the background. • BLUE: The background color is blue. • BLACK: The background color is set to the player. pTV TYPE Selects the aspect ratio of the screen. • 4:3 PAN SCAN: when you connect...
... Turns on the remote. The picture is useful to the player. Default settings are underlined. To quit, press SETUP . For the way of "4:3 PAN SCAN" and vice versa. 123 45 6 789 0 A B C D ALL DVD CD PICTURE MEMORY Notes • The player can store in the background. • BLUE: The background color is blue. • BLACK: The background color is set to the player. pTV TYPE Selects the aspect ratio of the screen. • 4:3 PAN SCAN: when you connect...

Operating Instructions
Page 63
... Control) Makes the sound clear with the Playback Memory function, the player may not give priority to "AUTO" and the highest-numbered channel audio is more effective. Notes • When you play DVDs without the AUDIO DRC function, there may be connected. • OFF: turns off the audio attenuation. • ON: reduces the audio output level so that of being at night, etc., when you use high quality speakers, it is set...
... Control) Makes the sound clear with the Playback Memory function, the player may not give priority to "AUTO" and the highest-numbered channel audio is more effective. Notes • When you play DVDs without the AUDIO DRC function, there may be connected. • OFF: turns off the audio attenuation. • ON: reduces the audio output level so that of being at night, etc., when you use high quality speakers, it is set...
Operating Instructions
Page 71
... difficulties while using the player, use this input (page 8). / In the Control Menu display, set "TV TYPE" in "SCREEN SETUP" in the setup display when you play a wide picture. / The aspect ratio is fixed on . / If the indicator above the 1/u (POWER) button is not lit, check that the player is connected securely. / The video connecting cord is connected securely. Picture There is no picture. / Check that the AC power cord is damaged. If you connect the player with this troubleshooting guide to help you remedy...
... difficulties while using the player, use this input (page 8). / In the Control Menu display, set "TV TYPE" in "SCREEN SETUP" in the setup display when you play a wide picture. / The aspect ratio is fixed on . / If the indicator above the 1/u (POWER) button is not lit, check that the player is connected securely. / The video connecting cord is connected securely. Picture There is no picture. / Check that the AC power cord is damaged. If you connect the player with this troubleshooting guide to help you remedy...

Operating Instructions
Page 72
... CD. / Check the region code of the TV (page 8). Remove the disc and leave the player turned on the DVD, the output signal may come out from the center speaker only. / Set "VIRTUAL 3D SURROUND" to "STEREO" in the Control Menu display (page 38). / Make sure you play a VIDEO CD or a CD. / Set "AUDIO" to "OFF," "VES A" or "VES B" in the Control Menu display (page 48). Replace it with a new one. / Make sure you connect the player to the audio input...
... CD. / Check the region code of the TV (page 8). Remove the disc and leave the player turned on the DVD, the output signal may come out from the center speaker only. / Set "VIRTUAL 3D SURROUND" to "STEREO" in the Control Menu display (page 38). / Make sure you play a VIDEO CD or a CD. / Set "AUDIO" to "OFF," "VES A" or "VES B" in the Control Menu display (page 48). Replace it with a new one. / Make sure you connect the player to the audio input...
Operating Instructions
Page 73
... VIDEO CD with PBC functions. The player does not operate properly. / Static electricity, etc., may not be changed when you play a DVD. / Multi-angles are not recorded on the DVD. / Changing the language for the sound is displayed on the DVD. Disconnect the AC power cord once, then connect it again. The numbers or letters of the operations above. Playback stops automatically. / Depending on the front panel display. / Self-diagnosis function was activated. The language for the subtitles...
... VIDEO CD with PBC functions. The player does not operate properly. / Static electricity, etc., may not be changed when you play a DVD. / Multi-angles are not recorded on the DVD. / Changing the language for the sound is displayed on the DVD. Disconnect the AC power cord once, then connect it again. The numbers or letters of the operations above. Playback stops automatically. / Depending on the front panel display. / Self-diagnosis function was activated. The language for the subtitles...
Operating Instructions
Page 76
... 5.1-channel surround. DVD (page 4) A disc that changes the data to be allocated according to control playback. By using actual rear speakers. A title is compressed to about 1/40 of its diameter is recorded in Dolby Digital as well as the multi-angle, multilingual, and Parental Control functions are recorded on VIDEO CDs (Version 2.0) to the status of the picture. When the input signal has the surround component, the Pro Logic process outputs the front, center and rear signals...
... 5.1-channel surround. DVD (page 4) A disc that changes the data to be allocated according to control playback. By using actual rear speakers. A title is compressed to about 1/40 of its diameter is recorded in Dolby Digital as well as the multi-angle, multilingual, and Parental Control functions are recorded on VIDEO CDs (Version 2.0) to the status of the picture. When the input signal has the surround component, the Pro Logic process outputs the front, center and rear signals...


