Cyber-shot® Handbook
Page 5
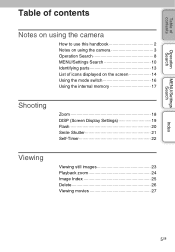
Table of contents Operation Search MENU/Settings Search Table of contents Notes on using the camera How to use this handbook 2 Notes on using the camera 3 Operation Search 8 MENU/Settings Search 10 Identifying parts 13 List of icons displayed on the screen 14 Using the mode switch 16 Using the internal memory 17 Shooting Zoom 18 DISP (Screen Display Settings 19 Flash 20 Smile Shutter 21 Self-Timer 22 Viewing Viewing still images 23 Playback zoom 24 Image Index 25 Delete 26 Viewing movies 27 Index 5GB
Table of contents Operation Search MENU/Settings Search Table of contents Notes on using the camera How to use this handbook 2 Notes on using the camera 3 Operation Search 8 MENU/Settings Search 10 Identifying parts 13 List of icons displayed on the screen 14 Using the mode switch 16 Using the internal memory 17 Shooting Zoom 18 DISP (Screen Display Settings 19 Flash 20 Smile Shutter 21 Self-Timer 22 Viewing Viewing still images 23 Playback zoom 24 Image Index 25 Delete 26 Viewing movies 27 Index 5GB
Cyber-shot® Handbook
Page 6
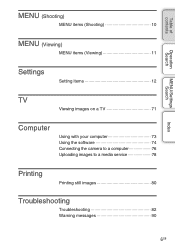
Table of contents Operation Search MENU/Settings Search MENU (Shooting) MENU items (Shooting 10 MENU (Viewing) MENU items (Viewing 11 Settings Setting items 12 TV Viewing images on a TV 71 Computer Using with your computer 73 Using the software 74 Connecting the camera to a computer 76 Uploading images to a media service 78 Printing Printing still images 80 Troubleshooting Troubleshooting 82 Warning messages 90 Index 6GB
Table of contents Operation Search MENU/Settings Search MENU (Shooting) MENU items (Shooting 10 MENU (Viewing) MENU items (Viewing 11 Settings Setting items 12 TV Viewing images on a TV 71 Computer Using with your computer 73 Using the software 74 Connecting the camera to a computer 76 Uploading images to a media service 78 Printing Printing still images 80 Troubleshooting Troubleshooting 82 Warning messages 90 Index 6GB
Cyber-shot® Handbook
Page 9
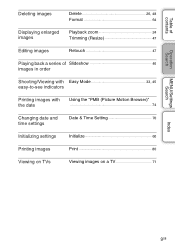
Table of contents Operation Search MENU/Settings Search Deleting images Delete 26, 48 Format 64 Displaying enlarged images Playback zoom 24 Trimming (Resize 47 Editing images Retouch 47 Playing back a series of Slideshow 46 images in order Shooting/Viewing with Easy Mode 33, 45 easy-to-see indicators Printing images with the date Using the "PMB (Picture Motion Browser)" 74 Changing date and time settings Date & Time Setting 70 Initializing settings Initialize 60 Printing images Print 80 Viewing on TVs Viewing images on a TV 71 Index 9GB
Table of contents Operation Search MENU/Settings Search Deleting images Delete 26, 48 Format 64 Displaying enlarged images Playback zoom 24 Trimming (Resize 47 Editing images Retouch 47 Playing back a series of Slideshow 46 images in order Shooting/Viewing with Easy Mode 33, 45 easy-to-see indicators Printing images with the date Using the "PMB (Picture Motion Browser)" 74 Changing date and time settings Date & Time Setting 70 Initializing settings Initialize 60 Printing images Print 80 Viewing on TVs Viewing images on a TV 71 Index 9GB
Cyber-shot® Handbook
Page 10
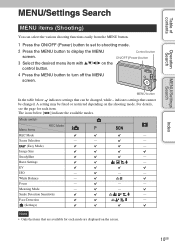
... the various shooting functions easily from the MENU button. 1 Press the ON/OFF (Power) button to set to shooting mode. 2 Press the MENU button to turn off the MENU screen. Index 10GB MENU button In the table below [ ] indicate the available modes. Image Size SteadyShot - Focus - - - Face Detection - (Settings) Note • Only the items that cannot be fixed or restricted depending on the control button. Scene Selection - - - (Easy Mode) - Smile Detection Sensitivity - Mode switch Menu items REC Mode REC Mode - White Balance - For details...
... the various shooting functions easily from the MENU button. 1 Press the ON/OFF (Power) button to set to shooting mode. 2 Press the MENU button to turn off the MENU screen. Index 10GB MENU button In the table below [ ] indicate the available modes. Image Size SteadyShot - Focus - - - Face Detection - (Settings) Note • Only the items that cannot be fixed or restricted depending on the control button. Scene Selection - - - (Easy Mode) - Smile Detection Sensitivity - Mode switch Menu items REC Mode REC Mode - White Balance - For details...
Cyber-shot® Handbook
Page 12
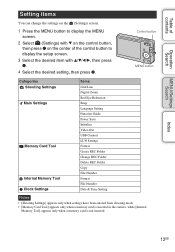
... z. Control button MENU button Categories Shooting Settings Main Settings Memory Card Tool Internal Memory Tool Clock Settings Items Grid Line Digital Zoom Red Eye Reduction Beep Language Setting Function Guide Power Save Initialize Video Out USB Connect LUN Settings Format Create REC.Folder Change REC.Folder Delete REC.Folder Copy File Number Format File Number Date & Time Setting Notes • [Shooting Settings] appears only when settings have been entered from shooting mode. • [Memory Card Tool] appears only when a memory card is inserted in the camera, while [Internal Memory Tool...
... z. Control button MENU button Categories Shooting Settings Main Settings Memory Card Tool Internal Memory Tool Clock Settings Items Grid Line Digital Zoom Red Eye Reduction Beep Language Setting Function Guide Power Save Initialize Video Out USB Connect LUN Settings Format Create REC.Folder Change REC.Folder Delete REC.Folder Copy File Number Format File Number Date & Time Setting Notes • [Shooting Settings] appears only when settings have been entered from shooting mode. • [Memory Card Tool] appears only when a memory card is inserted in the camera, while [Internal Memory Tool...
Cyber-shot® Handbook
Page 13
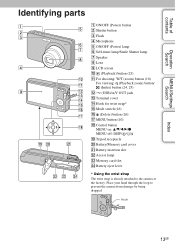
... camera at the factory. Table of contents Operation Search MENU/Settings Search Index Identifying parts A ON/OFF (Power) button B Shutter button C Flash D Microphone E ON/OFF (Power) lamp F Self-timer lamp/Smile Shutter lamp G Speaker H Lens I LCD screen J (Playback) button (23) K For shooting: W/T (zoom) button (18) For viewing: (Playback zoom) button/ (Index) button (24, 25) L (USB)/A/V OUT jack M Terminal cover N Hook for wrist strap* O Mode switch (16) P (Delete) button (26) Q MENU button (10) R Control button MENU on: v/V/b/B/z MENU off: DISP/ / / S Tripod receptacle T Battery/Memory...
... camera at the factory. Table of contents Operation Search MENU/Settings Search Index Identifying parts A ON/OFF (Power) button B Shutter button C Flash D Microphone E ON/OFF (Power) lamp F Self-timer lamp/Smile Shutter lamp G Speaker H Lens I LCD screen J (Playback) button (23) K For shooting: W/T (zoom) button (18) For viewing: (Playback zoom) button/ (Index) button (24, 25) L (USB)/A/V OUT jack M Terminal cover N Hook for wrist strap* O Mode switch (16) P (Delete) button (26) Q MENU button (10) R Control button MENU on: v/V/b/B/z MENU off: DISP/ / / S Tripod receptacle T Battery/Memory...
Cyber-shot® Handbook
Page 25
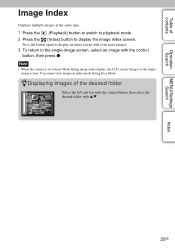
... images. 3 To return to Easy Mode during Easy Mode. Note • When the camera is set to the single-image screen, select an image with v/V. 25GB You cannot view images in index mode during image index display, the LCD screen changes to display the image index screen. zDisplaying images of contents Operation Search MENU/Settings Search Index Image Index Displays multiple images at the same time. 1 Press the (Playback) button to switch to playback mode. 2 Press the (Index) button to the single- image screen. Table of the desired folder...
... images. 3 To return to Easy Mode during Easy Mode. Note • When the camera is set to the single-image screen, select an image with v/V. 25GB You cannot view images in index mode during image index display, the LCD screen changes to display the image index screen. zDisplaying images of contents Operation Search MENU/Settings Search Index Image Index Displays multiple images at the same time. 1 Press the (Playback) button to switch to playback mode. 2 Press the (Index) button to the single- image screen. Table of the desired folder...

Cyber-shot® Handbook
Page 37
... contents Operation Search Burst Settings You can select single image mode or burst mode as the shooting mode. 1 MENU t (Burst Settings) t desired mode (Single) (Burst) Records a single image. Table of five images is recorded. • The recording interval becomes longer, depending on the setting for the image size. • When the battery level is low, or when the internal memory or the memory card is full, the Burst stops. • The focus, white balance, and exposure are adjusted...
... contents Operation Search Burst Settings You can select single image mode or burst mode as the shooting mode. 1 MENU t (Burst Settings) t desired mode (Single) (Burst) Records a single image. Table of five images is recorded. • The recording interval becomes longer, depending on the setting for the image size. • When the battery level is low, or when the internal memory or the memory card is full, the Burst stops. • The focus, white balance, and exposure are adjusted...

Cyber-shot® Handbook
Page 45
Table of contents Operation Search Easy Mode When viewing still images in a folder with [1 image], delete all images in Easy Mode, the playback screen text becomes larger, indicators become easier to see. 1 Press the 2 MENU t (Playback) button to switch to playback mode. (Easy Mode) t [OK] t z on the control button Notes • The battery charge is available. (Delete) button You can delete the currently displayed image with [All]. zViewing functions available in Easy Mode In Easy Mode, only deleting function is used up more quickly because the screen brightness increases ...
Table of contents Operation Search Easy Mode When viewing still images in a folder with [1 image], delete all images in Easy Mode, the playback screen text becomes larger, indicators become easier to see. 1 Press the 2 MENU t (Playback) button to switch to playback mode. (Easy Mode) t [OK] t z on the control button Notes • The battery charge is available. (Delete) button You can delete the currently displayed image with [All]. zViewing functions available in Easy Mode In Easy Mode, only deleting function is used up more quickly because the screen brightness increases ...
Cyber-shot® Handbook
Page 63
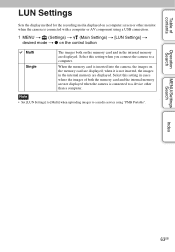
... the camera, the images on the memory card are displayed; Select this setting when you connect the camera to a media service using a USB connection. 1 MENU t (Settings) t (Main Settings) t [LUN Settings] t desired mode t z on the memory card and in the internal memory are displayed. MENU/Settings Search Index 63GB Table of both on the control button Multi Single The images both the memory card and the internal memory are not displayed when the camera is not inserted, the images in the internal memory are displayed. When the memory card is connected...
... the camera, the images on the memory card are displayed; Select this setting when you connect the camera to a media service using a USB connection. 1 MENU t (Settings) t (Main Settings) t [LUN Settings] t desired mode t z on the memory card and in the internal memory are displayed. MENU/Settings Search Index 63GB Table of both on the control button Multi Single The images both the memory card and the internal memory are not displayed when the camera is not inserted, the images in the internal memory are displayed. When the memory card is connected...
Cyber-shot® Handbook
Page 69
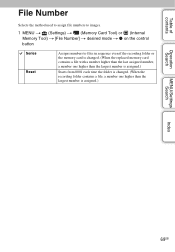
... contents File Number Selects the method used to assign file numbers to images. 1 MENU t (Settings) t (Memory Card Tool) or (Internal Memory Tool) t [File Number] t desired mode t z on the control button Series Reset Assigns numbers to files in sequence even if the recording folder or the memory card is changed. (When the replaced memory card contains a file with a number higher than the last assigned number, a number one higher than the largest number is assigned.) Starts from 0001 each time the folder is changed. (When the recording folder contains a file, a number one higher...
... contents File Number Selects the method used to assign file numbers to images. 1 MENU t (Settings) t (Memory Card Tool) or (Internal Memory Tool) t [File Number] t desired mode t z on the control button Series Reset Assigns numbers to files in sequence even if the recording folder or the memory card is changed. (When the replaced memory card contains a file with a number higher than the last assigned number, a number one higher than the largest number is assigned.) Starts from 0001 each time the folder is changed. (When the recording folder contains a file, a number one higher...
Cyber-shot® Handbook
Page 74
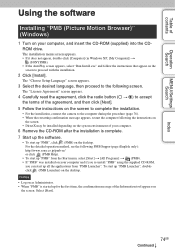
... contents Operation Search MENU/Settings Search Index Using the software Installing "PMB (Picture Motion Browser)" (Windows) 1 Turn on the desktop. The "License Agreement" screen appears. 4 Carefully read the agreement, click the radio button ( t ) to accept the terms of the agreement, and then click [Next]. 5 Follow the instructions on the screen to complete the installation. • For the installation, connect the camera to the following PMB Support page (English only...
... contents Operation Search MENU/Settings Search Index Using the software Installing "PMB (Picture Motion Browser)" (Windows) 1 Turn on the desktop. The "License Agreement" screen appears. 4 Carefully read the agreement, click the radio button ( t ) to accept the terms of the agreement, and then click [Next]. 5 Follow the instructions on the screen to complete the installation. • For the installation, connect the camera to the following PMB Support page (English only...
Cyber-shot® Handbook
Page 81
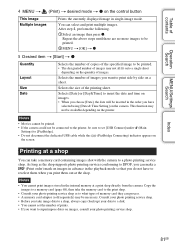
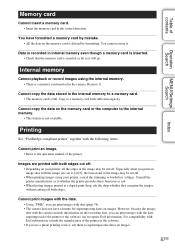
... print images stored in single-image mode. Selects the number of contents Operation Search MENU/Settings Search 4 MENU t (Print) t desired mode t z on the control button This Image Multiple Images Prints the currently displayed image in the internal memory at a shop You can take a memory card containing images shot with the camera to reselect them out at the shop. Consult your photo printing service shop. • Before you take the memory card to set the number of the printing sheet. Selects [Date] or [Day&Time] to insert the date and time...
... print images stored in single-image mode. Selects the number of contents Operation Search MENU/Settings Search 4 MENU t (Print) t desired mode t z on the control button This Image Multiple Images Prints the currently displayed image in the internal memory at a shop You can take a memory card containing images shot with the camera to reselect them out at the shop. Consult your photo printing service shop. • Before you take the memory card to set the number of the printing sheet. Selects [Date] or [Day&Time] to insert the date and time...

Cyber-shot® Handbook
Page 84
.... White, purple or other streaks appear or the entire screen appears reddish when shooting a bright subject. • This phenomenon is not a malfunction. Shooting in Movie Mode. • Set the flash to (On) (page 20) when the Scene Selection mode is selected in the image. Focus adjustment may take some time when shooting a close -up shoot function (Macro) does not work . • You cannot use the digital zoom when: - The F value and shutter speed flash when...
.... White, purple or other streaks appear or the entire screen appears reddish when shooting a bright subject. • This phenomenon is not a malfunction. Shooting in Movie Mode. • Set the flash to (On) (page 20) when the Scene Selection mode is selected in the image. Focus adjustment may take some time when shooting a close -up shoot function (Macro) does not work . • You cannot use the digital zoom when: - The F value and shutter speed flash when...
Cyber-shot® Handbook
Page 85
... shoot images in succession. • The internal memory or the memory card is low. The image does not appear on the LCD screen. • If the dedicated A/V cable is set to the color system of your computer. • No guarantees are not recorded. The image does not appear on the TV. • Check [Video Out] to see if the video output signal of the camera is connected to Easy Mode. Delete...
... shoot images in succession. • The internal memory or the memory card is low. The image does not appear on the LCD screen. • If the dedicated A/V cable is set to the color system of your computer. • No guarantees are not recorded. The image does not appear on the TV. • Check [Video Out] to see if the video output signal of the camera is connected to Easy Mode. Delete...
Cyber-shot® Handbook
Page 86
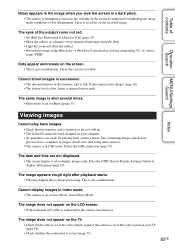
Shoot using "PMB", refer to the network. After making a USB connection, "PMB" does not start . • Set [LUN Settings] to [Multi] (page 63). • Set [USB Connect] to [Mass Storage] (page 62). • Connect the computer to "PMB Help" (page 74). • Consult the computer or software manufacturer. The image and sound are interrupted by the camera (page 64). Cannot play back the movie (page 74). Cannot import images. • Connect the camera and...
Shoot using "PMB", refer to the network. After making a USB connection, "PMB" does not start . • Set [LUN Settings] to [Multi] (page 63). • Set [USB Connect] to [Mass Storage] (page 62). • Connect the computer to "PMB Help" (page 74). • Consult the computer or software manufacturer. The image and sound are interrupted by the camera (page 64). Cannot play back the movie (page 74). Cannot import images. • Connect the camera and...
Cyber-shot® Handbook
Page 87
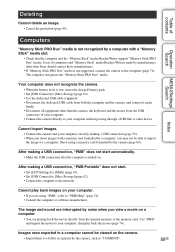
... internal memory. • This feature is full. Table of contents Operation Search MENU/Settings Search Index Memory card Cannot insert a memory card. • Insert the memory card in the camera. Copy to the operation manual of the printer or the software. • If you print an image shot with the image size set to whether the printer provides these functions or not. • When having images printed at a digital print shop, ask the shop whether they can print images with the date...
... internal memory. • This feature is full. Table of contents Operation Search MENU/Settings Search Index Memory card Cannot insert a memory card. • Insert the memory card in the camera. Copy to the operation manual of the printer or the software. • If you print an image shot with the image size set to whether the printer provides these functions or not. • When having images printed at a digital print shop, ask the shop whether they can print images with the date...

Cyber-shot® Handbook
Page 90
... use with the write-protect switch, and the switch is damaged. Set the switch to cool • The camera temperature has risen. Charge the battery pack immediately. Depending on again. Internal memory error • Turn the power off and then on this memory card. 90GB Read only memory card • The camera cannot record or delete images on again. Error formatting internal memory Error formatting memory card • Format the media again (page 64). The power may flash even though there are using the memory card with compatible battery...
... use with the write-protect switch, and the switch is damaged. Set the switch to cool • The camera temperature has risen. Charge the battery pack immediately. Depending on again. Internal memory error • Turn the power off and then on this memory card. 90GB Read only memory card • The camera cannot record or delete images on again. Error formatting internal memory Error formatting memory card • Format the media again (page 64). The power may flash even though there are using the memory card with compatible battery...

Cyber-shot® Handbook
Page 91
...; An error occurred while the image was playing back. Read only folder • You have been recorded in the internal memory. • No images that can be played back have selected a folder that cannot be set as a recording folder on the camera. Folder error • A folder with this camera, files containing images which were processed on a computer or images which were shot using [Multiple Images]. • You can add (Print order) marks to up to insufficient light.
...; An error occurred while the image was playing back. Read only folder • You have been recorded in the internal memory. • No images that can be played back have selected a folder that cannot be set as a recording folder on the camera. Folder error • A folder with this camera, files containing images which were processed on a computer or images which were shot using [Multiple Images]. • You can add (Print order) marks to up to insufficient light.
Instruction Manual
Page 9
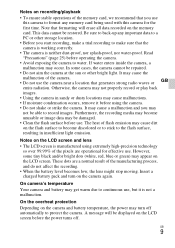
... first time. Insert a charged battery pack and turn on the camera and battery temperature, the power may become discolored or to stick to water. Notes on the LCD screen before use. On camera's temperature Your camera and battery may get warm due to become unusable or image data may appear on the flash surface to continuous use . A message will erase all data recorded on the memory card. In some tiny black and/or bright dots (white, red...
... first time. Insert a charged battery pack and turn on the camera and battery temperature, the power may become discolored or to stick to water. Notes on the LCD screen before use. On camera's temperature Your camera and battery may get warm due to become unusable or image data may appear on the flash surface to continuous use . A message will erase all data recorded on the memory card. In some tiny black and/or bright dots (white, red...


