Operating Guide
Page 8
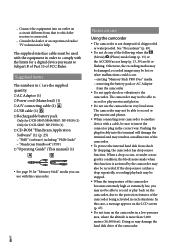
...) (1) A/V connecting cable (1) USB cable (1) Rechargeable battery pack Only for DCR-SR47/SR48/SR67: NP-FH30 (1) Only for DCR-SR87: NP-FH50 (1) CD-ROM "Handycam Application Software" (1) (p. 25) "PMB" (software) including "PMB Guide" "Handycam Handbook" (PDF) "Operating Guide" (This manual) (1) See page 39 for help. The camcorder may not...
...) (1) A/V connecting cable (1) USB cable (1) Rechargeable battery pack Only for DCR-SR47/SR48/SR67: NP-FH30 (1) Only for DCR-SR87: NP-FH50 (1) CD-ROM "Handycam Application Software" (1) (p. 25) "PMB" (software) including "PMB Guide" "Handycam Handbook" (PDF) "Operating Guide" (This manual) (1) See page 39 for help. The camcorder may not...

Operating Guide
Page 26
... the software. Depending on the computer screen. Read the terms of your camcorder, then connect the camcorder to the computer using the supplied USB cable. If the installation screen appears, follow the instructions to install the required software. Restart...USB CONNECT]. Click [Continue] on the computer, you may not work correctly. See page 45 on the "Handycam Handbook". Confirm that your camcorder is not connected to the computer. Turn on the computer. Log on as an Administrator for installation. ...
... the software. Depending on the computer screen. Read the terms of your camcorder, then connect the camcorder to the computer using the supplied USB cable. If the installation screen appears, follow the instructions to install the required software. Restart...USB CONNECT]. Click [Continue] on the computer, you may not work correctly. See page 45 on the "Handycam Handbook". Confirm that your camcorder is not connected to the computer. Turn on the computer. Log on as an Administrator for installation. ...

Operating Guide
Page 27
... function, you can use. If any software starts automatically, shut it down. 2 Turn on the installation procedure. The "Handycam Handbook" is completed, following icons will appear. Remove the CD-ROM from the computer Click the icon at the bottom right of the... however, do not start "PMB." Connect your computer, and place an empty disc on the camcorder screen. Disconnect the USB cable. Movies and photos recorded on your camcorder that have not yet been saved with One Touch Disc Burn can save movies and photos recorded on the internal...
... function, you can use. If any software starts automatically, shut it down. 2 Turn on the installation procedure. The "Handycam Handbook" is completed, following icons will appear. Remove the CD-ROM from the computer Click the icon at the bottom right of the... however, do not start "PMB." Connect your computer, and place an empty disc on the camcorder screen. Disconnect the USB cable. Movies and photos recorded on your camcorder that have not yet been saved with One Touch Disc Burn can save movies and photos recorded on the internal...
Operating Guide
Page 28
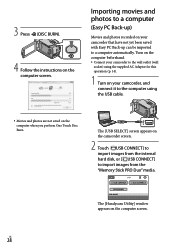
The [Handycam Utility] window appears on the computer screen. 3 Press (DISC BURN). 4 Follow the instructions on the computer screen. Importing movies and photos to a computer (Easy PC Back-up) Movies and photos recorded on your camcorder, and connect it to the computer using the supplied ... CONNECT] to a computer automatically. Turn on the computer beforehand. Connect your camcorder to the wall outlet (wall socket) using the USB cable. Movies and photos are not saved on the camcorder screen. 2 Touch [ USB CONNECT] to import images from the "Memory Stick PRO ...
The [Handycam Utility] window appears on the computer screen. 3 Press (DISC BURN). 4 Follow the instructions on the computer screen. Importing movies and photos to a computer (Easy PC Back-up) Movies and photos recorded on your camcorder, and connect it to the computer using the supplied ... CONNECT] to a computer automatically. Turn on the computer beforehand. Connect your camcorder to the wall outlet (wall socket) using the USB cable. Movies and photos are not saved on the camcorder screen. 2 Touch [ USB CONNECT] to import images from the "Memory Stick PRO ...
Operating Guide
Page 58
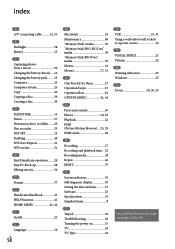
Index A A/V connecting cable...........24, 35 B Backlight 38 Battery 13 C Capturing photos from a movie 30 Charging the battery abroad......14 Charging the battery pack..........13 Computer 25 Computer system ... drive or folder........29 Disc recorder 35 DST SET 15 Dubbing 40 DVDirect Express 31 DVD writer 31 E Easy Handycam operation.........20 Easy PC Back-up 28 Editing movies 30 F Format 37 H Handycam Handbook 45 HELP function 41 HOME MENU 41, 42 I Install 25 L Language 16 US 58 M Macintosh 25 Maintenance 49...
Index A A/V connecting cable...........24, 35 B Backlight 38 Battery 13 C Capturing photos from a movie 30 Charging the battery abroad......14 Charging the battery pack..........13 Computer 25 Computer system ... drive or folder........29 Disc recorder 35 DST SET 15 Dubbing 40 DVDirect Express 31 DVD writer 31 E Easy Handycam operation.........20 Easy PC Back-up 28 Editing movies 30 F Format 37 H Handycam Handbook 45 HELP function 41 HOME MENU 41, 42 I Install 25 L Language 16 US 58 M Macintosh 25 Maintenance 49...


