
Operating Instructions
Page 151
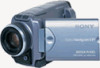
... on a tape on your computer. Tape images Camcorder Connection jack USB jack i.LINK (MICROMV Interface) "Memory Stick" USB jack* images Connection cable USB cable (supplied) i.LINK cable (optional) USB cable (supplied) Computer environment requirements USB connector, editing software i.LINK (IEEE 1394) connector editing software USB connector, editing software Reference pages For Windows For Macintosh users...
... on a tape on your computer. Tape images Camcorder Connection jack USB jack i.LINK (MICROMV Interface) "Memory Stick" USB jack* images Connection cable USB cable (supplied) i.LINK cable (optional) USB cable (supplied) Computer environment requirements USB connector, editing software i.LINK (IEEE 1394) connector editing software USB connector, editing software Reference pages For Windows For Macintosh users...
Operating Instructions
Page 152
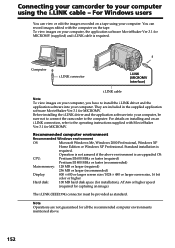
...To view images on your computer, the application software MovieShaker Ver.3.1 for MICROMV. Before installing the i.LINK driver and the application software into your computer. Operation is not assured if the above . 152 Connecting your camcorder to the operating instructions supplied with the computer... to your computer using your computer, be provided as standard. Note Operations are included in the supplied application software MovieShaker Ver.3.1 for MICROMV (supplied) and i.LINK cable is required. For Windows users You can record images edited with MovieShaker Ver.3.1...
...To view images on your computer, the application software MovieShaker Ver.3.1 for MICROMV. Before installing the i.LINK driver and the application software into your computer. Operation is not assured if the above . 152 Connecting your camcorder to the operating instructions supplied with the computer... to your computer using your computer, be provided as standard. Note Operations are included in the supplied application software MovieShaker Ver.3.1 for MICROMV (supplied) and i.LINK cable is required. For Windows users You can record images edited with MovieShaker Ver.3.1...

Operating Instructions
Page 153
... on a "Memory Stick" on the size of the USB driver before connecting the camcorder to your computer using the USB cable, you can process or edit them in image processing software and append them to the computer's USB connector. Viewing Images Using your Computer Connecting ...your camcorder to the computer. You can read still images. Recommended computer usage environment when connecting...
... on a "Memory Stick" on the size of the USB driver before connecting the camcorder to your computer using the USB cable, you can process or edit them in image processing software and append them to the computer's USB connector. Viewing Images Using your Computer Connecting ...your camcorder to the computer. You can read still images. Recommended computer usage environment when connecting...

Operating Instructions
Page 155
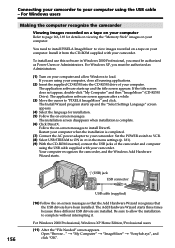
...Installing the USB driver Start the following operation without connecting the USB cable to "Making the computer recognize the camcorder". Connect the USB cable according to your computer. The application software starts up and the title screen appears. (3) Move the cursor to load. (2) Insert the supplied CD...the steps on -screen messages to your computer and allow Windows to USB Driver and click. Viewing Images Using your Computer Connecting your camcorder to install the USB driver. (5) Remove the CD-ROM and then restart the computer, in accordance with the instructions on the screen....
...Installing the USB driver Start the following operation without connecting the USB cable to "Making the computer recognize the camcorder". Connect the USB cable according to your computer. The application software starts up and the title screen appears. (3) Move the cursor to load. (2) Insert the supplied CD...the steps on -screen messages to your computer and allow Windows to USB Driver and click. Viewing Images Using your Computer Connecting your camcorder to install the USB driver. (5) Remove the CD-ROM and then restart the computer, in accordance with the instructions on the screen....
Operating Instructions
Page 156
...With the CD-ROM inserted, connect the USB jacks of the camcorder and computer using your computer, close all running applications. (2) Insert the supplied CD-ROM into the CD-ROM drive of your computer. The application software starts up and the "Select Settings Language" screen appears. ... on viewing the "Memory Stick" images on your computer. The application software screen appears after a while. (3) Move the cursor to complete without interrupting it from the CD-ROM supplied with your camcorder. The installation screen disappears when installation is completed. (7) Connect the AC...
...With the CD-ROM inserted, connect the USB jacks of the camcorder and computer using your computer, close all running applications. (2) Insert the supplied CD-ROM into the CD-ROM drive of your computer. The application software starts up and the "Select Settings Language" screen appears. ... on viewing the "Memory Stick" images on your computer. The application software screen appears after a while. (3) Move the cursor to complete without interrupting it from the CD-ROM supplied with your camcorder. The installation screen disappears when installation is completed. (7) Connect the AC...

Operating Instructions
Page 164
To view images recorded on a MICROMV tape, use the application software MovieShaker Ver.3.1 for the DV equipment though it turns off.... (2) Look at the last scene you want to that are not displayed correctly. •When your camcorder is in the menu settings when your computer. If image data cannot be transferred by the USB connection ... 158. Notes •PIXELA ImageMixer is only for MICROMV. •The following the procedure on want to your camcorder before installation of the camcorder are captured into your camcorder is in the standby, and no cassette is captured...
To view images recorded on a MICROMV tape, use the application software MovieShaker Ver.3.1 for the DV equipment though it turns off.... (2) Look at the last scene you want to that are not displayed correctly. •When your camcorder is in the menu settings when your computer. If image data cannot be transferred by the USB connection ... 158. Notes •PIXELA ImageMixer is only for MICROMV. •The following the procedure on want to your camcorder before installation of the camcorder are captured into your camcorder is in the standby, and no cassette is captured...

Operating Instructions
Page 169
...iMac with the Mac OS 8.6 standard installation and a slot loading type CD-ROM drive •iBook or Power Mac G4 with the application software required for viewing images. Notes •Operations are not guaranteed for all the recommended computer environments mentioned above. •Macintosh and Mac OS..., QuickTime are not mentioned in each case in order to connect the camcorder to the computer's USB connector. For Macintosh users When connecting to a computer via the USB jack You must install a USB driver ...
...iMac with the Mac OS 8.6 standard installation and a slot loading type CD-ROM drive •iBook or Power Mac G4 with the application software required for viewing images. Notes •Operations are not guaranteed for all the recommended computer environments mentioned above. •Macintosh and Mac OS..., QuickTime are not mentioned in each case in order to connect the camcorder to the computer's USB connector. For Macintosh users When connecting to a computer via the USB jack You must install a USB driver ...

Operating Instructions
Page 170
Your Mac is completed. For Mac OS 9.1/9.2/Mac OS X (v10.0/v10.1) The USB driver need not be installed. The application software screen appears. (3) Click the "USB Driver" to open the folder containing the six files related to your computer using the USB cable. For ... "Driver." 170 (4) Select the following two files, and drag and drop them into the System Folder. • Sony Camcorder USB Driver • Sony Camcorder USB Shim (5) When the message appears, click "OK." For Mac OS 8.5.1/8.6/9.0 users (1) Turn on your computer. (6) Remove the CD-ROM from the computer. (7) Restart...
Your Mac is completed. For Mac OS 9.1/9.2/Mac OS X (v10.0/v10.1) The USB driver need not be installed. The application software screen appears. (3) Click the "USB Driver" to open the folder containing the six files related to your computer using the USB cable. For ... "Driver." 170 (4) Select the following two files, and drag and drop them into the System Folder. • Sony Camcorder USB Driver • Sony Camcorder USB Shim (5) When the message appears, click "OK." For Mac OS 8.5.1/8.6/9.0 users (1) Turn on your computer. (6) Remove the CD-ROM from the computer. (7) Restart...

Operating Instructions
Page 194
... software. You cannot use cassette only. All of the MICROMV cassettes have Micro Cassette Memory. , , and are trademarks of software. Your camcorder does not record copyright control signals on your camcorder ...contains copyright signals, you cannot copy it records. 194 - Usable cassettes Selecting cassette types You can use any other 8 mm, Hi8, Digital8, VHS, VHSC, S-VHS, S-VHSC, Betamax, ED Betamax, DV, or mini DV cassettes. Additional Information - When you try to your camcorder that contains copyright control signals for copyright protection of Sony...
... software. You cannot use cassette only. All of the MICROMV cassettes have Micro Cassette Memory. , , and are trademarks of software. Your camcorder does not record copyright control signals on your camcorder ...contains copyright signals, you cannot copy it records. 194 - Usable cassettes Selecting cassette types You can use any other 8 mm, Hi8, Digital8, VHS, VHSC, S-VHS, S-VHSC, Betamax, ED Betamax, DV, or mini DV cassettes. Additional Information - When you try to your camcorder that contains copyright control signals for copyright protection of Sony...

Operating Instructions
Page 199
... can also be connected. Required i.LINK cable Use the Sony i.LINK 4-pin-to other video equipment having i.LINK (MICROMV Interface), see pages 87 and 90. i.LINK and are trademarks. 199 Additional Information For details on your computer, make sure that application software supported by Sony (e.g. About i.LINK i.LINK functions on this unit For details...
... can also be connected. Required i.LINK cable Use the Sony i.LINK 4-pin-to other video equipment having i.LINK (MICROMV Interface), see pages 87 and 90. i.LINK and are trademarks. 199 Additional Information For details on your computer, make sure that application software supported by Sony (e.g. About i.LINK i.LINK functions on this unit For details...


