
Limited Warranty (US Only)
Page 1
... limitation of the Product, including the antenna. 4-557-172-02 General Stereo/Hifi Components/Tape Decks ® CD Players/Mini Disc Players/Audio Systems Hifi Audio LIMITED WARRANTY Sony Electronics Inc. ("Sony") warrants this Product is valid only in material or workmanship as fuses or batteries). This warranty is determined to be presented to any authorized Sony service facility. For your authorized dealer...
... limitation of the Product, including the antenna. 4-557-172-02 General Stereo/Hifi Components/Tape Decks ® CD Players/Mini Disc Players/Audio Systems Hifi Audio LIMITED WARRANTY Sony Electronics Inc. ("Sony") warrants this Product is valid only in material or workmanship as fuses or batteries). This warranty is determined to be presented to any authorized Sony service facility. For your authorized dealer...
Operating Instructions
Page 2
... as vases, on the rear or bottom exterior. To 2GB DAV-DZ120 Serial No WARNING This equipment has been tested and found to the wall outlet (mains), even if the unit itself has been turned off and on, the user is connected. - Do not install the appliance in the space provided below. Record the serial number in a confined space, such...
... as vases, on the rear or bottom exterior. To 2GB DAV-DZ120 Serial No WARNING This equipment has been tested and found to the wall outlet (mains), even if the unit itself has been turned off and on, the user is connected. - Do not install the appliance in the space provided below. Record the serial number in a confined space, such...
Operating Instructions
Page 4
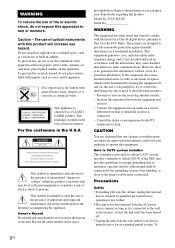
... Step 3: Performing the Quick Setup 15 Getting Started - Turning off the Demonstration 18 Installing the Speakers on a Wall.......... 19 TV Hookup (Advanced 20 Other Component Hookup 23 Basic Operations Playing Discs 25 Enjoying the Radio or Other Components 26 Enjoying TV or VCR Sound from All Speakers 27 Selecting the Movie or Music Mode 28 Sound Adjustments Enjoying Surround Sound by Using Sound Field 29 Various Functions for Playing Discs Searching for a Particular Point on a Disc 31 (Scan, Slow...
... Step 3: Performing the Quick Setup 15 Getting Started - Turning off the Demonstration 18 Installing the Speakers on a Wall.......... 19 TV Hookup (Advanced 20 Other Component Hookup 23 Basic Operations Playing Discs 25 Enjoying the Radio or Other Components 26 Enjoying TV or VCR Sound from All Speakers 27 Selecting the Movie or Music Mode 28 Sound Adjustments Enjoying Surround Sound by Using Sound Field 29 Various Functions for Playing Discs Searching for a Particular Point on a Disc 31 (Scan, Slow...
Operating Instructions
Page 5
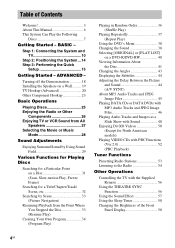
... Setup Display 66 Setting the Display or Sound Track Language 68 [LANGUAGE SETUP] Settings for the Display 68 [SCREEN SETUP] Custom Settings 70 [CUSTOM SETUP] Settings for the Speakers 71 [SPEAKER SETUP] Returning to the Default Settings.......... 74 Additional Information Precautions 75 Notes about the Discs 76 Troubleshooting 76 Self-diagnosis Function 79 (When letters/numbers appear in the display) Specifications 80 Glossary 81 Language Code List 84 Index to Parts and Controls 85 Guide to the Control Menu Display...... 87 DVD Setup Display...
... Setup Display 66 Setting the Display or Sound Track Language 68 [LANGUAGE SETUP] Settings for the Display 68 [SCREEN SETUP] Custom Settings 70 [CUSTOM SETUP] Settings for the Speakers 71 [SPEAKER SETUP] Returning to the Default Settings.......... 74 Additional Information Precautions 75 Notes about the Discs 76 Troubleshooting 76 Self-diagnosis Function 79 (When letters/numbers appear in the display) Specifications 80 Glossary 81 Language Code List 84 Index to Parts and Controls 85 Guide to the Control Menu Display...... 87 DVD Setup Display...
Operating Instructions
Page 15
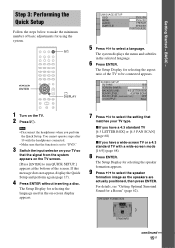
... You cannot operate steps after 10 with a wide-screen mode [16:9] (page 68) 8 Press ENTER. The Setup Display for selecting the speaker formation appears. 9 Press C/c to make the minimum number of basic adjustments for selecting the aspect ratio of the screen. Step 3: Performing the Quick Setup Follow the steps below to select the speaker formation image as the speakers are actually positioned, then press ENTER. "/1 C/X/x/c ENTER DISPLAY LANGUAGE SETUP OSD: MENU: AUDIO: SUBTITLE...
... You cannot operate steps after 10 with a wide-screen mode [16:9] (page 68) 8 Press ENTER. The Setup Display for selecting the speaker formation appears. 9 Press C/c to make the minimum number of basic adjustments for selecting the aspect ratio of the screen. Step 3: Performing the Quick Setup Follow the steps below to select the speaker formation image as the speakers are actually positioned, then press ENTER. "/1 C/X/x/c ENTER DISPLAY LANGUAGE SETUP OSD: MENU: AUDIO: SUBTITLE...
Operating Instructions
Page 16
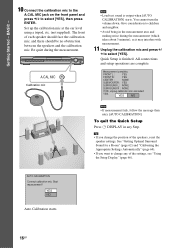
... between the speakers and the calibration mic. A.CAL MIC Calibration mic Note • Loud test sound is finished. Give consideration to select [YES]. All connections and setup operations are complete. BASIC - 10 Connect the calibration mic to the A.CAL MIC jack on the front panel and press X/x to change the position of the speakers, reset the speaker settings. AUTO CALIBRATION Connect calibration mic. YES NO Auto Calibration starts. 16GB To quit the Quick Setup Press DISPLAY in the measurement area and making noise during...
... between the speakers and the calibration mic. A.CAL MIC Calibration mic Note • Loud test sound is finished. Give consideration to select [YES]. All connections and setup operations are complete. BASIC - 10 Connect the calibration mic to the A.CAL MIC jack on the front panel and press X/x to change the position of the speakers, reset the speaker settings. AUTO CALIBRATION Connect calibration mic. YES NO Auto Calibration starts. 16GB To quit the Quick Setup Press DISPLAY in the measurement area and making noise during...
Operating Instructions
Page 25
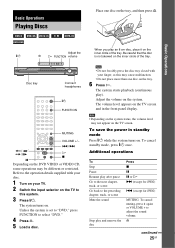
... screen and in standby mode Press "/1 while the system turns on. Basic Operations When you play an 8 cm disc, place it again or VOLUME + to select "DVD." 4 Press A. 5 Load a disc. To cancel standby mode, press "/1 once. The system turns on the system. Be careful that the disc "/1 A H FUNCTION volume is set to "DVD," press FUNCTION to adjust the sound volume. Note • Depending on the system status, the volume level may not appear on the DVD VIDEO...
... screen and in standby mode Press "/1 while the system turns on. Basic Operations When you play an 8 cm disc, place it again or VOLUME + to select "DVD." 4 Press A. 5 Load a disc. To cancel standby mode, press "/1 once. The system turns on the system. Be careful that the disc "/1 A H FUNCTION volume is set to "DVD," press FUNCTION to adjust the sound volume. Note • Depending on the system status, the volume level may not appear on the DVD VIDEO...
Operating Instructions
Page 29
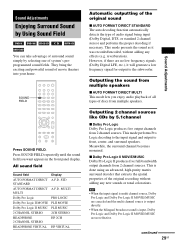
... subwoofer. They bring the exciting and powerful sound of audio signal being input (Dolby Digital, DTS, or standard 2 channel stereo) and performs the proper decoding if necessary. This mode presents the sound as it will generate a low frequency signal for output to front, center, and surround speakers. Press SOUND FIELD repeatedly until the sound field you enjoy audio playback of all types of discs from 2 channel sources. Meanwhile, the surround channel becomes monaural. Outputting the sound from multiple speakers x AUTO FORMAT DIRECT MULTI This mode...
... subwoofer. They bring the exciting and powerful sound of audio signal being input (Dolby Digital, DTS, or standard 2 channel stereo) and performs the proper decoding if necessary. This mode presents the sound as it will generate a low frequency signal for output to front, center, and surround speakers. Press SOUND FIELD repeatedly until the sound field you enjoy audio playback of all types of discs from 2 channel sources. Meanwhile, the surround channel becomes monaural. Outputting the sound from multiple speakers x AUTO FORMAT DIRECT MULTI This mode...

Operating Instructions
Page 33
... quickly. 1 Press PICTURE NAVI during setting Press O RETURN or DISPLAY. If "RESUME" does not appear, Resume Play is not available. 2 Press H. CHAPTER VIEWER ENTER 2 Press PICTURE NAVI repeatedly to normal play during playback. The first scene of the track. you do not remove the disc, Resume Play will work during Program Play and Shuffle Play. • This function may be able to select some discs. • When using...
... quickly. 1 Press PICTURE NAVI during setting Press O RETURN or DISPLAY. If "RESUME" does not appear, Resume Play is not available. 2 Press H. CHAPTER VIEWER ENTER 2 Press PICTURE NAVI repeatedly to normal play during playback. The first scene of the track. you do not remove the disc, Resume Play will work during Program Play and Shuffle Play. • This function may be able to select some discs. • When using...

Operating Instructions
Page 42
... (DivX video) or DATA DVD (DivX video) (except for North American models. ** Appears when: - If the disc does not contain text, "NO TEXT" appears. BRAHMS SYMPHONY To check DATA CD/DATA DVD (MP3 audio/DivX video*) text By pressing DISPLAY while playing MP3 audio tracks on a DATA CD/DATA DVD or DivX video files* on your TV screen. playing a DivX video file that contains MP3 audio signals on...
... (DivX video) or DATA DVD (DivX video) (except for North American models. ** Appears when: - If the disc does not contain text, "NO TEXT" appears. BRAHMS SYMPHONY To check DATA CD/DATA DVD (MP3 audio/DivX video*) text By pressing DISPLAY while playing MP3 audio tracks on a DATA CD/DATA DVD or DivX video files* on your TV screen. playing a DivX video file that contains MP3 audio signals on...
Operating Instructions
Page 56
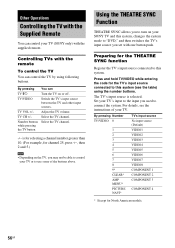
Adjust the TV volume. The TV's input source is for selecting a channel number greater than 10. (For example, for the THEATRE SYNC function Register the TV's input source connected to this system, changes the system mode to "DVD," and then switches the TV's input source you set with one button push. By pressing Number TV/VIDEO 0 1 2 3 4 5 6 7 8 9* CLEAR* AMP MENU* PICTURE NAVI* TV's input source No input source (Default) VIDEO1 VIDEO2 VIDEO3 VIDEO4 VIDEO5 VIDEO6 VIDEO7 VIDEO8 COMPONENT 1 COMPONENT 2 COMPONENT 3 COMPONENT 4 * Except for the TV's input source connected to this...
Adjust the TV volume. The TV's input source is for selecting a channel number greater than 10. (For example, for the THEATRE SYNC function Register the TV's input source connected to this system, changes the system mode to "DVD," and then switches the TV's input source you set with one button push. By pressing Number TV/VIDEO 0 1 2 3 4 5 6 7 8 9* CLEAR* AMP MENU* PICTURE NAVI* TV's input source No input source (Default) VIDEO1 VIDEO2 VIDEO3 VIDEO4 VIDEO5 VIDEO6 VIDEO7 VIDEO8 COMPONENT 1 COMPONENT 2 COMPONENT 3 COMPONENT 4 * Except for the TV's input source connected to this...
Operating Instructions
Page 64
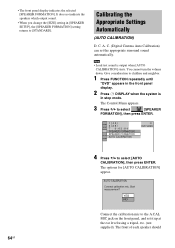
...FUNCTION repeatedly until "DVD" appears in the front panel display. 2 Press DISPLAY when the system is output when [AUTO CALIBRATION] starts. Calibrating the Appropriate Settings Automatically (AUTO CALIBRATION) D. A. The options for [AUTO CALIBRATION] appear. YES NO Connect the calibration mic to [STANDARD]. Note • Loud test sound is in [SPEAKER SETUP], the [SPEAKER FORMATION] setting returns to the A.CAL MIC jack on the front panel, and set the appropriate surround sound automatically. C. (Digital Cinema Auto Calibration) can set it up at the ear level using...
...FUNCTION repeatedly until "DVD" appears in the front panel display. 2 Press DISPLAY when the system is output when [AUTO CALIBRATION] starts. Calibrating the Appropriate Settings Automatically (AUTO CALIBRATION) D. A. The options for [AUTO CALIBRATION] appear. YES NO Connect the calibration mic to [STANDARD]. Note • Loud test sound is in [SPEAKER SETUP], the [SPEAKER FORMATION] setting returns to the A.CAL MIC jack on the front panel, and set the appropriate surround sound automatically. C. (Digital Cinema Auto Calibration) can set it up at the ear level using...

Operating Instructions
Page 65
... press ENTER. do not change the volume. - do not turn off the power. - FRONT L : YES FRONT R : YES CENTER : NONE SUBWOOFER : YES SURROUND L : NONE SURROUND R : NONE If OK, unplug calibration mic and select YES. Measurement failure. Note • While the Auto Calibration function works: - YES NO 5 Press X/x to retry. Retry? During the measurement, test signals are not correctly connected. -there is excessive noise around the calibration mic. -the calibration mic is implemented. x The...
... press ENTER. do not change the volume. - do not turn off the power. - FRONT L : YES FRONT R : YES CENTER : NONE SUBWOOFER : YES SURROUND L : NONE SURROUND R : NONE If OK, unplug calibration mic and select YES. Measurement failure. Note • While the Auto Calibration function works: - YES NO 5 Press X/x to retry. Retry? During the measurement, test signals are not correctly connected. -there is excessive noise around the calibration mic. -the calibration mic is implemented. x The...

Operating Instructions
Page 69
.... [AUTO] [PAL] [NTSC] Outputs the video signal in the system of the output signal to the standard level. Advanced Settings and Adjustments [ON] [OFF] Sets the black level of [4:3 PAN SCAN] or vice versa. If your display device from the COMPONENT VIDEO OUT jacks. Use this when the picture becomes too black. Lowers the standard black level. You cannot select this and the setting is already recorded on the DVD, [4:3 LETTER BOX...
.... [AUTO] [PAL] [NTSC] Outputs the video signal in the system of the output signal to the standard level. Advanced Settings and Adjustments [ON] [OFF] Sets the black level of [4:3 PAN SCAN] or vice versa. If your display device from the COMPONENT VIDEO OUT jacks. Use this when the picture becomes too black. Lowers the standard black level. You cannot select this and the setting is already recorded on the DVD, [4:3 LETTER BOX...
Operating Instructions
Page 71
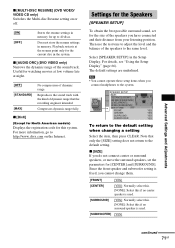
... to adjust the level and the balance of the sound track. Advanced Settings and Adjustments x [MULTI-DISC RESUME] (DVD VIDEO/ VIDEO CD only) Switches the Multi-disc Resume setting on the Internet. x [SIZE] If you cannot change them. [FRONT] [YES] [CENTER] [YES]: Normally select this. [NONE]: Select this if no center speaker is used. [SURROUND] [YES]: Normally select this. [NONE]: Select this system. Since the front speaker and subwoofer setting is fixed, you do not connect center or surround speakers, or move the surround speakers, set...
... to adjust the level and the balance of the sound track. Advanced Settings and Adjustments x [MULTI-DISC RESUME] (DVD VIDEO/ VIDEO CD only) Switches the Multi-disc Resume setting on the Internet. x [SIZE] If you cannot change them. [FRONT] [YES] [CENTER] [YES]: Normally select this. [NONE]: Select this if no center speaker is used. [SURROUND] [YES]: Normally select this. [NONE]: Select this system. Since the front speaker and subwoofer setting is fixed, you do not connect center or surround speakers, or move the surround speakers, set...
Operating Instructions
Page 75
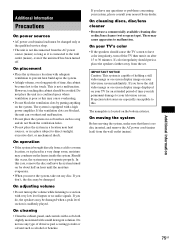
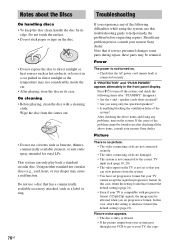
...'t, the disc may cause apparatus to direct sunlight, excessive dust, or mechanical shock. On cleaning • Clean the cabinet, panel, and controls with a soft cloth slightly moistened with very low level inputs or no disc inserted, and remove the AC power cord (mains lead) from the wall outlet (...Sony dealer. On adjusting volume • Do not turn it is no audio signals. If you have color irregularity, turn off . On your television screen indefinitely. IMPORTANT NOTICE Caution: This system is suddenly played. Do not place the unit in the system. • At high volume,...
...'t, the disc may cause apparatus to direct sunlight, excessive dust, or mechanical shock. On cleaning • Clean the cabinet, panel, and controls with a soft cloth slightly moistened with very low level inputs or no disc inserted, and remove the AC power cord (mains lead) from the wall outlet (...Sony dealer. On adjusting volume • Do not turn it is no audio signals. If you have color irregularity, turn off . On your television screen indefinitely. IMPORTANT NOTICE Caution: This system is suddenly played. Do not place the unit in the system. • At high volume,...
Operating Instructions
Page 76
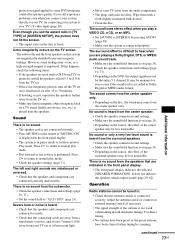
... signal in progressive format. Note that the AC power cord (mains lead) is connected securely. Press "/1 to help remedy the problem before requesting repairs. Using neither standard nor circular discs (e.g., card, heart, or star shape) may be affected when you can only play back a standard circular disc. Troubleshooting If you using the system, use solvents such as a label or ring. In this case, return the setting...
... signal in progressive format. Note that the AC power cord (mains lead) is connected securely. Press "/1 to help remedy the problem before requesting repairs. Using neither standard nor circular discs (e.g., card, heart, or star shape) may be affected when you can only play back a standard circular disc. Troubleshooting If you using the system, use solvents such as a label or ring. In this case, return the setting...
Operating Instructions
Page 77
... low-level sound is fixed. If you still experience problems even when you set . • Make sure that the antenna (aerial) is connected securely. It may be less noticeable. Severe hum or noise is heard. • Check that the speakers and components are connected securely. • Check that are playing a Dolby Digital, DTS, or MPEG audio sound track. • Make sure the sound field function is recorded in Dolby Digital or MPEG audio format. Operation Radio stations...
... low-level sound is fixed. If you still experience problems even when you set . • Make sure that the antenna (aerial) is connected securely. It may be less noticeable. Severe hum or noise is heard. • Check that the speakers and components are connected securely. • Check that are playing a Dolby Digital, DTS, or MPEG audio sound track. • Make sure the sound field function is recorded in Dolby Digital or MPEG audio format. Operation Radio stations...
Operating Instructions
Page 81
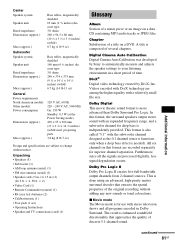
DivX® Digital video technology created by Sony to automatically measure and adjusts the speaker settings to change without adding any new sounds or tonal colorations. In this format are processed digitally, less signal degradation occurs. All six channels in this format, the surround speakers output stereo sound with a relatively small file size. Furthermore, since it functions only when a deep bass effect is done using an advanced, high-purity matrix surround decoder that...
DivX® Digital video technology created by Sony to automatically measure and adjusts the speaker settings to change without adding any new sounds or tonal colorations. In this format are processed digitally, less signal degradation occurs. All six channels in this format, the surround speakers output stereo sound with a relatively small file size. Furthermore, since it functions only when a deep bass effect is done using an advanced, high-purity matrix surround decoder that...
Operating Instructions
Page 92
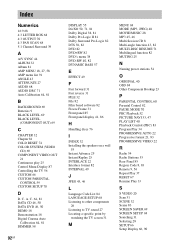
... Multi Session CD 8 Multi-angle function 43, 82 MULTI-DISC RESUME 71 Multilingual function 82 MUTING 25 N Naming preset stations 54 O ORIGINAL 40 OSD 68 Other Component Hookup 23 P PARENTAL CONTROL 60 Parental Control 82 PAUSE MODE 70 PBC Playback 52 PICTURE NAVI 33, 47 PLAY LIST 40 Playback Control (PBC) 83 Program Play 34 PROGRESSIVE AUTO 22 Progressive format 21, 83 PROGRESSIVE VIDEO 22 R Radio 54 Radio Stations 53 Rear Panel 85 Region Code 8, 83 Remote 9, 56 Repeat Play...
... Multi Session CD 8 Multi-angle function 43, 82 MULTI-DISC RESUME 71 Multilingual function 82 MUTING 25 N Naming preset stations 54 O ORIGINAL 40 OSD 68 Other Component Hookup 23 P PARENTAL CONTROL 60 Parental Control 82 PAUSE MODE 70 PBC Playback 52 PICTURE NAVI 33, 47 PLAY LIST 40 Playback Control (PBC) 83 Program Play 34 PROGRESSIVE AUTO 22 Progressive format 21, 83 PROGRESSIVE VIDEO 22 R Radio 54 Radio Stations 53 Rear Panel 85 Region Code 8, 83 Remote 9, 56 Repeat Play...


