User Manual
Page 1
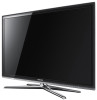
... complete service, please register your product at www.samsung.com/register Model Serial No LED TV user manual Contact SAMSUNG WORLDWIDE If you for purchasing this Samsung product. Country Customer Care Center CANADA 1-800-SAMSUNG (726-7864) Web Site www.samsung.com U.S.A 1-800-SAMSUNG (726-7864) www.samsung.com Address Samsung Electronics Canada Inc., Customer Service 55 Standish Court...
... complete service, please register your product at www.samsung.com/register Model Serial No LED TV user manual Contact SAMSUNG WORLDWIDE If you for purchasing this Samsung product. Country Customer Care Center CANADA 1-800-SAMSUNG (726-7864) Web Site www.samsung.com U.S.A 1-800-SAMSUNG (726-7864) www.samsung.com Address Samsung Electronics Canada Inc., Customer Service 55 Standish Court...
User Manual
Page 2
... Warranty Repair Service in the United States on SAMSUNG products purchased in Canada, and in Canada on the product. To reduce risk of this effect, please follow below recommendations: • Avoid displaying the same TV channel for details. Additionally, viewing other objects ... temperature of the product. ✎✎ When using a stand or wall-mount, use parts provided by your Samsung limited warranty. • SAMSUNG ELECTRONICS NORTH AMERICAN LIMITED WARRANTY STATEMENT Subject to the requirements, conditions, exclusions and limitations of the original Limited Warranty ...
... Warranty Repair Service in the United States on SAMSUNG products purchased in Canada, and in Canada on the product. To reduce risk of this effect, please follow below recommendations: • Avoid displaying the same TV channel for details. Additionally, viewing other objects ... temperature of the product. ✎✎ When using a stand or wall-mount, use parts provided by your Samsung limited warranty. • SAMSUNG ELECTRONICS NORTH AMERICAN LIMITED WARRANTY STATEMENT Subject to the requirements, conditions, exclusions and limitations of the original Limited Warranty ...
User Manual
Page 3
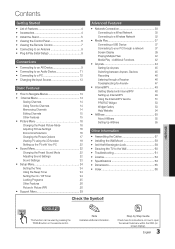
...ENGLISH TOOLS t This function can be used by Step Guide Check here for Anynet+ 47 yy Internet@TV 48 Getting Started with Internet@TV 48 Setting up Internet@TV 49 Using the Internet@TV service 51 PROFILE Widget 53 Widget Gallery 53 Help Website 54 yy AllShare 55 About AllShare 55 Setting...Up AllShare 55 Other Information yy Assembling the Cables 57 yy Installing the Wall Mount 58 yy Anti-theft Kensington Lock 59 yy Securing the TV to open the relevant submenu within the OSD (on the remote control. Contents Getting Started yy List of Features 4 yy Accessories 4 ...
...ENGLISH TOOLS t This function can be used by Step Guide Check here for Anynet+ 47 yy Internet@TV 48 Getting Started with Internet@TV 48 Setting up Internet@TV 49 Using the Internet@TV service 51 PROFILE Widget 53 Widget Gallery 53 Help Website 54 yy AllShare 55 About AllShare 55 Setting...Up AllShare 55 Other Information yy Assembling the Cables 57 yy Installing the Wall Mount 58 yy Anti-theft Kensington Lock 59 yy Securing the TV to open the relevant submenu within the OSD (on the remote control. Contents Getting Started yy List of Features 4 yy Accessories 4 ...
User Manual
Page 4
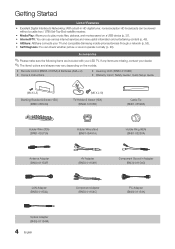
..., contact your dealer. ✎✎The items' colors and shapes may vary depending on a USB device (p. 37). If any items are included with your TV and compatible Samsung mobile phones/devices through a network (p. 55). yy Remote Control (BN68-01055A) & Batteries (AAA x 2) yy Owner's Instructions yy Cleaning Cloth (BN63-01798B) yy Warranty Card...
..., contact your dealer. ✎✎The items' colors and shapes may vary depending on a USB device (p. 37). If any items are included with your TV and compatible Samsung mobile phones/devices through a network (p. 55). yy Remote Control (BN68-01055A) & Batteries (AAA x 2) yy Owner's Instructions yy Cleaning Cloth (BN63-01798B) yy Warranty Card...

User Manual
Page 5
...X L8) at position 1, and then fasten three screws (M4 X L8) at least two persons lift and move the LED TV. If you fasten the screws with the LED TV placed down, it may lean to the Stand using four screws (M4 X L8) as shown. xx Make sure that at ... the product up and fasten the screws. Component Composite (AV) Install the Stand s s s s s Stand (1EA) Guide Stand (1EA) Follow the steps below to connect the TV to the stand. Screws (M4 X L8) Guide Stand s s s s s Stand Rear Top view Front Rear 1. Coaxial (RF) VGA (M4 X L8) Screws (9EA) s s s s s s 2 Screws ...
...X L8) at position 1, and then fasten three screws (M4 X L8) at least two persons lift and move the LED TV. If you fasten the screws with the LED TV placed down, it may lean to the Stand using four screws (M4 X L8) as shown. xx Make sure that at ... the product up and fasten the screws. Component Composite (AV) Install the Stand s s s s s Stand (1EA) Guide Stand (1EA) Follow the steps below to connect the TV to the stand. Screws (M4 X L8) Guide Stand s s s s s Stand Rear Top view Front Rear 1. Coaxial (RF) VGA (M4 X L8) Screws (9EA) s s s s s s 2 Screws ...
User Manual
Page 6
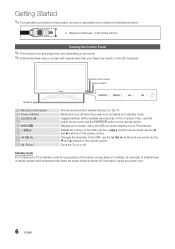
... connection to this product, be sure to unplug the power cord. 6 English Adjusts the volume. In the on-screen menu, use this spot on the TV. In the OSD, use cables with a maximum thickness as below: yy Maximum thickness - 0.55 inches (14mm) Viewing the Control Panel ✎✎The ...model. ✎✎External electrical noise or contact with objects other than your finger may switch on the remote control. A small amount of your TV in standby mode. Changes the channels. It is turned off . Toggles between all the available input sources. Standby mode Do not leave your...
... connection to this product, be sure to unplug the power cord. 6 English Adjusts the volume. In the on-screen menu, use this spot on the TV. In the OSD, use cables with a maximum thickness as below: yy Maximum thickness - 0.55 inches (14mm) Viewing the Control Panel ✎✎The ...model. ✎✎External electrical noise or contact with objects other than your finger may switch on the remote control. A small amount of your TV in standby mode. Changes the channels. It is turned off . Toggles between all the available input sources. Standby mode Do not leave your...
User Manual
Page 7
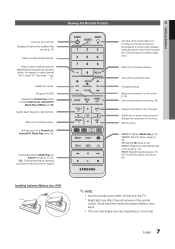
...channel "54-3", press "54", then press "-" and "3". For example, to directly access channels. Displays the Content View, which includes Channel List, Internet@TV, Media Play, AllShare and 3D. Returns to various internet services (p. 48). Link to the previous menu. Installing batteries (Battery size: AAA) ✎&#...When on the menu. Selects the on-screen menu items and changes the values seen on , the buttons become illuminated for Samsung recorders that have the Anynet+ feature) Viewing the Remote Control POWER ON/OFF SOURCE PRE-CH MUTE CH LIST CONTENT MENU INTERNET...
...channel "54-3", press "54", then press "-" and "3". For example, to directly access channels. Displays the Content View, which includes Channel List, Internet@TV, Media Play, AllShare and 3D. Returns to various internet services (p. 48). Link to the previous menu. Installing batteries (Battery size: AAA) ✎&#...When on the menu. Selects the on-screen menu items and changes the values seen on , the buttons become illuminated for Samsung recorders that have the Anynet+ feature) Viewing the Remote Control POWER ON/OFF SOURCE PRE-CH MUTE CH LIST CONTENT MENU INTERNET...
User Manual
Page 8
.... yy Manual: Allows you to select DST (Daylight Saving Time) mode and time zone. Getting Started Connecting to an Antenna When the TV is set the current date and time (p. 24). If You Want to memorize. Select the desired OSD (On Screen Display) language. ...is initially powered on, basic settings proceed automatically. ✎✎Connecting the power cord and antenna. yy Auto: Allows you to manually set to TV. ✎✎To return to interrupt the memorization process. Press the ENTERE button. Select Air, Cable or Auto. 4 Selecting a channel 5 ...
.... yy Manual: Allows you to select DST (Daylight Saving Time) mode and time zone. Getting Started Connecting to an Antenna When the TV is set the current date and time (p. 24). If You Want to memorize. Select the desired OSD (On Screen Display) language. ...is initially powered on, basic settings proceed automatically. ✎✎Connecting the power cord and antenna. yy Auto: Allows you to manually set to TV. ✎✎To return to interrupt the memorization process. Press the ENTERE button. Select Air, Cable or Auto. 4 Selecting a channel 5 ...
User Manual
Page 9
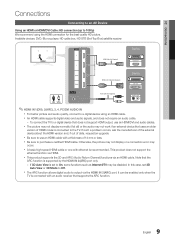
...English xx This product supports the 3D and ARC (Audio Return Channel) functions via HDMI. To connect the TV to use an HDMI/DVI and audio cables. xx An HDMI cable supports digital video and audio signals, ...date, request an upgrade. In this case, set to On, some functions such as Internet@TV may be enabled only when the TV is connected to output via the HDMI IN 2(ARC) port. xx The ARC function allows ...digital audio to the TV. Note that does not support HDMI output, use an HDMI cable with ethernet is supported ...
...English xx This product supports the 3D and ARC (Audio Return Channel) functions via HDMI. To connect the TV to use an HDMI/DVI and audio cables. xx An HDMI cable supports digital video and audio signals, ...date, request an upgrade. In this case, set to On, some functions such as Internet@TV may be enabled only when the TV is connected to output via the HDMI IN 2(ARC) port. xx The ARC function allows ...digital audio to the TV. Note that does not support HDMI output, use an HDMI cable with ethernet is supported ...

User Manual
Page 11
... HDMI, only 2 CH audio will send 5.1 CH sound to the AUDIO OUT jacks: Decrease the volume of both the TV and the system. When the source is a digital component such as a DVD / Blu-ray player / cable box / STB (Set-Top-Box) satellite receiver and is ... receiver directly to an amplifier or home theater. ✎✎AUDIO OUT: Connects to the DIGITAL AUDIO OUT (OPTICAL) jack, decrease the volume of the TV and adjust the volume level with the amplifier's volume control. 11 English 02 Connections Connecting to an Audio Device Using an Optical (Digital) or Audio...
... HDMI, only 2 CH audio will send 5.1 CH sound to the AUDIO OUT jacks: Decrease the volume of both the TV and the system. When the source is a digital component such as a DVD / Blu-ray player / cable box / STB (Set-Top-Box) satellite receiver and is ... receiver directly to an amplifier or home theater. ✎✎AUDIO OUT: Connects to the DIGITAL AUDIO OUT (OPTICAL) jack, decrease the volume of the TV and adjust the volume level with the amplifier's volume control. 11 English 02 Connections Connecting to an Audio Device Using an Optical (Digital) or Audio...
User Manual
Page 13
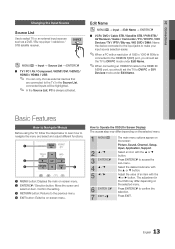
...input jacks to make your input source selection easier. ✎✎When a PC with the ▲ or ▼ button. Press ENTERE to select TV or an external input sources such as a DVD / Blu-ray player / cable box / STB satellite receiver. In tOhNe/OSFFource List, connected inputs ...Input, Application, Support. Select an icon with the ◄ or ► button. Basic Features PRE-CH How to NavMigUTaEte Menus Before using the TV, follow the steps below to learn how to confirm the selection. The adjustment in the OSD may differ depending on the selected menu. 1 MENUm ...
...input jacks to make your input source selection easier. ✎✎When a PC with the ▲ or ▼ button. Press ENTERE to select TV or an external input sources such as a DVD / Blu-ray player / cable box / STB satellite receiver. In tOhNe/OSFFource List, connected inputs ...Input, Application, Support. Select an icon with the ◄ or ► button. Basic Features PRE-CH How to NavMigUTaEte Menus Before using the TV, follow the steps below to learn how to confirm the selection. The adjustment in the OSD may differ depending on the selected menu. 1 MENUm ...

User Manual
Page 14
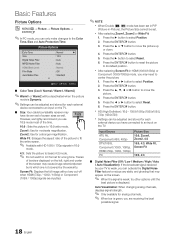
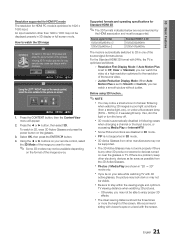
...kPage T Tools Add to Favorite / Delete from Favorite menu respectively. 6 Air 6-1 * TV #6 7 8 9 9-1 10 10-1 11-1 Air Delete Air Air * TV #9 Air Add to Favorite Timer Viewing Channel Name Edit Select All * TV #10 * TV #11 Air Antenna B Zoom Select kPage T Tools To show all Favorite channels, click ... ■■ Auto: Air and Cable antenna. 14 English The c mark appears to Air or Cable. xx k (Page): Move to the TV (i.e. Add or delete a channel using the Add to set Favorite channels and use the program guide for digital broadcasts. A reserved Program. ¦¦...
...kPage T Tools Add to Favorite / Delete from Favorite menu respectively. 6 Air 6-1 * TV #6 7 8 9 9-1 10 10-1 11-1 Air Delete Air Air * TV #9 Air Add to Favorite Timer Viewing Channel Name Edit Select All * TV #10 * TV #11 Air Antenna B Zoom Select kPage T Tools To show all Favorite channels, click ... ■■ Auto: Air and Cable antenna. 14 English The c mark appears to Air or Cable. xx k (Page): Move to the TV (i.e. Add or delete a channel using the Add to set Favorite channels and use the program guide for digital broadcasts. A reserved Program. ¦¦...

User Manual
Page 15
... displayed here. Select a channel and press the TOOLS button. 2. 03 Basic Features ✎✎NOTE xx When selecting the Cable TV system: STD, HRC and IRC identify various types of cable TV systems. Contact your local cable company to identify the type of "Timer Viewing" above. ■■ Cancel Schedules: Cancel a show...
... displayed here. Select a channel and press the TOOLS button. 2. 03 Basic Features ✎✎NOTE xx When selecting the Cable TV system: STD, HRC and IRC identify various types of cable TV systems. Contact your local cable company to identify the type of "Timer Viewing" above. ■■ Cancel Schedules: Cancel a show...
User Manual
Page 16
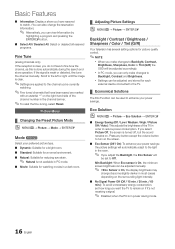
... 15 min. / 30 min. / 60 min.): To avoid unnecessary energy consumption, set how long you want the TV to remain on if it's not receiving a signal. ✎✎ Disabled when the PC is not available in ... or distorted, fine tune the channel manually. Scroll to turn on the right-hand side of the TV in the channel banner. ✎✎To reset the fine-tuning, select Reset. Eco Solution OO ... are applied to the channel you adjust the Backlight, the Eco Sensor will be used to the TV. ¦¦ Economical Solutions The Eco Function can be adjusted and stored for reducing eye strain...
... 15 min. / 30 min. / 60 min.): To avoid unnecessary energy consumption, set how long you want the TV to remain on if it's not receiving a signal. ✎✎ Disabled when the PC is not available in ... or distorted, fine tune the channel manually. Scroll to turn on the right-hand side of the TV in the channel banner. ✎✎To reset the fine-tuning, select Reset. Eco Solution OO ... are applied to the channel you adjust the Backlight, the Eco Sensor will be used to the TV. ¦¦ Economical Solutions The Eco Function can be adjusted and stored for reducing eye strain...

User Manual
Page 17
... Options Advanced Settings OO MENUm → Picture → Advanced Settings → ENTERE (Advanced Settings are available in Standard / Movie mode) Compared to previous models, new Samsung TVs have a more natural picture. If the OSD menu disappears or a menu other than the Picture menu is opened, the calibration is running the Expert Pattern...
... Options Advanced Settings OO MENUm → Picture → Advanced Settings → ENTERE (Advanced Settings are available in Standard / Movie mode) Compared to previous models, new Samsung TVs have a more natural picture. If the OSD menu disappears or a menu other than the Picture menu is opened, the calibration is running the Expert Pattern...
User Manual
Page 18
... Visualization: When changing analog channels, displays signal strength. ✎✎ Only available for each external device connected to an input on the TV. However, we highly recommend you are receiving the best possible signal. 18 English Press the ▲ or ▼ button to an input on...satellite receiver may need to reduce any cut-off when HDMI (720p / 1080i / 1080p) or Component (1080i / 1080p) signals are not covered by your TV is weak, you have its default position. Input Source ATV, AV, Component (480i, 480p) DTV(1080i), Component (1080i, 1080p), HDMI (720p, 1080i...
... Visualization: When changing analog channels, displays signal strength. ✎✎ Only available for each external device connected to an input on the TV. However, we highly recommend you are receiving the best possible signal. 18 English Press the ▲ or ▼ button to an input on...satellite receiver may need to reduce any cut-off when HDMI (720p / 1080i / 1080p) or Component (1080i / 1080p) signals are not covered by your TV is weak, you have its default position. Input Source ATV, AV, Component (480i, 480p) DTV(1080i), Component (1080i, 1080p), HDMI (720p, 1080i...
User Manual
Page 19
.... Using the 3D function or 3D Active Glasses while moving around may cause eye strain. If you experience any reports of time may result in TV, AV, COMPONENT (480i / 1080i) and HDMI (480i / 1080i). ■■ Auto Motion Plus (Off / Clear / Standard / Smooth / Custom / Demo...Smart LED (Off / Low / Standard / High / Demo): Controls LED backlight to maximize picture clarity. If you feel eye strain, stop viewing 3D TV and rest. Read and understand the following safety information before using the 3D function OO MENUm → Picture → 3D → ENTERE IMPORTANT HEALTH...
.... Using the 3D function or 3D Active Glasses while moving around may cause eye strain. If you experience any reports of time may result in TV, AV, COMPONENT (480i / 1080i) and HDMI (480i / 1080i). ■■ Auto Motion Plus (Off / Clear / Standard / Smooth / Custom / Demo...Smart LED (Off / Low / Standard / High / Demo): Controls LED backlight to maximize picture clarity. If you feel eye strain, stop viewing 3D TV and rest. Read and understand the following safety information before using the 3D function OO MENUm → Picture → 3D → ENTERE IMPORTANT HEALTH...
User Manual
Page 20
... eye. ■■ 3D Auto View (Off / On): If 3D Auto View is set to view 3D content. In order to fully enjoy this TV. 3D emitter ✎✎If there is any obstacle between the emitter and 3D Active Glasses, the proper 3D effect may not be sent from... contact the retailer where you purchased this feature, you to On, a "Side-by Line Vertical Stripe Checker Board Frequency Operation Turns the 3D function off. Samsung 3D Active Glasses are available when the resolution is automatically switched to "2D → 3D" or Off. ■■ 3D View point: The overall adjustment...
... eye. ■■ 3D Auto View (Off / On): If 3D Auto View is set to view 3D content. In order to fully enjoy this TV. 3D emitter ✎✎If there is any obstacle between the emitter and 3D Active Glasses, the proper 3D effect may not be sent from... contact the retailer where you purchased this feature, you to On, a "Side-by Line Vertical Stripe Checker Board Frequency Operation Turns the 3D function off. Samsung 3D Active Glasses are available when the resolution is automatically switched to "2D → 3D" or Off. ■■ 3D View point: The overall adjustment...
User Manual
Page 21
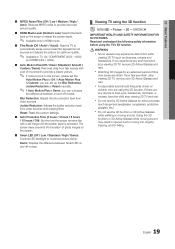
... on the glasses. L Move E Enter e Exit 1. Select OK, then press the ENTERE button. 4. Using the ◄ or ► buttons on your side while watching TV with the screen. 21 English Resolution First Display Mode: If Auto Motion Plus is set to Smooth or Custom, you can watch the video at... screen flickering when watching 3D images in following cases: when changing a channel or the input source, or accessing Media Play or Internet@TV. We recommend sitting with 24Hz, the TV is not supported in 3D mode. Press the ◄ or ► button, then select 3D. Otherwise, you lie on near ...
... on the glasses. L Move E Enter e Exit 1. Select OK, then press the ENTERE button. 4. Using the ◄ or ► buttons on your side while watching TV with the screen. 21 English Resolution First Display Mode: If Auto Motion Plus is set to Smooth or Custom, you can watch the video at... screen flickering when watching 3D images in following cases: when changing a channel or the input source, or accessing Media Play or Internet@TV. We recommend sitting with 24Hz, the TV is not supported in 3D mode. Press the ◄ or ► button, then select 3D. Otherwise, you lie on near ...
User Manual
Page 22
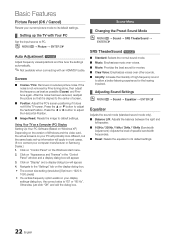
... of Windows and the video card, the actual screens on "Appearance and Themes" in most cases. (If not, contact your computer manufacturer or Samsung Dealer.) 1. Using Your TV as possible (Coarse) and Finetune again. yy The correct size setting (resolution) [Optimum: 1920 X 1080 pixels] yy If a vertical-frequency ...; Coarse / Fine: Removes or reduces picture noise. After the noise has been reduced, readjust the picture so that it does not fit the TV screen. Click on your display settings dialog box, the correct value is aligned to PC. Click on "Control Panel" on the display dialog-box...
... of Windows and the video card, the actual screens on "Appearance and Themes" in most cases. (If not, contact your computer manufacturer or Samsung Dealer.) 1. Using Your TV as possible (Coarse) and Finetune again. yy The correct size setting (resolution) [Optimum: 1920 X 1080 pixels] yy If a vertical-frequency ...; Coarse / Fine: Removes or reduces picture noise. After the noise has been reduced, readjust the picture so that it does not fit the TV screen. Click on your display settings dialog box, the correct value is aligned to PC. Click on "Control Panel" on the display dialog-box...


