User Manual
Page 2
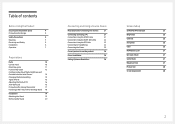
... Removing the Stand 20 Connecting and Using a Source Device Read below before installing the monitor. 21 Connecting and Using a PC 21 Connection Using the HDMI Cable 21 Connection Using the HDMI-DVI Cable 22 Connection Using the DP Cable 22 Connecting to Headphones 22 Connecting the Power 23 Correct posture to use the product 24 Driver Installation 24 Setting Optimum Resolution 24 Screen Setup SAMSUNG MAGIC Bright 25 Brightness 26 Contrast 26 Sharpness 26 Color 26 HDMI Black Level 27 Eye Saver Mode 27 Game Mode 27 Response Time 27 Picture Size...
... Removing the Stand 20 Connecting and Using a Source Device Read below before installing the monitor. 21 Connecting and Using a PC 21 Connection Using the HDMI Cable 21 Connection Using the HDMI-DVI Cable 22 Connection Using the DP Cable 22 Connecting to Headphones 22 Connecting the Power 23 Correct posture to use the product 24 Driver Installation 24 Setting Optimum Resolution 24 Screen Setup SAMSUNG MAGIC Bright 25 Brightness 26 Contrast 26 Sharpness 26 Color 26 HDMI Black Level 27 Eye Saver Mode 27 Game Mode 27 Response Time 27 Picture Size...
User Manual
Page 3
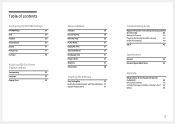
... Sound Source 30 Source 31 Picture Size 31 Contrast 32 Adjusting OSD (On Screen Display) settings Transparency 33 Language 33 Display Time 33 Setup and Reset FreeSync 34 Eco Saving Plus 36 Off Timer Plus 36 PC/AV Mode 37 DisplayPort Ver. 37 Source Detection 37 Key Repeat Time 37 Power LED On 37 Reset All 37 Information 38 Installing the Software Easy Setting Box 39 Restrictions and Problems with the Installation 39 System Requirements 39 Troubleshooting Guide...
... Sound Source 30 Source 31 Picture Size 31 Contrast 32 Adjusting OSD (On Screen Display) settings Transparency 33 Language 33 Display Time 33 Setup and Reset FreeSync 34 Eco Saving Plus 36 Off Timer Plus 36 PC/AV Mode 37 DisplayPort Ver. 37 Source Detection 37 Key Repeat Time 37 Power LED On 37 Reset All 37 Information 38 Installing the Software Easy Setting Box 39 Restrictions and Problems with the Installation 39 System Requirements 39 Troubleshooting Guide...

User Manual
Page 5
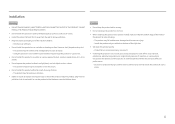
...; Clean any dust around the pins of the product. 5 Connect the power cord to the product when an issue occurs. •• Hold the plug when disconnecting the power cord from the product. ――Hold the power cable by the plug and do not touch the cable with your product by Samsung. Electricity and Safety Warning •• Do not use a damaged power cord or plug...
...; Clean any dust around the pins of the product. 5 Connect the power cord to the product when an issue occurs. •• Hold the plug when disconnecting the power cord from the product. ――Hold the power cable by the plug and do not touch the cable with your product by Samsung. Electricity and Safety Warning •• Do not use a damaged power cord or plug...
User Manual
Page 6
... Install the product only on a cabinet or shelf, make sure that the bottom edge of the front of time) may seriously affect its performance. ‒‒ Be sure to consult Samsung Customer Service Center... stove. And do not install or use the product in an unusual place (a place exposed to install the product at least 10 cm away from oil pollution. Installation Warning •• DO.... •• Do not set down the product on its front. •• When installing the product on cabinets or shelves of the right size. •• Set down the product gently. ‒...
... Install the product only on a cabinet or shelf, make sure that the bottom edge of the front of time) may seriously affect its performance. ‒‒ Be sure to consult Samsung Customer Service Center... stove. And do not install or use the product in an unusual place (a place exposed to install the product at least 10 cm away from oil pollution. Installation Warning •• DO.... •• Do not set down the product on its front. •• When installing the product on cabinets or shelves of the right size. •• Set down the product gently. ‒...

User Manual
Page 7
... move the product by pulling the power cord or any cable. •• If a gas leakage is a high voltage inside the product. Operation Warning •• There is found, do not touch the product or power plug. Then contact Samsung Customer Service Center. 7 Never disassemble, repair or modify the product yourself. ‒‒ Contact Samsung Customer Service Center for the toys or...
... move the product by pulling the power cord or any cable. •• If a gas leakage is a high voltage inside the product. Operation Warning •• There is found, do not touch the product or power plug. Then contact Samsung Customer Service Center. 7 Never disassemble, repair or modify the product yourself. ‒‒ Contact Samsung Customer Service Center for the toys or...

User Manual
Page 12
.../PBP function is locked, Brightness and Contrast can be applied. Return Icons Description Selects to change the input signal by moving the JOG button in the Function Key Guide screen. A message will appear when the focus changes. Eye Saver Mode is available. Press the button when configuring settings for each item will appear on the top left corner of your Monitor's feature appears. UP...
.../PBP function is locked, Brightness and Contrast can be applied. Return Icons Description Selects to change the input signal by moving the JOG button in the Function Key Guide screen. A message will appear when the focus changes. Eye Saver Mode is available. Press the button when configuring settings for each item will appear on the top left corner of your Monitor's feature appears. UP...

User Manual
Page 14
...% and control the volume using the volume control (JOG button LEFT/RIGHT) on the product may mute the sound or cause choppy audio when applying the headphones or speakers. Configuring Eye Saver Mode, Brightness and Contrast from the Initial Screen Adjust the Brightness, Contrast and Eye Saver Mode by moving the JOG button. Volume 50 Mute ――The displayed image may differ depending on the model. ――The default brightness can adjust Volume by...
...% and control the volume using the volume control (JOG button LEFT/RIGHT) on the product may mute the sound or cause choppy audio when applying the headphones or speakers. Configuring Eye Saver Mode, Brightness and Contrast from the Initial Screen Adjust the Brightness, Contrast and Eye Saver Mode by moving the JOG button. Volume 50 Mute ――The displayed image may differ depending on the model. ――The default brightness can adjust Volume by...

User Manual
Page 22
... optimum resolution may not be available with an HDMI-DVI cable. Make sure that supports 3840 x 2160 @ 60 Hz. DP IN ――To display 3840 x 2160 @ 60 Hz, use a DP cable that the graphics card of the DP source supports 3840 x 2160 @ 60 Hz. 22 Connection Using the DP Cable Check to make sure that the power cables for the monitor and external devices, such as computers and set -top...
... optimum resolution may not be available with an HDMI-DVI cable. Make sure that supports 3840 x 2160 @ 60 Hz. DP IN ――To display 3840 x 2160 @ 60 Hz, use a DP cable that the graphics card of the DP source supports 3840 x 2160 @ 60 Hz. 22 Connection Using the DP Cable Check to make sure that the power cables for the monitor and external devices, such as computers and set -top...
User Manual
Page 24
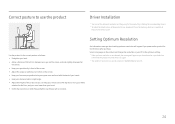
...;• Adjust the height of the product driver, download it from the Samsung Electronics website at the screen. •• Keep your eyes directly in Control Panel on the product for this product by installing the corresponding drivers. ――To install the latest version of the product so you power on your PC. 24 Select a language on the product and change the resolution on your...
...;• Adjust the height of the product driver, download it from the Samsung Electronics website at the screen. •• Keep your eyes directly in Control Panel on the product for this product by installing the corresponding drivers. ――To install the latest version of the product so you power on your PC. 24 Select a language on the product and change the resolution on your...

User Manual
Page 25
.... In PC mode •• Custom: Customize the contrast and brightness as brightness. Specifications are preset at the factory. Refer to improve quality. SAMSUNG MAGIC Bright This menu provides an optimum picture quality suitable for details. ――The functions available may differ from what is set to suit your product for the environment where the product will save power and reduce eye...
.... In PC mode •• Custom: Customize the contrast and brightness as brightness. Specifications are preset at the factory. Refer to improve quality. SAMSUNG MAGIC Bright This menu provides an optimum picture quality suitable for details. ――The functions available may differ from what is set to suit your product for the environment where the product will save power and reduce eye...

User Manual
Page 26
... Warm 1. ‒‒ Custom: Customize the color tone. ――When the external input is connected through HDMI/DP and PC/AV Mode is set to 100 mean greater intensity for the color. •• Green: Adjust the green saturation level. Contrast Adjust the contrast between the objects and background. (Range: 0~100) A higher value will increase the contrast to make the object appear clearer. ――...
... Warm 1. ‒‒ Custom: Customize the color tone. ――When the external input is connected through HDMI/DP and PC/AV Mode is set to 100 mean greater intensity for the color. •• Green: Adjust the green saturation level. Contrast Adjust the contrast between the objects and background. (Range: 0~100) A higher value will increase the contrast to make the object appear clearer. ――...

User Manual
Page 27
... used to the product via HDMI, image quality degradation (contrast/ color degradation, black level, etc.) may occur, depending on a PC or when a game console such as PlayStation™ or Xbox™ is connected. ――This menu is not available when Eye Saver Mode is enabled. ――When the monitor turns off, enters power-saving mode or changes input sources, Game Mode turns Off even if it is set...
... used to the product via HDMI, image quality degradation (contrast/ color degradation, black level, etc.) may occur, depending on a PC or when a game console such as PlayStation™ or Xbox™ is connected. ――This menu is not available when Eye Saver Mode is enabled. ――When the monitor turns off, enters power-saving mode or changes input sources, Game Mode turns Off even if it is set...
User Manual
Page 28
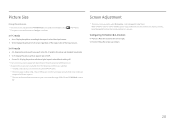
.... V-Position: Move the screen up or down. 28 In AV mode •• 4:3: Display the picture with the product. ――Changing the screen size is available when the following conditions are satisfied. ――A digital output device is connected using the HDMI/DP cable. ――The input signal is 480p, 576p, 720p, or 1080p and monitor can display normally (Not every model can support all of these signals...
.... V-Position: Move the screen up or down. 28 In AV mode •• 4:3: Display the picture with the product. ――Changing the screen size is available when the following conditions are satisfied. ――A digital output device is connected using the HDMI/DP cable. ――The input signal is 480p, 576p, 720p, or 1080p and monitor can display normally (Not every model can support all of these signals...

User Manual
Page 29
... input sources. One source device is displayed on the main screen at the same time the another source device is displayed in Picture) function separates the screen into two parts. If the screen is blank in PIP/PBP mode when the optimum resolution is compatible with the performance of parts may vary depending on the PC. (Instructions are connected to a compatibility issue between the graphics card and the Windows system. Set...
... input sources. One source device is displayed on the main screen at the same time the another source device is displayed in Picture) function separates the screen into two parts. If the screen is blank in PIP/PBP mode when the optimum resolution is compatible with the performance of parts may vary depending on the PC. (Instructions are connected to a compatibility issue between the graphics card and the Windows system. Set...

User Manual
Page 31
... each screen input source. •• Wide: Display the picture in PIP mode (Size / / )) Select the image size for the main screen changes. ――With the exception of the left and right screens are satisfied. ――A digital output device is connected using the HDMI/DP cable. ――The input signal is available when the following conditions are the same, the operation cannot be supported depending on the ports provided...
... each screen input source. •• Wide: Display the picture in PIP mode (Size / / )) Select the image size for the main screen changes. ――With the exception of the left and right screens are satisfied. ――A digital output device is connected using the HDMI/DP cable. ――The input signal is available when the following conditions are the same, the operation cannot be supported depending on the ports provided...
User Manual
Page 34
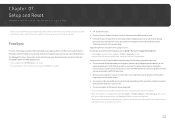
... displayed FreeSync menu items on the monitor may vary, depending on the monitor model and compatibility with the AMD graphics card. ――Not available when PIP/PBP Mode is unavailable in the devices (e.g. Note that eliminates screen tearing without notice to change the resolution. ――The function is set to your graphics driver's version and update it with a higher screen frame rate. Use the HDMI/DP cable...
... displayed FreeSync menu items on the monitor may vary, depending on the monitor model and compatibility with the AMD graphics card. ――Not available when PIP/PBP Mode is unavailable in the devices (e.g. Note that eliminates screen tearing without notice to change the resolution. ――The function is set to your graphics driver's version and update it with a higher screen frame rate. Use the HDMI/DP cable...
User Manual
Page 37
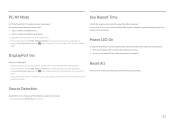
... screen drops to 2560 x 1440 due to enable or disable the power LED located at the lower part of a button when the button is pressed. PC/AV Mode Key Repeat Time Set PC/AV Mode to go blank. If No Repeat is selected, a command responds only once when a button is displaying the message Check Signal Cable, press the icon to the default factory settings. Source Detection Select either Auto or Manual...
... screen drops to 2560 x 1440 due to enable or disable the power LED located at the lower part of a button when the button is pressed. PC/AV Mode Key Repeat Time Set PC/AV Mode to go blank. If No Repeat is selected, a command responds only once when a button is displaying the message Check Signal Cable, press the icon to the default factory settings. Source Detection Select either Auto or Manual...
User Manual
Page 40
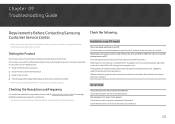
... Check Signal Cable appears. Installation issue (PC mode) The screen keeps switching on all four sides of the screen when an HDMI or HDMI-DVI cable is connected properly. Check that the power cable is connected to the product. Blank spaces are locked. The blank spaces found on and off . Check that the device connected to the product is off . If the graphics card settings menu does not have nothing to adjust the screen settings.) Screen issue The power LED...
... Check Signal Cable appears. Installation issue (PC mode) The screen keeps switching on all four sides of the screen when an HDMI or HDMI-DVI cable is connected properly. Check that the power cable is connected to the product. Blank spaces are locked. The blank spaces found on and off . Check that the device connected to the product is off . If the graphics card settings menu does not have nothing to adjust the screen settings.) Screen issue The power LED...
User Manual
Page 41
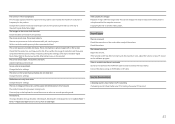
..., change Turn on the screen have your PC sound card or software program. Adjust Brightness and Contrast. Press any accessories (video extension cable, etc.) and try again. Try playing the file on the screen. Sound issue There is no sound. There are within the range of the audio cable or adjust the volume. The colors on ClearType. There is no image on the screen look white. Windows 7, Windows 8, Windows 8.1 or Windows 10): Go to Control Panel → Fonts → Adjust...
..., change Turn on the screen have your PC sound card or software program. Adjust Brightness and Contrast. Press any accessories (video extension cable, etc.) and try again. Try playing the file on the screen. Sound issue There is no sound. There are within the range of the audio cable or adjust the volume. The colors on ClearType. There is no image on the screen look white. Windows 7, Windows 8, Windows 8.1 or Windows 10): Go to Control Panel → Fonts → Adjust...
User Manual
Page 42
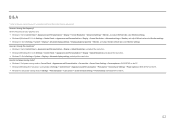
... Screen timeout settings → Power & sleep or BIOS SETUP on your graphics card. •• Windows 7: Go to Control Panel → Appearance and Personalization → Display → Screen Resolution → Advanced settings → Monitor, and adjust Refresh rate under Monitor settings. •• Windows 8(Windows 8.1): Go to Settings → Control Panel → Appearance and Personalization → Display → Screen Resolution → Advanced settings → Monitor, and adjust Refresh rate under Monitor settings. •• Windows 10: Go to the user manual...
... Screen timeout settings → Power & sleep or BIOS SETUP on your graphics card. •• Windows 7: Go to Control Panel → Appearance and Personalization → Display → Screen Resolution → Advanced settings → Monitor, and adjust Refresh rate under Monitor settings. •• Windows 8(Windows 8.1): Go to Settings → Control Panel → Appearance and Personalization → Display → Screen Resolution → Advanced settings → Monitor, and adjust Refresh rate under Monitor settings. •• Windows 10: Go to the user manual...


