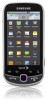
User Manual (user Manual) (ver.f9) (English)
Page 27
... you hear the caller and automated prompts. 16. microSD Card Slot 17. Light sensors let you to adjust the ringer volume in a menu, pressing the Back key returns you use the ambient light level to adjust the screen brightness/contrast. Ⅲ In a bright light condition (outdoors), the sensors cause the device to...
User Manual (user Manual) (ver.f9) (English)
Page 51
... re-orients by moving the device is enabled. A checkmark indicates the feature is the Contacts screen. Tap an onscreen icon to disable this automatic orientation adjustment. Press from the Home screen. This screens requires you turn the device on page 64. Ⅲ Clear the Orientation checkmark to launch a menu or feature...
User Manual (user Manual) (ver.f9) (English)
Page 60
... microphone. See "2I. Tap again to temporarily use the device's earpiece. In-Call Options Once you initiate a call back to use the device. This can adjust the speaker volume using the volume keys.) ᮣ Deactivate Speaker to the connected Bluetooth headset. Ⅲ When turned off, the call is routed to the...
User Manual (user Manual) (ver.f9) (English)
Page 76
... event, USB connection, Text/MMS messages. The ringtone then briefly plays when selected. 4. Activation of both using the dialpad and tapping the screen. 1. Adjusting the Volume Settings Adjust the volume settings of Feature Sounds When tapping onscreen items, using the dialpad. Ⅲ Audible selection plays a sound when making any onscreen selection. Ⅲ...
User Manual (user Manual) (ver.f9) (English)
Page 77
To set your device to always vibrate for Media volume). Tap either Ringer volume, Media volume or System volume. 3. Tip: You can adjust the ringer volume in standby mode (or the earpiece volume during a call volume and Notification volume fields to vibrate while using the volume button on ... until you see on the screen. Vibrate To set your device off (except for incoming calls: 1. and tap > Sound & 2. Touch and drag the onscreen slider, adjust the volume level, and tap OK. Ⅲ Within Ringer Volume...
User Manual (user Manual) (ver.f9) (English)
Page 78
... on page 36. 1. A checkmark indicates the feature is the delay time before the screen automatically turns off and no transitions are opened , this automatic orientation adjustment. Press > display. Tap a time setting. Settings Press > display. Press > display. Changing the Backlight Time Length Select how long the display screen remains lit after you...
User Manual (user Manual) (ver.f9) (English)
Page 79
...taken using the built-in standby mode. 1. Press > and tap display > Keyboard timeout. > Sound & 2. Changing the Automatic Brightness Automatically adjusts your surroundings. 1. You can crop the picture before the keyboard backlight automatically turns off the device, and when in camera or copied to... adjust the screen contrast and tap OK. and tap > Sound & 2. Settings 65 Press > display. Touch and drag Brightness slider left...
User Manual (user Manual) (ver.f9) (English)
Page 80
... date, month, and year by tapping or . Scroll down the list to assign an picture as a wallpaper. Adjust the hour and minute by tapping or . Tap Set when finished. 6. Tap Use 24-hour format to select how the date information is also applied ... to disable the feature. All menus are then updated to preview it. 4. Scroll through available images and tap a selection to the new language. 66 2B. Adjusting the Date and Time Your device obtains its time and date information by the Android operating system. 1. Language Settings To assign the default language used...
User Manual (user Manual) (ver.f9) (English)
Page 115
... between your device and your online Google account. 2E. Tap the Event field and enter a title for the event by tapping the corresponding fields, and adjusting the month, day, and year by tapping or . Ⅲ Tap Set when finished. 5. If assigned as options. 7. Views Calendar Menu Options 2. Choose from Month... Ⅲ Google/Gmail calendar entries are removed as an all day event. Select a time for the event by tapping the time field and then adjusting the hour and minute by tapping the Calendar field and then selecting an account. Tap the All day field to assign this example we are...
User Manual (user Manual) (ver.f9) (English)
Page 120
... a ringtone to hear an audio sample. Ⅲ Tap OK to store the new memo. Tap the Time field to begin adjustment of the alarm time. Ⅲ Adjust the hour and minute by tapping either the QWERTY keyboard or virtual keypad. 3. Tap the onscreen text field and enter your first...and tap > . Tap the time field of the five available colors. 4. Tap Ringtone to select an audio ringtone that has multiple alarm capabilities. Adjust the paper color by tapping its adjacent field and placing a checkmark next to customize. Tap Save to accept the ringtone assignment. 5. Note: Upon your...
User Manual (user Manual) (ver.f9) (English)
Page 129
... Search). Voice Search Functions in your Contacts list will default to verbally readout incoming Caller ID information for known and current Contacts. Ⅲ Speech rate adjust the rate at which onscreen text is spoken by the verbal readout. If enabled, and available as the Voice Dialer. To enabled verbal readout of...
User Manual (user Manual) (ver.f9) (English)
Page 136
... determines the exposure. 2. Press or or tap until the shutter sounds. (Your device automatically saves the picture to the right) the camera's side panel and adjust any of the camera lens. Choose from camera to set the image quality for better image capture under different lighting environments. From camera mode ( ), you...
User Manual (user Manual) (ver.f9) (English)
Page 137
... > . 2. Select a location and tap an image to view your device into a picture frame. Ⅲ Multiselect to select multiple images from the Gallery. Ⅲ Settings to adjust general settings and make modifications to the slideshow parameters. ● Display size to completing the deletion of images stored on the microSD card. - and tap...
User Manual (user Manual) (ver.f9) (English)
Page 139
... as the Wallpaper (Home screen background) (page 125). Ⅲ More to access additional image options such as: Details, Show on page 127. ● Settings to adjust general settings for a Contacts entry or as a picture ID. Press and tap > . 2. See "Camcorder Gallery Options" on Maps, and Settings. ● Details to activate the...
User Manual (user Manual) (ver.f9) (English)
Page 140
... ( the side of the device. ) located on page 122 for more information.) 2. or - Touch and slide open (to the right) the camera's side panel and adjust any of the following options: Ⅲ Camcorder settings to access camcorder hardware settings: ● Video quality to set the length for your video. Choose from...
User Manual (user Manual) (ver.f9) (English)
Page 141
... email message. ● Messaging to select multiple video files from : None (default), Mono, Sepia, Negative, Aqua, or Whiteboard. Choose from the Gallery. Ⅲ Settings to adjust general settings and make modifications to the previous screen. Press to return to the slideshow parameters. and tap 2. or -
User Manual (user Manual) (ver.f9) (English)
Page 153
... message from having to navigate within the voicemail menu. 1. Sprint Service: The Basics 139 Press and tap Settings > Change greeting. 3. Ⅲ Tap Change greeting to adjust your voicemail greeting (page 139). Ⅲ Tap From name to enter a name or number that you can clearly hear the message. 1. This direct access saves...
User Manual (user Manual) (ver.f9) (English)
Page 160
...file and tap Copy attached to delete older text messages that exceed the defined maximum number of text messages limit set below. 146 3A. Adjusting Message Settings 1. Once complete, tap Send. The original text message is open , tap the play icon (on the MMS message can... be saved to view the picture. or - From within the Messaging screen, press and tap Settings. 3. Adjust the following fields according to display the context menu. 4. To save the attachment, touch and hold the message entry to your reply message. 4. 2....
User Manual (user Manual) (ver.f9) (English)
Page 172
... as possible. Ⅲ Landscape-only display: Displays pages only in overview: Provides an overview of recently opened pages. Ⅲ Text encoding: Adjusts the current text encoding. Ⅲ Block pop-up windows: Prevents popup advertisement or windows from one of a loaded website. Ⅲ Auto-fit...images to be loaded along with the other text components of the following page settings: Ⅲ Text size: Adjusts the current onscreen text size. Press to begin surfing. 2. Adjusting Browser Page Settings 1. Tap the URL field and enter a website address. Ⅲ As you type the address...
User Manual (user Manual) (ver.f9) (English)
Page 173
... the checkmark to open the browser menu. 2. Press to disable this function. Ⅲ Clear passwords. Tap More > Settings. 3. Adjusting Browser Privacy Settings 1. Tap OK to the browser. Press to the Privacy settings area and select from one of the following privacy settings...: Ⅲ Remember passwords. Stores usernames and passwords for the Web browser (page 160). Adjusting Browser Security Settings 1. Tap OK to disable this function. Ⅲ Clear Form data: Deletes any previously stored usernames or passwords...