
User Manual (ENGLISH)
Page 5
... View 1 Introduction 2 Key features of the SPH-i700 2 Install the battery 3 Remove the battery 3 Charge the battery 4 Get Started 6 Turning on the i700 6 Navigating the PDA 6 Today Screen 6 Owner Information 8 The New command 9 Time & Appointments 9 Lock the i700 9 Unlock the i700 10 Screen Icons 11 Displaying your phone number 13 Placing calls 13 Answering calls 14 Using the...
... View 1 Introduction 2 Key features of the SPH-i700 2 Install the battery 3 Remove the battery 3 Charge the battery 4 Get Started 6 Turning on the i700 6 Navigating the PDA 6 Today Screen 6 Owner Information 8 The New command 9 Time & Appointments 9 Lock the i700 9 Unlock the i700 10 Screen Icons 11 Displaying your phone number 13 Placing calls 13 Answering calls 14 Using the...

User Manual (ENGLISH)
Page 11
Place the battery on the back of the phone. Remove the battery • Push the battery release latch, then slide the battery toward the bottom end of the phone, making sure the plastic tabs are aligned with the corresponding holes in the phone. 2. Gently push the battery up until it snaps into place. Install the battery 1. Introduction 3
Place the battery on the back of the phone. Remove the battery • Push the battery release latch, then slide the battery toward the bottom end of the phone, making sure the plastic tabs are aligned with the corresponding holes in the phone. 2. Gently push the battery up until it snaps into place. Install the battery 1. Introduction 3

User Manual (ENGLISH)
Page 12
.... Your phone is displayed in the Time and Next Appointment window. Samsung accessories are designed to charge the battery provided with a rechargeable battery. For a quick check of your phone's battery level, tap the time located in the upper left corner of the...Tap Start located in the upper right corner of the screen. 2. Only use Samsung-approved charging devices and batteries. A battery icon is powered by a rechargeable standard Li-ion battery. Checking battery charge Keeping track of the screen. 4. Charge the battery The i700 comes with your handset.
.... Your phone is displayed in the Time and Next Appointment window. Samsung accessories are designed to charge the battery provided with a rechargeable battery. For a quick check of your phone's battery level, tap the time located in the upper left corner of the...Tap Start located in the upper right corner of the screen. 2. Only use Samsung-approved charging devices and batteries. A battery icon is powered by a rechargeable standard Li-ion battery. Checking battery charge Keeping track of the screen. 4. Charge the battery The i700 comes with your handset.

User Manual (ENGLISH)
Page 13
... settings, searching for about four hours. The internal battery maintains data for service, vibrate mode and browser use affect the battery's talk and standby times. There is also an internal backup battery that saves all settings in case the battery is displayed and the unit automatically turns off the... LCD. An internal backup battery needs an initial charge of talk time ...
... settings, searching for about four hours. The internal battery maintains data for service, vibrate mode and browser use affect the battery's talk and standby times. There is also an internal backup battery that saves all settings in case the battery is displayed and the unit automatically turns off the... LCD. An internal backup battery needs an initial charge of talk time ...

User Manual (ENGLISH)
Page 17
... left side of the choices to launch the application. When a password is displayed. Tap Settings. 3. Lock the i700 When you to normal operation. Get Started 9 Time & Appointments To view the next upcoming appointment and battery indicator without launching the calendar or today screen: 1. Tap the Personal tab. 4. Select any of the screen...
... left side of the choices to launch the application. When a password is displayed. Tap Settings. 3. Lock the i700 When you to normal operation. Get Started 9 Time & Appointments To view the next upcoming appointment and battery indicator without launching the calendar or today screen: 1. Tap the Personal tab. 4. Select any of the screen...

User Manual (ENGLISH)
Page 20
Indicates that the i700 supports the 1X high speed data transfer protocol. Indicates a new voicemail message. Indicates your battery charge is displayed indicating the number of the home service area. Indicates missed calls. If you to access the Inbox. The roaming icon. If you ... that the vibrate function is being displayed, your phone is displayed that allows you tap this icon a window is available. The charging icon displays when i700 battery is On.
Indicates that the i700 supports the 1X high speed data transfer protocol. Indicates a new voicemail message. Indicates your battery charge is displayed indicating the number of the home service area. Indicates missed calls. If you to access the Inbox. The roaming icon. If you ... that the vibrate function is being displayed, your phone is displayed that allows you tap this icon a window is available. The charging icon displays when i700 battery is On.

User Manual (ENGLISH)
Page 52
... The following roaming options are roaming, extra charges may be used to select a desired roaming option. Tap Settings. 3. Roaming also consumes additional power from the battery requiring more information, see "Roaming Options" on other digital networks. For more frequent charges. Tap the Personal tab. 4. Some features may apply when making or...
... The following roaming options are roaming, extra charges may be used to select a desired roaming option. Tap Settings. 3. Roaming also consumes additional power from the battery requiring more information, see "Roaming Options" on other digital networks. For more frequent charges. Tap the Personal tab. 4. Some features may apply when making or...

User Manual (ENGLISH)
Page 97
Tap Start located in order to each is divided into the slot located on the i700. Tap the System tab. 4. Tap and hold the slider left corner of the screen. 5. Memory adjustments Memory is displayed on the side of data using ... memory amounts. 6. Once installed, the storage card is managed automatically, but can be used to backup or save data to avoid accidental loss due to battery discharge or other in the upper left or right to save and exit. Select the program from the list and tap Remove. Tap Memory. 5. Memory...
Tap Start located in order to each is divided into the slot located on the i700. Tap the System tab. 4. Tap and hold the slider left corner of the screen. 5. Memory adjustments Memory is displayed on the side of data using ... memory amounts. 6. Once installed, the storage card is managed automatically, but can be used to backup or save data to avoid accidental loss due to battery discharge or other in the upper left or right to save and exit. Select the program from the list and tap Remove. Tap Memory. 5. Memory...

User Manual (ENGLISH)
Page 113
...the reset button. For more information on resetting your handheld, see "Resetting Your Handheld" on page 105. • If you have to your phone or battery. • Make sure that there is no longer respond to buttons or the screen. You must have Standard User rights to press the reset button.... • Perform a soft or hard reset using Windows 2000 or XP, make sure you are using the stylus or a paper clip to install the i700 software. After a soft reset, the main phone screen is plugged in your handheld. On rare occasions, however your handheld running again.
...the reset button. For more information on resetting your handheld, see "Resetting Your Handheld" on page 105. • If you have to your phone or battery. • Make sure that there is no longer respond to buttons or the screen. You must have Standard User rights to press the reset button.... • Perform a soft or hard reset using Windows 2000 or XP, make sure you are using the stylus or a paper clip to install the i700 software. After a soft reset, the main phone screen is plugged in your handheld. On rare occasions, however your handheld running again.

User Manual (ENGLISH)
Page 115
...time. • Use only Samsung-approved batteries and chargers. The battery can be charged and discharged hundreds of times, but it uses less power; The battery may shorten its intended purpose. • If your battery. Usage guidelines: All about Performance and Safety Battery Precautions Your phone is damaged in..., since overcharging may require cooling or warming before charging. When a charger is not in any way. • Use the battery only for more than normal, it from the power source. talk and standby time are greatly affected by the signal strength on the remaining...
...time. • Use only Samsung-approved batteries and chargers. The battery can be charged and discharged hundreds of times, but it uses less power; The battery may shorten its intended purpose. • If your battery. Usage guidelines: All about Performance and Safety Battery Precautions Your phone is damaged in..., since overcharging may require cooling or warming before charging. When a charger is not in any way. • Use the battery only for more than normal, it from the power source. talk and standby time are greatly affected by the signal strength on the remaining...
User Manual (ENGLISH)
Page 116
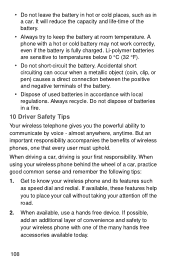
... 2. Accidental short circuiting can occur when a metallic object (coin, clip, or pen) causes a direct connection between the positive and negative terminals of the battery. • Dispose of the many hands free accessories available today. 108 When available, use a hands free device. Do not dispose of... will reduce the capacity and life-time of a car, practice good common sense and remember the following tips: 1. • Do not leave the battery in hot or cold places, such as speed dial and redial. When driving a car, driving is fully charged. When using your first responsibility.
... 2. Accidental short circuiting can occur when a metallic object (coin, clip, or pen) causes a direct connection between the positive and negative terminals of the battery. • Dispose of the many hands free accessories available today. 108 When available, use a hands free device. Do not dispose of... will reduce the capacity and life-time of a car, practice good common sense and remember the following tips: 1. • Do not leave the battery in hot or cold places, such as speed dial and redial. When driving a car, driving is fully charged. When using your first responsibility.

User Manual (ENGLISH)
Page 123
... parts and accessories out of the reach of small children's. • Keep the phone dry. Rough handling can shorten the life of electronic devices, damage batteries, and warp or melt certain plastics. • Do not store the phone in cold areas. Performance and Safety 115 Precipitation, humidity and liquids contain minerals...
... parts and accessories out of the reach of small children's. • Keep the phone dry. Rough handling can shorten the life of electronic devices, damage batteries, and warp or melt certain plastics. • Do not store the phone in cold areas. Performance and Safety 115 Precipitation, humidity and liquids contain minerals...

User Manual (ENGLISH)
Page 125
... removed or made illegible; (c) any plastic surfaces or other externally exposed parts that SAMSUNG's phones and accessories ("Products") are scratched or damaged due to normal usage; (d)... the accessories, products, ancillary, or peripheral equipment not furnished or approved by SAMSUNG; (e) defects or damage from defects in material and workmanship under normal use...product, or (g) Product used or purchased outside the United States or Canada. SAMSUNG TELECOMMUNICATIONS AMERICA, L.P. ("SAMSUNG") warrants the original ("Purchaser") that are free from improper testing, operation, maintenance...
... removed or made illegible; (c) any plastic surfaces or other externally exposed parts that SAMSUNG's phones and accessories ("Products") are scratched or damaged due to normal usage; (d)... the accessories, products, ancillary, or peripheral equipment not furnished or approved by SAMSUNG; (e) defects or damage from defects in material and workmanship under normal use...product, or (g) Product used or purchased outside the United States or Canada. SAMSUNG TELECOMMUNICATIONS AMERICA, L.P. ("SAMSUNG") warrants the original ("Purchaser") that are free from improper testing, operation, maintenance...

User Manual (ENGLISH)
Page 126
... purchase, the serial number of Product, and the seller's name and address. SAMSUNG may, at (888) 987-4357. batteries only if the battery falls below 80% of rated capacity or the battery leaks, and this limited warranty, purchaser must return Product to an authorized phone ...service facility in an adequate container for shipping, accompanied by SAMSUNG for charging the battery, (ii) any of the seals on the battery are SAMSUNG's Obligations? During the applicable warranty period, SAMSUNG will promptly repair the defective product. To obtain service under this Limited ...
... purchase, the serial number of Product, and the seller's name and address. SAMSUNG may, at (888) 987-4357. batteries only if the battery falls below 80% of rated capacity or the battery leaks, and this limited warranty, purchaser must return Product to an authorized phone ...service facility in an adequate container for shipping, accompanied by SAMSUNG for charging the battery, (ii) any of the seals on the battery are SAMSUNG's Obligations? During the applicable warranty period, SAMSUNG will promptly repair the defective product. To obtain service under this Limited ...

User Manual (ENGLISH)
Page 131
... options 17 placing a call ........ 14 Applications deleting 88 installing 88 Media Player 86 memory adjustments ........ 89 Pocket Excel 83 Pocket IE 79 Pocket Word 80 B Battery capacity 5 charging 4 checking charge 4 install 3 remove 3 Beam accepting beams 21 sending beams 21 C Calendar changing views 65 scheduling appoint- Index A Answering Calls answer call waiting...
... options 17 placing a call ........ 14 Applications deleting 88 installing 88 Media Player 86 memory adjustments ........ 89 Pocket Excel 83 Pocket IE 79 Pocket Word 80 B Battery capacity 5 charging 4 checking charge 4 install 3 remove 3 Beam accepting beams 21 sending beams 21 C Calendar changing views 65 scheduling appoint- Index A Answering Calls answer call waiting...
User Manual (ENGLISH)
Page 133
Troubleshooting checklist 105 hard reset 106 Resetting i700 105 soft reset 105 U Usage battery percautions ........ 107 driver safety tips 108 electronic devices .......... 111 emergency calls 113 environment 110 guidelines 107 medical devices 112 V Voicemail check messages 16 setup 15 Volume Settings alerts 51 HFK volume 49 notifications 51 record volume 49 setting levels 48 system volume 50 tone length 50 turning ringer off 52 voice volume 48 W Warranty 117 Warranty information Samsung liability 119 Samsung obligations ...... 118 Index 125
Troubleshooting checklist 105 hard reset 106 Resetting i700 105 soft reset 105 U Usage battery percautions ........ 107 driver safety tips 108 electronic devices .......... 111 emergency calls 113 environment 110 guidelines 107 medical devices 112 V Voicemail check messages 16 setup 15 Volume Settings alerts 51 HFK volume 49 notifications 51 record volume 49 setting levels 48 system volume 50 tone length 50 turning ringer off 52 voice volume 48 W Warranty 117 Warranty information Samsung liability 119 Samsung obligations ...... 118 Index 125

User Manual (ENGLISH)
Page 4
Understanding your Phone ........15 Front View of the I700 16 Viewing the Phone Screen Icons 17 Features of Contents Chapter 1 - Getting Started 12 Turning the i700 On 13 Entering the Owners Information 13 Setting up Voicemail 14 Contacting Customer Care 14 Chapter 2 - Table of the i700 19 Battery and Charger Accessories 20 Battery Capacity 20 Installing the Battery 21 Removing the Battery 22 Charging the Battery 23 Displaying your Phone Number 24 Making and Answering Calls 24 Making Calls 24 One Handed Dialing 25 Answering Calls 25 4
Understanding your Phone ........15 Front View of the I700 16 Viewing the Phone Screen Icons 17 Features of Contents Chapter 1 - Getting Started 12 Turning the i700 On 13 Entering the Owners Information 13 Setting up Voicemail 14 Contacting Customer Care 14 Chapter 2 - Table of the i700 19 Battery and Charger Accessories 20 Battery Capacity 20 Installing the Battery 21 Removing the Battery 22 Charging the Battery 23 Displaying your Phone Number 24 Making and Answering Calls 24 Making Calls 24 One Handed Dialing 25 Answering Calls 25 4

User Manual (ENGLISH)
Page 15
Chapter 2 - Understanding your Phone The following topics are discussed in this Chapter: • Front View of the i700 • Viewing the Phone Screen Icons • Features of the i700 • Battery and Charger Accessories • Displaying your Phone Number • Making/Answering Calls
Chapter 2 - Understanding your Phone The following topics are discussed in this Chapter: • Front View of the i700 • Viewing the Phone Screen Icons • Features of the i700 • Battery and Charger Accessories • Displaying your Phone Number • Making/Answering Calls

User Manual (ENGLISH)
Page 20
...i700 comes with a standard rechargable battery. The battery can be recharged before it is displayed and the unit automatically turns off the LCD. Understanding your phone. It is equipped with a standard battery, charger, and headset. Note: Long backlight settings, searching for service, vibrate mode and browser use only Samsung... approved accessories to avoid damage to your Phone 20 When the battery becomes low, a warning window is fully drained without causing battery damage. When there are approximately two minutes of ...
...i700 comes with a standard rechargable battery. The battery can be recharged before it is displayed and the unit automatically turns off the LCD. Understanding your phone. It is equipped with a standard battery, charger, and headset. Note: Long backlight settings, searching for service, vibrate mode and browser use only Samsung... approved accessories to avoid damage to your Phone 20 When the battery becomes low, a warning window is fully drained without causing battery damage. When there are approximately two minutes of ...

User Manual (ENGLISH)
Page 21
Gently push the battery up until it snaps into place. Installing the Battery 1. Chapter 2 - Understanding your Phone 21 Place the battery on the back of the phone, making sure that the plastic tabs are aligned with the corresponding holes in the phone. 2.
Gently push the battery up until it snaps into place. Installing the Battery 1. Chapter 2 - Understanding your Phone 21 Place the battery on the back of the phone, making sure that the plastic tabs are aligned with the corresponding holes in the phone. 2.


