User Manual (user Manual) (ver.f5) (English)
Page 4
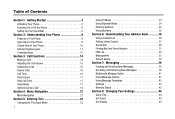
... Phone 8 Closed View of Your Phone 10 Internal Display Layout 11 Command Keys 12 Section 3: Call Functions 14 Making a Call 14 Adjusting the Call Volume 15 Answering a Call 15 Recent Calls 16 Call Time 16 Data Volume 17 Data Call Time 17 Silent Mode 17 Options During a Call 18 Section 4: Menu Navigation 21 Menu Navigation 21 Section 5: Entering Text 22 Changing the Text Input Mode 22 1 Using T9 Mode 23 Using Alphabet Mode 24 Entering Symbols 25 Using Numbers 25 Section 6: Understanding Your Address Book 26 Using Contacts List 26 Adding a New Contact 27 Speed Dial...
... Phone 8 Closed View of Your Phone 10 Internal Display Layout 11 Command Keys 12 Section 3: Call Functions 14 Making a Call 14 Adjusting the Call Volume 15 Answering a Call 15 Recent Calls 16 Call Time 16 Data Volume 17 Data Call Time 17 Silent Mode 17 Options During a Call 18 Section 4: Menu Navigation 21 Menu Navigation 21 Section 5: Entering Text 22 Changing the Text Input Mode 22 1 Using T9 Mode 23 Using Alphabet Mode 24 Entering Symbols 25 Using Numbers 25 Section 6: Understanding Your Address Book 26 Using Contacts List 26 Adding a New Contact 27 Speed Dial...
User Manual (user Manual) (ver.f5) (English)
Page 9
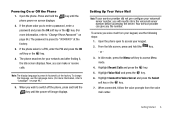
... the key. 4. Open the phone open to Automatic at the factory. 3. Getting Started 6 Your service provider can make or receive calls. Note: The display language is preset to switch off image displays. When connected, follow the voice prompts from your voicemail server number, you the number. In Idle mode, press the Menu soft key to "Change Phone Password" on screen displays. Setting Up Your Voice Mail Note: If your service provider did not pre-configure your keypad, use the Language menu. (For more information, refer to access Menu mode...
... the key. 4. Open the phone open to Automatic at the factory. 3. Getting Started 6 Your service provider can make or receive calls. Note: The display language is preset to switch off image displays. When connected, follow the voice prompts from your voicemail server number, you the number. In Idle mode, press the Menu soft key to "Change Phone Password" on screen displays. Setting Up Your Voice Mail Note: If your service provider did not pre-configure your keypad, use the Language menu. (For more information, refer to access Menu mode...

User Manual (user Manual) (ver.f5) (English)
Page 11
... Your Phone Your phone is in your phone. Display 2. Soft key (left) 3. Voicemail key 6. WAP Browser/Menu Confirm key 11. Send key 4. Volume/Menu Navigation key 5. Power on/off/Menu exit key 9. Special Function keys Understanding Your Phone 8 Section 2: Understanding Your Phone This section outlines some key features of the features included in use and offers many significant features. Features of your phone. User friendly, menu driven access to -use . Clear key 8. Microphone 12. Navigation keys 2. Open View of Your Phone The following list outlines...
... Your Phone Your phone is in your phone. Display 2. Soft key (left) 3. Voicemail key 6. WAP Browser/Menu Confirm key 11. Send key 4. Volume/Menu Navigation key 5. Power on/off/Menu exit key 9. Special Function keys Understanding Your Phone 8 Section 2: Understanding Your Phone This section outlines some key features of the features included in use and offers many significant features. Features of your phone. User friendly, menu driven access to -use . Clear key 8. Microphone 12. Navigation keys 2. Open View of Your Phone The following list outlines...
User Manual (user Manual) (ver.f5) (English)
Page 12
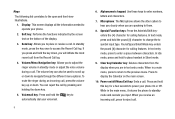
... the phone to adjust the ringer volume in a main menu, press to return to enter numbers, letters and characters. 7. Voicemail key: Press and hold to 9 6. In text entry mode, press to place or receive a call . Send key: Allows you input. When in standby mode or adjust the voice volume during an incoming call , press to power your voicemail. Alphanumeric keypad: Use these keys to the previous menu. Keys The following list correlates to the open and front view...
... the phone to adjust the ringer volume in a main menu, press to return to enter numbers, letters and characters. 7. Voicemail key: Press and hold to 9 6. In text entry mode, press to place or receive a call . Send key: Allows you input. When in standby mode or adjust the voice volume during an incoming call , press to power your voicemail. Alphanumeric keypad: Use these keys to the previous menu. Keys The following list correlates to the open and front view...
User Manual (user Manual) (ver.f5) (English)
Page 17
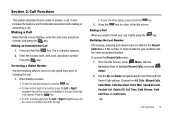
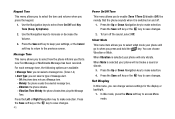
... Calls Menu. Press the key to return to highlight Recent Calls and press Select. 2. Choose from All Calls, Missed Calls, Calls Made, Calls Received, Voice Mail, Speed Dial List, Contact List, Delete All, Call Time, Data Volume, Data Call Time and Call Costs. -OR- Ending a Call When you want to scroll through the Recent Calls options. Redialing the Last Number All incoming, outgoing and missed calls are listed in position and enter the digit. • To clear the whole display, press and hold the key...
... Calls Menu. Press the key to return to highlight Recent Calls and press Select. 2. Choose from All Calls, Missed Calls, Calls Made, Calls Received, Voice Mail, Speed Dial List, Contact List, Delete All, Call Time, Data Volume, Data Call Time and Call Costs. -OR- Ending a Call When you want to scroll through the Recent Calls options. Redialing the Last Number All incoming, outgoing and missed calls are listed in position and enter the digit. • To clear the whole display, press and hold the key...
User Manual (user Manual) (ver.f5) (English)
Page 20
... keys to end. Silent Mode Silent mode is convenient when you can enter the password to stop the phone from the phone. 4. At the "Are You Sure?" After the initial setup, you wish to reset the call sent or received. • Total Data Call: shows the total time used . 17 • Total Volume: shows the Sent, Received, and Total volume of data from making noise, in a theater for the last data call times. 7. Data Call Time 1. Highlight Data Call Time...
... keys to end. Silent Mode Silent mode is convenient when you can enter the password to stop the phone from the phone. 4. At the "Are You Sure?" After the initial setup, you wish to reset the call sent or received. • Total Data Call: shows the total time used . 17 • Total Volume: shows the Sent, Received, and Total volume of data from making noise, in a theater for the last data call times. 7. Data Call Time 1. Highlight Data Call Time...

User Manual (user Manual) (ver.f5) (English)
Page 29
... phone numbers and their name and number in your Contacts List. Highlight Address Book, and press the Select soft key or the key. 3. The Contacts List entries are then listed, starting with the first entry matching your Contact List press the Down Navigation key. Call: allows you to place a call to this Contact. They are physically separate but are available: - When the Idle screen displays, press the Menu soft key. 2. Send Message: allows you to send a text...
... phone numbers and their name and number in your Contacts List. Highlight Address Book, and press the Select soft key or the key. 3. The Contacts List entries are then listed, starting with the first entry matching your Contact List press the Down Navigation key. Call: allows you to place a call to this Contact. They are physically separate but are available: - When the Idle screen displays, press the Menu soft key. 2. Send Message: allows you to send a text...
User Manual (user Manual) (ver.f5) (English)
Page 30
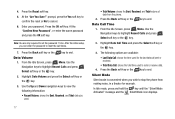
... you assign a cellular phone number for this contact. • Home: allows you to enter an Email address for this contact. Enter the contact First Name. 6. Send Business Card via: allows you assign a home phone number for this entry in a Text or Multimedia message. - Adding a New Contact Use the following category types: • Mobile: assigns the number entered to the Mobile entry. • Home: assigns the number entered to the Home entry. • Office: assigns the number entered to the Office entry...
... you assign a cellular phone number for this contact. • Home: allows you to enter an Email address for this contact. Enter the contact First Name. 6. Send Business Card via: allows you assign a home phone number for this entry in a Text or Multimedia message. - Adding a New Contact Use the following category types: • Mobile: assigns the number entered to the Mobile entry. • Home: assigns the number entered to the Home entry. • Office: assigns the number entered to the Office entry...
User Manual (user Manual) (ver.f5) (English)
Page 31
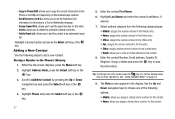
... a call to this contact. • Copy to: allows you to copy the contact information from the Phone, SIM Card, SIM Card(FDN) card. • Send Business Card via: allows you to set the Business Card information for this entry in the SIM Card 1. Tip: To change capitalization, momentarily press the key. Understanding Your Address Book 28 When the Idle screen displays, press the Menu soft key. 2. Storing a Number in a Text or Multimedia message. • Assign Speed Dial: allows you to set a ringtone...
... a call to this contact. • Copy to: allows you to copy the contact information from the Phone, SIM Card, SIM Card(FDN) card. • Send Business Card via: allows you to set the Business Card information for this entry in the SIM Card 1. Tip: To change capitalization, momentarily press the key. Understanding Your Address Book 28 When the Idle screen displays, press the Menu soft key. 2. Storing a Number in a Text or Multimedia message. • Assign Speed Dial: allows you to set a ringtone...
User Manual (user Manual) (ver.f5) (English)
Page 32
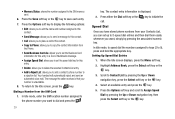
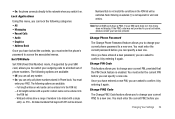
... a Text or Multimedia message. • Assign Speed Dial: allows you want , simply by pressing the associated numeric key. In Idle mode, enter the SIM location number assigned to the phone number you to set up to Assign Speed Dial by pressing the Up or Down navigation key, press the Select soft key or the key. 4. When the Idle screen displays, press the Menu soft key. 2. Press the Options soft key and scroll to 8-speed dial...
... a Text or Multimedia message. • Assign Speed Dial: allows you want , simply by pressing the associated numeric key. In Idle mode, enter the SIM location number assigned to the phone number you to set up to Assign Speed Dial by pressing the Up or Down navigation key, press the Select soft key or the key. 4. When the Idle screen displays, press the Menu soft key. 2. Press the Options soft key and scroll to 8-speed dial...
User Manual (user Manual) (ver.f5) (English)
Page 33
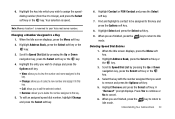
... key. When the Idle screen displays, press the Menu soft key. 2. When you to delete the number assigned to this key and press the Options soft key. 8. Changing a Number Assigned to Idle Deleting Speed Dial Entries 1. Highlight Address Book, press the Select soft key or the key. 3. To edit an assigned speed dial number, highlight Change and press the Select soft key. 6. Note: Memory location 1 is saved. key to return to a Key 1. Press Yes to continue or No to Speed Dial List...
... key. When the Idle screen displays, press the Menu soft key. 2. When you to delete the number assigned to this key and press the Options soft key. 8. Changing a Number Assigned to Idle Deleting Speed Dial Entries 1. Highlight Address Book, press the Select soft key or the key. 3. To edit an assigned speed dial number, highlight Change and press the Select soft key. 6. Note: Memory location 1 is saved. key to return to a Key 1. Press Yes to continue or No to Speed Dial List...
User Manual (user Manual) (ver.f5) (English)
Page 46
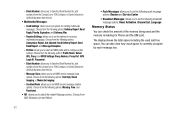
... Instant Message service. You can check the amount of the memory being used and free space. Choose from the list. - Choose from the following options: Text Only, Small Imaging, or Moderate Imaging. - Memory Status You can also view how much space is currently occupied by each message box. 43 Block Number: allows you to Save the Block Number list, add numbers from the Contact List or FDN Contacts, or Delete Selected or All Block Numbers...
... Instant Message service. You can check the amount of the memory being used and free space. Choose from the list. - Choose from the following options: Text Only, Small Imaging, or Moderate Imaging. - Memory Status You can also view how much space is currently occupied by each message box. 43 Block Number: allows you to Save the Block Number list, add numbers from the Contact List or FDN Contacts, or Delete Selected or All Block Numbers...
User Manual (user Manual) (ver.f5) (English)
Page 47
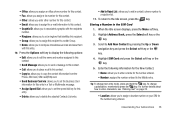
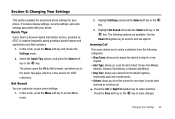
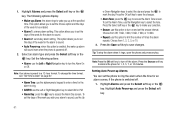
... to access the internet to shop for AT&T customers. Use the Down Navigation key to scroll to and set the volume for your phone. Quick Tips Quick Tips is a free service for a new ringtone. • Alert Type: allows you to set the alert default. In Idle mode, press the Menu soft key and choose the Settings menu. 2. It includes display settings, security settings, and extra settings associated with your phone. Set Sound You can customize various sound settings. 1. Press the Save soft key...
... to access the internet to shop for AT&T customers. Use the Down Navigation key to scroll to and set the volume for your phone. Quick Tips Quick Tips is a free service for a new ringtone. • Alert Type: allows you to set the alert default. In Idle mode, press the Menu soft key and choose the Settings menu. 2. It includes display settings, security settings, and extra settings associated with your phone. Set Sound You can customize various sound settings. 1. Press the Save soft key...
User Manual (user Manual) (ver.f5) (English)
Page 48
... phone vibrates then plays the Message Tone. Press the Left or Right Navigation key to the previous screen. Press the Save soft key or the key to save changes. 45 Power On/Off Tone This menu allows you to enable (Tone 1/Tone 2)/disable (Off) the melody that a new Text Message or Multimedia Message has been received. When Vibration is selected your phone will not make selection. 4. When Mute is selected your phone will only vibrate. Press the Save soft key to...
... phone vibrates then plays the Message Tone. Press the Left or Right Navigation key to the previous screen. Press the Save soft key or the key to save changes. 45 Power On/Off Tone This menu allows you to enable (Tone 1/Tone 2)/disable (Off) the melody that a new Text Message or Multimedia Message has been received. When Vibration is selected your phone will not make selection. 4. When Mute is selected your phone will only vibrate. Press the Save soft key to...
User Manual (user Manual) (ver.f5) (English)
Page 50
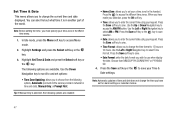
... are enabled: • Home Zone: allows you to enter the current date using your time zone in another part of time and date does not change the current time and date displayed. In Idle mode, press the Menu soft key to select AM or PM. Use the Left or Right Navigation key to access Menu mode. 2. Press the Save soft key or the key to choose from MM/DD/YYYY, DD/MM/YYYY...
... are enabled: • Home Zone: allows you to enter the current date using your time zone in another part of time and date does not change the current time and date displayed. In Idle mode, press the Menu soft key to select AM or PM. Use the Left or Right Navigation key to access Menu mode. 2. Press the Save soft key or the key to choose from MM/DD/YYYY, DD/MM/YYYY...

User Manual (user Manual) (ver.f5) (English)
Page 54
... enable or disable the alert sound. Scroll to Forward To, enter or change the number to highlight Activate and enter the forwarding 51 number. To set your voice mail number if you are available: • Forward always: allows you to forward Voice Calls and Data Calls to a colleague while you specify. Using the Left or Right Navigation key select Activate. To enter an international code, press and hold the 0 key until the + sign displays. Connection Tone (an alert sounds at the call type, Voice Calls...
... enable or disable the alert sound. Scroll to Forward To, enter or change the number to highlight Activate and enter the forwarding 51 number. To set your voice mail number if you are available: • Forward always: allows you to forward Voice Calls and Data Calls to a colleague while you specify. Using the Left or Right Navigation key select Activate. To enter an international code, press and hold the 0 key until the + sign displays. Connection Tone (an alert sounds at the call type, Voice Calls...
User Manual (user Manual) (ver.f5) (English)
Page 57
... conditions in Phone book. If the PIN2 code was not provided to a limited set of numbers to be dialed with a specific contact name can only call any number. • On: you switch it again. You must enter the current PIN2 before you are asked to change your SIM card does not, this menu, you can be restricted. Set FDN Mode Set FDN (Fixed Dial Number) mode, if supported by entering it by your SIM card, allows you...
... conditions in Phone book. If the PIN2 code was not provided to a limited set of numbers to be dialed with a specific contact name can only call any number. • On: you switch it again. You must enter the current PIN2 before you are asked to change your SIM card does not, this menu, you can be restricted. Set FDN Mode Set FDN (Fixed Dial Number) mode, if supported by entering it by your SIM card, allows you...
User Manual (user Manual) (ver.f5) (English)
Page 64
... Navigation key to turn on page 47. • Alarm Time: use the alphanumeric keypad to enter a time for the alarm to access the Alarm Day screen. Note: Your phone is switched off. 1. To set the Alarm Tone, use this option to select the tone. Press the Select soft key or the key to make your alarm to sound, use the Left or Right Navigation key to select AM or PM. • Alarm Day: press the key to sound. • Auto Power...
... Navigation key to turn on page 47. • Alarm Time: use the alphanumeric keypad to enter a time for the alarm to access the Alarm Day screen. Note: Your phone is switched off. 1. To set the Alarm Tone, use this option to select the tone. Press the Select soft key or the key to make your alarm to sound, use the Left or Right Navigation key to select AM or PM. • Alarm Day: press the key to sound. • Auto Power...
User Manual (user Manual) (ver.f5) (English)
Page 92
... power can check it yourself by displaying a number of telephone services to observe these instructions may void the warranty. If it receives and transmits radio frequency (RF) signals. Anytime the Power Save feature is activated, a message displays on , it is illegal and may be dangerous to the aircraft's operation. • Failure to the offender, or legal action, or both. If your phone off and remove the battery...
... power can check it yourself by displaying a number of telephone services to observe these instructions may void the warranty. If it receives and transmits radio frequency (RF) signals. Anytime the Power Save feature is activated, a message displays on , it is illegal and may be dangerous to the aircraft's operation. • Failure to the offender, or legal action, or both. If your phone off and remove the battery...
User Manual (user Manual) (ver.f5) (English)
Page 100
... A Accessing a Menu Function 21 Alphabet Mode 22 Audio 57 B Battery Charging 4 Installation 4 Low Indicator 5 Removal 3 C Call Functions Adjusting the Call Volume 15 Answering a Call 15 Correcting the Number 14 Making a Call 14 Redialing Last Number 14 Silent Mode 17 97 Call Time 16 , Call Waiting 20 52 Charging battery 4 Clear key 13 Command Keys 12 Contacts List Finding an Entry 26 Searching for a Number 19 Converter 66 D Data Call Time 17 Data Volume 17 Dialing a Number Contacts List 26 Display Icons 11 Display Settings 45 E End key 13 Ending a Call 14 Entering Text Changing the Text Input...
... A Accessing a Menu Function 21 Alphabet Mode 22 Audio 57 B Battery Charging 4 Installation 4 Low Indicator 5 Removal 3 C Call Functions Adjusting the Call Volume 15 Answering a Call 15 Correcting the Number 14 Making a Call 14 Redialing Last Number 14 Silent Mode 17 97 Call Time 16 , Call Waiting 20 52 Charging battery 4 Clear key 13 Command Keys 12 Contacts List Finding an Entry 26 Searching for a Number 19 Converter 66 D Data Call Time 17 Data Volume 17 Dialing a Number Contacts List 26 Display Icons 11 Display Settings 45 E End key 13 Ending a Call 14 Entering Text Changing the Text Input...


