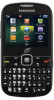
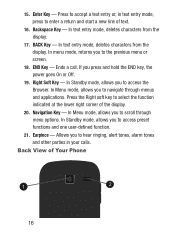
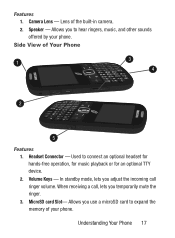
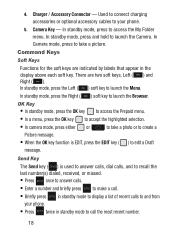
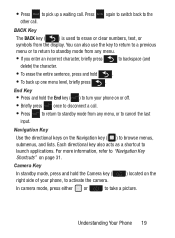
SCH S380C Phone - Samsung
SCH S380C Phone
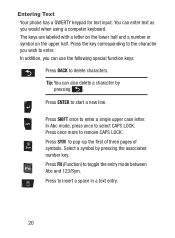
Related Manual Pages


Similar Questions

How To Add New Contacts To Your New S380c Straight Talk Phone
(Posted by hugdshr 9 years ago)


How Did I Take A Screenshot On My Phone?
(Posted by vampirekittystandsalone 10 years ago)


How Do You Unlock Your Phone If You Don't Recall The Pin Code???
The phone model is a Samsung t528g, Straight Talk
The phone model is a Samsung t528g, Straight Talk
(Posted by cheese 12 years ago)
Related Terms
The following terms were also used when searching for SCH S380C Phone - Samsung:- sch s380c software
- sch-s380c gp
- sch-s380c games
- sch-s380c free games
- sch-s380c free apps
- sch-s380c drivers
- sch-s380c driver
- sch-s380c case
- sch-s380c battery
- sch-s380c apps
- sch-s380c accessories
- sch-s380c (gp)
- sch-s380c
- sch-s380c hard cases
- sch s380c sim card
- sch s380c samsung driver
- sch s380c problems
- sch s380c phone
- sch s380c move contacts to new phone.
- sch s380c master reset
- sch s380c manual
- sch s380c hard reset
- sch s380c gp
- sch s380c games
- sch s380c free games
- sch-s380c software
- straight talk sch-s380c
- straight talk samsung sch-s380c
- sch-u350 sim card
- sch-u350 manual
- sch-u350 hard reset
- sch-s380c wont alert for texts
- sch-s380c won't alert for texts
- sch-s380c tracfone
- sch-s380c text alert
- sch-s380c straight talk
- sch-s380c specs
- sch-s380c software free
- sch s380c drivers
- sch-s380c sim card location
- sch-s380c sim card
- sch-s380c reviews
- sch-s380c reset
- sch-s380c problems
- sch-s380c phone
- sch-s380c operating system
- sch-s380c message alert
- sch-s380c manual
- sch-s380c import contacts
- sch-s380c hard reset
- samsung sch s380c master reset
- samsung sch-s380c free games
- samsung sch-s380c free apps
- samsung sch-s380c drivers
- samsung sch-s380c driver
- samsung sch-s380c case
- samsung sch-s380c battery
- samsung sch-s380c (gp)
- samsung sch-s380c
- samsung sch s380c software
- samsung sch s380c problems
- samsung sch s380c phone
- samsung sch s380c move contacts to new phone.
- samsung sch-s380c games
- samsung sch s380c manual
- samsung sch s380c hard reset
- samsung sch s380c gp
- samsung sch s380c games
- samsung sch s380c free games
- samsung sch s380c drivers
- samsung sch s380c driver
- samsung sch s380c
- samsung model sch s380c gp
- samsung model sch s380c
- model sch s380c gp
- samsung sch-s380c software free
- sch s380c driver
- sch s380c code entry mode
- sch s380c
- samsung schs380c
- samsung sch-u350 sim card
- samsung sch-u350 manual
- samsung sch-s380c wont alert for texts
- samsung sch-s380c won't alert for texts
- samsung sch-s380c tracfone
- samsung sch-s380c text alert
- samsung sch-s380c straight talk
- samsung sch-s380c specs
- model sch s380c
- samsung sch-s380c software
- samsung sch-s380c sim card
- samsung sch-s380c reviews
- samsung sch-s380c reset
- samsung sch-s380c problems
- samsung sch-s380c phone
- samsung sch-s380c operating system
- samsung sch-s380c message alert
- samsung sch-s380c manual
- samsung sch-s380c hard reset
- samsung sch-s380c hard cases