NP-QX410 Memory Upgrade - Samsung
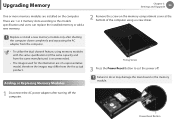
NP-QX410 Memory Upgrade
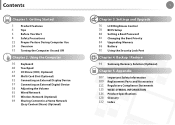
Related Manual Pages

Similar Questions

Hello, Sir How Can I Upgrade My Bios Amd A68m Tell Me The Full Process
I Want To Upgrade My Bios Tell Me Full Procedure.
I Want To Upgrade My Bios Tell Me Full Procedure.
(Posted by sanjaynayak931 10 years ago)

Ram Memory
what is the max memory support , most places say 16gb ,some say 32gb so i'd like to know what is it ...
what is the max memory support , most places say 16gb ,some say 32gb so i'd like to know what is it ...
(Posted by rchtz87 10 years ago)

Maximum Memory Allowed On Samsung Laptop R480
Maximum memory allowed on Samsung laptop R480
Maximum memory allowed on Samsung laptop R480
(Posted by Anonymous-92695 11 years ago)