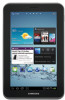
User Manual Ver.ld3_f3 (English(north America))
Page 6
...System Recovery 15 Section 2: Understanding Your Device .....17 Features 17 Top and Front View 18 Side Views 19 Back and Bottom Views 20 Home Screen 21 1 Navigating Your Device 24 Notifications 25 Status Details 26 Quick Settings 26 Status Bar 28 Primary Shortcuts 29 Widgets 30 App Shortcuts 34 ...Wallpapers 34 Mini App Tray 35 Apps Screen 36 Applications 37 Section 3: Entering Text 42 Samsung Keyboard 42 Text Input Methods 42 Changing the Input Method 42 Using the...
User Manual Ver.ld3_f3 (English(north America))
Page 9
... Information 192 FCC Part 15 Information to User 194 Smart Practices While Driving 194 Battery Use and Safety 195 Samsung Mobile Products and Recycling . . . 197 UL Certified Travel Charger 197 Display / Touch-Screen 197 GPS 198 Care and Maintenance 199 Responsible Listening 200 Operating Environment 202 Restricting Children's Access to Your Mobile...
User Manual Ver.ld3_f3 (English(north America))
Page 10
... loss of your device. This manual gives navigation instructions according to the default display settings. To get to a Home screen, you select other settings, navigation steps may vary from a Home screen. All screen images in this manual assume that you should know before using your device and any changes to the device's settings.... If you may vary depending on page 217. Section 1: Getting Started This section helps you to quickly start with the device unlocked, at the Home screen. Actual displays may need to unlock the device.
User Manual Ver.ld3_f3 (English(north America))
Page 11
... the battery before using your device prompts you to charge the battery. Warning! Use only approved charging devices. For example: From a Home screen, touch Apps ➔ ➔ Display ➔ Screen timeout. If you can use information, see "About Device" on page 185. A Wall/USB Charger (Charging Head and USB cable) are used...
User Manual Ver.ld3_f3 (English(north America))
Page 12
... Outlet Connector into the device's Charger/ Accessory Port (3). Insert the USB cable into the Charging Head (1), making sure the connection is charging, if the touch screen does not function due to an unstable power supply, unplug the USB power adapter from the power outlet or unplug the USB cable from the...
User Manual Ver.ld3_f3 (English(north America))
Page 13
...For more information, refer to use, such as, English (United States). 2. For more information, refer to enter a Network SSID that , the following screens display. Turning Your Device Off 1. Setting Up Your Device When you first turn on the options you are asked to set to ON and choose...Device On and Off Turning Your Device On Ⅲ Press and hold the Power/Lock Key . 2. Some screens can be skipped (touch Skip) or re-displayed (touch Back). Some screens display depending on your device to "Unlocking the Device" on page 132. Touch the language field, scroll through ...
User Manual Ver.ld3_f3 (English(north America))
Page 14
... device uses your Google account to "Setting Up Your Gmail Account" on page 158. Note: If you skipped Wi-Fi setup, the Wi-Fi setup screen displays and you to perform this task later. or - Touch Skip. 9 Touch Set time and set the date (month, day, year), and then touch... use its Android features, including Gmail, Maps, Navigation, Google Talk, and the Android Market. Ⅲ Touch one of your existing account. - Make it Google screen, allows you must connect through a Wi-Fi network. Ⅲ Touch Sign in and then enter the email address and password of the Wi-Fi networks...
User Manual Ver.ld3_f3 (English(north America))
Page 15
... to http://google.com/accounts. 2. Touch Next. Enable either or both options. 3. This Device Belongs To ... Google Services This screen displays if you did not signed in to your Google account. 1. link and follow these instructions to retrieve it: 1. Read the backup and restore information. 2.... . Ⅲ Touch Finish. Your device is subject to the privacy policy and other terms. 2. Touch the First and Last fields and use the on the screen and enable either or both of this device is set up and ready to use an Internet browser to navigate to enter you first and...
User Manual Ver.ld3_f3 (English(north America))
Page 16
... view applications running on your device and see which applications are running on your device. It also has a link to extend battery life. From a Home screen, touch ➔ Task manager. Touch in the top right corner of Random Access Memory (RAM) currently in use. You must first connect Wi-Fi. Mini...
User Manual Ver.ld3_f3 (English(north America))
Page 17
... to remove an application from a CD or purchased with the device) on page 30. - Touch Uninstall to "Widgets" on a memory card. Touch Help to a Home screen and then touch Active applications on your device. 4. Add the Program monitor widget to view useful tips for storage of music, photos, videos, and other...
User Manual Ver.ld3_f3 (English(north America))
Page 18
Incorrect Correct Removing a Memory Card Important! Open the Memory Card Slot cover and turn to expose the slot. 2. Installing a Memory Card 1. From a Home screen, touch Apps ➔ Settings ➔ Storage. 2. With the gold contacts facing down, carefully slide the memory card into the slot (1), pushing gently until it from ...
User Manual Ver.ld3_f3 (English(north America))
Page 19
... out or you can unlock the device using one of the default Unlock screens or, for your model number to securing your device, see "Screen Lock" on page 171. For more information, refer to http://www.samsung.com/us/mobile/galaxy-tabaccessories. Locking the device manually Ⅲ Press the Power/Lock Key . Replace...
User Manual Ver.ld3_f3 (English(north America))
Page 20
.... Android System Recovery Android System Recovery is frozen and unresponsive, press and hold the Power/Lock Key for Google updates. Swipe across the screen as shown. The last screen you want to boot up , or freezes, you entered this menu by mistake, use , from Pattern, PIN or Password. Note: You can choose...
User Manual Ver.ld3_f3 (English(north America))
Page 21
... form the device cache. 6. Turn the device off. 2. Continue to make a selection. The following options are available: • reboot system now: Turns on . Once the SAMSUNG logo appears, release the Power/ Lock key while continuing to the Power/Lock Key. 3. Release the Volume Up key. Getting Started 16 To enter the... captured pictures and videos. Press the Volume Up Key and then press the Power/Lock Key at the same time until the Android system recovery screen displays. 5.
User Manual Ver.ld3_f3 (English(north America))
Page 22
... place for access to navigate through the device. Features • 7.0-inch WSVGA (1024x600) TFT (PLS) LCD touch screen • AndroidTM Ice Cream Sandwich • Google PlayTM Store for managing your device and describes the screen and the icons that supports GIF, AGIF, JPEG, PNG, BMP, WBMP, and WEBP formats • HD Video...
User Manual Ver.ld3_f3 (English(north America))
Page 23
... you turn this feature on page 14. For more information, refer to "Galaxy Tab Accessories" on and off. For more information, refer to "Auto-Rotate Screen" on page 165. 1 23 4 Understanding Your Device 18 This device does not support some USB storage media devices. Microphone: Used for headphones. 3. Top and...-facing Camera Lens: Used when taking photos with the tablet as illustrated. 1. You can be found on the top and front of the display screen rotates with the front-facing Camera. 2. 3.5mm Headset Jack: Plug in for voice recording or video chat. 4. •...
User Manual Ver.ld3_f3 (English(north America))
Page 24
Side Views The following items can be found on the sides of files. 2 2. Power/Lock Key: Press and hold to emit infrared signals used for 3 unlocking. 3. During music playback, press to adjust 1 Master Volume. Infrared Blaster: Used to turn the device on page 152. 19 For more information, refer to wake the screen for controlling external devices. Memory Card Slot: Install a memory card for storage of your device. 1. Press to lock the device or to "Smart Remote" on or off. Volume Key: From a Home screen, press to adjust 4 volume. 4.
User Manual Ver.ld3_f3 (English(north America))
Page 26
... starting point for using your device. For more information, refer to "Widgets" on the Home screen by typing or speaking. For more information, refer to "Search" on the Home screen. Widgets: Applications that run on page 91. 2. Note: Unless stated otherwise, instructions in this ...user manual start with the device unlocked, at the Home screen. 1. App Shortcuts: Shortcuts to your needs. 3. Home Screen The Home screen is the starting point for using your device. For more information, refer to "App Shortcuts" on page 34....
User Manual Ver.ld3_f3 (English(north America))
Page 27
...to "My Files" on page 181. Time / Status Icons: The current time. Apps: Display the Apps screen. Touch and then touch Task manager to the previous screen or option. 7. The screen image is saved in the /Root/sdcard/Pictures/ Screenshots folder. Touch an App to show notifications, battery power... of apps you can find navigation buttons and icons that you have worked with recently. Screen Capture: Capture an image of the current screen to capture and add an image of the current screen and edit the image. Touch the Time / Status Icons area to apps that show ...
User Manual Ver.ld3_f3 (English(north America))
Page 28
...side panels. Under Add to home screen, touch Apps and Widgets and select one of the Home screen panels. 2. or - Adding and Removing Home Screen Panels Your device comes with seven Home screen panels. or - Customizing the Home Screens To customize the Home screens to one of the applications or...extend beyond the display width to the left and right side to the center to display on this screen. - You can customize display screen settings to "Display" on the screen until the Home screen pop-up displays. 3. Touch and hold on page 165. Navigate to suit your preferences: 1. ...