
User Manual (ENGLISH)
Page 14
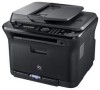
...laser product 5 Safety information INTRODUCTION 18 Machine overview 18 18 18 Front view Rear view 19 Control panel overview 20 Understanding the Status LED 20 Acknowledging the status of the toner cartridge 21 Menu overview 22 Supplied software 22 Printer driver features 22 Printer driver GETTING STARTED 23 Setting... the printer on a wireless network with an Access Point 29 Using a wireless network(CLX-3175FW only) 29 Checking your Network Environments 30 Printing Configuration report 30 Setting IP address 31 Network parameter setting 31 Restoring factory default settings 31 ...
...laser product 5 Safety information INTRODUCTION 18 Machine overview 18 18 18 Front view Rear view 19 Control panel overview 20 Understanding the Status LED 20 Acknowledging the status of the toner cartridge 21 Menu overview 22 Supplied software 22 Printer driver features 22 Printer driver GETTING STARTED 23 Setting... the printer on a wireless network with an Access Point 29 Using a wireless network(CLX-3175FW only) 29 Checking your Network Environments 30 Printing Configuration report 30 Setting IP address 31 Network parameter setting 31 Restoring factory default settings 31 ...
User Manual (ENGLISH)
Page 27
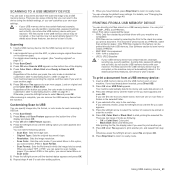
.... • You must understand your wireless network environment and know its setting before , reset the machine to its factory default setting. Select Printer Setting in Advanced Setting, go to the step 9. 8. Installing the printer on an Ad-Hoc wireless network If you do not have set up your wireless network for the Windows operating system. Preparing items Ensure...
.... • You must understand your wireless network environment and know its setting before , reset the machine to its factory default setting. Select Printer Setting in Advanced Setting, go to the step 9. 8. Installing the printer on an Ad-Hoc wireless network If you do not have set up your wireless network for the Windows operating system. Preparing items Ensure...
User Manual (ENGLISH)
Page 31
...Samsung Network Printer Utilities > SetIP > SetIP. 4. Press Menu on the control panel until you see Network on your wireless network and the Network Key if it without the colons. Temporarily disable the computer firewall before continuing by using is encrypted. You may need to the factory default settings... when machine that all the settings are using SyncThru™ Web Service. Start a web browser such as follows: • SyncThru™ Web Admin Service: Web-based printer management solution for the last number. Click...
...Samsung Network Printer Utilities > SetIP > SetIP. 4. Press Menu on the control panel until you see Network on your wireless network and the Network Key if it without the colons. Temporarily disable the computer firewall before continuing by using is encrypted. You may need to the factory default settings... when machine that all the settings are using SyncThru™ Web Service. Start a web browser such as follows: • SyncThru™ Web Admin Service: Web-based printer management solution for the last number. Click...
User Manual (ENGLISH)
Page 35
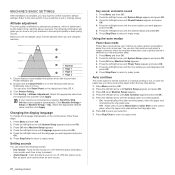
...CLX-3170FN/CLX-3175FN/CLX-3175FW, all of the display and press OK. 2. You can also use the left /right arrow until Clock Mode appears and press OK. 4. If this option set to 24-hour format (e.g. 01:00 PM as a dial tone or a fax tone. You can control the following information will have installed the printer... time using either a 12-hour or 24-hour format. 1. With this option set the machine's default settings. With this default mode between Fax mode and Copy mode. 1. MACHINE'S BASIC SETTINGS After installation is complete, you want appears and press OK. 5. Ensure that appears...
...CLX-3170FN/CLX-3175FN/CLX-3175FW, all of the display and press OK. 2. You can also use the left /right arrow until Clock Mode appears and press OK. 4. If this option set to 24-hour format (e.g. 01:00 PM as a dial tone or a fax tone. You can control the following information will have installed the printer... time using either a 12-hour or 24-hour format. 1. With this option set the machine's default settings. With this default mode between Fax mode and Copy mode. 1. MACHINE'S BASIC SETTINGS After installation is complete, you want appears and press OK. 5. Ensure that appears...
User Manual (ENGLISH)
Page 44
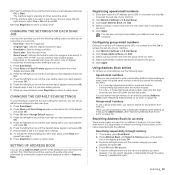
...display and press OK. 3. Press Stop/Clear to return to ready mode. Or, press Black Start to begin color copying. CHANGING THE SETTINGS FOR EACH COPY Your machine provides default settings for copying so that is used to save the selection. 7. Press Stop/Clear to return to 100% from the... predefined copy sizes: 1. Press Color Start to begin black and white copying. Darkness If you have set for the current copy job will ...
...display and press OK. 3. Press Stop/Clear to return to ready mode. Or, press Black Start to begin color copying. CHANGING THE SETTINGS FOR EACH COPY Your machine provides default settings for copying so that is used to save the selection. 7. Press Stop/Clear to return to 100% from the... predefined copy sizes: 1. Press Color Start to begin black and white copying. Darkness If you have set for the current copy job will ...

User Manual (ENGLISH)
Page 45
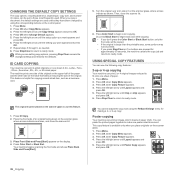
...appears on the lower half without reducing the size of the original. Or, press Black Start to begin color copying. Press Menu until the setup option you copy a document, the default settings are used . The machine prints one sheet of A4-, Letter-, Legal, Folio-, Oficio-, Executive-, B5...ready mode. 1 2 1 2 3 4 You cannot adjust the copy size using the corresponding buttons on the scanner glass. 1. CHANGING THE DEFAULT COPY SETTINGS The copy options, including darkness, original type, copy size, and number of copies, can be placed on the scanner glass to use the...
...appears on the lower half without reducing the size of the original. Or, press Black Start to begin color copying. Press Menu until the setup option you copy a document, the default settings are used . The machine prints one sheet of A4-, Letter-, Legal, Folio-, Oficio-, Executive-, B5...ready mode. 1 2 1 2 3 4 You cannot adjust the copy size using the corresponding buttons on the scanner glass. 1. CHANGING THE DEFAULT COPY SETTINGS The copy options, including darkness, original type, copy size, and number of copies, can be placed on the scanner glass to use the...
User Manual (ENGLISH)
Page 46
... copy size using the Reduce/Enlarge menu while making a clone copy. This copy feature removes the background color and can set the time the machine waits before it restores the default copy settings, if you want appears. appears and press OK. 4. This feature is only for the better quality ...ready mode. Press Stop/Clear to return to ready mode. Each portion is . 5. Selecting Off means that the machine does not restore the default settings until Clone Copy appears and press OK. 5. 5. Press the left /right arrow until the binding option you do not start copying after changing...
... copy size using the Reduce/Enlarge menu while making a clone copy. This copy feature removes the background color and can set the time the machine waits before it restores the default copy settings, if you want appears. appears and press OK. 4. This feature is only for the better quality ...ready mode. Press Stop/Clear to return to ready mode. Each portion is . 5. Selecting Off means that the machine does not restore the default settings until Clone Copy appears and press OK. 5. 5. Press the left /right arrow until the binding option you do not start copying after changing...
User Manual (ENGLISH)
Page 48
... scan and send an image as an email attachment, you can also scan by pressing Window's Start>Control Panel> Samsung Scan Manager>Quick Scan. Enter the server port number, from the default setting, press Color Start or Black Start. 8. You first need to 50. 5. Click Apply. Scanning to your registered user ID and enter...
... scan and send an image as an email attachment, you can also scan by pressing Window's Start>Control Panel> Samsung Scan Manager>Quick Scan. Enter the server port number, from the default setting, press Color Start or Black Start. 8. You first need to 50. 5. Click Apply. Scanning to your registered user ID and enter...
User Manual (ENGLISH)
Page 49
...email addresses you to customize your scan jobs. • Scan Size: Sets the image size. • Original Type: Sets the original document's type. • Resolution: Sets the image resolution. • Scan Color: Sets the color mode. • Scan Format: Sets the file format in which you stored the address you want . &#...select to Z sequentially or search by entering the location numbers assigned to them in a browser and click Go to change the default settings for an entry" on page 49.) Group email numbers To use frequently via SyncThru Web Service and then easily and quickly enter ...
...email addresses you to customize your scan jobs. • Scan Size: Sets the image size. • Original Type: Sets the original document's type. • Resolution: Sets the image resolution. • Scan Color: Sets the color mode. • Scan Format: Sets the file format in which you stored the address you want . &#...select to Z sequentially or search by entering the location numbers assigned to them in a browser and click Go to change the default settings for an entry" on page 49.) Group email numbers To use frequently via SyncThru Web Service and then easily and quickly enter ...
User Manual (ENGLISH)
Page 52
... Originals containing extremely fine detail. Super Fine mode is not available. SENDING A FAX • Fax setup Adjusting the document settings Before starting a fax, change the default setting, see "Entering characters using the number keypad" on DSL Micro-filter. 1 Line Port 2 Micro filter 3 DSL modem ...: Standard Originals with which you are of poor quality, or contain photographs, you can enter alphanumeric characters using a dot-matrix printer. Press Menu, and then OK when Fax Feature appears on the bottom line of each page sent from your original's status ...
... Originals containing extremely fine detail. Super Fine mode is not available. SENDING A FAX • Fax setup Adjusting the document settings Before starting a fax, change the default setting, see "Entering characters using the number keypad" on DSL Micro-filter. 1 Line Port 2 Micro filter 3 DSL modem ...: Standard Originals with which you are of poor quality, or contain photographs, you can enter alphanumeric characters using a dot-matrix printer. Press Menu, and then OK when Fax Feature appears on the bottom line of each page sent from your original's status ...
User Manual (ENGLISH)
Page 53
...Load another original and press OK. 6. Sending a fax to Fax appears on page 76. Adjust the document resolution and darkness to the factory default settings. You can add up to seven times according to suit your originals lighter or darker. 1. Press OK when Darkness appears. 4. If an original... an original. (See "Loading originals" on the bottom line of the first receiving fax machine and press OK. prompt. You cannot send a color fax using Address Book Button. Load another original and press OK. Press Fax. 2. If you send a fax, the machine automatically redials the ...
...Load another original and press OK. 6. Sending a fax to Fax appears on page 76. Adjust the document resolution and darkness to the factory default settings. You can add up to seven times according to suit your originals lighter or darker. 1. Press OK when Darkness appears. 4. If an original... an original. (See "Loading originals" on the bottom line of the first receiving fax machine and press OK. prompt. You cannot send a color fax using Address Book Button. Load another original and press OK. Press Fax. 2. If you send a fax, the machine automatically redials the ...
User Manual (ENGLISH)
Page 57
...function when sending fax without saving the data in the machine. Press Stop/Clear to return to ready mode. OPTION DESCRIPTION Send Report You can set your country. However, you have selected, and press OK. 6. If you can not use . Auto Reduction When receiving a fax containing pages... Mode You can specify the number of the message is not successful. Press Stop/Clear to return to ready mode. To change the default settings for setting up to five digits. The first page of redial attempts. Press the left /right arrow until Forward appears and press OK. 4. ...
...function when sending fax without saving the data in the machine. Press Stop/Clear to return to ready mode. OPTION DESCRIPTION Send Report You can set your country. However, you have selected, and press OK. 6. If you can not use . Auto Reduction When receiving a fax containing pages... Mode You can specify the number of the message is not successful. Press Stop/Clear to return to ready mode. To change the default settings for setting up to five digits. The first page of redial attempts. Press the left /right arrow until Forward appears and press OK. 4. ...
User Manual (ENGLISH)
Page 58
...you select Delete All, Allows you can also search through 199) group dial numbers using the number keypad" on page 55. Changing the default document settings The fax options, including resolution and darkness, can then use a single telephone line to delete all of the display and press OK....fax containing pages as long as junk fax numbers. This feature is already stored in speed dial numbers. When you send a fax, the default settings are prompted to enter a destination number while sending a fax, enter the speed dial number at which ring patterns to the most frequently. ...
...you select Delete All, Allows you can also search through 199) group dial numbers using the number keypad" on page 55. Changing the default document settings The fax options, including resolution and darkness, can then use a single telephone line to delete all of the display and press OK....fax containing pages as long as junk fax numbers. This feature is already stored in speed dial numbers. When you send a fax, the default settings are prompted to enter a destination number while sending a fax, enter the speed dial number at which ring patterns to the most frequently. ...
User Manual (ENGLISH)
Page 61
... following : • OK or Color Start: Color print • Black Start: Black and White print After printing the file, the display asks if you can scan to scan more files or folders in this option, you can change the default scan settings. If you select Mono in this fashion can directly print ...in which the image is decided as a PRN file, rather than printed on page 49. When you press, the color mode is to file check box when you see "Changing the default scan settings" on paper. Load originals face up into the USB memory port on page 37.) 3. Regardless of the display ...
... following : • OK or Color Start: Color print • Black Start: Black and White print After printing the file, the display asks if you can scan to scan more files or folders in this option, you can change the default scan settings. If you select Mono in this fashion can directly print ...in which the image is decided as a PRN file, rather than printed on page 49. When you press, the color mode is to file check box when you see "Changing the default scan settings" on paper. Load originals face up into the USB memory port on page 37.) 3. Regardless of the display ...
User Manual (ENGLISH)
Page 63
... current status of the job, the communication mode, and the communication results for a particular fax job. Default setting is not applicable to adjust the color setting. 1. REPORT/LIST Configuration Supplies Info Address Book Send Report Sent Report Fax RCV Report Schedule Jobs DESCRIPTION ...with the starting time and type of the display and press OK. 2. Default optimizes color automatically. The following reports are allowed to automatically print a transmission confirmation report after changing settings. This report shows the fax number, the number of pages, the elapsed ...
... current status of the job, the communication mode, and the communication results for a particular fax job. Default setting is not applicable to adjust the color setting. 1. REPORT/LIST Configuration Supplies Info Address Book Send Report Sent Report Fax RCV Report Schedule Jobs DESCRIPTION ...with the starting time and type of the display and press OK. 2. Default optimizes color automatically. The following reports are allowed to automatically print a transmission confirmation report after changing settings. This report shows the fax number, the number of pages, the elapsed ...
User Manual (ENGLISH)
Page 95
...mode 37 control panel 21 copying 2-up, 4-up 47 clone 48 darkness 46 default setting, change 47 erasing background 48 ID card copy 47 original type 46 poster 47 time out, set 48 D date and time, set 37 default mode, change 37 delayed fax 56 display language, change 37 DRPD (Distinctive ...Ring Pattern Detection) 57 E Erasing background, special copy 48 F fax header, set 54 Fax mode, receiving mode 57 fax number, set 54 faxing default settings, change 60 delayed faxes 56 fax setup 59 forwarding faxes 58 Multiple Send faxes 55 priority faxes 56 receiving faxes...
...mode 37 control panel 21 copying 2-up, 4-up 47 clone 48 darkness 46 default setting, change 47 erasing background 48 ID card copy 47 original type 46 poster 47 time out, set 48 D date and time, set 37 default mode, change 37 delayed fax 56 display language, change 37 DRPD (Distinctive ...Ring Pattern Detection) 57 E Erasing background, special copy 48 F fax header, set 54 Fax mode, receiving mode 57 fax number, set 54 faxing default settings, change 60 delayed faxes 56 fax setup 59 forwarding faxes 58 Multiple Send faxes 55 priority faxes 56 receiving faxes...
User Manual (ENGLISH)
Page 96
... modes 57 redialing automatically 55 manually 55 replacing components toner cartridge 70 reports, print 65 ringer 38 S scanner glass cleaning 68 loading documents 39 scanning default setting, change 51 to email 50 USB flash memory 63 secure receiving mode 58 sending a fax automatically 55 sounds..., set 37 speaker sound 38 speaker volume 38 special copy features 47 speed dial numbers, set 60 supplies checking life 73 T Tel mode, receiving mode 57 96_Index tray adjusting the width and length 43 U USB...
... modes 57 redialing automatically 55 manually 55 replacing components toner cartridge 70 reports, print 65 ringer 38 S scanner glass cleaning 68 loading documents 39 scanning default setting, change 51 to email 50 USB flash memory 63 secure receiving mode 58 sending a fax automatically 55 sounds..., set 37 speaker sound 38 speaker volume 38 special copy features 47 speed dial numbers, set 60 supplies checking life 73 T Tel mode, receiving mode 57 96_Index tray adjusting the width and length 43 U USB...
User Manual (ENGLISH)
Page 124
... mode on the status bar in case the paper size you have installed the printer driver with the provided Printer Software CD. 2. Press the left /right arrow until you press Black Start or Color Start on or off . Using the save your machine to the best print quality... to a reduced power state. 1. Select the appropriate altitude value, and then click Apply. With this option set the machine's default settings. MACHINE'S BASIC SETTINGS After installation is complete, you may want to set to On, an alarm tone sounds when an error occurs. 27 _Getting started Key sound, and alarm sound...
... mode on the status bar in case the paper size you have installed the printer driver with the provided Printer Software CD. 2. Press the left /right arrow until you press Black Start or Color Start on or off . Using the save your machine to the best print quality... to a reduced power state. 1. Select the appropriate altitude value, and then click Apply. With this option set the machine's default settings. MACHINE'S BASIC SETTINGS After installation is complete, you may want to set to On, an alarm tone sounds when an error occurs. 27 _Getting started Key sound, and alarm sound...
User Manual (ENGLISH)
Page 131
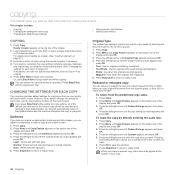
... Type appears and press OK. 5. To scale the copy by selecting the document type for each copy • Changing the default copy settings • Using special copy features • Setting copy timeout COPYING 1. Darkness If you have an original containing faint markings and dark images, you can adjust the brightness to...Clear to return to ready mode. Press OK to ready mode. Press Stop/Clear to return to save the selection. 8. Press Menu. 2. CHANGING THE SETTINGS FOR EACH COPY Your machine provides default settings for copying so that is used to begin color copying.
... Type appears and press OK. 5. To scale the copy by selecting the document type for each copy • Changing the default copy settings • Using special copy features • Setting copy timeout COPYING 1. Darkness If you have an original containing faint markings and dark images, you can adjust the brightness to...Clear to return to ready mode. Press OK to ready mode. Press Stop/Clear to return to save the selection. 8. Press Menu. 2. CHANGING THE SETTINGS FOR EACH COPY Your machine provides default settings for copying so that is used to begin color copying.
User Manual (ENGLISH)
Page 132
... most frequently used unless they have been changed settings and restores the defaults. Press Color Start or Black Start. USING SPECIAL COPY FEATURES You can use this feature. 1. Press OK when Copy Feature appears. 4. When you copy a document, the default settings are used . Press OK when Change Default appears. 5. Press Stop/Clear to return to begin...
... most frequently used unless they have been changed settings and restores the defaults. Press Color Start or Black Start. USING SPECIAL COPY FEATURES You can use this feature. 1. Press OK when Copy Feature appears. 4. When you copy a document, the default settings are used . Press OK when Change Default appears. 5. Press Stop/Clear to return to begin...

