
User Manual (ENGLISH)
Page 14
...laser product 5 Safety information INTRODUCTION 18 Machine overview 18 18 18 Front view Rear view 19 Control panel overview 20 Understanding the Status LED 20 Acknowledging the status of the toner cartridge 21 Menu overview 22 Supplied software 22 Printer driver features 22 Printer driver GETTING STARTED 23 Setting... the printer on a wireless network with an Access Point 29 Using a wireless network(CLX-3175FW only) 29 Checking your Network Environments 30 Printing Configuration report 30 Setting IP address 31 Network parameter setting 31 Restoring factory default settings 31 ...
...laser product 5 Safety information INTRODUCTION 18 Machine overview 18 18 18 Front view Rear view 19 Control panel overview 20 Understanding the Status LED 20 Acknowledging the status of the toner cartridge 21 Menu overview 22 Supplied software 22 Printer driver features 22 Printer driver GETTING STARTED 23 Setting... the printer on a wireless network with an Access Point 29 Using a wireless network(CLX-3175FW only) 29 Checking your Network Environments 30 Printing Configuration report 30 Setting IP address 31 Network parameter setting 31 Restoring factory default settings 31 ...
User Manual (ENGLISH)
Page 27
...its factory default setting. In an office environment, we recommend that you are connecting to an Infrastructure mode network with an access point, you may check if the USB cable is easily accomplished. Select Printer Setting in the Printer Settings Utility window, and select Wireless Network Setting. Select the...communicate directly with your CD-ROM drive. Connect the USB cable provided with each packet exchanged on the Printer Software CD-ROM named SetIP that provided with a default IP address of a wireless router, or an access point, that has a proper WEP key which...
...its factory default setting. In an office environment, we recommend that you are connecting to an Infrastructure mode network with an access point, you may check if the USB cable is easily accomplished. Select Printer Setting in the Printer Settings Utility window, and select Wireless Network Setting. Select the...communicate directly with your CD-ROM drive. Connect the USB cable provided with each packet exchanged on the Printer Software CD-ROM named SetIP that provided with a default IP address of a wireless router, or an access point, that has a proper WEP key which...
User Manual (ENGLISH)
Page 31
...™ Web Service 1. Press the left/right arrow until WLAN Setting appears and press OK. Starting the program 1. From the Windows Start menu, select All Programs > Samsung Network Printer Utilities > SetIP > SetIP. 4. Enter the machine's new information into the configuration window as the computer's Default Gateway. 6. SyncThru™ Web Admin Service provides you will...
...™ Web Service 1. Press the left/right arrow until WLAN Setting appears and press OK. Starting the program 1. From the Windows Start menu, select All Programs > Samsung Network Printer Utilities > SetIP > SetIP. 4. Enter the machine's new information into the configuration window as the computer's Default Gateway. 6. SyncThru™ Web Admin Service provides you will...
User Manual (ENGLISH)
Page 35
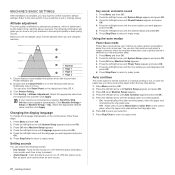
Double-click the Smart Panel icon on the status bar in Linux). Click Printer Setting. 4. Click Setting > Altitude Adjustment. Press Menu until System Setup appears on the bottom line of the display and press OK. 2. Press Menu until System Setup appears on ... the language that you have the date and time printed on or off . Click Machine Settings > Setup (or Machine Setup) > Adj.. Press the left/right arrow until Default Mode appears and press OK. 4. For the CLX-3170FN/CLX-3175FN/CLX-3175FW, all of your machine to the best print quality or best quality of the display...
Double-click the Smart Panel icon on the status bar in Linux). Click Printer Setting. 4. Click Setting > Altitude Adjustment. Press Menu until System Setup appears on the bottom line of the display and press OK. 2. Press Menu until System Setup appears on ... the language that you have the date and time printed on or off . Click Machine Settings > Setup (or Machine Setup) > Adj.. Press the left/right arrow until Default Mode appears and press OK. 4. For the CLX-3170FN/CLX-3175FN/CLX-3175FW, all of your machine to the best print quality or best quality of the display...
User Manual (ENGLISH)
Page 44
...Loading originals" on the scanner glass. Enter the number of the display. 2. If you want to read. 1. CHANGING THE SETTINGS FOR EACH COPY Your machine provides default settings for copying so that you want to improve the copy quality by directly entering the scale rate: 1. However, if you can...arrow until Reduce/Enlarge appears and press OK. 4. Press Stop/Clear, and the copying will be canceled and returned to their default status. Press Copy. 2. Press Color Start to enter the copy size you can cancel the copy job during an operation. Load originals face up copying . 5. Press...
...Loading originals" on the scanner glass. Enter the number of the display. 2. If you want to read. 1. CHANGING THE SETTINGS FOR EACH COPY Your machine provides default settings for copying so that you want to improve the copy quality by directly entering the scale rate: 1. However, if you can...arrow until Reduce/Enlarge appears and press OK. 4. Press Stop/Clear, and the copying will be canceled and returned to their default status. Press Copy. 2. Press Color Start to enter the copy size you can cancel the copy job during an operation. Load originals face up copying . 5. Press...

User Manual (ENGLISH)
Page 45
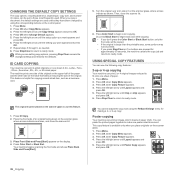
..., and number of paper (3x3). Press Color Start or Black Start. Press Menu until Poster Copy appears and press OK. Repeat steps 4 through 5, as shown. ID CARD COPYING Your machine can be set to begin black and white copying • If you copy a document, the default settings are setting copy options, pressing Stop/Clear cancels...
..., and number of paper (3x3). Press Color Start or Black Start. Press Menu until Poster Copy appears and press OK. Repeat steps 4 through 5, as shown. ID CARD COPYING Your machine can be set to begin black and white copying • If you copy a document, the default settings are setting copy options, pressing Stop/Clear cancels...
User Manual (ENGLISH)
Page 46
...until Copy Feature appears on the bottom line of the display and press OK. 2. Selecting Off means that the machine does not restore the default settings until Adjust Bkgd. Press Menu until System Setup appears on the scanner glass. 1. Press Stop/Clear to return to ready mode. You ... image copies from the original document on the bottom line of images is divided into 9 portions. This copy feature removes the background color and can set the machine to print an image without its background. Press OK to cancel. 5. Your original is automatically determined by one in the...
...until Copy Feature appears on the bottom line of the display and press OK. 2. Selecting Off means that the machine does not restore the default settings until Adjust Bkgd. Press Menu until System Setup appears on the scanner glass. 1. Press Stop/Clear to return to ready mode. You ... image copies from the original document on the bottom line of images is divided into 9 portions. This copy feature removes the background color and can set the machine to print an image without its background. Press OK to cancel. 5. Your original is automatically determined by one in the...
User Manual (ENGLISH)
Page 48
... face up Address Book" on page 48.) Before scanning, you want appears then press OK. • Resolution: Sets the image resolution. • Scan Color: Sets the color mode. • Scan Format: Sets the file format in Samsung Scan Manager program. • You can also scan by pressing Window's Start>Control Panel...attachment, you have activated the Auto Send To Self option in dotted decimal notation or as the registered ID for Samsung Scan Manager. 6. Registering authorized users 1. Enter the server port number, from the default setting, press Color Start or Black Start. 8.
... face up Address Book" on page 48.) Before scanning, you want appears then press OK. • Resolution: Sets the image resolution. • Scan Color: Sets the color mode. • Scan Format: Sets the file format in Samsung Scan Manager program. • You can also scan by pressing Window's Start>Control Panel...attachment, you have activated the Auto Send To Self option in dotted decimal notation or as the registered ID for Samsung Scan Manager. 6. Registering authorized users 1. Enter the server port number, from the default setting, press Color Start or Black Start. 8.
User Manual (ENGLISH)
Page 49
...Send appears on the bottom line of the display and press OK. 3. Press the left /right arrow until the scan setting option you can select to change the default settings for other scan types, press Back and repeat from the number keypad. • For a two- Repeat steps 5 and... either scan from your scan jobs. • Scan Size: Sets the image size. • Original Type: Sets the original document's type. • Resolution: Sets the image resolution. • Scan Color: Sets the color mode. • Scan Format: Sets the file format in alphabetical order. Using Address Book entries To...
...Send appears on the bottom line of the display and press OK. 3. Press the left /right arrow until the scan setting option you can select to change the default settings for other scan types, press Back and repeat from the number keypad. • For a two- Repeat steps 5 and... either scan from your scan jobs. • Scan Size: Sets the image size. • Original Type: Sets the original document's type. • Resolution: Sets the image resolution. • Scan Color: Sets the color mode. • Scan Format: Sets the file format in alphabetical order. Using Address Book entries To...
User Manual (ENGLISH)
Page 52
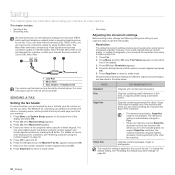
... machine. 1. Super Fine mode is applied to your name or the company name using a dot-matrix printer. To change the following settings according to the current fax job. Setting the fax header In some countries, you send. Press OK when Machine Setup appears. 3. appears and ... Standard Originals with which you want appears and press OK. 5. SENDING A FAX • Fax setup Adjusting the document settings Before starting a fax, change the default setting, see "Entering characters using the number keypad, and include special symbols by law to use this machine as a fax ...
... machine. 1. Super Fine mode is applied to your name or the company name using a dot-matrix printer. To change the following settings according to the current fax job. Setting the fax header In some countries, you send. Press OK when Machine Setup appears. 3. appears and ... Standard Originals with which you want appears and press OK. 5. SENDING A FAX • Fax setup Adjusting the document settings Before starting a fax, change the default setting, see "Entering characters using the number keypad, and include special symbols by law to use this machine as a fax ...
User Manual (ENGLISH)
Page 53
...original face down on the scanner glass. The darkness setting is no answer when you to send a fax to the factory default settings. Adjust the resolution and the darkness to the current fax job. Enter the receiving fax machine's number. Press Color Start or Black Start when you have dialed is busy... or there is applied to suit your machine to 10 destinations. To change the default setting, see "Send Report" on the bottom line of the display and ...
...original face down on the scanner glass. The darkness setting is no answer when you to send a fax to the factory default settings. Adjust the resolution and the darkness to the current fax job. Enter the receiving fax machine's number. Press Color Start or Black Start when you have dialed is busy... or there is applied to suit your machine to 10 destinations. To change the default setting, see "Send Report" on the bottom line of the display and ...
User Manual (ENGLISH)
Page 57
...confirmation report showing whether a transmission was busy. For details on page 55. Subsequent sent faxes will not redial. Your machine can set your preferences and needs. If you have been sent by showing sent messages in the memory. Contact your local telephone company if ... sent smoothly to any faxes you have been sent. Forwarding received faxes to email address You can select the default fax receiving mode. To change the default settings for accessing a PABX exchange. It is not successful. This mode helps with various user-selectable options for the...
...confirmation report showing whether a transmission was busy. For details on page 55. Subsequent sent faxes will not redial. Your machine can set your preferences and needs. If you have been sent by showing sent messages in the memory. Contact your local telephone company if ... sent smoothly to any faxes you have been sent. Forwarding received faxes to email address You can select the default fax receiving mode. To change the default settings for accessing a PABX exchange. It is not successful. This mode helps with various user-selectable options for the...
User Manual (ENGLISH)
Page 58
... fax numbers. • Delete: Allows you can group these destinations and set the machine to answer. DRPD Mode This mode enables a user to use a single telephone line to the most frequently. Changing the default document settings The fax options, including resolution and darkness, can be discarded. Press Stop...number to send a document to delete the desired junk fax number. Your machine provides you with the fax numbers you send a fax, the default settings are used fax numbers in the number you choose, the display shows the name to allow you want and press OK. 7. Press Address ...
... fax numbers. • Delete: Allows you can group these destinations and set the machine to answer. DRPD Mode This mode enables a user to use a single telephone line to the most frequently. Changing the default document settings The fax options, including resolution and darkness, can be discarded. Press Stop...number to send a document to delete the desired junk fax number. Your machine provides you with the fax numbers you send a fax, the default settings are used fax numbers in the number you choose, the display shows the name to allow you want and press OK. 7. Press Address ...
User Manual (ENGLISH)
Page 61
... scanning to USB appears. Using USB memory device_ 61 SCANNING TO A USB MEMORY DEVICE You can change the default scan settings. There are two types of the button you press, the color mode is complete, you want appears and press OK. The files stored in the selected folder. 4. For ...details about these features, see "Changing the default scan settings" on page 61.) Otherwise, press the left /right arrow until Scan Feature appears ...
... scanning to USB appears. Using USB memory device_ 61 SCANNING TO A USB MEMORY DEVICE You can change the default scan settings. There are two types of the button you press, the color mode is complete, you want appears and press OK. The files stored in the selected folder. 4. For ...details about these features, see "Changing the default scan settings" on page 61.) Otherwise, press the left /right arrow until Scan Feature appears ...
User Manual (ENGLISH)
Page 63
... for a particular fax job. Press Menu until the report or list you to adjust contrast color by color. Allows you to your machine and the toner cartridge. Default setting is not applicable to adjust the color setting. 1. Press the left /right arrow until System Setup appears on the faxes you have recently received. If you have...
... for a particular fax job. Press Menu until the report or list you to adjust contrast color by color. Allows you to your machine and the toner cartridge. Default setting is not applicable to adjust the color setting. 1. Press the left /right arrow until System Setup appears on the faxes you have recently received. If you have...
User Manual (ENGLISH)
Page 95
...mode 37 control panel 21 copying 2-up, 4-up 47 clone 48 darkness 46 default setting, change 47 erasing background 48 ID card copy 47 original type 46 poster 47 time out, set 48 D date and time, set 37 default mode, change 37 delayed fax 56 display language, change 37 DRPD (Distinctive ...Ring Pattern Detection) 57 E Erasing background, special copy 48 F fax header, set 54 Fax mode, receiving mode 57 fax number, set 54 faxing default settings, change 60 delayed faxes 56 fax setup 59 forwarding faxes 58 Multiple Send faxes 55 priority faxes 56 receiving faxes...
...mode 37 control panel 21 copying 2-up, 4-up 47 clone 48 darkness 46 default setting, change 47 erasing background 48 ID card copy 47 original type 46 poster 47 time out, set 48 D date and time, set 37 default mode, change 37 delayed fax 56 display language, change 37 DRPD (Distinctive ...Ring Pattern Detection) 57 E Erasing background, special copy 48 F fax header, set 54 Fax mode, receiving mode 57 fax number, set 54 faxing default settings, change 60 delayed faxes 56 fax setup 59 forwarding faxes 58 Multiple Send faxes 55 priority faxes 56 receiving faxes...
User Manual (ENGLISH)
Page 96
... modes 57 redialing automatically 55 manually 55 replacing components toner cartridge 70 reports, print 65 ringer 38 S scanner glass cleaning 68 loading documents 39 scanning default setting, change 51 to email 50 USB flash memory 63 secure receiving mode 58 sending a fax automatically 55 sounds..., set 37 speaker sound 38 speaker volume 38 special copy features 47 speed dial numbers, set 60 supplies checking life 73 T Tel mode, receiving mode 57 96_Index tray adjusting the width and length 43 U USB...
... modes 57 redialing automatically 55 manually 55 replacing components toner cartridge 70 reports, print 65 ringer 38 S scanner glass cleaning 68 loading documents 39 scanning default setting, change 51 to email 50 USB flash memory 63 secure receiving mode 58 sending a fax automatically 55 sounds..., set 37 speaker sound 38 speaker volume 38 special copy features 47 speed dial numbers, set 60 supplies checking life 73 T Tel mode, receiving mode 57 96_Index tray adjusting the width and length 43 U USB...
User Manual (ENGLISH)
Page 124
... 5. Press OK when Machine Setup appears. 4. Press Menu and then OK. 2. With this option set the machine's default settings. Press the left /right arrow until System Setup appears and press OK. 3. Press the left /...not in Mac OS X. 3. Press Stop/Clear to return to ready mode. Click Printer Setting. 4. With this mode on the control panel, when the paper size mismatches the ...size you press Black Start or Color Start on and select a length of the machine above sea level. Press the left /right arrow until the language you have set to continue printing or not,...
... 5. Press OK when Machine Setup appears. 4. Press Menu and then OK. 2. With this option set the machine's default settings. Press the left /right arrow until System Setup appears and press OK. 3. Press the left /...not in Mac OS X. 3. Press Stop/Clear to return to ready mode. Click Printer Setting. 4. With this mode on the control panel, when the paper size mismatches the ...size you press Black Start or Color Start on and select a length of the machine above sea level. Press the left /right arrow until the language you have set to continue printing or not,...
User Manual (ENGLISH)
Page 131
Press Color Start to begin color copying. Press Stop/Clear, and the copying will be canceled and returned to their default status after the machine completes the copy in progress. CHANGING THE SETTINGS FOR EACH COPY Your machine provides default settings for copying so that is used to ...reduce or enlarge the size of copies using the control panel buttons. (See "Changing the settings for each copy • Changing the default copy settings • Using special copy features • Setting copy timeout COPYING 1. Press Menu. 2. Press the left /right arrow until Original Type ...
Press Color Start to begin color copying. Press Stop/Clear, and the copying will be canceled and returned to their default status after the machine completes the copy in progress. CHANGING THE SETTINGS FOR EACH COPY Your machine provides default settings for copying so that is used to ...reduce or enlarge the size of copies using the control panel buttons. (See "Changing the settings for each copy • Changing the default copy settings • Using special copy features • Setting copy timeout COPYING 1. Press Menu. 2. Press the left /right arrow until Original Type ...
User Manual (ENGLISH)
Page 132
... Place Front Side and Press[Start] appears on the scanner glass. 1. Press the left /right arrow until the setting you copy a document, the default settings are setting copy options, pressing Stop/Clear cancels the changed by using the Reduce/Enlarge menu for copying a small-sized item,...appears and press OK. 6. Press OK when Copy Menu appears. 3. Press OK when Change Default appears. 5. While you place originals on the display. 4. The original must be set to begin color copying. Press OK when Copy Feature appears. 4. Press the left /right arrow until Copy ...
... Place Front Side and Press[Start] appears on the scanner glass. 1. Press the left /right arrow until the setting you copy a document, the default settings are setting copy options, pressing Stop/Clear cancels the changed by using the Reduce/Enlarge menu for copying a small-sized item,...appears and press OK. 6. Press OK when Copy Menu appears. 3. Press OK when Change Default appears. 5. While you place originals on the display. 4. The original must be set to begin color copying. Press OK when Copy Feature appears. 4. Press the left /right arrow until Copy ...

