User's Guide
Page 2
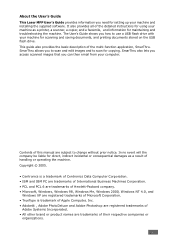
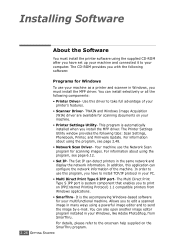
About the User's Guide This Laser MFP User's Guide provides information you how to use a USB flash drive with your machine for scanning and saving documents, and printing documents stored on ...; IBM and IBM PC are trademarks of International Business Machines Corporation. • PCL and PCL 6 are trademarks of Hewlett-Packard company. • Microsoft, Windows, Windows 98, Windows Me, Windows 2000, Windows NT 4.0, and Windows XP are registered trademarks of Microsoft Corporation. • TrueType is trademark of Apple Computer, Inc. • Adobe® , Adobe PhotoDeluxe and Adobe...
About the User's Guide This Laser MFP User's Guide provides information you how to use a USB flash drive with your machine for scanning and saving documents, and printing documents stored on ...; IBM and IBM PC are trademarks of International Business Machines Corporation. • PCL and PCL 6 are trademarks of Hewlett-Packard company. • Microsoft, Windows, Windows 98, Windows Me, Windows 2000, Windows NT 4.0, and Windows XP are registered trademarks of Microsoft Corporation. • TrueType is trademark of Apple Computer, Inc. • Adobe® , Adobe PhotoDeluxe and Adobe...
User's Guide
Page 12
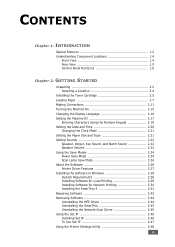
... the Save Modes 2.24 Power Save Mode 2.24 Scan Lamp Save Mode 2.24 About the Software 2.26 Printer Driver Features 2.27 Installing the Software in Windows 2.28 System Requirements 2.28 Installing Software for Local Printing 2.29 Installing Software for Network Printing 2.34 Installing the SmarThru 4 2.41 Repairing Software 2.43 Removing Software...
... the Save Modes 2.24 Power Save Mode 2.24 Scan Lamp Save Mode 2.24 About the Software 2.26 Printer Driver Features 2.27 Installing the Software in Windows 2.28 System Requirements 2.28 Installing Software for Local Printing 2.29 Installing Software for Network Printing 2.34 Installing the SmarThru 4 2.41 Repairing Software 2.43 Removing Software...
User's Guide
Page 13
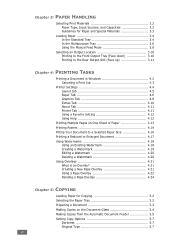
... 3.10 Printing to the Front Output Tray (Face down 3.10 Printing to the Rear Output Slot (Face up 3.11 Chapter 4: PRINTING TASKS Printing a Document in Windows 4.2 Canceling a Print Job 4.3 Printer Settings 4.4 Layout tab 4.5 Paper Tab 4.6 Graphics Tab 4.8 Extras Tab 4.10 About Tab 4.11 Printer Tab 4.11 Using a Favorite Setting 4.12 Using...
... 3.10 Printing to the Front Output Tray (Face down 3.10 Printing to the Rear Output Slot (Face up 3.11 Chapter 4: PRINTING TASKS Printing a Document in Windows 4.2 Canceling a Print Job 4.3 Printer Settings 4.4 Layout tab 4.5 Paper Tab 4.6 Graphics Tab 4.8 Extras Tab 4.10 About Tab 4.11 Printer Tab 4.11 Using a Favorite Setting 4.12 Using...
User's Guide
Page 16
... 9.17 Printing Quality Problems 9.19 Copying Problems 9.24 Scanning Problems 9.25 Fax Problems 9.26 Solving Network Printing Problems 9.28 General Problems 9.28 Windows Problems 9.29 Network Scan Problems 9.29 Chapter 10: USING USB FLASH DRIVE About USB Flash Drives 10.2 Installing a USB Flash Drive 10.2 ...Drive 10.10 Backing Up Data 10.11 Appendix A: USING YOUR MACHINE ON A NETWORK Setting Up a Locally-Shared Machine A.2 In Windows 98/Me A.2 In Windows NT 4.0/2000/XP A.3 Setting Up a Network-Connected Machine A.4 Configuring Network Parameters on the Control Panel A.4 xv
... 9.17 Printing Quality Problems 9.19 Copying Problems 9.24 Scanning Problems 9.25 Fax Problems 9.26 Solving Network Printing Problems 9.28 General Problems 9.28 Windows Problems 9.29 Network Scan Problems 9.29 Chapter 10: USING USB FLASH DRIVE About USB Flash Drives 10.2 Installing a USB Flash Drive 10.2 ...Drive 10.10 Backing Up Data 10.11 Appendix A: USING YOUR MACHINE ON A NETWORK Setting Up a Locally-Shared Machine A.2 In Windows 98/Me A.2 In Windows NT 4.0/2000/XP A.3 Setting Up a Network-Connected Machine A.4 Configuring Network Parameters on the Control Panel A.4 xv
User's Guide
Page 20
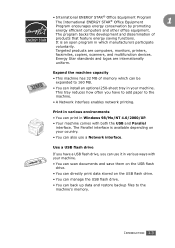
... data and restore backup files to the machine. • A Network interface enables network printing. Use a USB flash drive If you can also use it in Windows 98/Me/NT 4.0/2000/XP. • Your machine comes with your machine. • You can scan documents and save them on the USB flash drive...
... data and restore backup files to the machine. • A Network interface enables network printing. Use a USB flash drive If you can also use it in Windows 98/Me/NT 4.0/2000/XP. • Your machine comes with your machine. • You can scan documents and save them on the USB flash drive...
User's Guide
Page 26
... Date and Time Setting the Paper Size and Type Setting Sounds Using the Save Modes • Installing Software About the Software Installing the Software in Windows Repairing Software Removing Software Using the Set IP Using the Printer Settings Utility 2 GETTING STARTED This chapter gives you step-by-step instructions for setting...
... Date and Time Setting the Paper Size and Type Setting Sounds Using the Save Modes • Installing Software About the Software Installing the Software in Windows Repairing Software Removing Software Using the Set IP Using the Printer Settings Utility 2 GETTING STARTED This chapter gives you step-by-step instructions for setting...

User's Guide
Page 38
... you want to use the parallel and the USB cables at the same time. • If you are using a USB cable, you must be running Windows 98/ Me/2000/XP. Push the metal clips down to connect one of the cables mentioned above. To the parallel port on your machine.
... you want to use the parallel and the USB cables at the same time. • If you are using a USB cable, you must be running Windows 98/ Me/2000/XP. Push the metal clips down to connect one of the cables mentioned above. To the parallel port on your machine.
User's Guide
Page 51
... powerful image editor and to install TCP/IP protocol in your PC. • Multi Direct Print Type S IPP port- The Printer Settings Utility window provides the following components: • Printer Driver- In order to use the Network Scan program for your machine. • Printer Settings Utility-... information about using the program, see page 6.12. • Set IP- The Multi Direct Print Type S IPP port is the accompanying Windows-based software for scanning images. This program is automatically installed when you have to send the image by e-mail. Your machine use this program...
... powerful image editor and to install TCP/IP protocol in your PC. • Multi Direct Print Type S IPP port- The Printer Settings Utility window provides the following components: • Printer Driver- In order to use the Network Scan program for your machine. • Printer Settings Utility-... information about using the program, see page 6.12. • Set IP- The Multi Direct Print Type S IPP port is the accompanying Windows-based software for scanning images. This program is automatically installed when you have to send the image by e-mail. Your machine use this program...
User's Guide
Page 53
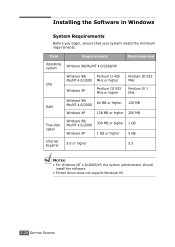
... Pentium III 933 MHz or higher Pentium IV 1 GHz RAM Windows 98/ Me/NT 4.0/2000 64 MB or higher 128 MB Windows XP 128 MB or higher 256 MB Free disk space Windows 98/ Me/NT 4.0/2000 300 MB or higher 1 GB Windows XP 1 GB or higher 5 GB Internet Explorer 5.0 or higher 5.5 NOTES:... • For Windows NT 4.0/2000/XP, the system administrator should install the...
... Pentium III 933 MHz or higher Pentium IV 1 GHz RAM Windows 98/ Me/NT 4.0/2000 64 MB or higher 128 MB Windows XP 128 MB or higher 256 MB Free disk space Windows 98/ Me/NT 4.0/2000 300 MB or higher 1 GB Windows XP 1 GB or higher 5 GB Internet Explorer 5.0 or higher 5.5 NOTES:... • For Windows NT 4.0/2000/XP, the system administrator should install the...
User's Guide
Page 54
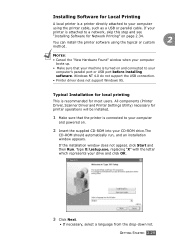
...on and connected to your computer and powered on page 2.34. If the installation window does not appear, click Start and then Run. GETTING STARTED 2.29 NOTES: • Cancel the "New Hardware Found" window when your computer boots up. • Make sure that the printer is connected...supplied CD-ROM into your CD-ROM drive.The CD-ROM should automatically run, and an installation window appears. Windows NT 4.0 do not support the USB connection. • Printer driver does not support Windows 95. Type X:\setup.exe, replacing "X" with the letter which represents your computer using the typical...
...on and connected to your computer and powered on page 2.34. If the installation window does not appear, click Start and then Run. GETTING STARTED 2.29 NOTES: • Cancel the "New Hardware Found" window when your computer boots up. • Make sure that the printer is connected...supplied CD-ROM into your CD-ROM drive.The CD-ROM should automatically run, and an installation window appears. Windows NT 4.0 do not support the USB connection. • Printer driver does not support Windows 95. Type X:\setup.exe, replacing "X" with the letter which represents your computer using the typical...

User's Guide
Page 55
NOTES: If your computer doesn't have Adobe Acrobat, click on the following window will not be printed at this screen, page 2.41. • View User's Guide: Allows you to step 7. 2.30 GETTING STARTED If you click to install ... connecting the printer, click Next. • If you don't want to connect the printer at the end of the installation. 5 After the installation is finished, a window asking you to print a test page, select the checkbox and click Next. If your printer is not already connected to the computer, the following screen...
NOTES: If your computer doesn't have Adobe Acrobat, click on the following window will not be printed at this screen, page 2.41. • View User's Guide: Allows you to step 7. 2.30 GETTING STARTED If you click to install ... connecting the printer, click Next. • If you don't want to connect the printer at the end of the installation. 5 After the installation is finished, a window asking you to print a test page, select the checkbox and click Next. If your printer is not already connected to the computer, the following screen...
User's Guide
Page 56
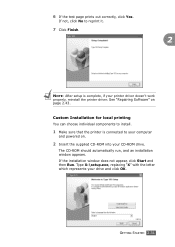
... install. 1 Make sure that the printer is complete, if your CD-ROM drive. If the installation window does not appear, click Start and then Run. The CD-ROM should automatically run, and an installation window appears. Custom Installation for local printing You can choose individual components to your computer and powered on...
... install. 1 Make sure that the printer is complete, if your CD-ROM drive. If the installation window does not appear, click Start and then Run. The CD-ROM should automatically run, and an installation window appears. Custom Installation for local printing You can choose individual components to your computer and powered on...

User's Guide
Page 58
... the installation. 6 Select the components to be installed and click Next. 7 After the installation is not already connected to the computer, the following window will not be printed at this time, click Next, and No on the following screen. If not, click No to step 9. 8 If the... page prints out correctly, click Yes. GETTING STARTED 2.33 Otherwise, just click Next and skip to reprint it. NOTES: If your printer is finished, a window asking you to print a test page appears. Then the installation will start and a test page will appear. 2 • After connecting the printer, click ...
... the installation. 6 Select the components to be installed and click Next. 7 After the installation is not already connected to the computer, the following window will not be printed at this time, click Next, and No on the following screen. If not, click No to step 9. 8 If the... page prints out correctly, click Yes. GETTING STARTED 2.33 Otherwise, just click Next and skip to reprint it. NOTES: If your printer is finished, a window asking you to print a test page appears. Then the installation will start and a test page will appear. 2 • After connecting the printer, click ...
User's Guide
Page 59
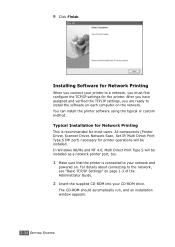
... TCP/IP settings, you must first configure the TCP/IP settings for the printer. The CD-ROM should automatically run, and an installation window appears. 2.34 GETTING STARTED In Windows 98/Me and NT 4.0, Multi Direct Print Type S will be installed as a network printer port, too. 1 Make sure that the printer is...
... TCP/IP settings, you must first configure the TCP/IP settings for the printer. The CD-ROM should automatically run, and an installation window appears. 2.34 GETTING STARTED In Windows 98/Me and NT 4.0, Multi Direct Print Type S will be installed as a network printer port, too. 1 Make sure that the printer is...

User's Guide
Page 60
.... • If necessary, select a language from the drop-down list. • Install SmarThru: Installs the SmarThru program. Click Next. GETTING STARTED 2.35 If the installation window does not appear, click Start and then Run. If you click to install SmarThru on this screen, page 2.41. • View User's Guide: Allows you...
.... • If necessary, select a language from the drop-down list. • Install SmarThru: Installs the SmarThru program. Click Next. GETTING STARTED 2.35 If the installation window does not appear, click Start and then Run. If you click to install SmarThru on this screen, page 2.41. • View User's Guide: Allows you...

User's Guide
Page 61
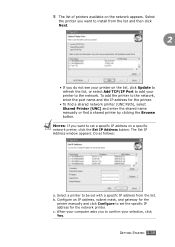
... a shared printer by clicking the Browse button. When your computer asks you do not see your printer on the network appears. c. The Set IP Address window appears. Select a printer to set with a specific IP address from the list and then click Next. • If you to set a specific IP address on...
... a shared printer by clicking the Browse button. When your computer asks you do not see your printer on the network appears. c. The Set IP Address window appears. Select a printer to set with a specific IP address from the list and then click Next. • If you to set a specific IP address on...
User's Guide
Page 62
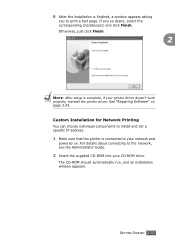
... if your printer driver doesn't work properly, reinstall the printer driver. Otherwise, just click Finish. 2 NOTE: After setup is finished, a window appears asking you so desire, select the corresponding checkbox(es) and click Finish. See "Repairing Software" on . The CD-ROM should automatically... run, and an installation window appears. For details about connecting to your CD-ROM drive. Custom Installation for Network Printing You can choose individual components to install...
... if your printer driver doesn't work properly, reinstall the printer driver. Otherwise, just click Finish. 2 NOTE: After setup is finished, a window appears asking you so desire, select the corresponding checkbox(es) and click Finish. See "Repairing Software" on . The CD-ROM should automatically... run, and an installation window appears. For details about connecting to your CD-ROM drive. Custom Installation for Network Printing You can choose individual components to install...

User's Guide
Page 63
... the drop-down list. • Install SmarThru: Installs the SmarThru program. If you click to view the User's Guide and Administrator Guide. If the installation window does not appear, click Start and then Run. Type X:\setup.exe, replacing "X" with the letter which represents your computer doesn't have Adobe Acrobat, click on...
... the drop-down list. • Install SmarThru: Installs the SmarThru program. If you click to view the User's Guide and Administrator Guide. If the installation window does not appear, click Start and then Run. Type X:\setup.exe, replacing "X" with the letter which represents your computer doesn't have Adobe Acrobat, click on...
User's Guide
Page 64
... (UNC Path), select Shared Printer [UNC] and enter the shared name manually or find a shared printer by clicking the Browse button. The Set IP Address window appears. Select a printer to set a specific IP address on a specific network printer, click the Set IP Address button. NOTES: If you want to install from...
... (UNC Path), select Shared Printer [UNC] and enter the shared name manually or find a shared printer by clicking the Browse button. The Set IP Address window appears. Select a printer to set a specific IP address on a specific network printer, click the Set IP Address button. NOTES: If you want to install from...

User's Guide
Page 65
Click Next. You can also change the port name of each printer. If you to print a test page. 6 Select the components to be shared on a server checkbox. 8 After the installation is finished, a window appears asking you so desire, select the corresponding checkbox(es) and click Finish. 2.40 GETTING STARTED To install this software on a server, select the Setting up this printer on the network, set the printer as the default printer, and change the printer name, set the printer to be installed and click Next. 7 After selecting the components, the following window appears.
Click Next. You can also change the port name of each printer. If you to print a test page. 6 Select the components to be shared on a server checkbox. 8 After the installation is finished, a window appears asking you so desire, select the corresponding checkbox(es) and click Finish. 2.40 GETTING STARTED To install this software on a server, select the Setting up this printer on the network, set the printer as the default printer, and change the printer name, set the printer to be installed and click Next. 7 After selecting the components, the following window appears.


