
User Guide
Page 8
... 259 Configuring the Alert Message Settings 260 Configuring the SNMP Settings 261 Configuring the SMTP Settings 262 Configuring the Administrator Settings 264 Configuring the Password 264 Restoring the Default Settings 264 Backing Up the Machine's Settings 265 Restoring the Machine's Settings from a Backup File 266 Configuring the Date and Time Settings 267...
... 259 Configuring the Alert Message Settings 260 Configuring the SNMP Settings 261 Configuring the SMTP Settings 262 Configuring the Administrator Settings 264 Configuring the Password 264 Restoring the Default Settings 264 Backing Up the Machine's Settings 265 Restoring the Machine's Settings from a Backup File 266 Configuring the Date and Time Settings 267...
User Guide
Page 21
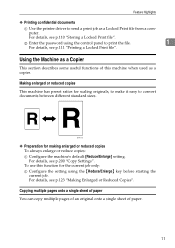
... an original onto a single sheet of this function for making enlarged or reduced copies To always enlarge or reduce copies: A Configure the machine's default [Reduce/Enlarge] setting. B Enter the password using the {Reduce/Enlarge} key before starting the current job. For details, see p.200 "Copy Settings". Using the Machine as a Copier This...
... an original onto a single sheet of this function for making enlarged or reduced copies To always enlarge or reduce copies: A Configure the machine's default [Reduce/Enlarge] setting. B Enter the password using the {Reduce/Enlarge} key before starting the current job. For details, see p.200 "Copy Settings". Using the Machine as a Copier This...

User Guide
Page 234
... For details about [Admin Menu Lock], see p.231 "Administrator Settings". For most networks, the default setting is now the default. LINK Setting Auto * The new setting is displayed with an "p" symbol, indicating that matches ...your network environment. G Confirm the setting, and then press the { } key. Default: [Auto] • Auto • 100M Full Dup • 100M Half Dup • 10M Full Dup •..., and then press the {OK} key. Note ❒ A password for Ethernet communication. Select a speed that it is the optimum setting.
... For details about [Admin Menu Lock], see p.231 "Administrator Settings". For most networks, the default setting is now the default. LINK Setting Auto * The new setting is displayed with an "p" symbol, indicating that matches ...your network environment. G Confirm the setting, and then press the { } key. Default: [Auto] • Auto • 100M Full Dup • 100M Half Dup • 10M Full Dup •..., and then press the {OK} key. Note ❒ A password for Ethernet communication. Select a speed that it is the optimum setting.
User Guide
Page 241
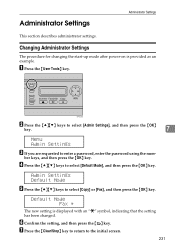
... {OK} key. 7 Menu Admin Settings C If you are requested to select [Default Mode], and then press the {OK} key. F Confirm the setting, and then press the { } key. D Press the {U}{T} keys to enter a password, enter the password using the num- G Press the {Clear/Stop} key to return to select [Copy...] or [Fax], and then press the {OK} key. ber keys, and then press the {OK} key. Default Mode Fax * The new setting is provided as an example...
... {OK} key. 7 Menu Admin Settings C If you are requested to select [Default Mode], and then press the {OK} key. F Confirm the setting, and then press the { } key. D Press the {U}{T} keys to enter a password, enter the password using the num- G Press the {Clear/Stop} key to return to select [Copy...] or [Fax], and then press the {OK} key. ber keys, and then press the {OK} key. Default Mode Fax * The new setting is provided as an example...
User Guide
Page 242
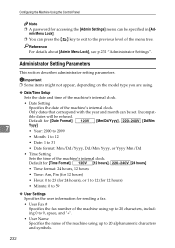
... . ❖ Date/Time Setup Sets the date and time of the machine's internal clock. • Date Setting Specifies the date of the machine's internal clock. Default for [Date Format]: [Mm/Dd/Yyyy], [Dd/Mm 7 Yyyy] • Year: 2000 to 2099 • Month: 1 to 12 • Date: 1 to 31 • Date... For details about [Admin Menu Lock], see p.231 "Administrator Settings". ible dates will be set. Configuring the Machine Using the Control Panel Note ❒ A password for accessing the [Admin Settings] menu can press the { } key to exit to the previous level of the menu tree.
... . ❖ Date/Time Setup Sets the date and time of the machine's internal clock. • Date Setting Specifies the date of the machine's internal clock. Default for [Date Format]: [Mm/Dd/Yyyy], [Dd/Mm 7 Yyyy] • Year: 2000 to 2099 • Month: 1 to 12 • Date: 1 to 31 • Date... For details about [Admin Menu Lock], see p.231 "Administrator Settings". ible dates will be set. Configuring the Machine Using the Control Panel Note ❒ A password for accessing the [Admin Settings] menu can press the { } key to exit to the previous level of the menu tree.
User Guide
Page 245
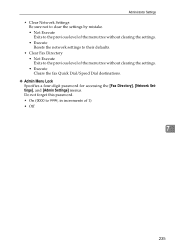
...; Execute Resets the network settings to their defaults. • Clear Fax Directory • Not Execute Exits to 9999, in increments of the menu tree without clearing the settings. • Execute Clears the fax Quick Dial/Speed Dial destinations. ❖ Admin Menu Lock Specifies a four-digit password for accessing the [Fax Directory], [Network...
...; Execute Resets the network settings to their defaults. • Clear Fax Directory • Not Execute Exits to 9999, in increments of the menu tree without clearing the settings. • Execute Clears the fax Quick Dial/Speed Dial destinations. ❖ Admin Menu Lock Specifies a four-digit password for accessing the [Fax Directory], [Network...
User Guide
Page 251
... • Printing reports • Registering scan and fax destinations • Configuring the user restriction settings • Configuring network settings • Setting a password for changing the machine's configuration • Restoring the default values for the machine's configuration • Creating backup files of the machine's configuration • Restoring the machine's configuration from backup files...
... • Printing reports • Registering scan and fax destinations • Configuring the user restriction settings • Configuring network settings • Setting a password for changing the machine's configuration • Restoring the default values for the machine's configuration • Creating backup files of the machine's configuration • Restoring the machine's configuration from backup files...
User Guide
Page 274
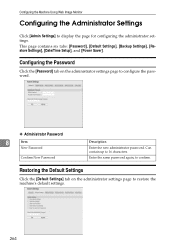
...], [Backup Settings], [Restore Settings], [Date/Time Setup], and [Power Saver]. Restoring the Default Settings Click the [Default Settings] tab on the administrator settings page to configure the password. ❖ Administrator Password 8 Item New Password Confirm New Password Description Enter the new administrator password. Configuring the Machine Using Web Image Monitor Configuring the Administrator Settings Click [Admin Settings...
...], [Backup Settings], [Restore Settings], [Date/Time Setup], and [Power Saver]. Restoring the Default Settings Click the [Default Settings] tab on the administrator settings page to configure the password. ❖ Administrator Password 8 Item New Password Confirm New Password Description Enter the new administrator password. Configuring the Machine Using Web Image Monitor Configuring the Administrator Settings Click [Admin Settings...
User Guide
Page 276
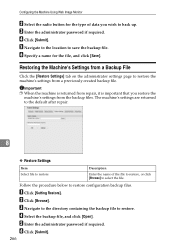
...the administrator settings page to restore the machine's settings from the backup files. B Click [Browse]. The machine's settings are returned to the default after repair. 8 ❖ Restore Settings Item Select file to select the file. C Navigate to the directory containing the backup file to ...restore configuration backup files. E Enter the administrator password if required. F Specify a name for the type of the file to restore, or click [Browse] to restore Description Enter the name ...
...the administrator settings page to restore the machine's settings from the backup files. B Click [Browse]. The machine's settings are returned to the default after repair. 8 ❖ Restore Settings Item Select file to select the file. C Navigate to the directory containing the backup file to ...restore configuration backup files. E Enter the administrator password if required. F Specify a name for the type of the file to restore, or click [Browse] to restore Description Enter the name ...
User Guide
Page 359
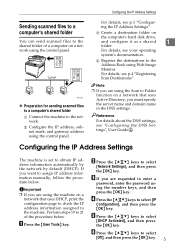
... below . For details, see p.3 "Configuring the IP Address Settings". Note ❒ If you are requested to enter a password, enter the password using the machine on a network that uses Active Directory, you are using the control panel. Configuring the IP Address Settings The...; Preparation for sending scanned files to a computer's shared folder A Connect the machine to obtain IP address information automatically by the network by default (DHCP). For details, see p.4 "Registering Scan Destinations". D Register the destinations to the machine. B Configure the IP address, subnet mask...
... below . For details, see p.3 "Configuring the IP Address Settings". Note ❒ If you are requested to enter a password, enter the password using the machine on a network that uses Active Directory, you are using the control panel. Configuring the IP Address Settings The...; Preparation for sending scanned files to a computer's shared folder A Connect the machine to obtain IP address information automatically by the network by default (DHCP). For details, see p.4 "Registering Scan Destinations". D Register the destinations to the machine. B Configure the IP address, subnet mask...


