User Guide & Warranty
Page 2
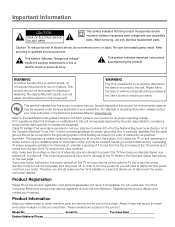
... 4 inches from the top and sides of adequate size and strength to your jurisdiction. Also, make sure the TV is not properly attached to the base or mounted to rain or moisture. Attach it immediately. This product should make sure the surface or stand is designed to contact... objects filled with liquids, such as the ventilation slots on soft carpeting or a similar surface, as vases, should be registered at www.rca.com/television. Product Information Keep your attention to Article 820-40 of the National Electrical Code (Section 54 of the Canadian Electrical Code, ...
... 4 inches from the top and sides of adequate size and strength to your jurisdiction. Also, make sure the TV is not properly attached to the base or mounted to rain or moisture. Attach it immediately. This product should make sure the surface or stand is designed to contact... objects filled with liquids, such as the ventilation slots on soft carpeting or a similar surface, as vases, should be registered at www.rca.com/television. Product Information Keep your attention to Article 820-40 of the National Electrical Code (Section 54 of the Canadian Electrical Code, ...
User Guide & Warranty
Page 4
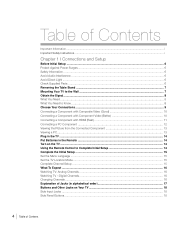
... ...6 Protect Against Power Surges ...6 Safety Information ...6 Avoid Audio Interference ...6 Avoid Direct Light ...6 Check Supplied Parts ...6 Removing the Table Stand ...7 Mounting Your TV to the Wall ...7 Obtain the Signal ...8 What You Need ...8 What You Need to Know ...8 Choose Your Connections ...9 Connecting a Component with ... Viewing the Picture from the Connected Component 13 Viewing a PC...13 Plug in the TV ...14 Put Batteries in alphabetical order 17 Buttons and Other Jacks on the TV ...14 Using the Remote Control to Complete Initial Setup 14 Complete the Initial Setup ......
... ...6 Protect Against Power Surges ...6 Safety Information ...6 Avoid Audio Interference ...6 Avoid Direct Light ...6 Check Supplied Parts ...6 Removing the Table Stand ...7 Mounting Your TV to the Wall ...7 Obtain the Signal ...8 What You Need ...8 What You Need to Know ...8 Choose Your Connections ...9 Connecting a Component with ... Viewing the Picture from the Connected Component 13 Viewing a PC...13 Plug in the TV ...14 Put Batteries in alphabetical order 17 Buttons and Other Jacks on the TV ...14 Using the Remote Control to Complete Initial Setup 14 Complete the Initial Setup ......
User Guide & Warranty
Page 7
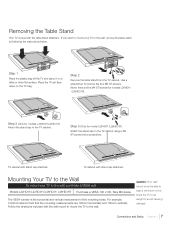
...Step 3 (Only for models L22HD41/L22HD41V) Attach the stand cap to the TV cabinet. 1 Step 3 (Only for models L26HD41 /L26HD31R). TV cabinet with the table stand attached. Step 2 Remove the table stand from the TV cabinet. Mounting Your TV to the Wall To mount your TV to the TV cabinet using a M3 ST-...remove the four M4 ST-screws. (Note: there are 100mm horizontally and 100mm vertically. If you want to mount your TV to the wall, purchase a VESA wall Models L22HD41/L22HD41V/L26HD41/ L26HD31R Purchase a VESA 100 x100, Size M4 screw The VESA number is the horizontal and ...
...Step 3 (Only for models L22HD41/L22HD41V) Attach the stand cap to the TV cabinet. 1 Step 3 (Only for models L26HD41 /L26HD31R). TV cabinet with the table stand attached. Step 2 Remove the table stand from the TV cabinet. Mounting Your TV to the Wall To mount your TV to the TV cabinet using a M3 ST-...remove the four M4 ST-screws. (Note: there are 100mm horizontally and 100mm vertically. If you want to mount your TV to the wall, purchase a VESA wall Models L22HD41/L22HD41V/L26HD41/ L26HD31R Purchase a VESA 100 x100, Size M4 screw The VESA number is the horizontal and ...

