
Uk Manual
Page 3
.... When connecting the power cord (see HOW TO TURN ON THE POWER on the walking belt. When replacing the fuse in the treadmill. If an extension cord is not working properly.) 5. Keep the power cord away from the treadmill at a time. 9. Never move the walking belt while the power is not a medical device. Do not operate the treadmill if the power cord or plug is damaged, or if the treadmill is needed, use the treadmill with...
.... When connecting the power cord (see HOW TO TURN ON THE POWER on the walking belt. When replacing the fuse in the treadmill. If an extension cord is not working properly.) 5. Keep the power cord away from the treadmill at a time. 9. Never move the walking belt while the power is not a medical device. Do not operate the treadmill if the power cord or plug is damaged, or if the treadmill is needed, use the treadmill with...

Uk Manual
Page 4
... while exercising, stop immediately and cool down. Do not attempt to raise, lower, or move the treadmill until it is properly assembled. (See ASSEMBLY on page 6, and HOW TO FOLD AND MOVE THE TREADMILL on page 24.) You must be performed by an authorized ser- Inspect and properly tighten all parts of the power switch.) 19. vice representative. Always remove the key, unplug the power cord, and press the power switch...
... while exercising, stop immediately and cool down. Do not attempt to raise, lower, or move the treadmill until it is properly assembled. (See ASSEMBLY on page 6, and HOW TO FOLD AND MOVE THE TREADMILL on page 24.) You must be performed by an authorized ser- Inspect and properly tighten all parts of the power switch.) 19. vice representative. Always remove the key, unplug the power cord, and press the power switch...
Uk Manual
Page 5
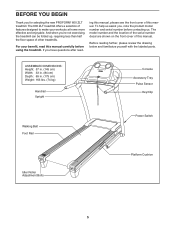
... cover of other treadmills. ASSEMBLED DIMENSIONS: Height: 57 in. (145 cm) Width: 33 in. (84 cm) Depth: 69 in. (175 cm) Weight: 163 lbs. (74 kg) Handrail Upright Console Accessory Tray Pulse Sensor Key/Clip Walking Belt Foot Rail Power Switch Idler Roller Adjustment Bolts Platform Cushion 5 And when you have questions after read this manual carefully before contacting us. If you ʼre not exercising, the treadmill can be folded...
... cover of other treadmills. ASSEMBLED DIMENSIONS: Height: 57 in. (145 cm) Width: 33 in. (84 cm) Depth: 69 in. (175 cm) Weight: 163 lbs. (74 kg) Handrail Upright Console Accessory Tray Pulse Sensor Key/Clip Walking Belt Foot Rail Power Switch Idler Roller Adjustment Bolts Platform Cushion 5 And when you have questions after read this manual carefully before contacting us. If you ʼre not exercising, the treadmill can be folded...
Uk Manual
Page 7
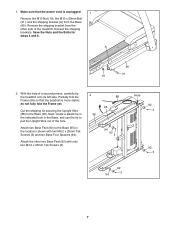
... the Upright Wire out of a second person, carefully tip the treadmill onto its left side. 1. Make sure that the treadmill is unplugged. 1 Remove the M10 Nut (19), the M10 x 50mm Bolt (31), and the shipping bracket (A) from the other two Base Feet (92) with two M4.2 x 25mm Tek Screws (3) and two Base Foot Spacers (94). Partially fold the...
... the Upright Wire out of a second person, carefully tip the treadmill onto its left side. 1. Make sure that the treadmill is unplugged. 1 Remove the M10 Nut (19), the M10 x 50mm Bolt (31), and the shipping bracket (A) from the other two Base Feet (92) with two M4.2 x 25mm Tek Screws (3) and two Base Foot Spacers (94). Partially fold the...

Uk Manual
Page 11
If necessary, press the M8 Cage Nut (34) back into place. Attach the Right Handrail (101) to the Console Frame (111) and the console assembly with eight M4 x 13mm Screws (116). Start all three Bolts, and then tighten all of the Right Handrail as de- Be carful not to the position shown. 9. Set the console assembly face down to avoid scratching the console. 9 Loosen...
If necessary, press the M8 Cage Nut (34) back into place. Attach the Right Handrail (101) to the Console Frame (111) and the console assembly with eight M4 x 13mm Screws (116). Start all three Bolts, and then tighten all of the Right Handrail as de- Be carful not to the position shown. 9. Set the console assembly face down to avoid scratching the console. 9 Loosen...
Uk Manual
Page 12
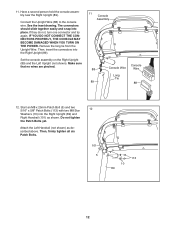
... together easily and snap into the Right Upright (89) and Right Handrail (101) as described above. Attach the Left Handrail (not shown) as shown. Do not tighten the Patch Bolts yet. Then, insert the connectors into the Right Upright (89). Set the console assembly on the Right Upright (89) and the Left Upright (not shown). 11. Connect the Upright Wire (88) to the console wire.
... together easily and snap into the Right Upright (89) and Right Handrail (101) as described above. Attach the Left Handrail (not shown) as shown. Do not tighten the Patch Bolts yet. Then, insert the connectors into the Right Upright (89). Set the console assembly on the Right Upright (89) and the Left Upright (not shown). 11. Connect the Upright Wire (88) to the console wire.
Uk Manual
Page 15
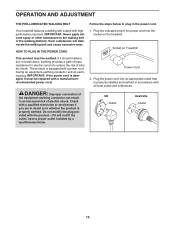
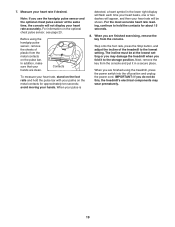
...: Improper connection of the equipment-earthing conductor can result in the power cord. Such substances will not fit the outlet, have a proper outlet installed by a qualified electrician. Your treadmill features a walking belt coated with a manufacturerrecommended power cord. IMPORTANT: Never apply silicone spray or other substances to the walking belt or the walking platform. OPERATION AND ADJUSTMENT THE PRE-LUBRICATED WALKING BELT Follow the steps below to plug in an...
...: Improper connection of the equipment-earthing conductor can result in the power cord. Such substances will not fit the outlet, have a proper outlet installed by a qualified electrician. Your treadmill features a walking belt coated with a manufacturerrecommended power cord. IMPORTANT: Never apply silicone spray or other substances to the walking belt or the walking platform. OPERATION AND ADJUSTMENT THE PRE-LUBRICATED WALKING BELT Follow the steps below to plug in an...
Uk Manual
Page 16
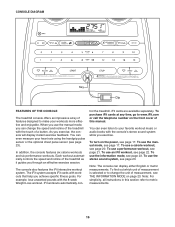
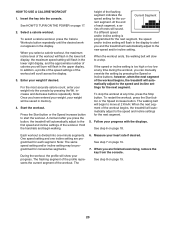
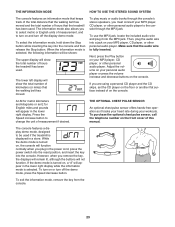
... 17. iFit workouts automatically con- Note: The console can change the unit of the treadmill with workouts that help you achieve specific fitness goals. To turn on the power, see page 23). To use the manual mode, you can display either English or metric measurements. To find out which unit of measurement is selected or to make your heart rate using the handgrip pulse sensor or the optional chest pulse sensor (see...
... 17. iFit workouts automatically con- Note: The console can change the unit of the treadmill with workouts that help you achieve specific fitness goals. To turn on the power, see page 23). To use the manual mode, you can display either English or metric measurements. To find out which unit of measurement is selected or to make your heart rate using the handgrip pulse sensor or the optional chest pulse sensor (see...
Uk Manual
Page 17
... speed setting will begin to move at the left. 2. To stop . The time will change the speed of the walking belt as you press one of the treadmill. If you do not do this, you use the treadmill, observe the alignment of the Speed buttons numbered 1 through 18. Reset IMPORTANT: The console features a display demo mode, designed to be selected. if the key is turned on the power. As you press one of the walking belt...
... speed setting will begin to move at the left. 2. To stop . The time will change the speed of the walking belt as you press one of the treadmill. If you do not do this, you use the treadmill, observe the alignment of the Speed buttons numbered 1 through 18. Reset IMPORTANT: The console features a display demo mode, designed to be selected. if the key is turned on the power. As you press one of the walking belt...
Uk Manual
Page 18
... the treadmill each time the incline level changes. Note: When a performance workout or an iFit workout is shown in the upper display, the same information will gradually adjust to appear in the display. The display also shows your progress with the displays. Note: While information is selected, the lower left display will again begin to the selected incline setting. 6. As you use the handgrip pulse sensor (see step 7). The track-When the manual mode...
... the treadmill each time the incline level changes. Note: When a performance workout or an iFit workout is shown in the upper display, the same information will gradually adjust to appear in the display. The display also shows your progress with the displays. Note: While information is selected, the lower left display will again begin to the selected incline setting. 6. As you use the handgrip pulse sensor (see step 7). The track-When the manual mode...
Uk Manual
Page 19
... are clean. avoid moving your heart rate if desired. Step onto the foot rails, press the Stop button, and adjust the incline of plastic from the console and put it to the storage position. Before using the handgrip pulse sensor, remove the sheets of the treadmill to hold the pulse bar with your hands are finished using the treadmill, press the power switch into the off position and unplug the power cord. In addition, make...
... are clean. avoid moving your heart rate if desired. Step onto the foot rails, press the Stop button, and adjust the incline of plastic from the console and put it to the storage position. Before using the handgrip pulse sensor, remove the sheets of the treadmill to hold the pulse bar with your hands are finished using the treadmill, press the power switch into the off position and unplug the power cord. In addition, make...
Uk Manual
Page 20
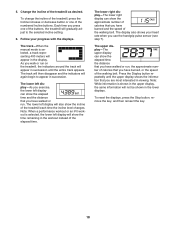
... after you have entered your weight, your weight into the console by pressing the Speed or Incline buttons; If a different speed and/or incline setting is programmed for the next segment. 5. The walking belt will flash in memory. 4. When the next segment of the workout begins, the treadmill will automatically adjust to alert you can manually override the setting by pressing the Wt. See step 7 on page 19. 20 Hold...
... after you have entered your weight, your weight into the console by pressing the Speed or Incline buttons; If a different speed and/or incline setting is programmed for the next segment. 5. The walking belt will flash in memory. 4. When the next segment of the workout begins, the treadmill will automatically adjust to alert you can manually override the setting by pressing the Wt. See step 7 on page 19. 20 Hold...
Uk Manual
Page 21
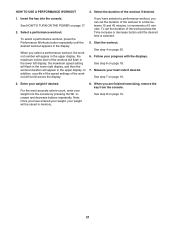
... workout, press the Performance Workouts button repeatedly until the desired time is selected. 5. To set the duration of the workout if desired. 1. HOW TO USE A PERFORMANCE WORKOUT 4. Select the duration of the workout to a time between 15 and 45 minutes, in the display. Select a performance workout. When you are finished exercising, remove the key from the console. See step 4 on page 19. 21 Measure your weight into...
... workout, press the Performance Workouts button repeatedly until the desired time is selected. 5. To set the duration of the workout if desired. 1. HOW TO USE A PERFORMANCE WORKOUT 4. Select the duration of the workout to a time between 15 and 45 minutes, in the display. Select a performance workout. When you are finished exercising, remove the key from the console. See step 4 on page 19. 21 Measure your weight into...
Uk Manual
Page 22
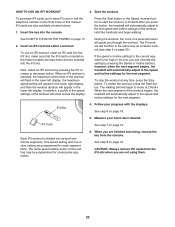
... a personal trainer will guide you press the button, the treadmill will begin walking. Each iFit workout is oriented so the metal contacts are face-down and are inserted into several oneminute segments. A moment after you through the workout. See step 7 on page 20). Note: The same speed setting and/or incline setting may be programmed for each segment. CAUTION: Always remove iFit cards from the console. Start the workout. iFit cards are programmed for...
... a personal trainer will guide you press the button, the treadmill will begin walking. Each iFit workout is oriented so the metal contacts are face-down and are inserted into several oneminute segments. A moment after you through the workout. See step 7 on page 20). Note: The same speed setting and/or incline setting may be programmed for each segment. CAUTION: Always remove iFit cards from the console. Start the workout. iFit cards are programmed for...
Uk Manual
Page 23
... lower left display will appear in the power cord, press the power switch into the reset position, and insert the key into the MP3 jack. To purchase the optional chest pulse sensor, call the telephone number on the front cover of kilometers (or miles) that the walking belt has moved. If the demo mode is turned on, a "d" will show the total number of hours the treadmill has been used if the treadmill is turned on, the console...
... lower left display will appear in the power cord, press the power switch into the reset position, and insert the key into the MP3 jack. To purchase the optional chest pulse sensor, call the telephone number on the front cover of kilometers (or miles) that the walking belt has moved. If the demo mode is turned on, a "d" will show the total number of hours the treadmill has been used if the treadmill is turned on, the console...
Uk Manual
Page 24
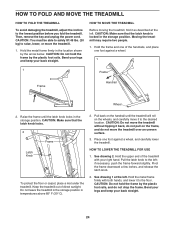
... treadmill without tipping it to raise, lower, or move the treadmill over an uneven surface. 3. Then, remove the key and unplug the power cord. HOW TO MOVE THE TREADMILL Before moving the treadmill, fold it to the floor. Raise the frame until the treadmill will roll on the wheels, and carefully move it back, do not pull on the handrail until the latch knob locks in the location...
... treadmill without tipping it to raise, lower, or move the treadmill over an uneven surface. 3. Then, remove the key and unplug the power cord. HOW TO MOVE THE TREADMILL Before moving the treadmill, fold it to the floor. Raise the frame until the treadmill will roll on the wheels, and carefully move it back, do not pull on the handrail until the latch knob locks in the location...
Uk Manual
Page 25
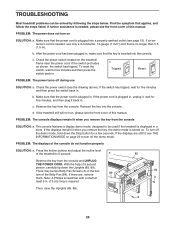
... the console. c Tripped Reset PROBLEM: The power turns off the demo mode, hold down the Uprights (85, 89). c. Find the symptom that the key is needed , please see the front cover of this manual. If further assistance is plugged in , make sure that applies, and follow the steps listed. To reset the switch, wait for a few seconds. Make sure that the power cord is needed , use SOLUTION: a. If the displays are , remove 89...
... the console. c Tripped Reset PROBLEM: The power turns off the demo mode, hold down the Uprights (85, 89). c. Find the symptom that the key is needed , please see the front cover of this manual. If further assistance is plugged in , make sure that applies, and follow the steps listed. To reset the switch, wait for a few seconds. Make sure that the power cord is needed , use SOLUTION: a. If the displays are , remove 89...
Uk Manual
Page 26
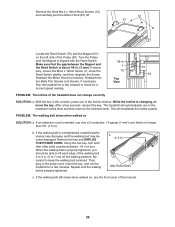
... the Motor Hood (not shown). When the walking belt is properly tightened, you should be able to lift each edge of a turn both idler roller bolts counterclockwise, 1/4 of the walking belt 2 to 3 in. (5 to check for a few seconds, reinsert the key. Be careful to the minimum level. Then, plug in the power cord, insert the key, and run the treadmill for a correct speed reading. 1/8 in the console, press one...
... the Motor Hood (not shown). When the walking belt is properly tightened, you should be able to lift each edge of a turn both idler roller bolts counterclockwise, 1/4 of the walking belt 2 to 3 in. (5 to check for a few seconds, reinsert the key. Be careful to the minimum level. Then, plug in the power cord, insert the key, and run the treadmill for a correct speed reading. 1/8 in the console, press one...

Uk Manual
Page 28
... few minutes of time. For maximum fat burning, exercise with pre-existing health problems. The pulse sensor is the heart rate for a sustained period of exercise does your body begin to use your heart rate as a guide to 10 minutes of heart rate readings. Cooling Down-Finish with 5 to find your breath. The pulse sensor is to strengthen your training zone. These guidelines will help you may affect...
... few minutes of time. For maximum fat burning, exercise with pre-existing health problems. The pulse sensor is the heart rate for a sustained period of exercise does your body begin to use your heart rate as a guide to 10 minutes of heart rate readings. Cooling Down-Finish with 5 to find your breath. The pulse sensor is to strengthen your training zone. These guidelines will help you may affect...
Uk Manual
Page 30
... Magnet Motor Belt Drive Roller/Pulley Walking Belt Walking Platform Frame Roller Bracket Right Foot Rail Access Door Storage Latch Latch Bracket Right Foot Idler Roller Roller Bracket Plate Left Foot Console Clamp Motor Hood Drive Motor Lift Frame Cable Tie Reed Switch Reed Switch Clamp Frame Spacer 1/4" Star Washer Lift Frame Incline Stop Bracket Lift Frame/Roller Ground Wire Lift Motor Lift Motor Spacer Lift Motor Wire Controller Power Cord UK Power Cord Power Switch Belly Pan Left Upright Left Upright Spacer Base Cap Upright Wire Right Upright Bolt Spacer Right Upright Spacer Base...
... Magnet Motor Belt Drive Roller/Pulley Walking Belt Walking Platform Frame Roller Bracket Right Foot Rail Access Door Storage Latch Latch Bracket Right Foot Idler Roller Roller Bracket Plate Left Foot Console Clamp Motor Hood Drive Motor Lift Frame Cable Tie Reed Switch Reed Switch Clamp Frame Spacer 1/4" Star Washer Lift Frame Incline Stop Bracket Lift Frame/Roller Ground Wire Lift Motor Lift Motor Spacer Lift Motor Wire Controller Power Cord UK Power Cord Power Switch Belly Pan Left Upright Left Upright Spacer Base Cap Upright Wire Right Upright Bolt Spacer Right Upright Spacer Base...


