Owner's Manual
Page 6
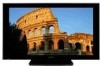
...Pioneer PureVision PRO-FHD1 incorporates the latest in the future during the recycling process. Direct Color Filter. This improves the color/picture reproduction of time. • When playing a game, the "GAME" mode setting within "AV Selection" is poor. • Do not cover with a cloth, etc. • Clean the vents on your plasma...video game images which have both very bright areas and very dark areas side by side should be placed in front of the plasma panel, which have static portions). • Avoid viewing the On Screen Display for extended periods, from a decoder, DVD player, ...
...Pioneer PureVision PRO-FHD1 incorporates the latest in the future during the recycling process. Direct Color Filter. This improves the color/picture reproduction of time. • When playing a game, the "GAME" mode setting within "AV Selection" is poor. • Do not cover with a cloth, etc. • Clean the vents on your plasma...video game images which have both very bright areas and very dark areas side by side should be placed in front of the plasma panel, which have static portions). • Avoid viewing the On Screen Display for extended periods, from a decoder, DVD player, ...
Owner's Manual
Page 23
...you cannot select "Contrast", "Brightness", "Color", "Tint", "Sharpness", "Pro Adjust", and "Reset"; For 16:9 squeeze pictures. Bars may cause temporary or permanent image retention depending on some programmes. ...the input signal aspect ratio. In this mode the picture is progressively stretched toward each side. NOTE • The Plasma Display's imaging characteristics may cause uneven wear. After ... of the copyrights of the screen. • It is not recommended to customize settings as desired. You can set the mode for a prolonged period: 4:3, FULL 14:9, CINEMA 14:9, Dot by...
...you cannot select "Contrast", "Brightness", "Color", "Tint", "Sharpness", "Pro Adjust", and "Reset"; For 16:9 squeeze pictures. Bars may cause temporary or permanent image retention depending on some programmes. ...the input signal aspect ratio. In this mode the picture is progressively stretched toward each side. NOTE • The Plasma Display's imaging characteristics may cause uneven wear. After ... of the copyrights of the screen. • It is not recommended to customize settings as desired. You can set the mode for a prolonged period: 4:3, FULL 14:9, CINEMA 14:9, Dot by...
Owner's Manual
Page 24
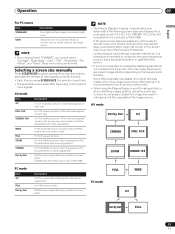
...exit the menu. 08 Menu Setup Menu Setup Using the menu AV mode menus Home Menu Picture Sound Power Control Option Setup Item Contrast Brightness Color Tint Sharpness Pro Adjust Reset Treble Bass Balance Front Surround FOCUS Reset Energy Save No Signal off Power Management ...by pressing RETURN. For the actual procedures, see the appropriate pages that describes individual functions. NOTE • Items within parentheses ( ) indicate notations for setting up the menus. RETURN HOME MENU ENTER AXD1509 1 Press HOME MENU. 2 Press / to select a menu item, and then press ENTER (ENTER/DISP...
...exit the menu. 08 Menu Setup Menu Setup Using the menu AV mode menus Home Menu Picture Sound Power Control Option Setup Item Contrast Brightness Color Tint Sharpness Pro Adjust Reset Treble Bass Balance Front Surround FOCUS Reset Energy Save No Signal off Power Management ...by pressing RETURN. For the actual procedures, see the appropriate pages that describes individual functions. NOTE • Items within parentheses ( ) indicate notations for setting up the menus. RETURN HOME MENU ENTER AXD1509 1 Press HOME MENU. 2 Press / to select a menu item, and then press ENTER (ENTER/DISP...
Owner's Manual
Page 25
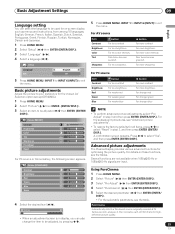
...picture adjustments". • To restore the factory defaults for high- Picture STANDARD Contrast 40 Brightness 0 Advanced picture adjustments The Plasma... ( / ). Red Green Blue Reset 0 2 Select "Picture" ( / then ENTER (ENTER/DISP.)). 0 3 Select "Pro Adjust" ( / then ENTER (ENTER/DISP.)). 0 4 Select...picture quality. • When an adjustment screen is in step 3 and then press ENTER (ENTER/DISP.). Several functions are not available when 1080p@50 Hz or 1080p@60 Hz signals are input. Basic Adjustment Settings 09 Basic Adjustment Settings English Language setting...
...picture adjustments". • To restore the factory defaults for high- Picture STANDARD Contrast 40 Brightness 0 Advanced picture adjustments The Plasma... ( / ). Red Green Blue Reset 0 2 Select "Picture" ( / then ENTER (ENTER/DISP.)). 0 3 Select "Pro Adjust" ( / then ENTER (ENTER/DISP.)). 0 4 Select...picture quality. • When an adjustment screen is in step 3 and then press ENTER (ENTER/DISP.). Several functions are not available when 1080p@50 Hz or 1080p@60 Hz signals are input. Basic Adjustment Settings 09 Basic Adjustment Settings English Language setting...
Owner's Manual
Page 26
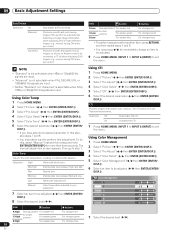
...; "Advanced" is not selectable when PAL, SECAM, 576i, or 1080i@50 Hz signals are input. • Neither "Standard" nor "Advanced" is selectable when 576p, 1080p or 720p@ 50 Hz signals are input. Mid-Low Intermediate tone between High and Mid Mid...displaying DVD images (e.g., movies) having 24 frames per second. 09 Basic Adjustment Settings PureCinema Selections Off Standard Advanced Deactivates the PureCinema. Using Color Temp 1 Press HOME MENU. 2 Select "Picture" ( / then ENTER (ENTER/DISP.)). 3 Select "Pro Adjust" ( / then ENTER (ENTER/DISP.)). 6 Select the desired parameter ...
...; "Advanced" is not selectable when PAL, SECAM, 576i, or 1080i@50 Hz signals are input. • Neither "Standard" nor "Advanced" is selectable when 576p, 1080p or 720p@ 50 Hz signals are input. Mid-Low Intermediate tone between High and Mid Mid...displaying DVD images (e.g., movies) having 24 frames per second. 09 Basic Adjustment Settings PureCinema Selections Off Standard Advanced Deactivates the PureCinema. Using Color Temp 1 Press HOME MENU. 2 Select "Picture" ( / then ENTER (ENTER/DISP.)). 3 Select "Pro Adjust" ( / then ENTER (ENTER/DISP.)). 6 Select the desired parameter ...

Owner's Manual
Page 27
... NR 7 Press HOME MENU, INPUT 1 to INPUT 6 (INPUT) to exit the menu. Selections Off Deactivates the 3DYC. Basic Adjustment Settings 09 Item R Y button Closer to magenta Closer to red button Closer to yellow Closer to green • You can select "DNR"... Reduces video noise for separating brightness signals and color signals. Using the Dynamic Range Expander (DRE) functions 1 Press HOME MENU. 2 Select "Picture" ( / then ENTER (ENTER/DISP.)). 3 Select "Pro Adjust" ( / then ENTER (ENTER/DISP.)). 4 Select "DRE" ( / then ENTER (ENTER/DISP.)). 5 Select an item to be adjusted...
... NR 7 Press HOME MENU, INPUT 1 to INPUT 6 (INPUT) to exit the menu. Selections Off Deactivates the 3DYC. Basic Adjustment Settings 09 Item R Y button Closer to magenta Closer to red button Closer to yellow Closer to green • You can select "DNR"... Reduces video noise for separating brightness signals and color signals. Using the Dynamic Range Expander (DRE) functions 1 Press HOME MENU. 2 Select "Picture" ( / then ENTER (ENTER/DISP.)). 3 Select "Pro Adjust" ( / then ENTER (ENTER/DISP.)). 4 Select "DRE" ( / then ENTER (ENTER/DISP.)). 5 Select an item to be adjusted...


