Operation Manual
Page 6
Before Using This Product Precaution • Keep this manual handy as a reference for operating procedures and precautions. • Always keep the volume low enough for repair without advance contact. ■ U.S.A. Inc. In case the ... product for its aftersales service (including warranty conditions) or any other information. Factory Service East 300 Allstate Parkway Markham, ON L3R 0P2 (905) 479-441 I Pioneer Electronics of Canada. Factory Service West 13911 Bridgeport Road Richmond, BC V6V 1J6 (604) 278-1014 For warranty information please see the Limited Warranty sheet...
Before Using This Product Precaution • Keep this manual handy as a reference for operating procedures and precautions. • Always keep the volume low enough for repair without advance contact. ■ U.S.A. Inc. In case the ... product for its aftersales service (including warranty conditions) or any other information. Factory Service East 300 Allstate Parkway Markham, ON L3R 0P2 (905) 479-441 I Pioneer Electronics of Canada. Factory Service West 13911 Bridgeport Road Richmond, BC V6V 1J6 (604) 278-1014 For warranty information please see the Limited Warranty sheet...

Operation Manual
Page 8
... of this unit is 500 mV. • When the head unit's preout output level is reset to the head unit. Refer to the Operation Manual that accompanies the head unit. Before using, reset the head unit volume level following the above steps. Set the volume of the head unit to... balance, fader and other level adjustments with this unit, set the head unit as follows. 1. k Itkka Mk Mt Mk ma,cy 2. Refer to the Operation Manual that accompanies the head unit. Note: • If you remove the car battery, or press the head unit's RESET button, the head unit's volume level...
... of this unit is 500 mV. • When the head unit's preout output level is reset to the head unit. Refer to the Operation Manual that accompanies the head unit. Before using, reset the head unit volume level following the above steps. Set the volume of the head unit to... balance, fader and other level adjustments with this unit, set the head unit as follows. 1. k Itkka Mk Mt Mk ma,cy 2. Refer to the Operation Manual that accompanies the head unit. Note: • If you remove the car battery, or press the head unit's RESET button, the head unit's volume level...
Operation Manual
Page 26
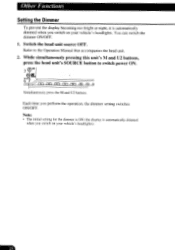
... source OFF. Simultaneously press the M and U2 buttons. While simultaneously pressing this unit's M and U2 buttons, press the head unit's SOURCE button to the Operation Manual that accompanies the head unit. 2. Other Functions Setting the Dimmer To prevent the display becoming too bright at night, it is automatically dimmed when you...
... source OFF. Simultaneously press the M and U2 buttons. While simultaneously pressing this unit's M and U2 buttons, press the head unit's SOURCE button to the Operation Manual that accompanies the head unit. 2. Other Functions Setting the Dimmer To prevent the display becoming too bright at night, it is automatically dimmed when you...
Operation Manual
Page 33
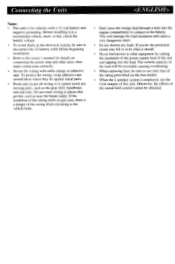
... rails. Otherwise, the effects of the sound field control cannot be sure to e disconnect the battery cable before beginning installation. • Refer to the owner's manual for vehicles with cable clamps or adhesive tape. Connecting the Units Note: • This unit is for details on the fuse holder. • When the...
... rails. Otherwise, the effects of the sound field control cannot be sure to e disconnect the battery cable before beginning installation. • Refer to the owner's manual for vehicles with cable clamps or adhesive tape. Connecting the Units Note: • This unit is for details on the fuse holder. • When the...
