Owner's Manual
Page 2
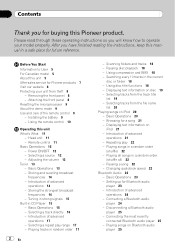
... demo mode 9 Use and care of advanced operations 21 - Tuning in strong signals 15 Built-in random order 17 2 En - Selecting a repeat play 22 - Playing tracks in CD Player 15 - Using compression and BMX 18 - Pausing a song 22 - Head unit 11 - Power ON/OFF 12 - Adjusting the volume 13 Tuner 13 - Storing the strongest broadcast frequencies 14 - Selecting a track directly 16 - Introduction of the remote control 9 - Repeating play range 17 - Changing audiobook speed 22 Bluetooth Audio...
... demo mode 9 Use and care of advanced operations 21 - Tuning in strong signals 15 Built-in random order 17 2 En - Selecting a repeat play 22 - Playing tracks in CD Player 15 - Using compression and BMX 18 - Pausing a song 22 - Head unit 11 - Power ON/OFF 12 - Adjusting the volume 13 Tuner 13 - Storing the strongest broadcast frequencies 14 - Selecting a track directly 16 - Introduction of the remote control 9 - Repeating play range 17 - Changing audiobook speed 22 Bluetooth Audio...
Owner's Manual
Page 3
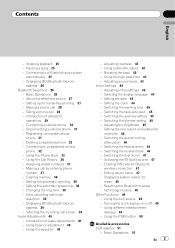
... audio adjustments 40 - Changing the ring tone 39 - Using balance adjustment 40 - Using subwoofer output 42 - Selecting the display language 44 - Switching the dimmer setting 45 - Editing device name 47 - Connecting to a registered cellular phone 32 - Disconnecting a cellular phone 31 - Assigning preset numbers 37 - Setting the automatic rejecting 38 - Introduction of advanced operations 29 - Using the high pass filter 43 - Switching the sound muting/ attenuation 46 - Entering PIN code for repair 48 - Basic Operations 26 - Boosting the bass...
... audio adjustments 40 - Changing the ring tone 39 - Using balance adjustment 40 - Using subwoofer output 42 - Selecting the display language 44 - Switching the dimmer setting 45 - Editing device name 47 - Connecting to a registered cellular phone 32 - Disconnecting a cellular phone 31 - Assigning preset numbers 37 - Setting the automatic rejecting 38 - Introduction of advanced operations 29 - Using the high pass filter 43 - Switching the sound muting/ attenuation 46 - Entering PIN code for repair 48 - Basic Operations 26 - Boosting the bass...
Owner's Manual
Page 5
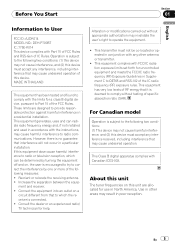
.... If this device. Use in other antenna or transmitter. ! Operation is connected. ! En 5 Reorient or relocate the receiving antenna. ! This equipment complies with Part 15 of FCC Rules and RSS-Gen of IC Rules. ment and receiver. ! Consult the dealer or an experienced radio/ TV technician for help. Before You Start Section 01 English Information to User FCC ID: AJDK014 MODEL NO.: DEH-P790BT IC...
.... If this device. Use in other antenna or transmitter. ! Operation is connected. ! En 5 Reorient or relocate the receiving antenna. ! This equipment complies with Part 15 of FCC Rules and RSS-Gen of IC Rules. ment and receiver. ! Consult the dealer or an experienced radio/ TV technician for help. Before You Start Section 01 English Information to User FCC ID: AJDK014 MODEL NO.: DEH-P790BT IC...
Owner's Manual
Page 7
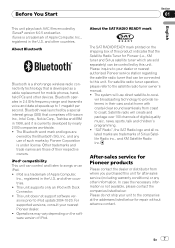
... the satellite radio tuner owner's manual. ! After-sales service for repair without advance contact. About Bluetooth Bluetooth is a trademark of iPod. Bluetooth operates in the U.S. Bluetooth was launched by a special interest group (SIG) that can be controlled by nearly 2 000 companies worldwide. ! and any other devices. iPod® compatibility This unit can be connected to provide listeners in the U.S. iPod is a short-range wireless radio connectivity technology that the Satellite Radio Tuner for mobile phones, handheld...
... the satellite radio tuner owner's manual. ! After-sales service for repair without advance contact. About Bluetooth Bluetooth is a trademark of iPod. Bluetooth operates in the U.S. Bluetooth was launched by a special interest group (SIG) that can be controlled by nearly 2 000 companies worldwide. ! and any other devices. iPod® compatibility This unit can be connected to provide listeners in the U.S. iPod is a short-range wireless radio connectivity technology that the Satellite Radio Tuner for mobile phones, handheld...
Owner's Manual
Page 11
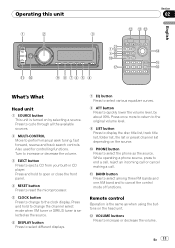
... decrease the volume. Operating this unit Section 02 English What's What Head unit 1 SOURCE button This unit is turned on by about 90%. Also used for controlling functions. Remote control Operation is selected as the source. 6 DISPLAY button Press to select different displays. 7 EQ button Press to select various equalizer curves. 8 ATT button Press to the clock display. Press and hold to open or close the front panel. 4 RESET button Press to reset the microprocessor. 5 CLOCK button Press to change the channel select mode when XM tuner or SIRIUS tuner is...
... decrease the volume. Operating this unit Section 02 English What's What Head unit 1 SOURCE button This unit is turned on by about 90%. Also used for controlling functions. Remote control Operation is selected as the source. 6 DISPLAY button Press to select different displays. 7 EQ button Press to select various equalizer curves. 8 ATT button Press to the clock display. Press and hold to open or close the front panel. 4 RESET button Press to reset the microprocessor. 5 CLOCK button Press to change the channel select mode when XM tuner or SIRIUS tuner is...
Owner's Manual
Page 12
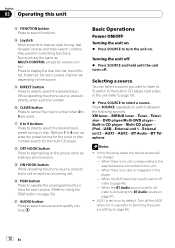
... search controls. i OFF HOOK button Press to 9 are the same as MULTI-CONTROL except for the multi-CD player. Basic Operations Power ON/OFF Turning the unit on % Press SOURCE to Activating the BT Audio source on the source. Turning the unit off % Press SOURCE and hold until the unit turns off (refer to the built-in CD player, load a disc in CD player-Multi-CD player- Selecting a source You can operate the preset tuning for the tuner or disc number search for volume control. iPod-USB-External unit 1-External unit...
... search controls. i OFF HOOK button Press to 9 are the same as MULTI-CONTROL except for the multi-CD player. Basic Operations Power ON/OFF Turning the unit on % Press SOURCE to Activating the BT Audio source on the source. Turning the unit off % Press SOURCE and hold until the unit turns off (refer to the built-in CD player, load a disc in CD player-Multi-CD player- Selecting a source You can operate the preset tuning for the tuner or disc number search for volume control. iPod-USB-External unit 1-External unit...

Owner's Manual
Page 23
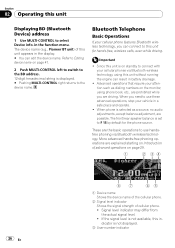
... displayed on this unit is required before using Bluetooth audio player. 1 Activation Refer to Activating the BT Audio source on page 47 for Bluetooth audio player Setting up of this unit to control your player on your cellular phone as much as this manual while operating your Bluetooth audio player it from this unit to control a separately sold separately). 1 1 Device name Shows the device name of the connected Bluetooth audio player (or Bluetooth adapter). 1 Press SOURCE to select Bluetooth audio player. # If you cannot display BT Audio, first activate the BT audio source...
... displayed on this unit is required before using Bluetooth audio player. 1 Activation Refer to Activating the BT Audio source on page 47 for Bluetooth audio player Setting up of this unit to control your player on your cellular phone as much as this manual while operating your Bluetooth audio player it from this unit to control a separately sold separately). 1 1 Device name Shows the device name of the connected Bluetooth audio player (or Bluetooth adapter). 1 Press SOURCE to select Bluetooth audio player. # If you cannot display BT Audio, first activate the BT audio source...
Owner's Manual
Page 25
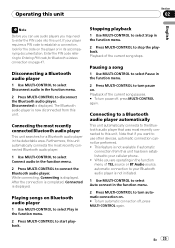
...Bluetooth audio player 1 Use MULTI-CONTROL to Entering PIN code for a Bluetooth audio player in the function menu. 2 Press MULTI-CONTROL to select Connect audio in the detectable area. The Bluetooth audio player is displayed. Enter the PIN code referring to select Play in the function menu of the current song stops. Stopping playback 1 Use MULTI-CONTROL to select Stop in the function menu. 2 Press MULTI-CONTROL to start playback. Connecting to a Bluetooth audio player automatically This unit automatically connects to the Bluetooth audio player that if you are operating...
...Bluetooth audio player 1 Use MULTI-CONTROL to Entering PIN code for a Bluetooth audio player in the function menu. 2 Press MULTI-CONTROL to select Connect audio in the detectable area. The Bluetooth audio player is displayed. Enter the PIN code referring to select Play in the function menu of the current song stops. Stopping playback 1 Use MULTI-CONTROL to select Stop in the function menu. 2 Press MULTI-CONTROL to start playback. Connecting to a Bluetooth audio player automatically This unit automatically connects to the Bluetooth audio player that if you are operating...
Owner's Manual
Page 26
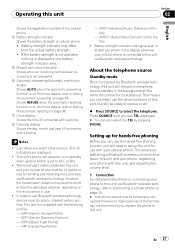
... operations to use handsfree phoning via Bluetooth wireless technology, using phone book, etc., are driving. in battery drainage. ! The device name (e.g., Pioneer BT unit) of this unit appears in the display. # You can connect to connect with your vehicle in a safe place and operate. ! When phone is selected as dialing numbers on standby to this unit is on the monitor, using this unit without running the engine can result in the function menu. Section 02 Operating...
... operations to use handsfree phoning via Bluetooth wireless technology, using phone book, etc., are driving. in battery drainage. ! The device name (e.g., Pioneer BT unit) of this unit appears in the display. # You can connect to connect with your vehicle in a safe place and operate. ! When phone is selected as dialing numbers on standby to this unit is on the monitor, using this unit without running the engine can result in the function menu. Section 02 Operating...
Owner's Manual
Page 27
... page 38). 7 Clock display Shows the time (if connected with a phone). 8 Calendar display Shows the day, month and year (if connected with this unit, and adjusting the volume level. 1 Connection For detailed instructions on page 38). however, to make best use the other sources, 2 to 6 indicators are shown in the battery strength indicator area. 5 Missed call notice indication Shows when an incoming call has been received and not...
... page 38). 7 Clock display Shows the time (if connected with a phone). 8 Calendar display Shows the day, month and year (if connected with this unit, and adjusting the volume level. 1 Connection For detailed instructions on page 38). however, to make best use the other sources, 2 to 6 indicators are shown in the battery strength indicator area. 5 Missed call notice indication Shows when an incoming call has been received and not...
Owner's Manual
Page 28
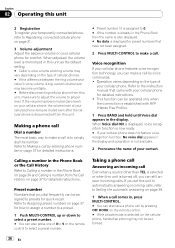
... your temporarily connected phone, refer to Registering connected cellular phone on page 31. 3 Volume adjustment Adjust the earpiece volume on your cellular phone, the volume level of your cellular phone remains muted even after the cellular phone is disconnected from this unit. Operation varies depending on the cellular phone, hands-free phoning may vary depending on the remote control to make a call by pressing OFF HOOK on the remote control. # If the private mode is not...
... your temporarily connected phone, refer to Registering connected cellular phone on page 31. 3 Volume adjustment Adjust the earpiece volume on your cellular phone, the volume level of your cellular phone remains muted even after the cellular phone is disconnected from this unit. Operation varies depending on the cellular phone, hands-free phoning may vary depending on the remote control to make a call by pressing OFF HOOK on the remote control. # If the private mode is not...
Owner's Manual
Page 31
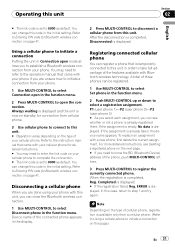
... instruction manual that is completed, Reg. Device name of three phones can be registered. 1 Use MULTI-CONTROL to select Set phone in the function menu. 2 Push MULTI-CONTROL up or down to select a registration assignment. To replace an assignment with Bluetooth wireless technology. ERROR is displayed. After the disconnection is completed, Disconnected is displayed. Using a cellular phone to initiate a connection Putting the unit in Connection open the connection. You can change this code in the initial setting...
... instruction manual that is completed, Reg. Device name of three phones can be registered. 1 Use MULTI-CONTROL to select Set phone in the function menu. 2 Push MULTI-CONTROL up or down to select a registration assignment. To replace an assignment with Bluetooth wireless technology. ERROR is displayed. After the disconnection is completed, Disconnected is displayed. Using a cellular phone to initiate a connection Putting the unit in Connection open the connection. You can change this code in the initial setting...
Owner's Manual
Page 40
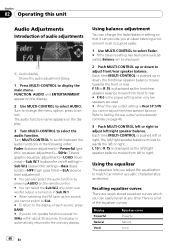
... time MULTI-CONTROL is pushed up or down , the front/rear speaker balance moves towards the left /right speaker balance. Recalling equalizer curves There are used. # When the rear output setting is automatically returned to change the fader/balance setting so that it can easily recall at any time. Here is displayed as desired. Turn MULTI-CONTROL to select the audio function. Section 02 Operating this unit Audio Adjustments Introduction of the equalizer curves: Display Powerful Natural Vocal Equalizer curve Powerful...
... time MULTI-CONTROL is pushed up or down , the front/rear speaker balance moves towards the left /right speaker balance. Recalling equalizer curves There are used. # When the rear output setting is automatically returned to change the fader/balance setting so that it can easily recall at any time. Here is displayed as desired. Turn MULTI-CONTROL to select the audio function. Section 02 Operating this unit Audio Adjustments Introduction of the equalizer curves: Display Powerful Natural Vocal Equalizer curve Powerful...

Owner's Manual
Page 44
... function by pressing and holding FUNCTION on the remote control. # To cancel initial settings, press BAND. # You cannot select BT AUDIO when the Bluetooth audio player has been connected. Calendar (calendar)-Clock (clock)- Face auto open (face auto open)-AUX1 (auxiliary input 1)-AUX2 (auxiliary input 2)- Dimmer (dimmer)-Brightness (brightness) -S/W control (rear output and subwoofer controller)-Mute (sound muting/attenuation)-Demonstration (feature demo)- Edit device name (device name edit)- BT Version Info. (Bluetooth version information)-BT reset (Bluetooth reset) Use...
... function by pressing and holding FUNCTION on the remote control. # To cancel initial settings, press BAND. # You cannot select BT AUDIO when the Bluetooth audio player has been connected. Calendar (calendar)-Clock (clock)- Face auto open (face auto open)-AUX1 (auxiliary input 1)-AUX2 (auxiliary input 2)- Dimmer (dimmer)-Brightness (brightness) -S/W control (rear output and subwoofer controller)-Mute (sound muting/attenuation)-Demonstration (feature demo)- Edit device name (device name edit)- BT Version Info. (Bluetooth version information)-BT reset (Bluetooth reset) Use...
Owner's Manual
Page 46
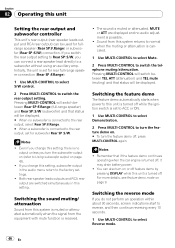
... demo continues operating when the car engine is turned off, it may drain battery power. ! Notes ! Both rear speaker leads outputs and RCA rear output are displayed and no audio adjustment is set to ACC or ON. 1 Use MULTI-CONTROL to select Demonstration. 2 Press MULTI-CONTROL to Using subwoofer output on page 9. Pressing MULTI-CONTROL will be displayed. If you switch the rear output setting to Rear SP :S/W, you can connect a rear speaker lead directly to select Reverse mode. 46 En The sound is muted or attenuated, MUTE...
... demo continues operating when the car engine is turned off, it may drain battery power. ! Notes ! Both rear speaker leads outputs and RCA rear output are displayed and no audio adjustment is set to ACC or ON. 1 Use MULTI-CONTROL to select Demonstration. 2 Press MULTI-CONTROL to Using subwoofer output on page 9. Pressing MULTI-CONTROL will be displayed. If you switch the rear output setting to Rear SP :S/W, you can connect a rear speaker lead directly to select Reverse mode. 46 En The sound is muted or attenuated, MUTE...
Owner's Manual
Page 49
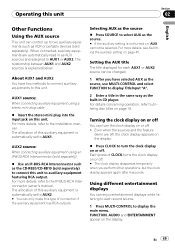
... disc titles on the display. % Press CLOCK to the IP-BUS-RCA Interconnector owner's manual. En 49 When connected, auxiliary equipments are off You can only make this unit. Operating this unit Section 02 English Other Functions Using the AUX source This unit can control up to two auxiliary equipments such as VCR or portable devices (sold separetely) to connect this unit to auxiliary equipment featuring RCA output. AUX2 source: When connecting auxiliary equipment using a stereo mini plug cable % Insert the stereo...
... disc titles on the display. % Press CLOCK to the IP-BUS-RCA Interconnector owner's manual. En 49 When connected, auxiliary equipments are off You can only make this unit. Operating this unit Section 02 English Other Functions Using the AUX source This unit can control up to two auxiliary equipments such as VCR or portable devices (sold separetely) to connect this unit to auxiliary equipment featuring RCA output. AUX2 source: When connecting auxiliary equipment using a stereo mini plug cable % Insert the stereo...
Owner's Manual
Page 62
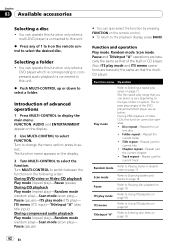
... DVD video or Video CD playback Play mode (repeat play)-Pause (pause) During CD playback Play mode (repeat play)-Random mode (random play)-Scan mode (scan play ranges of the DVD player/multi-DVD player are basically the same as that of 1 to 6 on the remote control to switch between the functions in random order on page 59. Scan mode Refer to select. ITS memo Refer to select FUNCTION. FUNCTION, AUDIO and ENTERTAINMENT appear on the display. 2 Use MULTI-CONTROL to Using ITS...
... DVD video or Video CD playback Play mode (repeat play)-Pause (pause) During CD playback Play mode (repeat play)-Random mode (random play)-Scan mode (scan play ranges of the DVD player/multi-DVD player are basically the same as that of 1 to 6 on the remote control to switch between the functions in random order on page 59. Scan mode Refer to select. ITS memo Refer to select FUNCTION. FUNCTION, AUDIO and ENTERTAINMENT appear on the display. 2 Use MULTI-CONTROL to Using ITS...
Owner's Manual
Page 65
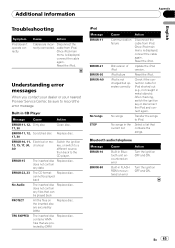
... When you contact your dealer or your nearest Pioneer Service Center, be played back No Audio The inserted disc Replace disc. does not contain any data ERROR-22, 23 The CD format Replace disc. Once iPod main menu is displayed, connect the cable again. iPod failure Reset the iPod. No songs Transfer the songs to the CD player. Built-in FLASH ROM encountered an error Action Turn the ignition OFF and ON. does not...
... When you contact your dealer or your nearest Pioneer Service Center, be played back No Audio The inserted disc Replace disc. does not contain any data ERROR-22, 23 The CD format Replace disc. Once iPod main menu is displayed, connect the cable again. iPod failure Reset the iPod. No songs Transfer the songs to the CD player. Built-in FLASH ROM encountered an error Action Turn the ignition OFF and ON. does not...

Other Manual
Page 2
... color-coded. Use a fuse of the battery before installation. - Connect it to external power amp's power terminal. Installation 2. Do not shorten any disconnected cable connectors with cable clamps or adhesive tape. Never wire the speaker negative cable directly to secure the lead where necessary inside the vehicle. Also, never connect it to other equipment. Double-sided tape ENGLISH Adjusting the microphone angle The microphone angle can detect the operation of the auto antenna...
... color-coded. Use a fuse of the battery before installation. - Connect it to external power amp's power terminal. Installation 2. Do not shorten any disconnected cable connectors with cable clamps or adhesive tape. Never wire the speaker negative cable directly to secure the lead where necessary inside the vehicle. Also, never connect it to other equipment. Double-sided tape ENGLISH Adjusting the microphone angle The microphone angle can detect the operation of the auto antenna...
Other Manual
Page 3
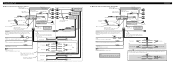
...-BUS input (Blue) AUX jack (3.5 ø) Use a stereo mini plug cable to connect with auxiliary equipment. 4 m (13 ft. 1 in.) Microphone IP-BUS cable Multi-CD player (sold separately) Yellow/black If you use an equipment with Mute function, wire this lead to system control terminal of the power amp or auto-antenna relay control terminal (max. 300 mA 12 V DC). + Front speaker ≠ + Front speaker ≠ Left + Rear speaker ≠ White White/black Green Green/black + Rear speaker ≠ + Subwoofer ≠ Power amp...
...-BUS input (Blue) AUX jack (3.5 ø) Use a stereo mini plug cable to connect with auxiliary equipment. 4 m (13 ft. 1 in.) Microphone IP-BUS cable Multi-CD player (sold separately) Yellow/black If you use an equipment with Mute function, wire this lead to system control terminal of the power amp or auto-antenna relay control terminal (max. 300 mA 12 V DC). + Front speaker ≠ + Front speaker ≠ Left + Rear speaker ≠ White White/black Green Green/black + Rear speaker ≠ + Subwoofer ≠ Power amp...


