Owner's Manual
Page 2
...Best Stations Memory (BSM) Using the Built-in CD Player .......... 11 - Pause (PAUSE) - Repeat Play (REPEAT) - Erase a Disc Program Disc Title 25 - Disc Title Input (TITLE IN) - Title Display Switching - Front Image Enhancer Function (FIE) - Contents Dear Customer 3 Key Finder 4 - Manual and Seek Tuning - Disc Search - Random Play (RANDOM) - Pause (PAUSE) ITS (Instant Track Selection 23 - Balance Adjustment (FADER) - Subwoofer Output (SUB.W) - Subwoofer Setting Adjustment (80HZ 0) - Non Fading Output Level Adjustment (NON FAD) - Eject Basic Operation of Tuner...
...Best Stations Memory (BSM) Using the Built-in CD Player .......... 11 - Pause (PAUSE) - Repeat Play (REPEAT) - Erase a Disc Program Disc Title 25 - Disc Title Input (TITLE IN) - Title Display Switching - Front Image Enhancer Function (FIE) - Contents Dear Customer 3 Key Finder 4 - Manual and Seek Tuning - Disc Search - Random Play (RANDOM) - Pause (PAUSE) ITS (Instant Track Selection 23 - Balance Adjustment (FADER) - Subwoofer Output (SUB.W) - Subwoofer Setting Adjustment (80HZ 0) - Non Fading Output Level Adjustment (NON FAD) - Eject Basic Operation of Tuner...

Owner's Manual
Page 3
... Front Panel - Setting the Warning Tone (WARN) - AUX Title Input Cellular Telephone Muting 48 CD Player and Care 49 Precaution 49 Built-in CD Player's Error Message 49 Specifications 50 2 FRANÇAIS ITALIANO NEDERLANDS Speaker Volume Output Adjustment Selecting Door Switching Systems 43 - Setting the PGM Button - Setting the Dimmer (DIMMER) - ENGLISH ESPAÑOL DEUTSCH Detaching and Replacing the Front Panel 36 Theft Protection 36 - Using the PGM Button Displaying the Time 47 Using the AUX Source 47...
... Front Panel - Setting the Warning Tone (WARN) - AUX Title Input Cellular Telephone Muting 48 CD Player and Care 49 Precaution 49 Built-in CD Player's Error Message 49 Specifications 50 2 FRANÇAIS ITALIANO NEDERLANDS Speaker Volume Output Adjustment Selecting Door Switching Systems 43 - Setting the PGM Button - Setting the Dimmer (DIMMER) - ENGLISH ESPAÑOL DEUTSCH Detaching and Replacing the Front Panel 36 Theft Protection 36 - Using the PGM Button Displaying the Time 47 Using the AUX Source 47...

Owner's Manual
Page 5
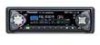
... Finder Head Unit DISPLAY button VOLUME BAND button OPEN button FUNCTION button 5/∞/2/3 buttons EQ selector LOUD button Buttons 1-6 AUDIO button PGM button SOURCE/OFF button CLOCK button Remote Controller (for DEH-P6200. Operation is supplied only for DEH-P6200) A remote controller that enables remote operation of the head unit is the same as when using buttons on the head unit. AUDIO button 5/∞/2/3 buttons TUNER button Press once to the original volume level. Press once more to return to select a tuner. button Raise or lower the volume. PAUSE button Press...
... Finder Head Unit DISPLAY button VOLUME BAND button OPEN button FUNCTION button 5/∞/2/3 buttons EQ selector LOUD button Buttons 1-6 AUDIO button PGM button SOURCE/OFF button CLOCK button Remote Controller (for DEH-P6200. Operation is supplied only for DEH-P6200) A remote controller that enables remote operation of the head unit is the same as when using buttons on the head unit. AUDIO button 5/∞/2/3 buttons TUNER button Press once to the original volume level. Press once more to return to select a tuner. button Raise or lower the volume. PAUSE button Press...

Owner's Manual
Page 6
... to help you read and observe the "Precaution" on the head unit. Important The serial number of this device is intended to record this number on the enclosed warranty card. 5 We recommend that you benefit fully from their operation by reading through the manual before you familiarize yourself with the remote controller only when operating DEH-P6200. This operation manual is located on the bottom of ATT, a function...
... to help you read and observe the "Precaution" on the head unit. Important The serial number of this device is intended to record this number on the enclosed warranty card. 5 We recommend that you benefit fully from their operation by reading through the manual before you familiarize yourself with the remote controller only when operating DEH-P6200. This operation manual is located on the bottom of ATT, a function...

Owner's Manual
Page 8
... operate. Should the Battery be swallowed, immediately consult a doctor. CAUTION: • Do not recharge, disassemble, heat or dispose of battery leakage, wipe the remote controller completely clean and install a new bat- Precaution: • Do not store the remote controller in high temperatures or direct sunlight. • The controller may not function properly in fire. • Use a CR2032 (3 V) Lithium Battery only. Replacing the Lithium Battery: • Use...
... operate. Should the Battery be swallowed, immediately consult a doctor. CAUTION: • Do not recharge, disassemble, heat or dispose of battery leakage, wipe the remote controller completely clean and install a new bat- Precaution: • Do not store the remote controller in high temperatures or direct sunlight. • The controller may not function properly in fire. • Use a CR2032 (3 V) Lithium Battery only. Replacing the Lithium Battery: • Use...

Owner's Manual
Page 9
...'s source is switched ON. Tuner) Each press changes the Source ... 7 Head Unit Each press of the SOURCE/OFF button selects the desired source in the following order: Built-in CD player = TV = Tuner = Multi-CD player = External Unit = AUX 7 Remote Controller (for DEH-P6200) Each press of the button selects the desired source in the following cases, the sound source will not change: * When a product corresponding to each source is not connected to this product. * When no disc is set...
...'s source is switched ON. Tuner) Each press changes the Source ... 7 Head Unit Each press of the SOURCE/OFF button selects the desired source in the following order: Built-in CD player = TV = Tuner = Multi-CD player = External Unit = AUX 7 Remote Controller (for DEH-P6200) Each press of the button selects the desired source in the following cases, the sound source will not change: * When a product corresponding to each source is not connected to this product. * When no disc is set...

Owner's Manual
Page 14
... Disc Number Indicator Play Time Indicator Track Number Indicator Disc Search Disc Number Search (for 2 seconds. Refer to the Multi-CD player owner's manual. • If there are no discs in the Multi-CD player magazine, "NO DISC" is connected and you want to select disc 7 to 12, press the 1 to 6 buttons for 6-Disc, 12-Disc types) • You can control a Multi-CD player (sold separately). Just press the number corresponding to the disc...
... Disc Number Indicator Play Time Indicator Track Number Indicator Disc Search Disc Number Search (for 2 seconds. Refer to the Multi-CD player owner's manual. • If there are no discs in the Multi-CD player magazine, "NO DISC" is connected and you want to select disc 7 to 12, press the 1 to 6 buttons for 6-Disc, 12-Disc types) • You can control a Multi-CD player (sold separately). Just press the number corresponding to the disc...
Owner's Manual
Page 30
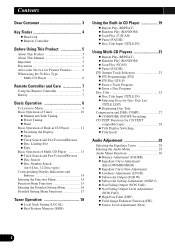
... different "CUSTOM" curves for different sources. (The Built-in the Audio Menu. ting in the Initial Setting Menu. (Refer to select the desired Equalizer curve. Audio Adjustment Selecting the Equalizer Curve You can adjust the sound quality. Note: • After entering the Audio Menu, if you can switch between Equalizer curves. • Rotate the EQ selector up or down to "Setting the Rear Speaker Lead and Subwoofer Controller" on the Rear Speaker Lead and Subwoofer Controller set-
... different "CUSTOM" curves for different sources. (The Built-in the Audio Menu. ting in the Initial Setting Menu. (Refer to select the desired Equalizer curve. Audio Adjustment Selecting the Equalizer Curve You can adjust the sound quality. Note: • After entering the Audio Menu, if you can switch between Equalizer curves. • Rotate the EQ selector up or down to "Setting the Rear Speaker Lead and Subwoofer Controller" on the Rear Speaker Lead and Subwoofer Controller set-
Owner's Manual
Page 31
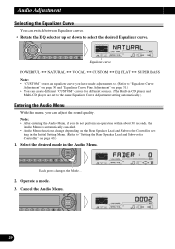
... functions. The display shows "+6" - "-6". Balance Adjustment (FADER) This function allows you cannot adjust front/rear speaker balance. (Refer to select a Fader/Balance setting that provides ideal listening conditions in the Audio Menu. 2. Press the AUDIO button and select the Equalizer mode (EQ-LOW/MID/HIGH) in all occupied seats. 1. Note: • When the Rear Speaker Lead setting is "REAR SP:S/W", you to page 40.) • "FADER : 0" is selected, the newly adjusted curve will replace the previous adjusted...
... functions. The display shows "+6" - "-6". Balance Adjustment (FADER) This function allows you cannot adjust front/rear speaker balance. (Refer to select a Fader/Balance setting that provides ideal listening conditions in the Audio Menu. 2. Press the AUDIO button and select the Equalizer mode (EQ-LOW/MID/HIGH) in all occupied seats. 1. Note: • When the Rear Speaker Lead setting is "REAR SP:S/W", you to page 40.) • "FADER : 0" is selected, the newly adjusted curve will replace the previous adjusted...

Owner's Manual
Page 33
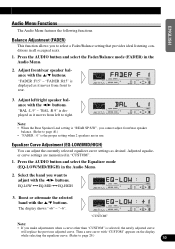
.... Initially, Subwoofer output is the default phase. Press the AUDIO button and select the Subwoofer ON/OFF mode (SUB.W) in the Audio Menu. 2. FRANÇAIS ITALIANO NEDERLANDS 32 Switch the Subwoofer output ON/OFF with the 2/3 buttons. Switch the Loudness function ON/OFF with the 2/3 buttons. Note: • When the Subwoofer Controller setting is "S/W CTL:EXT", you cannot change the level. ENGLISH ESPAÑOL DEUTSCH Loudness Adjustment (LOUD) The Loudness function compensates...
.... Initially, Subwoofer output is the default phase. Press the AUDIO button and select the Subwoofer ON/OFF mode (SUB.W) in the Audio Menu. 2. FRANÇAIS ITALIANO NEDERLANDS 32 Switch the Subwoofer output ON/OFF with the 2/3 buttons. Switch the Loudness function ON/OFF with the 2/3 buttons. Note: • When the Subwoofer Controller setting is "S/W CTL:EXT", you cannot change the level. ENGLISH ESPAÑOL DEUTSCH Loudness Adjustment (LOUD) The Loudness function compensates...

Owner's Manual
Page 34
... Subwoofer ON/OFF mode. Non Fading Output (NON FAD) When the Non Fading Output setting is ON, the audio signal does not pass through the RCA output. Press the AUDIO button and select the Subwoofer setting mode (80HZ 0) in the Audio Menu. 2. Audio Adjustment Subwoofer Setting Adjustment (80HZ 0) When the Subwoofer output is only "S/W CTL:EXT", you can adjust the cut-off frequency and the output level of Subwoofer. 1. "- 6". Note: • When the Subwoofer Controller setting is ON, you can switch...
... Subwoofer ON/OFF mode. Non Fading Output (NON FAD) When the Non Fading Output setting is ON, the audio signal does not pass through the RCA output. Press the AUDIO button and select the Subwoofer setting mode (80HZ 0) in the Audio Menu. 2. Audio Adjustment Subwoofer Setting Adjustment (80HZ 0) When the Subwoofer output is only "S/W CTL:EXT", you can adjust the cut-off frequency and the output level of Subwoofer. 1. "- 6". Note: • When the Subwoofer Controller setting is ON, you can switch...

Owner's Manual
Page 35
...-range frequencies. Increase or decrease the output level with the 5/∞ buttons. 3. function is a simple method of all frequencies, not just bass sounds. Only higher frequencies than those in the Audio Menu. 2. Reduce the volume before disengaging F.I .E. (Front Image Enhancer) function is ON, you want sound in the Audio Menu. 2. mode. Press the AUDIO button and select the Non Fading Output setting mode (NON FAD) in the Subwoofer output frequency range output from the rear speakers, limiting their output to...
...-range frequencies. Increase or decrease the output level with the 5/∞ buttons. 3. function is a simple method of all frequencies, not just bass sounds. Only higher frequencies than those in the Audio Menu. 2. Reduce the volume before disengaging F.I .E. (Front Image Enhancer) function is ON, you want sound in the Audio Menu. 2. mode. Press the AUDIO button and select the Non Fading Output setting mode (NON FAD) in the Subwoofer output frequency range output from the rear speakers, limiting their output to...

Owner's Manual
Page 36
... in the Audio Menu. 3. Switch the F.I .E. function is "REAR SP:S/W", you cannot switch to the F.I .E. Source Level Adjustment (SLA) The SLA (Source Level Adjustment) function prevents radical leaps in CD player.) 2. Settings are balanced. • When the Rear Speaker Lead setting is ON, you cannot switch to sources other source. (e.g. The display shows "+4" - Compare the FM volume with the 5/∞ buttons. function OFF when using a 2-speaker system. Built-in volume level when switching between sources. Press the AUDIO button and select the F.I .E. mode. •...
... in the Audio Menu. 3. Switch the F.I .E. function is "REAR SP:S/W", you cannot switch to the F.I .E. Source Level Adjustment (SLA) The SLA (Source Level Adjustment) function prevents radical leaps in CD player.) 2. Settings are balanced. • When the Rear Speaker Lead setting is ON, you cannot switch to sources other source. (e.g. The display shows "+4" - Compare the FM volume with the 5/∞ buttons. function OFF when using a 2-speaker system. Built-in volume level when switching between sources. Press the AUDIO button and select the F.I .E. mode. •...

Owner's Manual
Page 41
... change the Subwoofer Controller, Subwoofer output and Non Fading output in the Audio Menu return to a Subwoofer without using an auxiliary amp. troller. 3. ENGLISH ESPAÑOL DEUTSCH Setting the Rear Speaker Lead and Subwoofer Controller (REAR SP) This product's rear speaker leads can be used for rear full-range speaker connection ("REAR SP:FUL"). Change the Rear Speaker Lead setting with the 2/3 buttons. 40 FRANÇAIS ITALIANO NEDERLANDS Initially, the unit is set for Subwoofer "REAR SP:S/W". • When the Rear Speaker Lead setting is selected...
... change the Subwoofer Controller, Subwoofer output and Non Fading output in the Audio Menu return to a Subwoofer without using an auxiliary amp. troller. 3. ENGLISH ESPAÑOL DEUTSCH Setting the Rear Speaker Lead and Subwoofer Controller (REAR SP) This product's rear speaker leads can be used for rear full-range speaker connection ("REAR SP:FUL"). Change the Rear Speaker Lead setting with the 2/3 buttons. 40 FRANÇAIS ITALIANO NEDERLANDS Initially, the unit is set for Subwoofer "REAR SP:S/W". • When the Rear Speaker Lead setting is selected...
Owner's Manual
Page 42
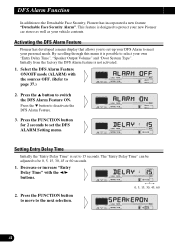
.... Press the ∞ button to 15 seconds. Setting Entry Delay Time Initially the "Entry Delay Time" is possible to protect your new Pioneer car stereo as well as your own "Entry Delay Time", "Speaker Output Volume" and "Door System Type". Activating the DFS Alarm Feature Pioneer has developed a menu display that allows you to set-up your personal needs. Select the DFS Alarm Feature ON/OFF mode (ALARM) with the...
.... Press the ∞ button to 15 seconds. Setting Entry Delay Time Initially the "Entry Delay Time" is possible to protect your new Pioneer car stereo as well as your own "Entry Delay Time", "Speaker Output Volume" and "Door System Type". Activating the DFS Alarm Feature Pioneer has developed a menu display that allows you to set-up your personal needs. Select the DFS Alarm Feature ON/OFF mode (ALARM) with the...

Owner's Manual
Page 43
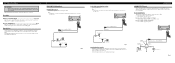
To adjust the volume you to deactivate or activate the "Internal Speaker". Decrease or increase the volume with ∞ button. 5. Press the FUNCTION button to move to switch the "TEST MODE" ON. Note: • If the "Internal Speaker Output" is activated. Press the 5 button to the next selection. After setting volume, switch the "TEST MODE" OFF with the VOLUME. FRANÇAIS ITALIANO NEDERLANDS 42 Initially from the factory the speaker output is turned OFF...
To adjust the volume you to deactivate or activate the "Internal Speaker". Decrease or increase the volume with ∞ button. 5. Press the FUNCTION button to move to switch the "TEST MODE" ON. Note: • If the "Internal Speaker Output" is activated. Press the 5 button to the next selection. After setting volume, switch the "TEST MODE" OFF with the VOLUME. FRANÇAIS ITALIANO NEDERLANDS 42 Initially from the factory the speaker output is turned OFF...

Other Manual
Page 1
... ignition switch ON/OFF operations. If the car features a glass antenna, connect to the antenna booster power supply terminal. • When an external power amp is not done, the vehicle battery may result in a vehicle that get hot, such as power amps. Before installing it cannot touch any leads. Especially, insulate the unused speaker leads without fail. Connect the connectors of the IP-BUS connector is blue, and the output...
... ignition switch ON/OFF operations. If the car features a glass antenna, connect to the antenna booster power supply terminal. • When an external power amp is not done, the vehicle battery may result in a vehicle that get hot, such as power amps. Before installing it cannot touch any leads. Especially, insulate the unused speaker leads without fail. Connect the connectors of the IP-BUS connector is blue, and the output...

Other Manual
Page 2
...) Power amp (sold separately) + Front speaker ≠ + Front speaker ≠ Right + Rear speaker ≠ + Rear speaker ≠ + Subwoofer ≠ Fig. 2 7 When using a Subwoofer without using a different amp (sold separately) IP-BUS input (Blue) Antenna jack This Product Multi-CD player (sold separately) IP-BUS cable Subwoofer output or Non Fading output Yellow/black If you use a cellular telephone, connect it via the Audio Mute lead on the cellular telephone. Orange To lighting switch terminal. If not, keep the Audio Mute lead free...
...) Power amp (sold separately) + Front speaker ≠ + Front speaker ≠ Right + Rear speaker ≠ + Rear speaker ≠ + Subwoofer ≠ Fig. 2 7 When using a Subwoofer without using a different amp (sold separately) IP-BUS input (Blue) Antenna jack This Product Multi-CD player (sold separately) IP-BUS cable Subwoofer output or Non Fading output Yellow/black If you use a cellular telephone, connect it via the Audio Mute lead on the cellular telephone. Orange To lighting switch terminal. If not, keep the Audio Mute lead free...
Other Manual
Page 3
... to work with your DFS Alarm be used to sound a siren, horn or flash lights. This Product Brown (refer to "ALARM OUTPUT".) White/yellow Fuse holder Dome light Factory Door Switches Fig. 4 Positive (Non-grounding) Type Switch: Ford, Jaguar, Mercedes Note: • Set DFS Alarm to installation and wiring. Follow the makers instructions as to recognize positive trigger from DFS Alarm Setting Menu. Recommended Wiring: 30 amp relay (sold pin switches...
... to work with your DFS Alarm be used to sound a siren, horn or flash lights. This Product Brown (refer to "ALARM OUTPUT".) White/yellow Fuse holder Dome light Factory Door Switches Fig. 4 Positive (Non-grounding) Type Switch: Ford, Jaguar, Mercedes Note: • Set DFS Alarm to installation and wiring. Follow the makers instructions as to recognize positive trigger from DFS Alarm Setting Menu. Recommended Wiring: 30 amp relay (sold pin switches...

Other Manual
Page 4
... driver's way and cannot injure the passenger if there is all connected up properly, and the unit and the system work properly. • Use only the parts included with the unit to remove ...factory radio mounting bracket. (Fig. 12) (Fig. 13) Select a position where the screw holes of the bracket and the screw holes of the dashboard material and bend them. (Install as firmly as shown in the bracket. 10 Factory radio mounting bra1c2ket Fig. 12 S1c1rew D13ashboard or Console Fig. 13 Fig. 8 Installation Note: • Before finally installing the unit, connect the wiring temporarily, making...
... driver's way and cannot injure the passenger if there is all connected up properly, and the unit and the system work properly. • Use only the parts included with the unit to remove ...factory radio mounting bracket. (Fig. 12) (Fig. 13) Select a position where the screw holes of the bracket and the screw holes of the dashboard material and bend them. (Install as firmly as shown in the bracket. 10 Factory radio mounting bra1c2ket Fig. 12 S1c1rew D13ashboard or Console Fig. 13 Fig. 8 Installation Note: • Before finally installing the unit, connect the wiring temporarily, making...


