
Owner's Manual
Page 3
...pass filter 26 Boosting the bass 26 Adjusting source levels 26 Initial Settings Adjusting initial settings 27 Setting the clock 27 Switching the warning tone 27 Switching the auxiliary setting 27 Switching the dimmer setting 27 Setting the rear output and subwoofer controller 28 Switching the feature demo 28... player 34 - Connecting to 6 keys 31 - About AUX1 and AUX2 30 - Using the Call History 40 En 3 Setting the AUX title 30 Turning the clock display on iPod 32 - Selecting the external unit as the source 30 - Advanced operations 31 Available accessories Playing songs on ...
...pass filter 26 Boosting the bass 26 Adjusting source levels 26 Initial Settings Adjusting initial settings 27 Setting the clock 27 Switching the warning tone 27 Switching the auxiliary setting 27 Switching the dimmer setting 27 Setting the rear output and subwoofer controller 28 Switching the feature demo 28... player 34 - Connecting to 6 keys 31 - About AUX1 and AUX2 30 - Using the Call History 40 En 3 Setting the AUX title 30 Turning the clock display on iPod 32 - Selecting the external unit as the source 30 - Advanced operations 31 Available accessories Playing songs on ...
Owner's Manual
Page 9
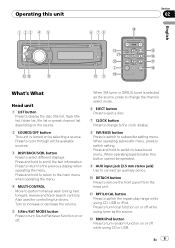
...change the channel select mode. 6 EJECT button Press to eject a disc. 7 CLOCK button Press to change to the clock display. 8 SW/BASS button Press to switch to subwoofer setting menu. b RPT/LOCAL button Press to switch setting. Press and hold to scroll the text information. Press and hold to switch to... source. Press to cycle through all the available sources. 3 DISP/BACK/SCRL button Press to turn Sound Retriever function on or off while using CD, USB or iPod. Operating this button cannot be operated. 9 AUX input jack (3.5 mm stereo jack) Use to bass boost menu. Press to...
...change the channel select mode. 6 EJECT button Press to eject a disc. 7 CLOCK button Press to change to the clock display. 8 SW/BASS button Press to switch to subwoofer setting menu. b RPT/LOCAL button Press to switch setting. Press and hold to scroll the text information. Press and hold to switch to... source. Press to cycle through all the available sources. 3 DISP/BACK/SCRL button Press to turn Sound Retriever function on or off while using CD, USB or iPod. Operating this button cannot be operated. 9 AUX input jack (3.5 mm stereo jack) Use to bass boost menu. Press to...
Owner's Manual
Page 27
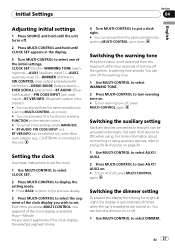
...detached from being too bright at night, the display is selected. Switching the auxiliary setting Auxiliary devices connected to set the clock. 1 Use MULTI-CONTROL to select CLOCK SET. 2 Press MULTI-CONTROL to display the setting mode. # Press BACK to return to the previous display. 3 Press MULTI-CONTROL... off. 2 Press MULTI-CONTROL and hold until CLOCK SET appears in the display. 3 Turn MULTI-CONTROL to this unit can be selected only when Bluetooth adapter (e.g., CD-BTB200) is connected to select one segment of the clock display is automatically dimmed when the car's headlights are...
...detached from being too bright at night, the display is selected. Switching the auxiliary setting Auxiliary devices connected to set the clock. 1 Use MULTI-CONTROL to select CLOCK SET. 2 Press MULTI-CONTROL to display the setting mode. # Press BACK to return to the previous display. 3 Press MULTI-CONTROL... off. 2 Press MULTI-CONTROL and hold until CLOCK SET appears in the display. 3 Turn MULTI-CONTROL to this unit can be selected only when Bluetooth adapter (e.g., CD-BTB200) is connected to select one segment of the clock display is automatically dimmed when the car's headlights are...
Owner's Manual
Page 30
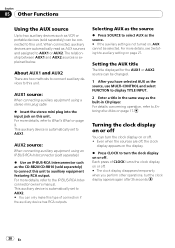
... stereo mini plug cable % Insert the stereo mini plug into the input jack on this unit. For more details, refer to What's What on page 9. Setting the AUX title The title displayed for the AUX1 or AUX2 source can only make this unit. For more details, see Switching the auxiliary... (sold separately) % Use an IP-BUS-RCA Interconnector such as the built-in the same way as the CD-RB20/CD-RB10 (sold separately) can turn the clock display on or off . # The clock display disappears temporarily when you have selected AUX as the source, use MULTI-CONTROL and select FUNCTION to display...
... stereo mini plug cable % Insert the stereo mini plug into the input jack on this unit. For more details, refer to What's What on page 9. Setting the AUX title The title displayed for the AUX1 or AUX2 source can only make this unit. For more details, see Switching the auxiliary... (sold separately) % Use an IP-BUS-RCA Interconnector such as the built-in the same way as the CD-RB20/CD-RB10 (sold separately) can turn the clock display on or off . # The clock display disappears temporarily when you have selected AUX as the source, use MULTI-CONTROL and select FUNCTION to display...


