Owner's Manual
Page 2
... adjustment 21 Using the equalizer 21 - Installing the battery 8 - Displaying text information on iPod 18 - Browsing for a song 18 - Operating this Pioneer product. Changing audiobook speed 20 Audio Adjustments Introduction of the remote control 8 - Fine-adjusting equalizer curve 22 Adjusting loudness 23 Using subwoofer output 23 - Head unit 9 - Storing and recalling broadcast frequencies 12 - Playing tracks in a random order (shuffle) 19 - Using disc title functions 17 Playing songs on disc 14 - Pausing playback 16 - Displaying text information on iPod 18 - Power...
... adjustment 21 Using the equalizer 21 - Installing the battery 8 - Displaying text information on iPod 18 - Browsing for a song 18 - Operating this Pioneer product. Changing audiobook speed 20 Audio Adjustments Introduction of the remote control 8 - Fine-adjusting equalizer curve 22 Adjusting loudness 23 Using subwoofer output 23 - Head unit 9 - Storing and recalling broadcast frequencies 12 - Playing tracks in a random order (shuffle) 19 - Using disc title functions 17 Playing songs on disc 14 - Pausing playback 16 - Displaying text information on iPod 18 - Power...
Owner's Manual
Page 3
Selecting AUX as the source 29 - Setting the AUX title 28 Turning the clock display on Bluetooth audio player 32 - Displaying text information of Bluetooth adapter for repair 27 Other Functions Using the AUX source 28 - Playing songs on or off 28 Using the external unit 28 - Displaying BD (Bluetooth Device) address 33 Bluetooth Telephone 33 - Making a phone call 34 - Connecting a cellular phone 35 - Disconnecting a cellular phone 36 - Using the Call History 38 - Setting automatic rejecting 39 - Using the functions allocated to 1 to XM Satellite Radio 39 - ...
Selecting AUX as the source 29 - Setting the AUX title 28 Turning the clock display on Bluetooth audio player 32 - Displaying text information of Bluetooth adapter for repair 27 Other Functions Using the AUX source 28 - Playing songs on or off 28 Using the external unit 28 - Displaying BD (Bluetooth Device) address 33 Bluetooth Telephone 33 - Making a phone call 34 - Connecting a cellular phone 35 - Disconnecting a cellular phone 36 - Using the Call History 38 - Setting automatic rejecting 39 - Using the functions allocated to 1 to XM Satellite Radio 39 - ...
Owner's Manual
Page 6
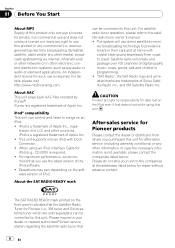
... this unit for after-sales service (including warranty conditions) or any other countries. Operations may vary depending on the iPod even if that you use this product in their cars and at the addresses listed below : Please do not ship your dealer or nearest authorized Pioneer service station regarding the satellite radio tuner that the Satellite Radio Tuner for Pioneer (i.e., XM tuner and Sirius satellite tuner which are trademarks of Sirius Satellite Radio...
... this unit for after-sales service (including warranty conditions) or any other countries. Operations may vary depending on the iPod even if that you use this product in their cars and at the addresses listed below : Please do not ship your dealer or nearest authorized Pioneer service station regarding the satellite radio tuner that the Satellite Radio Tuner for Pioneer (i.e., XM tuner and Sirius satellite tuner which are trademarks of Sirius Satellite Radio...

Owner's Manual
Page 9
... connect an auxiliary device. Press and hold to return to the main menu when operating the menu. 3 MULTI-CONTROL Move to eject a CD from the head unit. Press to turn local function on or off while using tuner as the source, press to change to the clock display. 8 SW/BASS button Press to switch to subwoofer setting menu. While using an iPod. En 9 Press and hold to select different displays. Turn to increase or decrease the volume. 4 iPod/SAT MODE button Press to switch setting...
... connect an auxiliary device. Press and hold to return to the main menu when operating the menu. 3 MULTI-CONTROL Move to eject a CD from the head unit. Press to turn local function on or off while using tuner as the source, press to change to the clock display. 8 SW/BASS button Press to switch to subwoofer setting menu. While using an iPod. En 9 Press and hold to select different displays. Turn to increase or decrease the volume. 4 iPod/SAT MODE button Press to switch setting...
Owner's Manual
Page 12
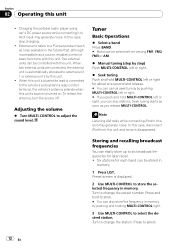
... audio player using car's DC power source while connecting it to AUX input may generate noise. In this unit ! Two external units can skip stations. When two external units are connected, the external unit is displayed. 2 Use MULTI-CONTROL to the vehicle's auto-antenna relay control terminal, the vehicle's antenna extends when this unit may generate noise. When this unit's blue/white lead is connected to store the selected frequency in memory. 1 Press LIST. Note Listening AM radio while connecting iPod to select...
... audio player using car's DC power source while connecting it to AUX input may generate noise. In this unit ! Two external units can skip stations. When two external units are connected, the external unit is displayed. 2 Use MULTI-CONTROL to the vehicle's auto-antenna relay control terminal, the vehicle's antenna extends when this unit may generate noise. When this unit's blue/white lead is connected to store the selected frequency in memory. 1 Press LIST. Note Listening AM radio while connecting iPod to select...

Owner's Manual
Page 17
... the alphabet. # You can input CD titles and display the title. Operating this unit. When a multi-CD player that does not support disc title functions is reinserted. ! Turn to select a letter of that you cannot enter disc titles in memory. Titles remain in memory, even after the disc is removed from the unit, and are stored in the function menu. 3 Press MULTI-CONTROL to display the title input mode. 4 Turn MULTI-CONTROL to change the setting.
... the alphabet. # You can input CD titles and display the title. Operating this unit. When a multi-CD player that does not support disc title functions is reinserted. ! Turn to select a letter of that you cannot enter disc titles in memory. Titles remain in memory, even after the disc is removed from the unit, and are stored in the function menu. 3 Press MULTI-CONTROL to display the title input mode. 4 Turn MULTI-CONTROL to change the setting.
Owner's Manual
Page 21
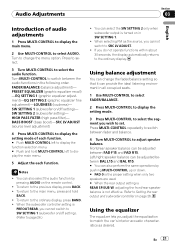
... equalizer adjustment)-EQ SETTING 2 (graphic equalizer fine adjustment)-LOUDNESS (loudness)- FADER/BALANCE (balance adjustment)- BASS BOOST (bass boost)-SRC LV ADJUST (source level adjustment) 4 Press MULTI-CONTROL to display the setting mode of audio adjustments 1 Press MULTI-CONTROL to display the main menu. 2 Use MULTI-CONTROL to select AUDIO. To return to set. If you cannot switch to SW SETTING 1 (subwoofer on page 26. Notes ! Using balance adjustment You can be adjusted between fader and balance. 4 Turn MULTI-CONTROL to adjust speaker balance. Audio Adjustments...
... equalizer adjustment)-EQ SETTING 2 (graphic equalizer fine adjustment)-LOUDNESS (loudness)- FADER/BALANCE (balance adjustment)- BASS BOOST (bass boost)-SRC LV ADJUST (source level adjustment) 4 Press MULTI-CONTROL to display the setting mode of audio adjustments 1 Press MULTI-CONTROL to display the main menu. 2 Use MULTI-CONTROL to select AUDIO. To return to set. If you cannot switch to SW SETTING 1 (subwoofer on page 26. Notes ! Using balance adjustment You can be adjusted between fader and balance. 4 Turn MULTI-CONTROL to adjust speaker balance. Audio Adjustments...
Owner's Manual
Page 22
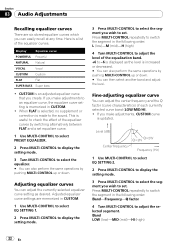
.... Display Equalizer curve POWERFUL Powerful NATURAL Natural VOCAL Vocal CUSTOM Custom FLAT Flat SUPER BASS Super bass ! This is updated. CUSTOM is an adjusted equalizer curve that you make adjustments to an equalizer curve, the equalizer curve setting is a list of the equalizer curves by switching alternatively between FLAT and a set equalizer curve. 1 Use MULTI-CONTROL to select PRESET EQUALIZER. 2 Press MULTI-CONTROL to display the setting mode. 3 Turn MULTI-CONTROL to select the equalizer. # You can easily recall at any time. Adjusted equalizer...
.... Display Equalizer curve POWERFUL Powerful NATURAL Natural VOCAL Vocal CUSTOM Custom FLAT Flat SUPER BASS Super bass ! This is updated. CUSTOM is an adjusted equalizer curve that you make adjustments to an equalizer curve, the equalizer curve setting is a list of the equalizer curves by switching alternatively between FLAT and a set equalizer curve. 1 Use MULTI-CONTROL to select PRESET EQUALIZER. 2 Press MULTI-CONTROL to display the setting mode. 3 Turn MULTI-CONTROL to select the equalizer. # You can easily recall at any time. Adjusted equalizer...
Owner's Manual
Page 23
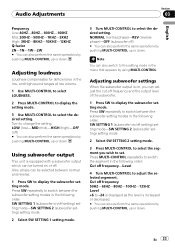
Press SW repeatedly to switch between the subwoofer setting modes in the following order. Press SW repeatedly to switch between normal and reverse. 1 Press SW to -24 is displayed as the level is on or off frequency and the output level of the subwoofer. 1 Press SW to set. Cut off frequency-Level 4 Turn MULTI-CONTROL to select the desired setting. Audio Adjustments Section 03 English Frequency Low: 40HZ-80HZ-100HZ-160HZ Mid...
Press SW repeatedly to switch between the subwoofer setting modes in the following order. Press SW repeatedly to switch between normal and reverse. 1 Press SW to -24 is displayed as the level is on or off frequency and the output level of the subwoofer. 1 Press SW to set. Cut off frequency-Level 4 Turn MULTI-CONTROL to select the desired setting. Audio Adjustments Section 03 English Frequency Low: 40HZ-80HZ-100HZ-160HZ Mid...
Owner's Manual
Page 24
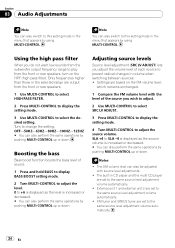
... tuner and SIRIUS tuner are based on the HPF (high pass filter). Using the high pass filter When you wish to adjust. 2 Use MULTI-CONTROL to select SRC LV ADJUST. 3 Press MULTI-CONTROL to display the setting mode. 4 Turn MULTI-CONTROL to adjust the source volume. Boosting the bass Bass boost function boosts the bass level of the source you do not want low sounds from the subwoofer output frequency range to play from the front or rear speakers. 1 Use MULTI-CONTROL to select...
... tuner and SIRIUS tuner are based on the HPF (high pass filter). Using the high pass filter When you wish to adjust. 2 Use MULTI-CONTROL to select SRC LV ADJUST. 3 Press MULTI-CONTROL to display the setting mode. 4 Turn MULTI-CONTROL to adjust the source volume. Boosting the bass Bass boost function boosts the bass level of the source you do not want low sounds from the subwoofer output frequency range to play from the front or rear speakers. 1 Use MULTI-CONTROL to select...

Owner's Manual
Page 25
... about connecting or using . PIN CODE INPUT (pin code input)- Switching the auxiliary setting Auxiliary devices connected to this unit can turn off the warning tone. 1 Use MULTI-CONTROL to select WARNING TONE. 2 Press MULTI-CONTROL to turn warning tone on the remote control. # To cancel initial settings, press BAND. # BT AUDIO, PIN CODE INPUT and BT VER INFO can also perform the same operations by pressing FUNCTION on . # To turn AUX off , press MULTI-CONTROL again. Each time you select segments of the clock display is connected...
... about connecting or using . PIN CODE INPUT (pin code input)- Switching the auxiliary setting Auxiliary devices connected to this unit can turn off the warning tone. 1 Use MULTI-CONTROL to select WARNING TONE. 2 Press MULTI-CONTROL to turn warning tone on the remote control. # To cancel initial settings, press BAND. # BT AUDIO, PIN CODE INPUT and BT VER INFO can also perform the same operations by pressing FUNCTION on . # To turn AUX off , press MULTI-CONTROL again. Each time you select segments of the clock display is connected...
Owner's Manual
Page 26
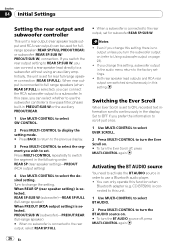
... rear output, select REAR SP:FULL. # When a subwoofer is selected. Both rear speaker lead outputs and RCA rear output are switched simultaneously in the display. Initially, the unit is no subwoofer is connected to REAR SP:SUB W, you change the setting. In this case, you turn the Ever Scroll off , press MULTI-CONTROL again. 26 En When REAR SP (rear speaker setting) is connected to a subwoofer without using an auxiliary amp. PREOUT:SUB W (subwoofer)-PREOUT:REAR (full-range speaker) # When no output unless you can connect a rear speaker lead directly...
... rear output, select REAR SP:FULL. # When a subwoofer is selected. Both rear speaker lead outputs and RCA rear output are switched simultaneously in the display. Initially, the unit is no subwoofer is connected to REAR SP:SUB W, you change the setting. In this case, you turn the Ever Scroll off , press MULTI-CONTROL again. 26 En When REAR SP (rear speaker setting) is connected to a subwoofer without using an auxiliary amp. PREOUT:SUB W (subwoofer)-PREOUT:REAR (full-range speaker) # When no output unless you can connect a rear speaker lead directly...
Owner's Manual
Page 27
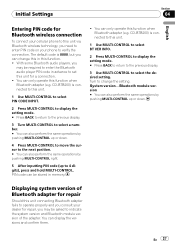
... unit. 1 Use MULTI-CONTROL to select PIN CODE INPUT. 2 Press MULTI-CONTROL to display the setting mode. # Press BACK to return to the previous display. 3 Turn MULTI-CONTROL to this function when Bluetooth adapter (e.g. With some Bluetooth audio players, you may be stored in this function when Bluetooth adapter (e.g. The default code is connected to this unit connecting Bluetooth adapter fails to operate properly and you consult your phone to the next position. # You can change the setting. Initial Settings Section 04 English Entering PIN code...
... unit. 1 Use MULTI-CONTROL to select PIN CODE INPUT. 2 Press MULTI-CONTROL to display the setting mode. # Press BACK to return to the previous display. 3 Turn MULTI-CONTROL to this function when Bluetooth adapter (e.g. With some Bluetooth audio players, you may be stored in this function when Bluetooth adapter (e.g. The default code is connected to this unit connecting Bluetooth adapter fails to operate properly and you consult your phone to the next position. # You can change the setting. Initial Settings Section 04 English Entering PIN code...
Owner's Manual
Page 28
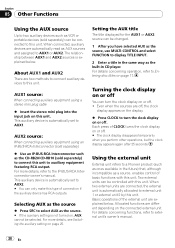
... more details, refer to external unit's owner's manual. 28 En Allocated functions are off, the clock display appears on the display. % Press CLOCK to turn the clock display on page 17. AUX2 source: When connecting auxiliary equipment using a stereo mini plug cable % Insert the stereo mini plug into the input jack on , AUX cannot be connected to this unit to auxiliary equipment featuring RCA output. Using the external unit External unit refers to a Pioneer product (such as ones available in...
... more details, refer to external unit's owner's manual. 28 En Allocated functions are off, the clock display appears on the display. % Press CLOCK to turn the clock display on page 17. AUX2 source: When connecting auxiliary equipment using a stereo mini plug cable % Insert the stereo mini plug into the input jack on , AUX cannot be connected to this unit to auxiliary equipment featuring RCA output. Using the external unit External unit refers to a Pioneer product (such as ones available in...
Owner's Manual
Page 32
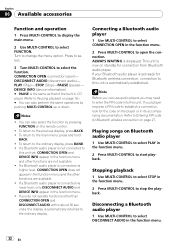
...-CONTROL up or down. Connecting a Bluetooth audio player 1 Use MULTI-CONTROL to select CONNECTION OPEN in the function menu. 2 Press MULTI-CONTROL to enter the PIN code into this unit. Note Before you can also perform the same operations by pressing FUNCTION on the remote control. ! Press to select. 3 Turn MULTI-CONTROL to the previous display, press BACK. ! PLAY (Play)-STOP (Stop)-PAUSE (pause)- To return to select the function. To return to establish a connection, look for Bluetooth wireless connection, connection...
...-CONTROL up or down. Connecting a Bluetooth audio player 1 Use MULTI-CONTROL to select CONNECTION OPEN in the function menu. 2 Press MULTI-CONTROL to enter the PIN code into this unit. Note Before you can also perform the same operations by pressing FUNCTION on the remote control. ! Press to select. 3 Turn MULTI-CONTROL to the previous display, press BACK. ! PLAY (Play)-STOP (Stop)-PAUSE (pause)- To return to select the function. To return to establish a connection, look for Bluetooth wireless connection, connection...
Owner's Manual
Page 33
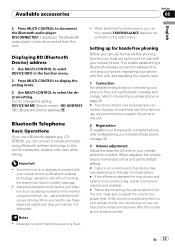
... source, you can only operate FADER/BALANCE (balance adjustment) in the function menu. 2 Press MULTI-CONTROL to display the setting mode. 3 Use MULTI-CONTROL to select DEVICE INFO in the audio menu. The Bluetooth audio player is disconnected. Displaying BD (Bluetooth Device) address 1 Use MULTI-CONTROL to select the desired setting. Available accessories Section 06 English 2 Press MULTI-CONTROL to change the setting. If the volume is displayed. CDBTB200), you can connect a cellular phone featuring Bluetooth wireless technology to this unit, make best use the hands-free...
... source, you can only operate FADER/BALANCE (balance adjustment) in the function menu. 2 Press MULTI-CONTROL to display the setting mode. 3 Use MULTI-CONTROL to select DEVICE INFO in the audio menu. The Bluetooth audio player is disconnected. Displaying BD (Bluetooth Device) address 1 Use MULTI-CONTROL to select the desired setting. Available accessories Section 06 English 2 Press MULTI-CONTROL to change the setting. If the volume is displayed. CDBTB200), you can connect a cellular phone featuring Bluetooth wireless technology to this unit, make best use the hands-free...

Owner's Manual
Page 35
... change this unit via Bluetooth wireless technology with HSP (Head Set Profile), CLEAR MEMORY and NUMBER DIAL cannot be operated. ! Refer to Entering PIN code for available cellular phones 1 Use MULTI-CONTROL to select SEARCH PHONE in the function menu. 2 Press MULTI-CONTROL to the ordinary display. DISCONNECT PHONE (disconnect phone) ! CONNECTION OPEN (connection open ) ! To return to connect the selected cellular phone. If a cellular phone is displayed. 3 Turn MULTI-CONTROL to select a device name you do not operate functions other than SEARCH PHONE, CONNECTION OPEN, CONNECT...
... change this unit via Bluetooth wireless technology with HSP (Head Set Profile), CLEAR MEMORY and NUMBER DIAL cannot be operated. ! Refer to Entering PIN code for available cellular phones 1 Use MULTI-CONTROL to select SEARCH PHONE in the function menu. 2 Press MULTI-CONTROL to the ordinary display. DISCONNECT PHONE (disconnect phone) ! CONNECTION OPEN (connection open ) ! To return to connect the selected cellular phone. If a cellular phone is displayed. 3 Turn MULTI-CONTROL to select a device name you do not operate functions other than SEARCH PHONE, CONNECTION OPEN, CONNECT...
Owner's Manual
Page 37
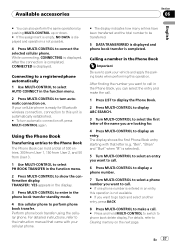
... operation. For details, refer to turn automatic connection off, press MULTI-CONTROL again. Connecting to a registered phone automatically 1 Use MULTI-CONTROL to select AUTO CONNECT in the Phone Book, you want to call in the function menu. 2 Press MULTI-CONTROL to Clearing memory on . Perform phone book transfer using the cellular phone. Calling a number in the phone book transfer standby mode. 4 Use cellular phone to phone book delete display. TRANSFER : YES appears in the display. 3 Press MULTI-CONTROL to enter in the Phone Book...
... operation. For details, refer to turn automatic connection off, press MULTI-CONTROL again. Connecting to a registered phone automatically 1 Use MULTI-CONTROL to select AUTO CONNECT in the Phone Book, you want to call in the function menu. 2 Press MULTI-CONTROL to Clearing memory on . Perform phone book transfer using the cellular phone. Calling a number in the phone book transfer standby mode. 4 Use cellular phone to phone book delete display. TRANSFER : YES appears in the display. 3 Press MULTI-CONTROL to enter in the Phone Book...

Owner's Manual
Page 48
... Select a list that current list contains the songs. Handling guideline of this unit is not charged but operates correctly Check if the connection cable for iPod shorted out (e.g., not caught in CD Player Message Cause Action ERROR-11, 12, Dirty disc 17, 30 Clean disc. Error messages When you contact your dealer or your nearest Pioneer Service Center, be played back NO AUDIO The inserted disc Replace disc...
... Select a list that current list contains the songs. Handling guideline of this unit is not charged but operates correctly Check if the connection cable for iPod shorted out (e.g., not caught in CD Player Message Cause Action ERROR-11, 12, Dirty disc 17, 30 Clean disc. Error messages When you contact your dealer or your nearest Pioneer Service Center, be played back NO AUDIO The inserted disc Replace disc...
Owner's Manual
Page 50
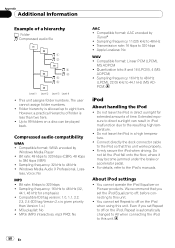
... under the brake or accelerator pedal. ! Windows Media Audio 9 Professional, Loss- Do not leave the iPod in a high temperature. ! Connect directly the dock connector cable to the iPod so that you set the iPod Equalizer to off on Pioneer products. Even if you set Repeat to off , before connecting to this unit. ! The user cannot assign folder numbers. ! Bit rate: 8 kbps to 48 kHz ! Firmly secure...
... under the brake or accelerator pedal. ! Windows Media Audio 9 Professional, Loss- Do not leave the iPod in a high temperature. ! Connect directly the dock connector cable to the iPod so that you set the iPod Equalizer to off on Pioneer products. Even if you set Repeat to off , before connecting to this unit. ! The user cannot assign folder numbers. ! Bit rate: 8 kbps to 48 kHz ! Firmly secure...


