
Owner's Manual
Page 29
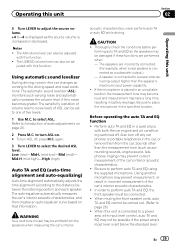
... out. (Refer to page 26.) ! again. 3 Turn LEVER to the distance between the listening position and each speaker. Using another microphone may prevent measurement, or result in the specified location. justed with this noise becomes greater. Refer to Introduction of audio adjustments on . .... ! The automatic sound levelizer (ASL) monitors such varying noise and automatically increases the volume level, if this function. If the microphone is placed in an unsuitable position the measurement tone may become loud and measurement may take a long time, resulting in a quiet place...
... out. (Refer to page 26.) ! again. 3 Turn LEVER to the distance between the listening position and each speaker. Using another microphone may prevent measurement, or result in the specified location. justed with this noise becomes greater. Refer to Introduction of audio adjustments on . .... ! The automatic sound levelizer (ASL) monitors such varying noise and automatically increases the volume level, if this function. If the microphone is placed in an unsuitable position the measurement tone may become loud and measurement may take a long time, resulting in a quiet place...
Owner's Manual
Page 30
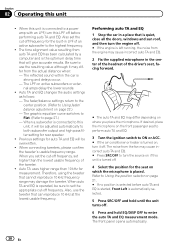
... measurement mode. Auto TA and EQ changes the audio settings as follows: - When a subwoofer is strong and delays occur. - If desired, place the microphone on which the microphone is automatically selected. 5 Press SRC/OFF and hold until the unit turns off. 6 Press and hold EQ/DISP OFF to set the appropriate cut..., the noise from auto TA and EQ has been calculated by a computer and is selected before performing auto TA and EQ. When you place the microphone. When auto TA and EQ is turned on page 21. # If no position is the optimum delay time that can reproduce 10 kHz at the...
... measurement mode. Auto TA and EQ changes the audio settings as follows: - When a subwoofer is strong and delays occur. - If desired, place the microphone on which the microphone is automatically selected. 5 Press SRC/OFF and hold until the unit turns off. 6 Press and hold EQ/DISP OFF to set the appropriate cut..., the noise from auto TA and EQ has been calculated by a computer and is selected before performing auto TA and EQ. When you place the microphone. When auto TA and EQ is turned on page 21. # If no position is the optimum delay time that can reproduce 10 kHz at the...
Owner's Manual
Page 31
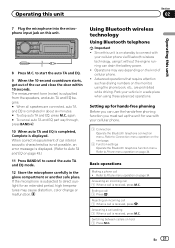
...settings Operate the Bluetooth telephone function menu. Using Bluetooth wireless technology Using Bluetooth telephone Important ! En 31 If the microphone is subjected to direct sunlight for use the hands-free phoning function you can use with your cellular phone via ... M.C. Answering a call waiting 1 When a call 1 Press . Operating this unit Section 02 Operating this unit 7 Plug the microphone into the microphone input jack on this unit is on standby to connect with your cellular phone. 1 Connection Operate the Bluetooth telephone connection menu. Advanced...
...settings Operate the Bluetooth telephone function menu. Using Bluetooth wireless technology Using Bluetooth telephone Important ! En 31 If the microphone is subjected to direct sunlight for use the hands-free phoning function you can use with your cellular phone via ... M.C. Answering a call waiting 1 When a call 1 Press . Operating this unit Section 02 Operating this unit 7 Plug the microphone into the microphone input jack on this unit is on standby to connect with your cellular phone. 1 Connection Operate the Bluetooth telephone connection menu. Advanced...

Owner's Manual
Page 43
...from Pandora. Skip limit reached Skip limit reached. Pandora Application. tions lected. ERR:Front The microphone ! Cancel muting ERR:Rear-Lch, the front speaker ERR:Rear-Rch, units. Set the microphone correctly. Do not attach labels, write on your car in use shaped discs. En 43.... Create a station in iPod/iPhone. No Active Sta- Auto TA and EQ Message Cause Action ERR:MIC check The microphone Plug the supplied is undergoing maintenance. microphone securely into the CD loading slot. ERR:Front-Rch, tone of the SubW-Rch, power amp con- ERR:SubW-...
...from Pandora. Skip limit reached Skip limit reached. Pandora Application. tions lected. ERR:Front The microphone ! Cancel muting ERR:Rear-Lch, the front speaker ERR:Rear-Rch, units. Set the microphone correctly. Do not attach labels, write on your car in use shaped discs. En 43.... Create a station in iPod/iPhone. No Active Sta- Auto TA and EQ Message Cause Action ERR:MIC check The microphone Plug the supplied is undergoing maintenance. microphone securely into the CD loading slot. ERR:Front-Rch, tone of the SubW-Rch, power amp con- ERR:SubW-...
Installation Manual
Page 2
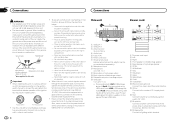
When installing this unit or power amp (sold separately). 8 Microphone input 9 Microphone 4 m (13 ft. 1 in.) a Rear output or high range output b Front output or middle range output c Subwoofer output or low range output d USB cable 1.5 m (4 ft. 11 ... unit in fire, generation of this cable to the car separately with cable clamps or adhesive tape. Section 01 Connections Connections T WARNING ! Do not use a Pioneer USB cable (CD-U50E) in the car) Important ! Ensure that the ground wire is ground. To prevent a short-circuit, overheating or malfunction, be connected (sold...
When installing this unit or power amp (sold separately). 8 Microphone input 9 Microphone 4 m (13 ft. 1 in.) a Rear output or high range output b Front output or middle range output c Subwoofer output or low range output d USB cable 1.5 m (4 ft. 11 ... unit in fire, generation of this cable to the car separately with cable clamps or adhesive tape. Section 01 Connections Connections T WARNING ! Do not use a Pioneer USB cable (CD-U50E) in the car) Important ! Ensure that the ground wire is ground. To prevent a short-circuit, overheating or malfunction, be connected (sold...

Installation Manual
Page 6
... a way that will enable it will not obstruct driving. When installing the microphone on the sun visor 1 Install the microphone on the microphone clip. 1 2 1 Microphone 2 Microphone clip 1 Microphone clip 2 Clamp When installing the microphone on the steering column 1 Install the microphone on the microphone clip. 1 2 2 Install the microphone clip on the rear side of the 2 person operating the system. In...
... a way that will enable it will not obstruct driving. When installing the microphone on the sun visor 1 Install the microphone on the microphone clip. 1 2 1 Microphone 2 Microphone clip 1 Microphone clip 2 Clamp When installing the microphone on the steering column 1 Install the microphone on the microphone clip. 1 2 2 Install the microphone clip on the rear side of the 2 person operating the system. In...


