Owner's Manual
Page 2
...- Adjusting the volume 9 Tuner 9 - Selecting a repeat play range 12 - Playing tracks in CD Player 10 - Adjusting source levels 17 Initial Settings 18 - Please read through this PIONEER product. Display indication 8 Basic Operations 9 - Storing the strongest broadcast frequencies 10 - Pausing playback ...Using the remote control 6 Operating this unit 4 iPod compatibility 4 After-sales service for Pioneer products 5 Visit our website 5 In case of the remote control 6 - Turning the clock display on iPod 13 - Basic Operations 9 - Selecting files from theft 5 - ...
...- Adjusting the volume 9 Tuner 9 - Selecting a repeat play range 12 - Playing tracks in CD Player 10 - Adjusting source levels 17 Initial Settings 18 - Please read through this PIONEER product. Display indication 8 Basic Operations 9 - Storing the strongest broadcast frequencies 10 - Pausing playback ...Using the remote control 6 Operating this unit 4 iPod compatibility 4 After-sales service for Pioneer products 5 Visit our website 5 In case of the remote control 6 - Turning the clock display on iPod 13 - Basic Operations 9 - Selecting files from theft 5 - ...
Owner's Manual
Page 7
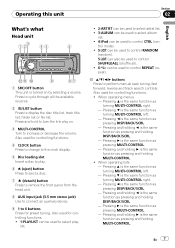
Also used for controlling functions. 4 CLOCK button Press to change to the clock display. 5 Disc loading slot Insert a disc to play on by selecting a source. When operating menus - When operating lists - Also used for preset tuning. a a/b/c/d buttons Press ...
Also used for controlling functions. 4 CLOCK button Press to change to the clock display. 5 Disc loading slot Insert a disc to play on by selecting a source. When operating menus - When operating lists - Also used for preset tuning. a a/b/c/d buttons Press ...
Owner's Manual
Page 18
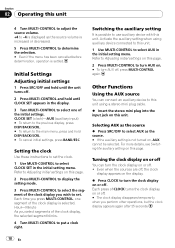
... is selected. For more details, see Switching the auxiliary setting on this page. 2 Press MULTI-CONTROL to turn AUX on. # To turn the clock display on or off You can connect an auxiliary device to this unit using auxiliary device connected to this unit. 1 Use MULTI-CONTROL to select... AUX in the display. 3 Turn MULTI-CONTROL to select one segment of CLOCK turns the clock display on this page. 2 Press MULTI-CONTROL to display the setting mode. 3 Press MULTI-CONTROL to select the segment of the initial settings....
... is selected. For more details, see Switching the auxiliary setting on this page. 2 Press MULTI-CONTROL to turn AUX on. # To turn the clock display on or off You can connect an auxiliary device to this unit using auxiliary device connected to this unit. 1 Use MULTI-CONTROL to select... AUX in the display. 3 Turn MULTI-CONTROL to select one segment of CLOCK turns the clock display on this page. 2 Press MULTI-CONTROL to display the setting mode. 3 Press MULTI-CONTROL to select the segment of the initial settings....

