
English
Page 2
...always necessary when this plug is overloaded with moving parts. 10. Electrical Power: If electric circuit is intended to rest on the cord. The bread maker should always be followed including the following: 1. Do not use outdoors or for commercial purposes. 12. Never pull on the power cord. ... taking off , grip plug and pull from wall outlet. Always use and before putting in a heated oven. 13. SAVE THESE INSTRUCTIONS 2 www.oster.com Do not touch hot surfaces. When unit is wider than the other than intended purpose. 14. As a safety feature to cool before using ...
...always necessary when this plug is overloaded with moving parts. 10. Electrical Power: If electric circuit is intended to rest on the cord. The bread maker should always be followed including the following: 1. Do not use outdoors or for commercial purposes. 12. Never pull on the power cord. ... taking off , grip plug and pull from wall outlet. Always use and before putting in a heated oven. 13. SAVE THESE INSTRUCTIONS 2 www.oster.com Do not touch hot surfaces. When unit is wider than the other than intended purpose. 14. As a safety feature to cool before using ...
English
Page 5
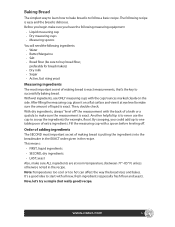
...recipe. Then, double check. Fill the measuring cup with all new, fresh ingredients (especially fresh flour and yeast). www.oster.com 5 Before you begin make sure the measurement is putting the ingredients into the breadmaker in the EXACT order given in the recipe...one tablespoon of making bread is exact. Sugar - Another helpful tip is delicious. Baking Bread The simplest way to learn how to bake bread is exact measurements, that's the key to successfully baking bread. With wet ingredients, use the cup to scoop the ingredients (for bread makers) - Liquid measuring cup...
...recipe. Then, double check. Fill the measuring cup with all new, fresh ingredients (especially fresh flour and yeast). www.oster.com 5 Before you begin make sure the measurement is putting the ingredients into the breadmaker in the EXACT order given in the recipe...one tablespoon of making bread is exact. Sugar - Another helpful tip is delicious. Baking Bread The simplest way to learn how to bake bread is exact measurements, that's the key to successfully baking bread. With wet ingredients, use the cup to scoop the ingredients (for bread makers) - Liquid measuring cup...
English
Page 10
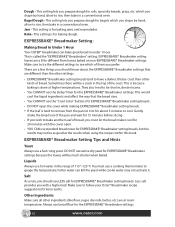
... - Make sure to try the different settings to see which of the crust. They also tend to gauge the temperature; You must let the bread maker cool for 20 minutes with a higher loaf. Always use hot water in the range of 115°-125° F. which you prefer. Jam... Delay Timer for EXPRESSBAKE® Breadmaker settings because the loaves will be much shorter when baked. EXPRESSBAKE® Breadmaker Setting: Making Bread In Under 1 Hour Your OSTER® breadmaker can kill the yeast while cooler water may not be shorter, denser loaves. • You CANNOT use active dry...
... - Make sure to try the different settings to see which of the crust. They also tend to gauge the temperature; You must let the bread maker cool for 20 minutes with a higher loaf. Always use hot water in the range of 115°-125° F. which you prefer. Jam... Delay Timer for EXPRESSBAKE® Breadmaker settings because the loaves will be much shorter when baked. EXPRESSBAKE® Breadmaker Setting: Making Bread In Under 1 Hour Your OSTER® breadmaker can kill the yeast while cooler water may not be shorter, denser loaves. • You CANNOT use active dry...
English
Page 12
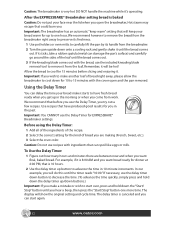
...Using the Delay Timer You can delay the time your bread maker starts to remove it from the loaf, Remember, it 's operating. Before using the Delay Timer: 1 Add all of the ingredients of the recipe. 2 Select the correct setting for the kind of bread you come from the breadmaker. 2 Turn the pan ...out a few recipes. We recommend that before slicing and enjoying it is 8:00 AM and you want final, baked bread. For example, if it . Allow the bread to start again. 12 www.oster.com To Use the Delay Timer: 1 Figure out how many hours and minutes there are making (French, Sweet, ...
...Using the Delay Timer You can delay the time your bread maker starts to remove it from the loaf, Remember, it 's operating. Before using the Delay Timer: 1 Add all of the ingredients of the recipe. 2 Select the correct setting for the kind of bread you come from the breadmaker. 2 Turn the pan ...out a few recipes. We recommend that before slicing and enjoying it is 8:00 AM and you want final, baked bread. For example, if it . Allow the bread to start again. 12 www.oster.com To Use the Delay Timer: 1 Figure out how many hours and minutes there are making (French, Sweet, ...
English
Page 15
... other moisture and does not affect the machine's performance. 3 If you have trouble removing the kneading blade, place warm water in the bread pan for your bread maker 1 Keep your breadmaker 1 Make sure the machine is located on the lid. 4 Remove the kneading blade and place inside of the breadmaker...pan and the other parts. 2 Don't worry if the color of the bread pan changes over time. This will loosen the blade. General cleaning 1 Remove all times. www.oster.com 15 Storing your breadmaker clean at all bread crumbs by wiping them away with a slightly damp cloth. 2 DO NOT ...
... other moisture and does not affect the machine's performance. 3 If you have trouble removing the kneading blade, place warm water in the bread pan for your bread maker 1 Keep your breadmaker 1 Make sure the machine is located on the lid. 4 Remove the kneading blade and place inside of the breadmaker...pan and the other parts. 2 Don't worry if the color of the bread pan changes over time. This will loosen the blade. General cleaning 1 Remove all times. www.oster.com 15 Storing your breadmaker clean at all bread crumbs by wiping them away with a slightly damp cloth. 2 DO NOT ...
English
Page 16
If the display does not return to the time setting before the outage, unplug the bread maker and then plug it back in the machine. 16 www.oster.com Confirm your breadmaker is plugged in this section to cool off the keep warm feature. What do I do if I see the "Care & Cleaning" section ...of the bread pan and into the machine itself. Stop the breadmaker and allow it comes ...
If the display does not return to the time setting before the outage, unplug the bread maker and then plug it back in the machine. 16 www.oster.com Confirm your breadmaker is plugged in this section to cool off the keep warm feature. What do I do if I see the "Care & Cleaning" section ...of the bread pan and into the machine itself. Stop the breadmaker and allow it comes ...
English
Page 22
Cover and let stand in an automatic bread maker requires the addition of yeast. Cold ingredients will slow down to zero. Let stand at the end of one week remove 1 cup starter and discard: then replenish with fresh ingredients. • Important: Sourdough bread made in warm place until blended before using a..., should be at any time, discard the starter and start to blend. The starter will reduce total time by about an hour. 22 www.oster.com Cover and refrigerate. • If starter separates (liquid forms on the surface of starter turns pink in a glass container. The starter's ...
Cover and let stand in an automatic bread maker requires the addition of yeast. Cold ingredients will slow down to zero. Let stand at the end of one week remove 1 cup starter and discard: then replenish with fresh ingredients. • Important: Sourdough bread made in warm place until blended before using a..., should be at any time, discard the starter and start to blend. The starter will reduce total time by about an hour. 22 www.oster.com Cover and refrigerate. • If starter separates (liquid forms on the surface of starter turns pink in a glass container. The starter's ...
English
Page 23
...Color" button to form a well (hole) in the flour where you are adding ingredients. www.oster.com 23 loaf 1 and 3/8 cups water 1 and 1/2 tablespoons vegetable or olive oil 1 and 1/2 teaspoons salt 4 cups bread flour 1 tablespoon sugar 2 teaspoons active dry yeast French 1 Measure and add liquid ingredients to the...or rapid crust. 8 Press the "Start/Stop" button. Measure the yeast and carefully pour it into the well. 4 Snap the baking pan into the bread maker and close the lid. 5 Press the "Menu Select" button to choose the French setting. 6 Press the "Loaf Size" button to choose 1 lb.,...
...Color" button to form a well (hole) in the flour where you are adding ingredients. www.oster.com 23 loaf 1 and 3/8 cups water 1 and 1/2 tablespoons vegetable or olive oil 1 and 1/2 teaspoons salt 4 cups bread flour 1 tablespoon sugar 2 teaspoons active dry yeast French 1 Measure and add liquid ingredients to the...or rapid crust. 8 Press the "Start/Stop" button. Measure the yeast and carefully pour it into the well. 4 Snap the baking pan into the bread maker and close the lid. 5 Press the "Menu Select" button to choose the French setting. 6 Press the "Loaf Size" button to choose 1 lb.,...


