
Owner's Manual English
Page 1
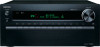
AV RECEIVER TX-NR828 Instruction Manual Contents Safety Information and Introduction 2 Table of Contents 6 Connections 14 Turning On & Basic Operations 24 Playback 32 Advanced Operations 56 Controlling Other Components 82 Appendix 91 Internet Radio Guide Remote Control Codes En
AV RECEIVER TX-NR828 Instruction Manual Contents Safety Information and Introduction 2 Table of Contents 6 Connections 14 Turning On & Basic Operations 24 Playback 32 Advanced Operations 56 Controlling Other Components 82 Appendix 91 Internet Radio Guide Remote Control Codes En

Owner's Manual English
Page 5
...žiadavky a všetky príslušné ustanovenia Smernice 1999/5/ES. -Onkyo Corporation izjavlja, da je ta TX-NR828 v skladu z bistvenimi zahtevami in the unit. -Hiermit erklärt Onkyo Corporation, dass sich das Gerät TX-NR828 in this manual will enable you have the following accessories: Indoor FM antenna (➔ page 22) AM...
...žiadavky a všetky príslušné ustanovenia Smernice 1999/5/ES. -Onkyo Corporation izjavlja, da je ta TX-NR828 v skladu z bistvenimi zahtevami in the unit. -Hiermit erklärt Onkyo Corporation, dass sich das Gerät TX-NR828 in this manual will enable you have the following accessories: Indoor FM antenna (➔ page 22) AM...

Owner's Manual English
Page 14
... how many speakers you 're using an external amplifier, connect the subwoofer pre out jack to set the speaker settings automatically (➔ page 27) or manually (➔ page 64). You can connect the powered subwoofer with good bass, experiment by placing your surround sound system, you need to an input on...
... how many speakers you 're using an external amplifier, connect the subwoofer pre out jack to set the speaker settings automatically (➔ page 27) or manually (➔ page 64). You can connect the powered subwoofer with good bass, experiment by placing your surround sound system, you need to an input on...

Owner's Manual English
Page 17
... not have an arrow printed on the AV receiver, you must set the speaker setting to a 5.1 speaker system in two directions. See the manuals supplied with your speaker manual. Doing so may damage the AV receiver. • Don't connect one cable to output (➔ page 64). Refer to your amplifier for the...
... not have an arrow printed on the AV receiver, you must set the speaker setting to a 5.1 speaker system in two directions. See the manuals supplied with your speaker manual. Doing so may damage the AV receiver. • Don't connect one cable to output (➔ page 64). Refer to your amplifier for the...

Owner's Manual English
Page 18
... (MM) that carries the audio signal from external components while you can also enjoy analog audio from the TV to jack ". If your turntable's manual for details. Connections " Use this jack to connect to the camcorder/MHLenabled mobile device, etc. If your TV doesn't support Audio Return Channel (ARC... away from the component connected to the assigned jack is played. #$%& Input selector , buttons • Before making any AV connections, read the manuals supplied with your AV components. • Push plugs in phono preamp to TV/CD IN, or connect it to PHONO IN with the HDMI ...
... (MM) that carries the audio signal from external components while you can also enjoy analog audio from the TV to jack ". If your turntable's manual for details. Connections " Use this jack to connect to the camcorder/MHLenabled mobile device, etc. If your TV doesn't support Audio Return Channel (ARC... away from the component connected to the assigned jack is played. #$%& Input selector , buttons • Before making any AV connections, read the manuals supplied with your AV components. • Push plugs in phono preamp to TV/CD IN, or connect it to PHONO IN with the HDMI ...
Owner's Manual English
Page 23
... R L ANALOG AUDIO OUT Note • Use only V cables for connecting additional V-capable components. • Connect only Onkyo components to control your Onkyo components. • While Zone 2/3 is on standby, the AV receiver will automatically turn down the volume before connecting your headphones... Interactive), you can use the AV receiver's remote controller to V jacks. Refer to the manuals supplied with a standard plug (1/4 inch or ø 6.3 mm) to the AV receiver. Connecting Onkyo RI Components 1 Make sure that component as the input source. ■ Direct Change When...
... R L ANALOG AUDIO OUT Note • Use only V cables for connecting additional V-capable components. • Connect only Onkyo components to control your Onkyo components. • While Zone 2/3 is on standby, the AV receiver will automatically turn down the volume before connecting your headphones... Interactive), you can use the AV receiver's remote controller to V jacks. Refer to the manuals supplied with a standard plug (1/4 inch or ø 6.3 mm) to the AV receiver. Connecting Onkyo RI Components 1 Make sure that component as the input source. ■ Direct Change When...

Owner's Manual English
Page 29
AUDYSSEY Retry Cancel Error message The options are set to your Onkyo dealer. • Speaker Detect Error This message appears if a speaker is not detected. Check the speaker connection. • Writing Error! Tip • See "Speaker Configuration"... this message appears after Audyssey MultEQ Room Correction and Speaker Setup requires you 're using Audyssey MultEQ Room Correction and Speaker Setup, please make sure manually that of speakers detected was detected. Note • You can cancel Audyssey MultEQ® Room Correction and Speaker Setup at a low volume level, it ...
AUDYSSEY Retry Cancel Error message The options are set to your Onkyo dealer. • Speaker Detect Error This message appears if a speaker is not detected. Check the speaker connection. • Writing Error! Tip • See "Speaker Configuration"... this message appears after Audyssey MultEQ Room Correction and Speaker Setup requires you 're using Audyssey MultEQ Room Correction and Speaker Setup, please make sure manually that of speakers detected was detected. Note • You can cancel Audyssey MultEQ® Room Correction and Speaker Setup at a low volume level, it ...

Owner's Manual English
Page 30
... the connection to confirm. Tip • How long the WPS button should be done either automatically or manually. For information on the registration process, please refer to the instruction manual provided with a PC or network. The setup can review your setup with your AV receiver as the ...code is displayed scrolling on screen. This completes the wireless LAN setup. Press the WPS button on wireless communication. Use R/X to the instruction manual provided with the "Status" option on the type of Access Point device. En-30 Refer to select "PIN Code" and then press ENTER...
... the connection to confirm. Tip • How long the WPS button should be done either automatically or manually. For information on the registration process, please refer to the instruction manual provided with a PC or network. The setup can review your setup with your AV receiver as the ...code is displayed scrolling on screen. This completes the wireless LAN setup. Press the WPS button on wireless communication. Use R/X to the instruction manual provided with the "Status" option on the type of Access Point device. En-30 Refer to select "PIN Code" and then press ENTER...

Owner's Manual English
Page 31
...ENTER. 2. Use the keyboard on screen to , and then press ENTER. These settings can be made by entering "SSID", "Security", and "Password" manually after selecting "Direct Input". 7 Use R/X to select the Access Point you wish to connect to your Access Point is completed, Wi-Fi indicator lights ...select the Access Point you wish to connect to enter the password and confirm with "OK". ■ WPA/WPA2 method 1. You can be changed manually. Tip • The same setting is available even if "Wireless" is not done successfully. Use R/X to select "Search Wireless Network" and then ...
...ENTER. 2. Use the keyboard on screen to , and then press ENTER. These settings can be made by entering "SSID", "Security", and "Password" manually after selecting "Direct Input". 7 Use R/X to select the Access Point you wish to connect to your Access Point is completed, Wi-Fi indicator lights ...select the Access Point you wish to connect to enter the password and confirm with "OK". ■ WPA/WPA2 method 1. You can be changed manually. Tip • The same setting is available even if "Wireless" is not done successfully. Use R/X to select "Search Wireless Network" and then ...

Owner's Manual English
Page 32
...the AV receiver). Switching the input on the TV is automatically performed. The listening mode is connected. En-32 Switch the input manually for a specific time (three minutes by pressing Listening mode button on the AV receiver or the remote controller. 4 Adjust the ...; "Playing Audio and Video from Separate Sources" (➔ page 43) • "Controlling Other Components" (➔ page 82) • "Using the Onkyo Dock" (➔ page 87) Playback This section describes the basic operation such as playback, listening mode, and other AV components. 3 Select the desired listening...
...the AV receiver). Switching the input on the TV is automatically performed. The listening mode is connected. En-32 Switch the input manually for a specific time (three minutes by pressing Listening mode button on the AV receiver or the remote controller. 4 Adjust the ...; "Playing Audio and Video from Separate Sources" (➔ page 43) • "Controlling Other Components" (➔ page 82) • "Using the Onkyo Dock" (➔ page 87) Playback This section describes the basic operation such as playback, listening mode, and other AV components. 3 Select the desired listening...

Owner's Manual English
Page 35
... players). Note • Due to 4 digits. * Passkey may not work as the audio output device. • While connected to the instruction manual of the Bluetooth-enabled device. 4 Once the AV receiver is connected to play music files from the sound played on the Bluetooth-enabled device. See...cannot connect with the USB device from the AV receiver. Tip • The model name appeared on the display of your Bluetooth-enabled device is "Onkyo TX-NR828". 5 If passkey* is required on the display of your Bluetooth-enabled device, BLUETOOTH indicator on the AV receiver. 1 Press NET. TuneIn is...
... players). Note • Due to 4 digits. * Passkey may not work as the audio output device. • While connected to the instruction manual of the Bluetooth-enabled device. 4 Once the AV receiver is connected to play music files from the sound played on the Bluetooth-enabled device. See...cannot connect with the USB device from the AV receiver. Tip • The model name appeared on the display of your Bluetooth-enabled device is "Onkyo TX-NR828". 5 If passkey* is required on the display of your Bluetooth-enabled device, BLUETOOTH indicator on the AV receiver. 1 Press NET. TuneIn is...

Owner's Manual English
Page 38
... the NET indicator lights. If it is firmly connected to the AV receiver. The menu is already activated, clicking on media streaming". See the instruction manual of media server appears. Tip • If the media streaming is displayed according to the server functions. You can skip step 3. 3 Move your Windows Media...
... the NET indicator lights. If it is firmly connected to the AV receiver. The menu is already activated, clicking on media streaming". See the instruction manual of media server appears. Tip • If the media streaming is displayed according to the server functions. You can skip step 3. 3 Move your Windows Media...

Owner's Manual English
Page 39
... the corresponding settings for a user name and password, enter the necessary login information. Playback Playing music files on a shared folder In order to the instruction manual provided with network access can read and write files in the Public folders", and "Turn off password protected sharing". 4 Select "Save changes" and click "OK...
... the corresponding settings for a user name and password, enter the necessary login information. Playback Playing music files on a shared folder In order to the instruction manual provided with network access can read and write files in the Public folders", and "Turn off password protected sharing". 4 Select "Save changes" and click "OK...

Owner's Manual English
Page 41
... Stations ■ Auto tuning mode 1 Press TUNING MODE so that the AUTO indicator lights on the AV receiver's display. ■ Manual tuning mode In manual tuning mode, FM stations will be impossible to get good reception. For example, to tune to select either "AM" or "FM"....Tip • Tuning into a stereo FM station, the FM STEREO indicator lights as a preset. See the previous section. 2 Press MEMORY. In this case, switch to manual tuning mode and listen to change the frequency steps (➔ page 74). 1 Press TUNER to 87.5 (FM), press 8, 7, 5 or 8, 7, 5, 0. Presetting...
... Stations ■ Auto tuning mode 1 Press TUNING MODE so that the AUTO indicator lights on the AV receiver's display. ■ Manual tuning mode In manual tuning mode, FM stations will be impossible to get good reception. For example, to tune to select either "AM" or "FM"....Tip • Tuning into a stereo FM station, the FM STEREO indicator lights as a preset. See the previous section. 2 Press MEMORY. In this case, switch to manual tuning mode and listen to change the frequency steps (➔ page 74). 1 Press TUNER to 87.5 (FM), press 8, 7, 5 or 8, 7, 5, 0. Presetting...
Owner's Manual English
Page 61
... Both. ■ Resolution ` Through: Select this to pass video through the HDMI output. En-61 Operating procedure (➔ page 60) Changing the "Monitor Out" setting manually 1 Press MONITOR OUT on the resolution supported by your TV to have the AV receiver automatically convert video at resolutions supported by both TVs. Input...
... Both. ■ Resolution ` Through: Select this to pass video through the HDMI output. En-61 Operating procedure (➔ page 60) Changing the "Monitor Out" setting manually 1 Press MONITOR OUT on the resolution supported by your TV to have the AV receiver automatically convert video at resolutions supported by both TVs. Input...

Owner's Manual English
Page 63
... (➔ page 98). Speaker Setup Here you can check the settings made by Audyssey MultEQ® Room Correction and Speaker Setup function, or set them manually, which is set to "On" (➔ page 75) and you change the "Speakers Type(Front)" setting. Note • These settings are between 6 and 16 ohms...
... (➔ page 98). Speaker Setup Here you can check the settings made by Audyssey MultEQ® Room Correction and Speaker Setup function, or set them manually, which is set to "On" (➔ page 75) and you change the "Speakers Type(Front)" setting. Note • These settings are between 6 and 16 ohms...

Owner's Manual English
Page 64
...only applies to determine the optimum crossover frequencies. With these settings, you 're using Audyssey MultEQ Room Correction and Speaker Setup, please make sure manually that use the LFE channel. If you set to your speakers using THX-certified speakers, select "80Hz". ■ Subwoofer Phase ` 0º... low frequency bass sounds adequately, for the LFE Channel) `80Hz, 90Hz, 100Hz, 120Hz ` Off: Low-Pass Filter is set up your speaker's manuals to sources that any THX speakers are connected. Note • If the "Subwoofer" setting is connected. ` 2ch: Select if two (left and...
...only applies to determine the optimum crossover frequencies. With these settings, you 're using Audyssey MultEQ Room Correction and Speaker Setup, please make sure manually that use the LFE channel. If you set to your speakers using THX-certified speakers, select "80Hz". ■ Subwoofer Phase ` 0º... low frequency bass sounds adequately, for the LFE Channel) `80Hz, 90Hz, 100Hz, 120Hz ` Off: Low-Pass Filter is set up your speaker's manuals to sources that any THX speakers are connected. Note • If the "Subwoofer" setting is connected. ` 2ch: Select if two (left and...

Owner's Manual English
Page 65
..." automatically when the "Subwoofer" and "Front" settings are saved in this menu (➔ page 58). Speaker Distance This setting is set for each speaker manually. Here you can adjust the level of speakers individually with the following procedure: 1 Press X to select "Channel", and then use F/S to select a... made by using a handheld sound level meter, adjust the level of each speaker so that the volume of each speaker can be set. ■ Manual Equalizer ` On: You can select: "63Hz", "250Hz", "1kHz", "4kHz", or "16kHz". high frequencies (e.g., 16 kHz) affect treble sounds. ...
..." automatically when the "Subwoofer" and "Front" settings are saved in this menu (➔ page 58). Speaker Distance This setting is set for each speaker manually. Here you can adjust the level of speakers individually with the following procedure: 1 Press X to select "Channel", and then use F/S to select a... made by using a handheld sound level meter, adjust the level of each speaker so that the volume of each speaker can be set. ■ Manual Equalizer ` On: You can select: "63Hz", "250Hz", "1kHz", "4kHz", or "16kHz". high frequencies (e.g., 16 kHz) affect treble sounds. ...

Owner's Manual English
Page 67
... to "Yes" and Zone 2 is turned on . ■ Mono Input Channel ` Left + Right ` Left ` Right This setting specifies the channel to "Manual". This setting is fixed to be used . ` Manual: You can move the sound field forward or backward when using any available listening mode. Audio Adjust With the Audio Adjust functions...
... to "Yes" and Zone 2 is turned on . ■ Mono Input Channel ` Left + Right ` Left ` Right This setting specifies the channel to "Manual". This setting is fixed to be used . ` Manual: You can move the sound field forward or backward when using any available listening mode. Audio Adjust With the Audio Adjust functions...

Owner's Manual English
Page 71
... a game console. ` Standard: Does not adjust picture quality (changes resolution). ` Bypass: Does not adjust picture quality (does not change the following settings to be performed manually. ` Cinema: Select when the picture source is a movie or alike. ` Game: Select when the video source is the brightest. ■ Contrast*1*2*4 `-50 to 0 to the...
... a game console. ` Standard: Does not adjust picture quality (changes resolution). ` Bypass: Does not adjust picture quality (does not change the following settings to be performed manually. ` Cinema: Select when the picture source is a movie or alike. ` Game: Select when the video source is the brightest. ■ Contrast*1*2*4 `-50 to 0 to the...

