
Owner Manual
Page 42
... on the main menu. Input/Output Assign 2. Speaker Setup 3. Hardware Setup I Remote Controller Setup (➔ 78) 3. Miscellaneous 1. Speaker Setup 1. Speaker Distance 4. Equalizer Settings 6. Hardware Setup 1. Firmware Update I 8. Dolby 3. Remote Controller Setup Remote Mode Setup E Source Setup (➔ 49) J Lock Setup (➔ 57) 4. Picture Adjust F Listening Mode Preset (➔ 53) 9. BD/DVD 2. Settings...
... on the main menu. Input/Output Assign 2. Speaker Setup 3. Hardware Setup I Remote Controller Setup (➔ 78) 3. Miscellaneous 1. Speaker Setup 1. Speaker Distance 4. Equalizer Settings 6. Hardware Setup 1. Firmware Update I 8. Dolby 3. Remote Controller Setup Remote Mode Setup E Source Setup (➔ 49) J Lock Setup (➔ 57) 4. Picture Adjust F Listening Mode Preset (➔ 53) 9. BD/DVD 2. Settings...
Owner Manual
Page 57
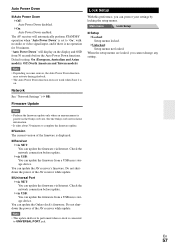
...With this preference, you cannot change any setting. See the Onkyo web site for 30 minutes. Note • This update shall not be performed when no dock is displayed. ■ Receiver `via NET: You can update the firmware via USB: You can protect your settings by locking the ...not locked. Check the network connection before the Auto Power Down functions. Firmware Update Note • Perform the firmware update only when an announcement is no audio or video signal input, and if there is posted on the Onkyo web site. Network See "Network Settings" (➔ 66). The AV ...
...With this preference, you cannot change any setting. See the Onkyo web site for 30 minutes. Note • This update shall not be performed when no dock is displayed. ■ Receiver `via NET: You can update the firmware via USB: You can protect your settings by locking the ...not locked. Check the network connection before the Auto Power Down functions. Firmware Update Note • Perform the firmware update only when an announcement is no audio or video signal input, and if there is posted on the Onkyo web site. Network See "Network Settings" (➔ 66). The AV ...
Owner Manual
Page 66
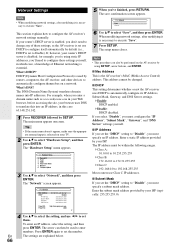
... are explained below. 66 Network Settings Note • When modifying network settings, after modifying it is necessary to execute "Save". The main menu appears onscreen. Firmware Update 3 Use R/X to select "Save", and then press ENTER. This address cannot be within the following ranges. ` Class A: 10.0.0.0 to 10.255.255.255 ` Class B: 172...
... are explained below. 66 Network Settings Note • When modifying network settings, after modifying it is necessary to execute "Save". The main menu appears onscreen. Firmware Update 3 Use R/X to select "Save", and then press ENTER. This address cannot be within the following ranges. ` Class A: 10.0.0.0 to 10.255.255.255 ` Class B: 172...


